Painted Wood Photoshop Action Comics Book Photoshop Action Infographic JS Library Textures for Photoshop Online Label Maker

Christmas Snow And Glass Text Effect Photoshop Tutorial

www.psd-dude.com
Tutorials Text Effects 80719 November 26th, 2018

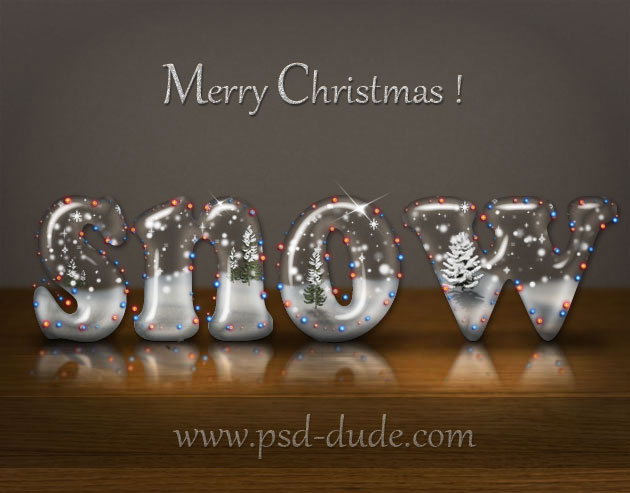
Because the Christmas is coming soon I decided to make some winter season inspired text effects and I will start today with this beautiful snow text effect. To create it I was inspired by this awesome Christmas snow globe tutorial. So starting from this Christmas snow style I start creating my snow and glass text effect using a simple winter landscape, transparent glass text and of course some really nice snow brushes.

For more tutorials like this you should check out this fantastic list of Christmas Photoshop tutorials.

Learn how to make a creative snowy glass text effect in Photoshop just in time for the upcoming Christmas time. For this tutorial you have to know how to add layer styles, how to work with paths and how to apply layer masks in Photoshop. Each step has a reference to tutorials for beginners so that everybody can complete this tutorial.
Christmas Snow In Glass Ornament Photoshop Tutorial

I will use a wood texture to create a wood table as background for my snow text effect but you can choose any background you want. I decided to keep it simple.

Pick the Type Tool and write a text using Cooper Std free font. You can choose any other font that you fond on the internet; I prefer a round font. Call this layer Transparent Glass Text.

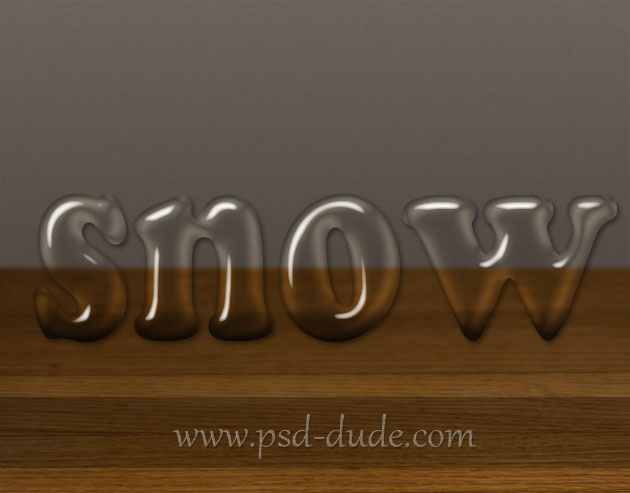
Reduce the Fill of the Transparent Glass Text layer and add the following layer styles. We want to obtain a transparent text.

After appling all these layer styles our text should look like a transparent glass text. There are little details that you have to make in order to look like real glass. You can download the PSD file to see all the layer style details like colors and contour settings.
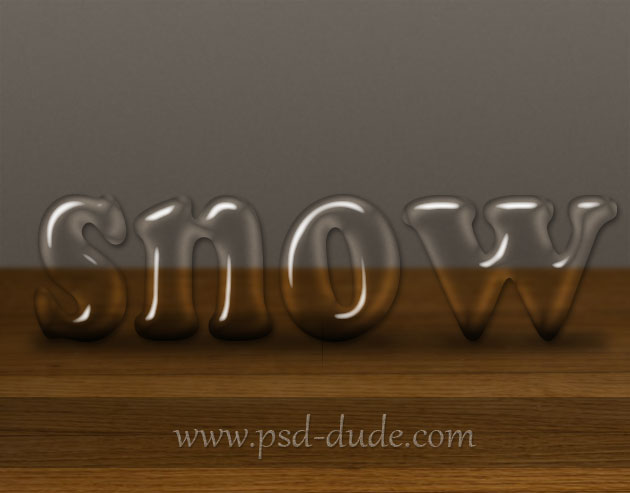
To make the text look like it is placed on the table, I have added a soft shadow effect. Create a black rectangle below the text bottom area and simply use Gaussian Blur and lower the opacity to make it look realistic.
Copy this snow stock image and use the Pen Tool to select and crop parts from the snow area. If you are not really sure how to do that check out these How to Use Pen Tool tutorials for beginners.

After right click and choose Make Selection, press SHIFT+CTRL+I to invert it. Press CTRL+J to make a Layer via Copy out of this selection. Call the new layer Snow Area.

Duplicate the Snow Area one or two times and arrange them to obtain nice snow dunes like in the image. Use the Burn Tool and Dodge Tool to create contrast areas. When you are sure about the result merge the Snow Area layers into one layer again.

Make a selection out of the Transparent Glass Text layer. To make a selection hold down CTRL and click on the layer thumbnail. Use this selection as a layer mask for the Snow Area layer.

Next I will add some of these Christmas trees and place them on the snow. You will have to resize them and place a couple of trees where you decide best.

Add a little shadow effect under each tree to look as realistic as possible.

In this step I will use some snow brushes to add snow effect. Use the Brush Tool and color white to add the snow in a new layer called Snow Layer.
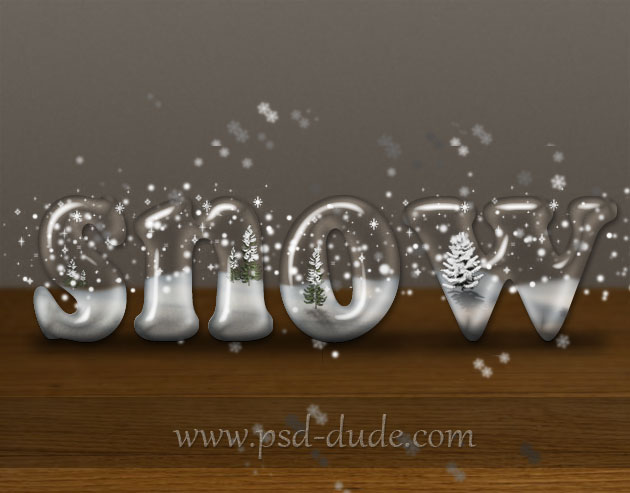
Use Transparent Glass Text layer as a mask so that the snow to be just inside the text.

As a final touch I have added two Lights Layers. Simply make a Work Path out of the text layer and Stroke Path using the lights brushes. To create the lights I will use a simple dotted brush like in this tutorial with one small change; use the Shape Dynamics to set the Size Jitter to arround 60%. And also I have used the Scattering option to set the Scatter to around 260%. Inside the ZIP file that you can download at the end of this tut, you will find the layer styles that I have used for the lights. You can easily change the color if you want other combination.

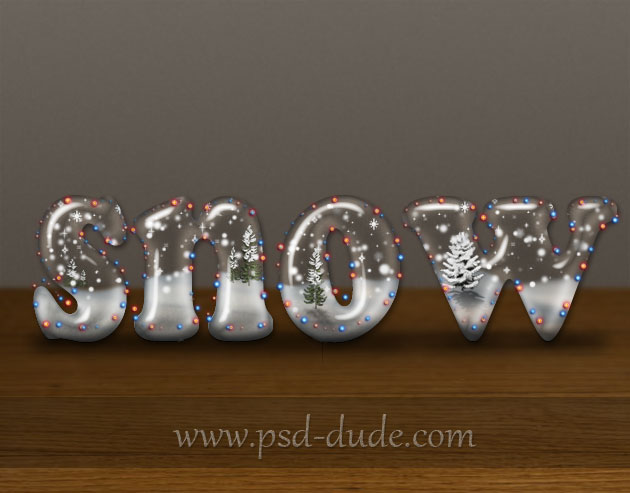
Duplicate all the snow text layers and merge them. Use this merged layer to create a text reflection. Learn how to create a reflection in Photoshop. I have also added a sparkle effect; learn how to create sparkle brush from this easy to follow tutorial.

If you want you can add the falling snow texture and set the blend mode to Screen. You can use these textures snowfall 1 and snowfall 2 with Screen blend mode. Also you can download this snow brushes and add snow using the Brush Tool and color #ffffff.

So here is the final result for the Christmas Snow Text Effect that you can use for the upcoming winter season. Great for creating personalized Christmas cards. Hope you upload your results at our comments section.

Snow And Glass Photoshop Text Effect PSD File

download the PSD FILE(2.63 MB)

The PSD file for the snow globe text effect has all the layers and layer styles intact. This is only for personal non-commercial use; the redistribution on other websites is not allowed.

Online Christmas Card Maker

Did you know you can use online tools like MockoFun to make Christmas cards?
Combine Christmas vector shapes with text and create some amazing Christmas cards. MockoFun provides pre-made templates for making Christmas cards online in just a few minutes.

Check out this awesome list of over 50 Christmas fonts that you can use online or download for free to use in Photoshop. Combine Christmas fonts with text symbols like a star symbol for example.

Check out this tutorial on how to use the online Christmas Card Maker and all the awesome features that MockoFun has to offer.

Online Christmas Card Maker

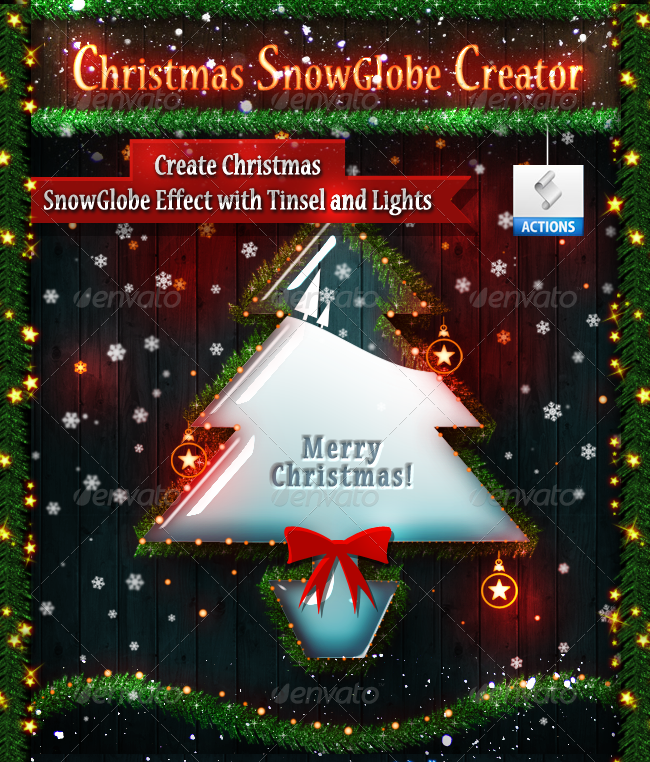
Christmas Snow Globe Creator Photoshop Action

You can create unique Christmas effects using this one of a kind premium Photoshop action set. The pack contains 2 Photoshop actions that will allow you to create realistic Christmas snow globe effects out of any text, shape, raster or hand drawn path. It comes included with a fully detailed PSD Help File for you to obtain the best results.
4.9 ( 108 votes)

If you're looking for amazing textures and backgrounds for Photoshop, explore Textures4Photoshop where you can find 1000+ unique images. You can download all these textures and backgrounds for free to use in personal or commercial projects!

Be a Cool Dude!

With your donation you can help us maintain this website and keep producing free resources many months to come! Any amount counts

34 comment(s) for "Christmas Snow Photoshop Text Effect"

Finja
Finja
11:46 PM Monday, November 26, 2012
WOW, that's a nice tutorial. Thanks for sharing.
LG
Finja reply
Darrell
Darrell
11:46 PM Monday, November 26, 2012
Thank you, this is awesome ! reply
PSDDUde
11:48 PM Monday, November 26, 2012
Thanks, I am glad you like it! If you practice the tut upload your result; I am curious to see how it looks like with another landscape image inside the snow globe :) reply
PSDDude
11:49 PM Monday, November 26, 2012
Thank you Darrell ! reply
Agota
Agota
6:29 AM Tuesday, November 27, 2012
This is a beautiful-beautiful work.
But I would like to ask how can I create the background with gray color and the wood image.
Please, help me! Thanx! reply
PSDDude
6:35 AM Tuesday, November 27, 2012
Hi Agota,
Please download the PSD file and you will see how the background was created; there are added a color overlay, a gradient and a pattern overlay just for the background. As for the wood table you can choose one of the wood textures (the link is at the beginning of the tut) . reply
krizmaz
krizmaz
8:31 AM Sunday, December 2, 2012
wow thank u so much!!!
reply
Suzette
Suzette
12:34 AM Saturday, December 8, 2012
Thanks for the tutorial. I loved doing it. reply
PSDDude
11:19 PM Sunday, December 9, 2012
Here is a nice practice of this snow effect made by one of our blog friends from www.chez-mireilled.com/

reply
John
1:44 AM Thursday, December 20, 2012
Yet another practice of my Snow Globe Photoshop Text Tutorial with a great result, that I have found on flickr http://www.flickr.com/photos/palms1/8226982102/ reply
John
John
6:19 AM Tuesday, January 8, 2013
Hi Ksusha, you have to use the UPLOAD button to post your work! reply
Ksusha
Ksusha
1:56 AM Friday, January 11, 2013
It didn't work when I tried to download the result. Here it is now. I don't know why but my letters don't look so glassy. And the lights in the stroke aren't that shiny... Maybe I'll have to do it all over again... some time! reply
Ksusha
Ksusha
1:56 AM Friday, January 11, 2013
Thanks for the magic tutorial! My result somewhat differs, but still I like it. reply
John
2:00 AM Friday, January 11, 2013
You can download the PSD file and see the exact settings for each layer. Very important! all the layer styles used in this tut are customized for an image of around 630 px width; so if you have a 1200px width image you have to scale the layer styles ( Image>Layer Style>Scale Effects) reply
Ksusha
Ksusha
9:05 AM Friday, January 11, 2013
Thanks, I'll study the styles more closely. reply
John
10:28 AM Tuesday, November 5, 2013
Another beautiful Snow Globe Photoshop Text effect made by Kellye reply
Emma Penet
Emma Penet
12:02 AM Friday, November 22, 2013
Super tuto ! reply
razaberry
razaberry
11:05 AM Sunday, December 1, 2013
I reg but I still can't download this file. Its not reconizing my user name and when I try to rereg it says I already am. I don't know what else to do. reply
John
11:09 AM Sunday, December 1, 2013
After you registered you received and activation email. You have to activate your account in order to login. reply
droopy
droopy
12:58 AM Thursday, December 5, 2013
Hello
I want to register, but i did not received the activation email !!! reply
John
1:00 AM Thursday, December 5, 2013
Try to look for the activation email in the SPAM folder, sometimes it gets there. reply
Artsyatheart
Artsyatheart
12:27 AM Monday, December 15, 2014
PSD Dude where is the PSD file for the SnowGlob text effect loacated? reply
PSDDude
12:31 AM Monday, December 15, 2014
The link is at the end of the tutorial (Part 2/ Step 8) reply
Dawn
Dawn
2:40 AM Sunday, April 19, 2015
I like this tutorial, but am having trouble with the layer mask in step 9. Seems to be related to Step 4. Can you please say specifically what you reduced your text fill to? I had taken mine to 0 which (I think) messes up the layer masking later on. Can you help? I'm a newbie, so please be kind. thx reply
PSDDude
2:47 AM Sunday, April 19, 2015
You have to set the Fill to 0%. This will not affect the selection nor the layer mask.
Simply make the selection using the text layer and add it as layer mask for the texture layer. reply
Alicja Janik
Alicja Janik
3:34 AM Sunday, November 15, 2015
Thank you reply
PSDDude
3:36 AM Sunday, November 15, 2015
Hi Alicja! I am glad you enjoyed our Snow Globe Text Photoshop tutorial :) your result is very nice! reply
Delores
Delores
2:27 AM Wednesday, December 9, 2015
How much should you reduce the fill by in step 1? reply
PSDDude
2:29 AM Wednesday, December 9, 2015
Reduce the Fill to 0% reply
drew
drew
6:05 AM Friday, December 16, 2016
how do u make a selection out of the text layer? reply
PSDDude
6:07 AM Friday, December 16, 2016
I have updated the tutorial so please read the steps 9 and 10 again.

"To make a selection hold down CTRL and click on the layer thumbnail" reply
Mirrrr
Mirrrr
4:21 AM Wednesday, December 28, 2016
My result thanks for the nice tutorial reply
kim
kim
7:13 AM Tuesday, September 26, 2017
Hi. I am new to photoshop, is there a way to do this in Photoshop Elements 15? Thank you. reply
PSDDude
7:17 AM Tuesday, September 26, 2017
Hi Kim, I don't work with Photoshop Elements but I think you can create this snow text effect. reply

Have something to say? Leave us a comment

Click to Upload Fan Art!

Share your Psd Dude inspired works


Get new posts by email:
LIKE US ON FACEBOOK

      Online Photo Editor
top