Create a Fairy with Sparkle Dust Trail in Photoshop
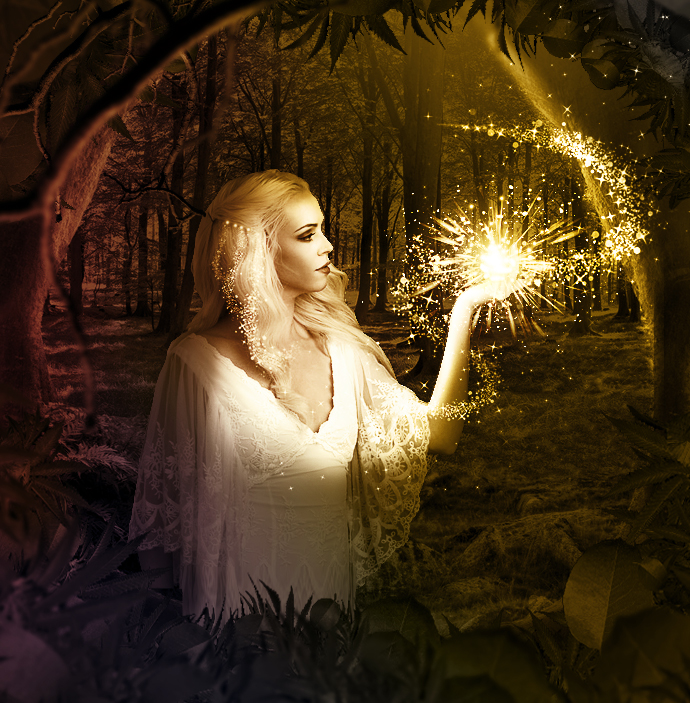
Tutorial Assets
For this tutorial you need the following stock images and textures.
- Forest background
- Girl Stock
- Green leaf border
- Tree branch PNG
- Sparkle Trail
- Light Burst
- Fairy Pixie Dust
- Sparkle Stars
How to Create a Fairy with Sparkle Dust Trail in Photoshop

Create a new PSD file, size around 690x700px to give you an idea about the width and height proportion. In a new layer add this forest background and resize it like shown in the image.
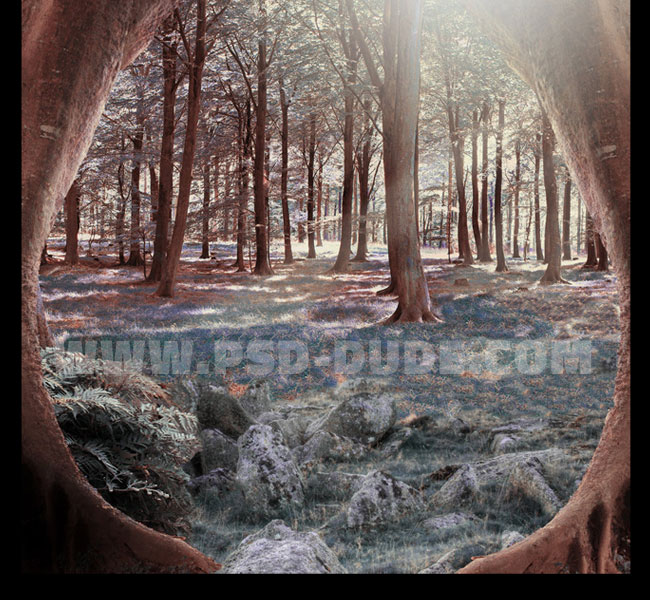
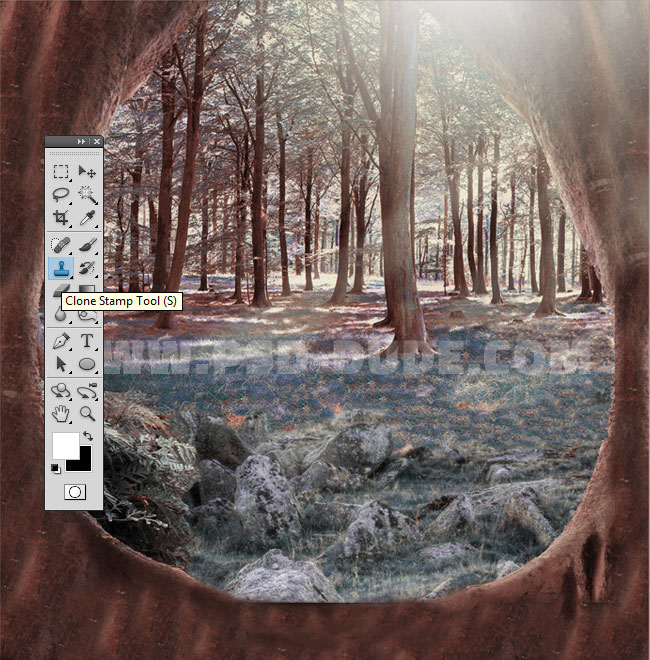
Use the Clone Tool to fill the rest of the image with tree texture. It doesn't have to look perfect because we will add other layers and also darken the background. But make it look good. It is a good Clone Stamp Tool exercise.
Add this Girl Stock and remove the background using one of the Photoshop selection tool cut out techniques. I used the Magic Wand Tool. Call this layer Fairy.
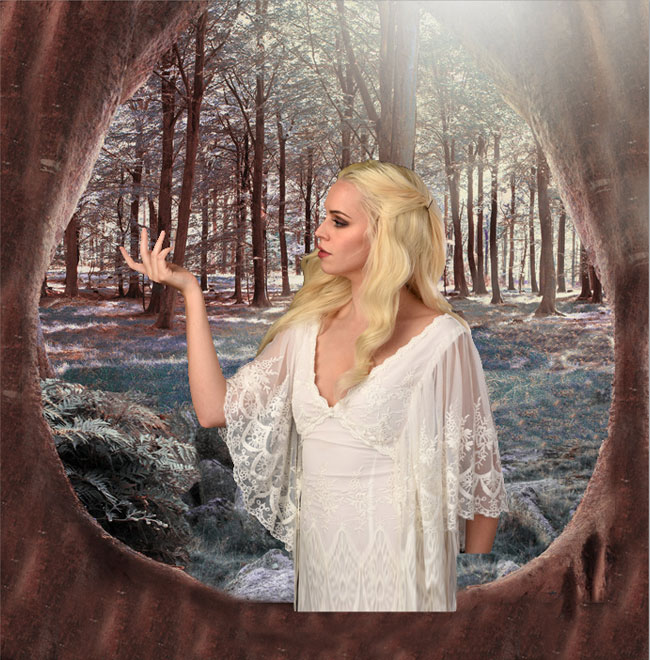
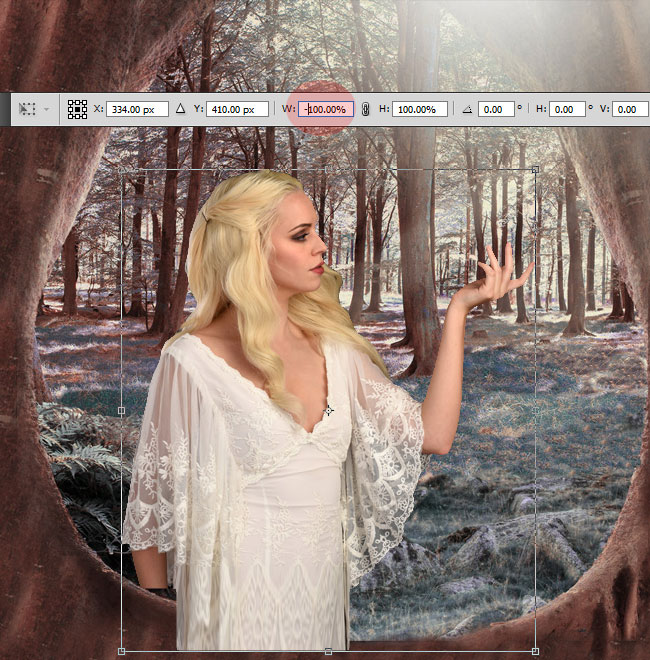
Press Control-T to flip the image horizontally. Set the Horizontal Scale to -100% . You might have to use the Clone Stamp again to make the dress of the girl longer. We will add foliage layer over the image but still you have to fill a little more.
How to Add a Green Leaf Border in Photoshop
In a new layer add this green leaf border and use the Eraser Tool to keep leaves on the top, bottom and some on the edges like shown in the preview. Call this layer Leaf Frame.
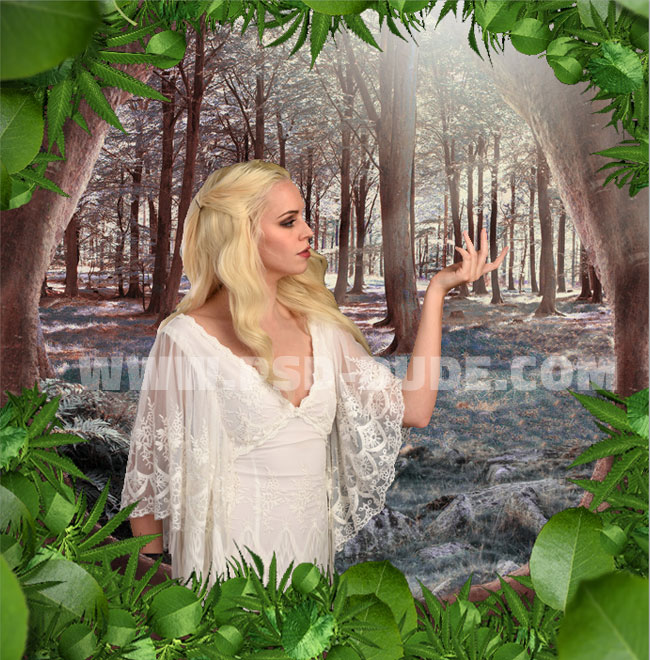
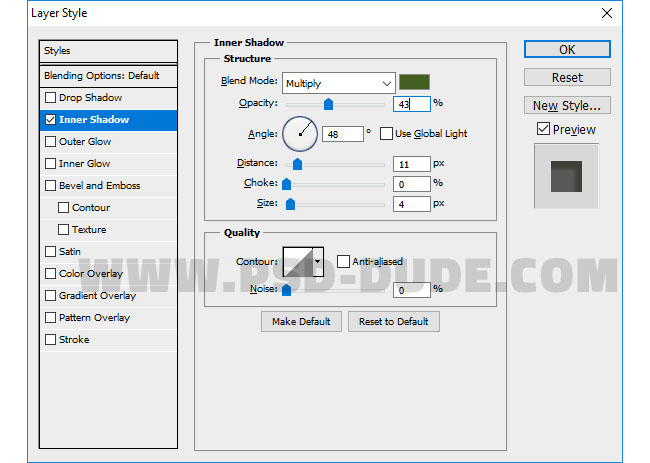
Add an Inner Shadow layer style using color #445f21 for the shadow.
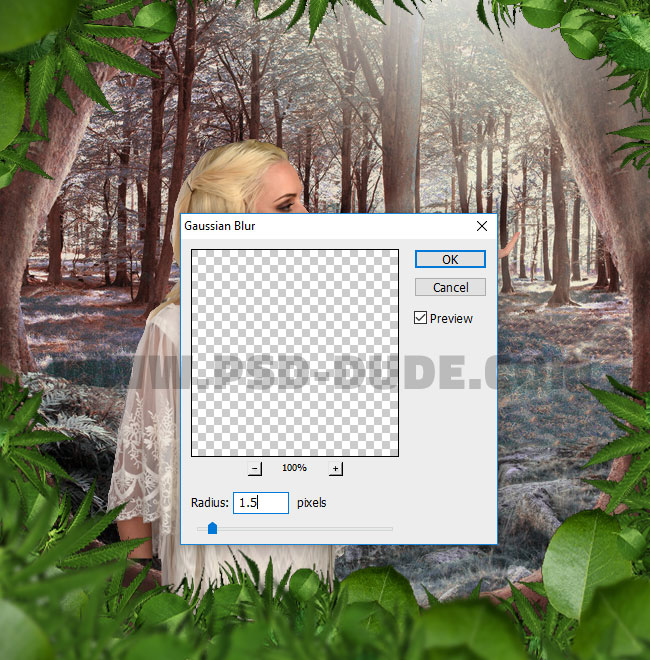
Duplicate the Leaf Frame layer and resize to around 120%. Keep only some leaves and use the Eraser Tool to remove the rest. Go to Filter > Blur > Gaussian Blur and make these settings.
Create a new layer and add this tree branch PNG on the top left side of the image. Add a Levels adjustment. Right click on the Levels and choose Create Clipping Mask.
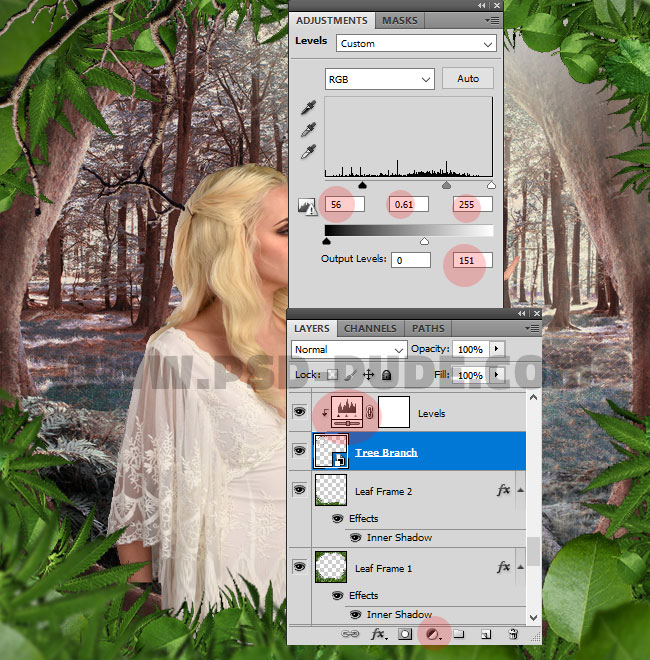
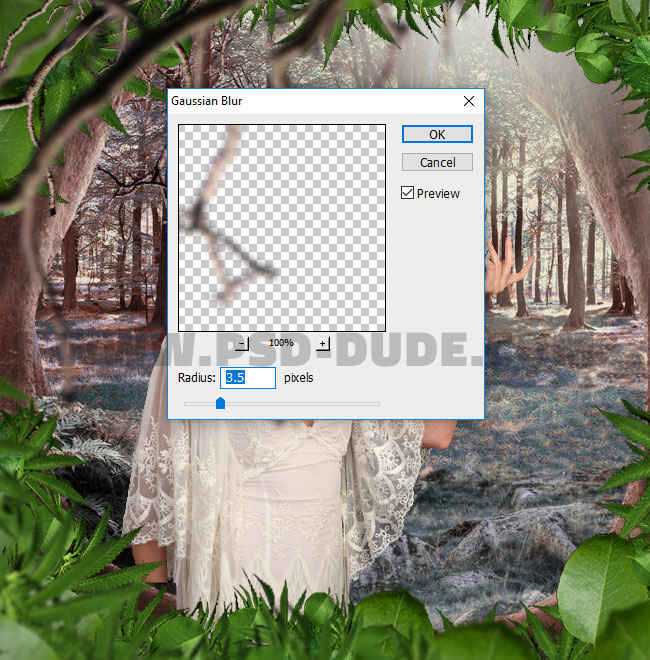
Duplicate the Tree Branch layer and its Levels adjustment. Press Control-T to resize the layer to 180% . Use the Eraser Tool to remove some parts of the branch. Go to Filter > Blur > Gaussian Blur and set the radius to 3.5 pixels.
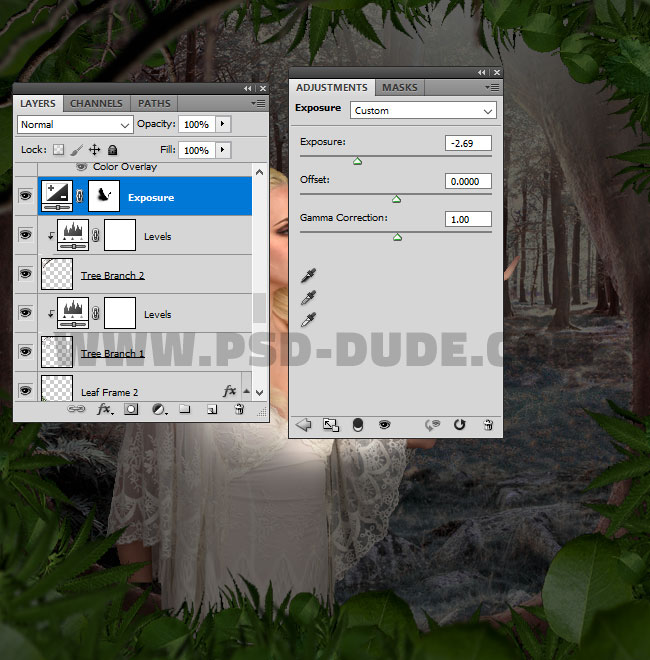
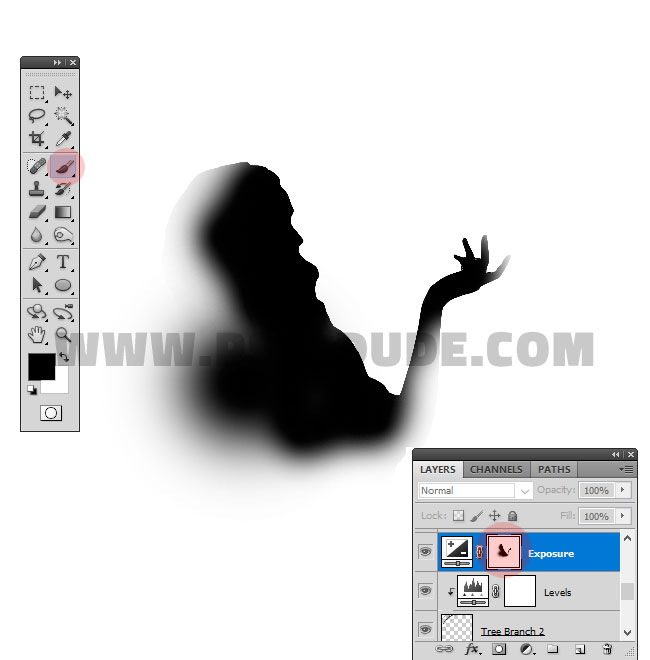
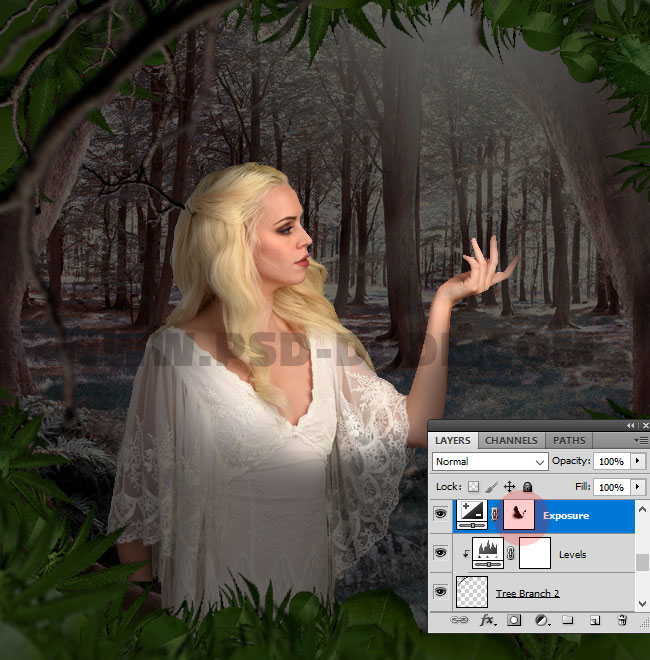
Add an Exposure adjustment layer. Use the Brush Tool color black and a soft round brush, to paint over the girl image like shown in the preview.
How to Create a Fairy Dust Trail in Photoshop
Create a new layer and add this Sparkle Trail texture overlay for Photoshop and set the blend mode to Screen. Press Control-T and resize the texture and also rotate it.
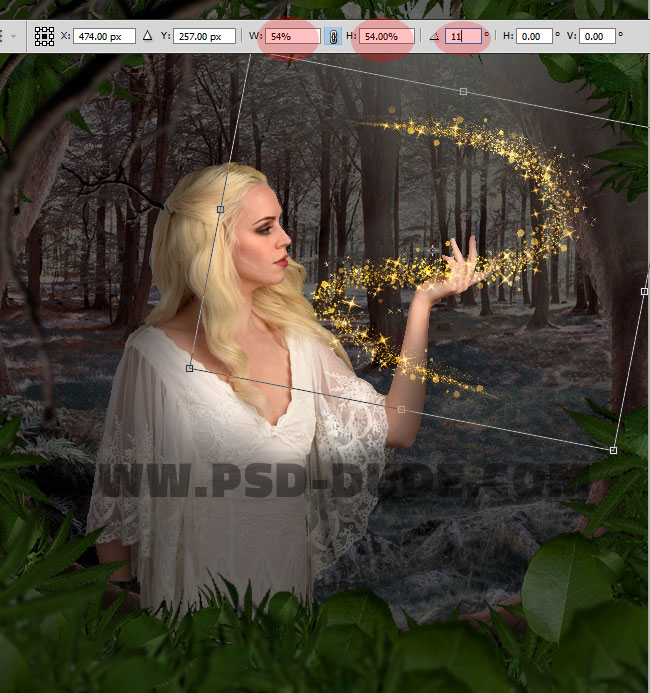
Add a layer mask to the Sparkle Trail layer. Use the Brush Tool with a soft round brush and color black to erase part from the trail as shown in the screenshot.
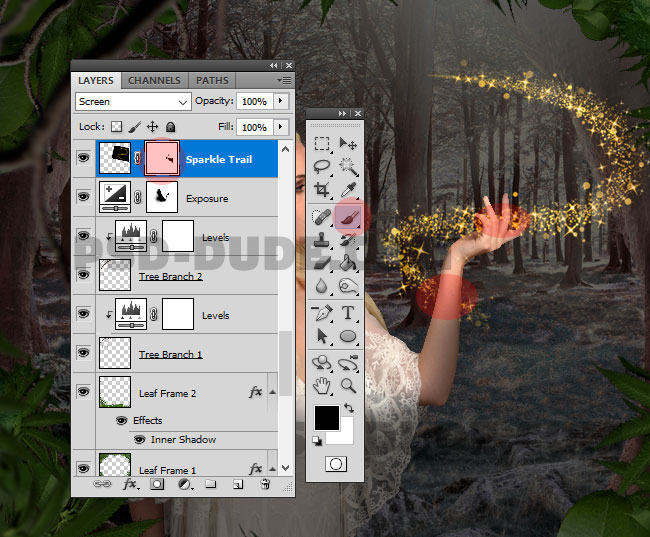
Duplicate the Sparkle Trail layer, resize it and place it like shown in the preview. Use again the layer mask to hide some parts.
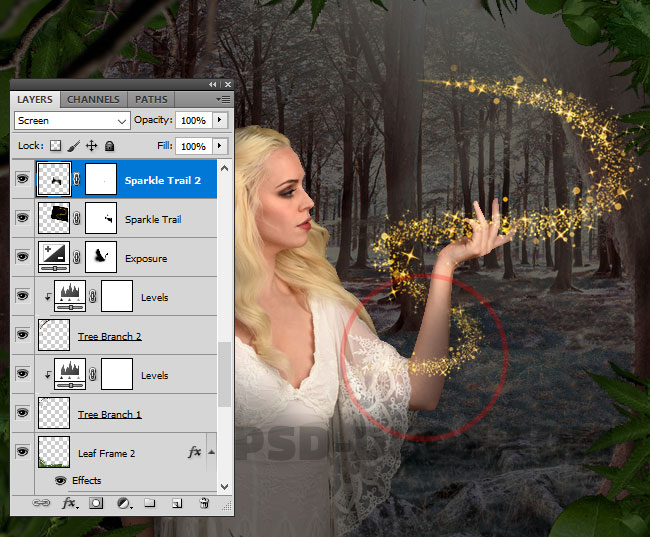
Use the Sparkle Trail texture to add glitter effect on the girl hair like in the preview. Simply rotate the image and erase the parts that you don't need.
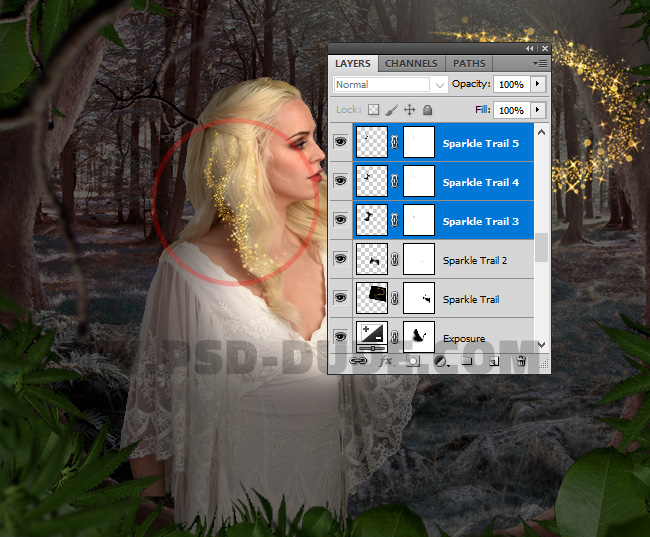
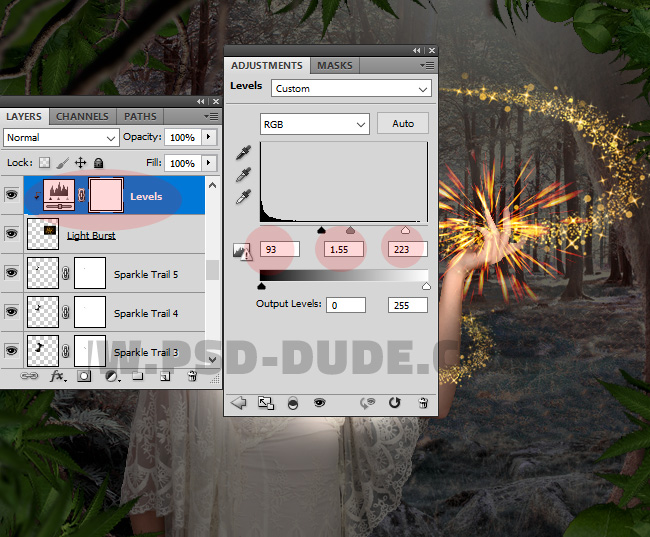
Use this Light Burst texture overlay to create sparkle light rays. Set the blend mode to Screen and add a Levels adjustment.
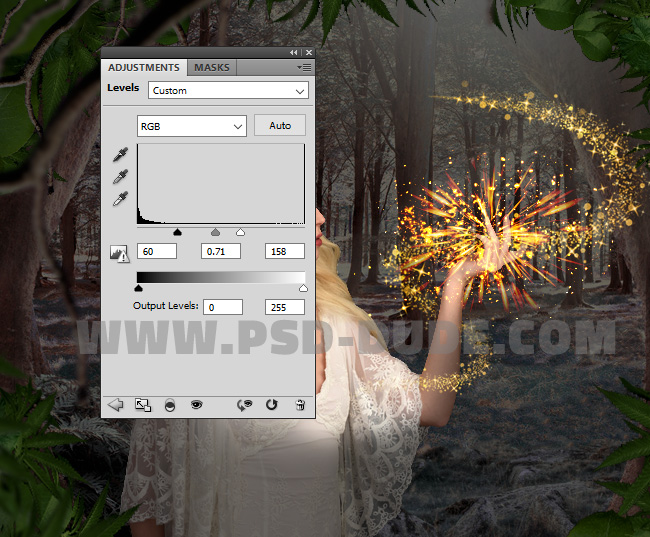
If you want more sparkle effects you can add this Fairy Pixie Dust texture overlay. Again resize, set the blend mode to Screen. You can also add a Levels adjustment just for this layer.
You can also add Sparkle Stars in the same way.
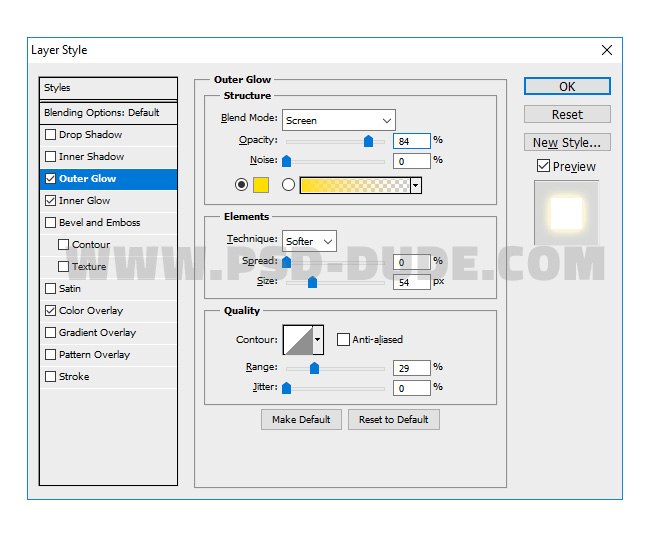
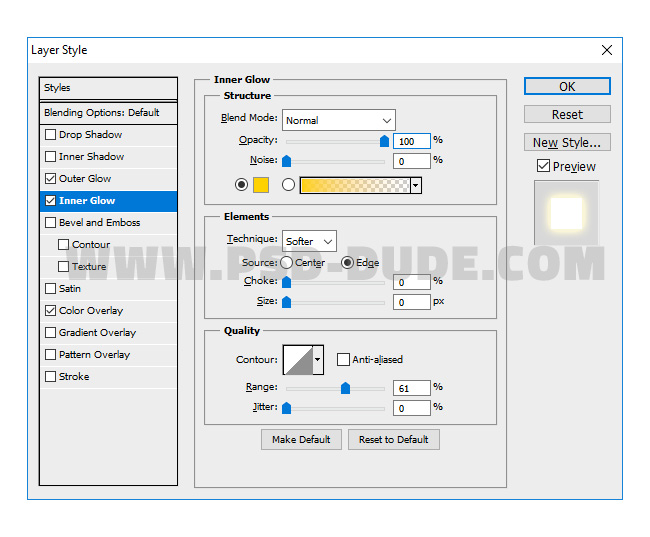
Create a new layer and use the Brush Tool, color white to add some dot points like shown in the preview. Add these layer styles to this layer to create glowing dots: Outer Glow, color #ffde00 ; Inner Glow, color #fed100 .
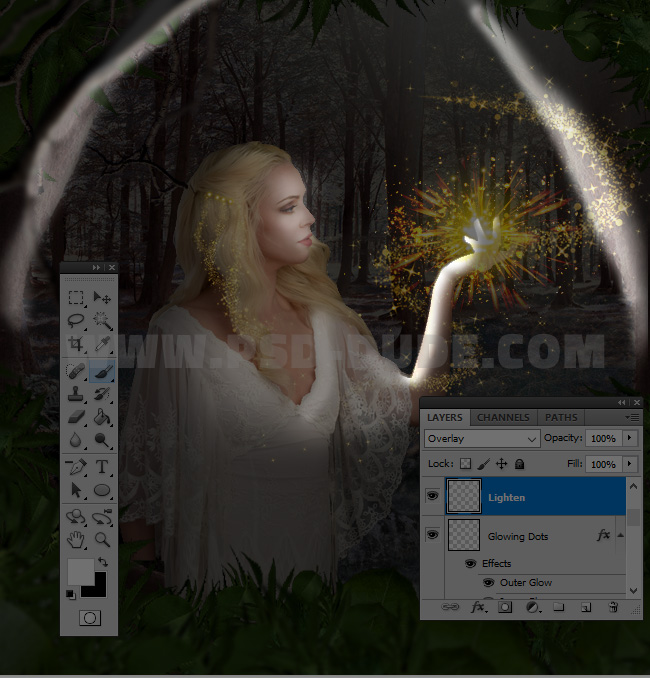
Create a new layer and set the blend mode to Overlay. Use the Brush Tool and a soft round brush, color white and different opacity levels to lighten some areas (on the face, hands, trees) like shown in the preview.
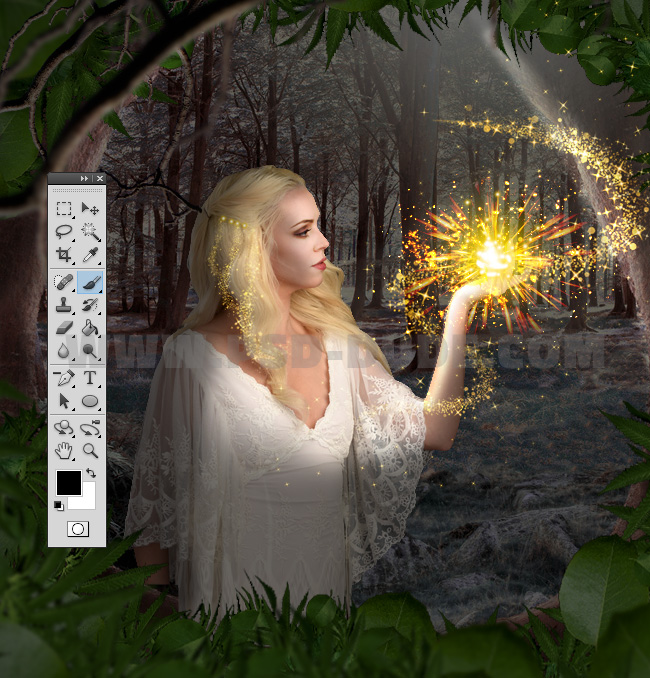
Create a new layer and set the blend mode to Multiply. Use the Brush Tool and a soft round brush, color black and different opacity levels to darken some areas (girl silhouette) like shown in the preview.
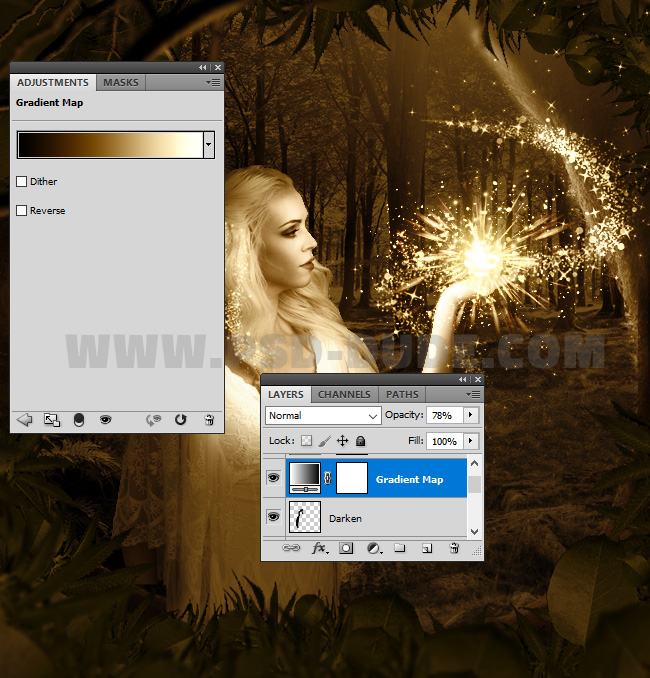
For the final touches we'll add some adjustment layers, gradient maps to add color effect. Add a Gradient Map with these colors: #000000 (location 0%), #6e4300 (location 38%), #ffecbd (location 82%) and #ffffff (location 100%). Blend mode is Normal, opacity 78%.
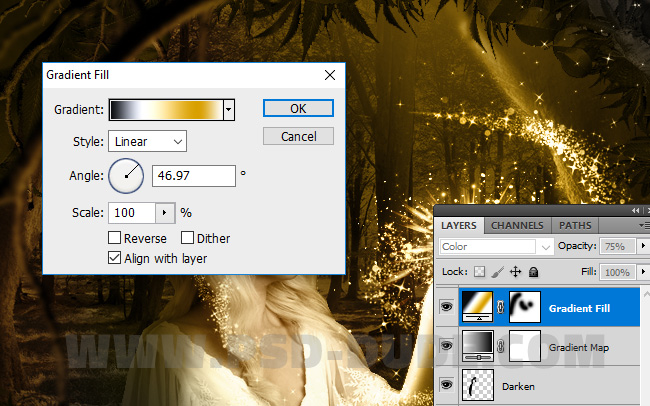
Add a Gradient Fill with these colors: #080b0e (location 0%), #ffffff (location 28%), #d99f00 (location 77%) and #ffffff (location 100%). Blend mode is Color, opacity 75%. Also use the Brush Tool in the layer mask to hide some of the color effects using black color.
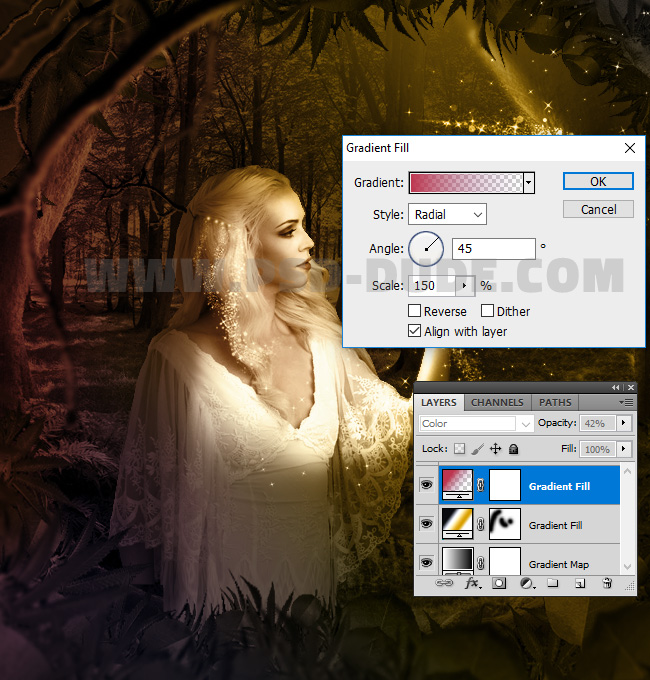
Add another Gradient Fill with these colors: #be354f (location 0%) and #a20098 (location 100%, opacity 0%). Blend mode is Color, opacity 42%.
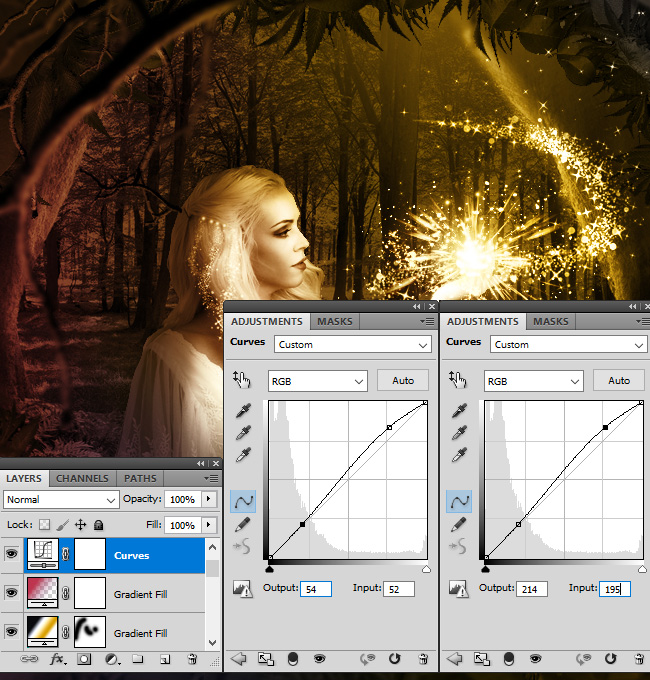
Add a Curves adjustment.
High Pass Filter Sharpen Effect in Photoshop
To create a sharpen photo effect in Photoshop you can use the High Pass Filter technique.
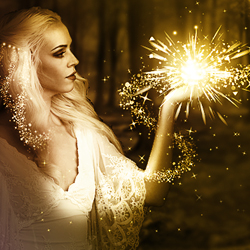
Congratulations! The Final Result Is This
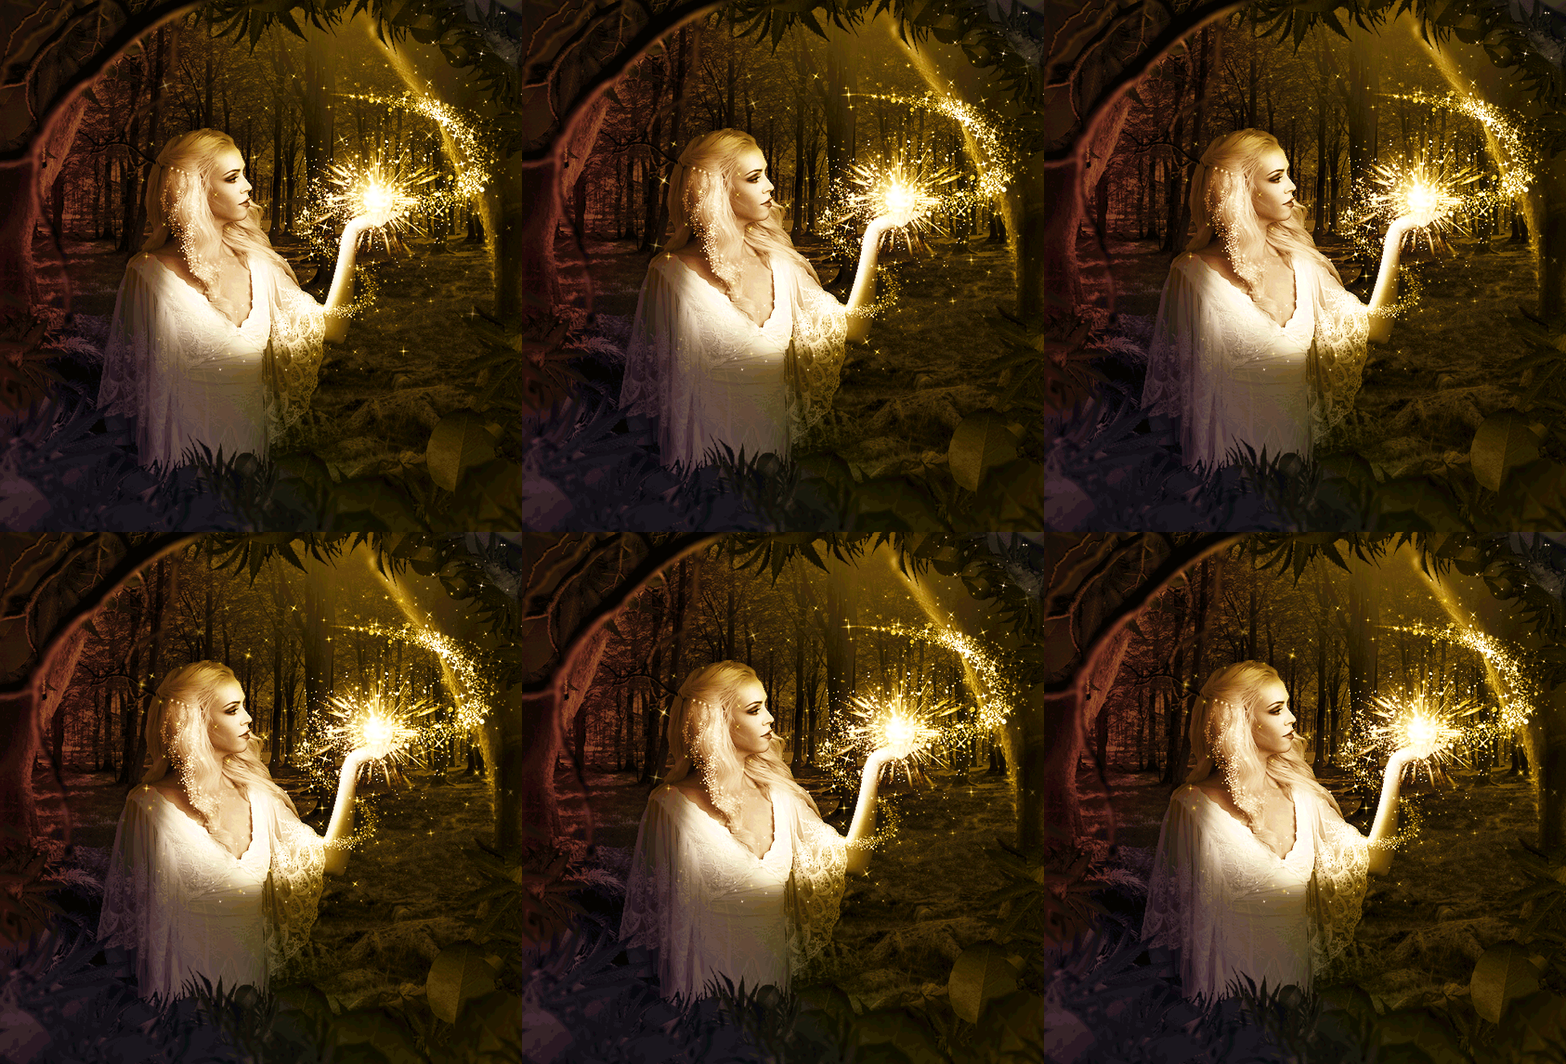
So here is the final result for the magic fairy dust trail Photoshop manipulation tutorial.

Animated GIF Sparkle Fairy Dust Effect



3 comment(s) for "Magic Fairy Dust Photoshop Fantasy Manipulation Tutorial"