Ghost an Image with Photoshop
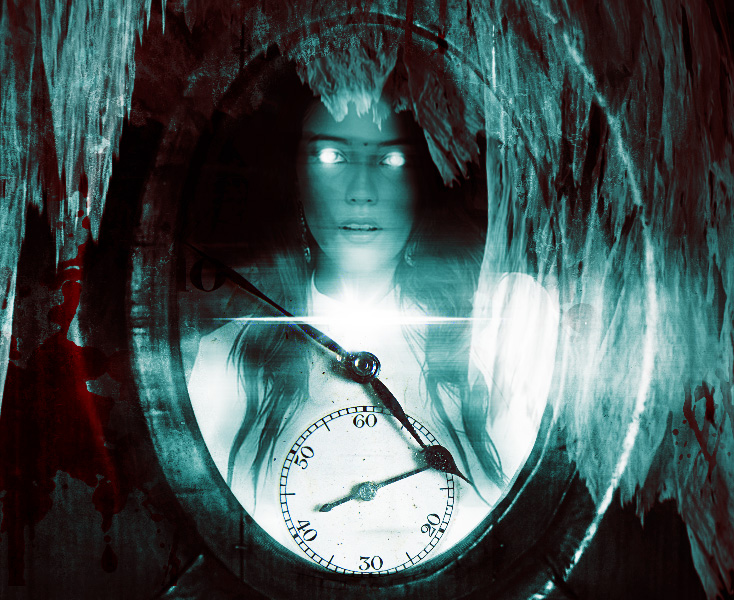
Photoshopping a ghost is really easy! In just a few easy steps we'll create this earie spirit effect in Photoshop.
So, let's see how to make someone look like a ghost in Photoshop.
Tutorial Assets
For this tutorial you will nedd these stock images, textures and other resources.
- Old Mirror Frame stock image
- Girl Model stock image
- dust cloud texture overlay
- blood stains and splatters
- ripped curtain fabric PNG image
- grunge texture
- lens flare texture overlay
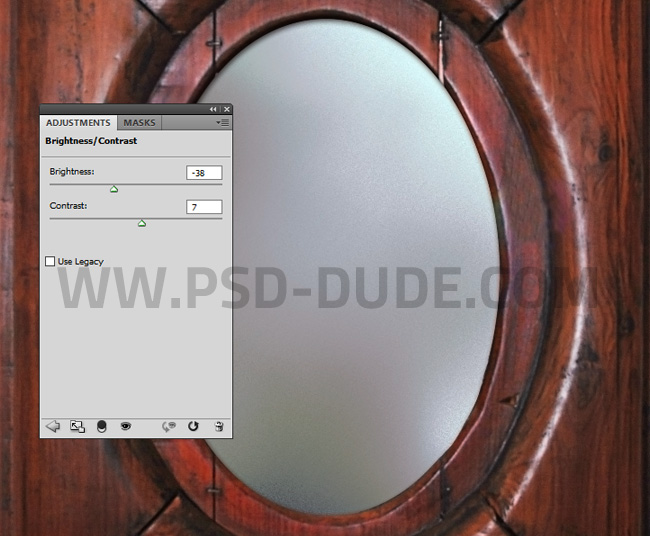
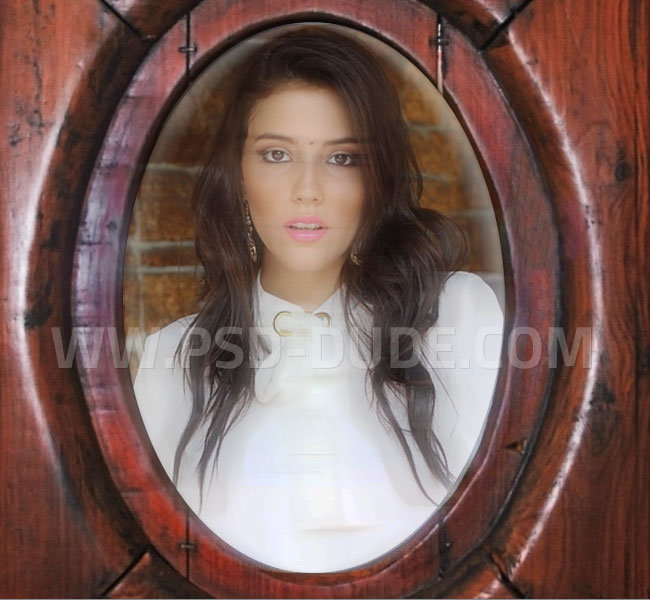
Add this Old Mirror Frame stock image in a new layer. Add a Brightness/Contrast adjustment layer.
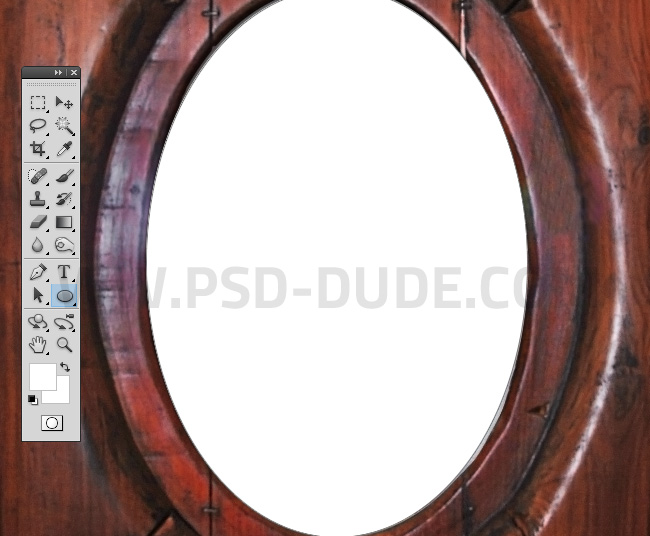
Use the Ellipse Tool to make a rounded shape to cover the mirror glass. Call this ellipse shape Round Mask layer.
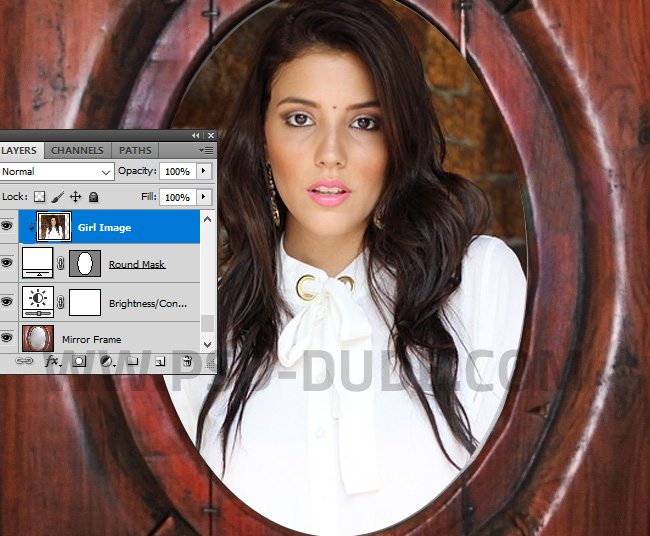
Create a new layer and add this Girl Model stock image. You might want to use your own picture.
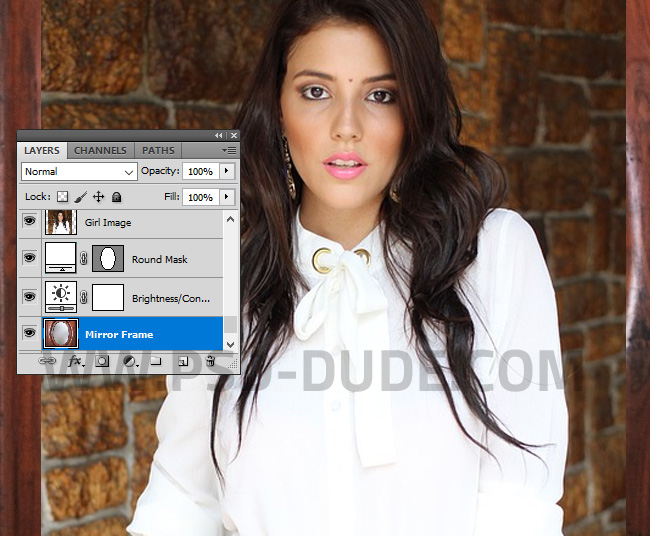
Right click on the Girl Image layer and choose Create Clipping Mask.
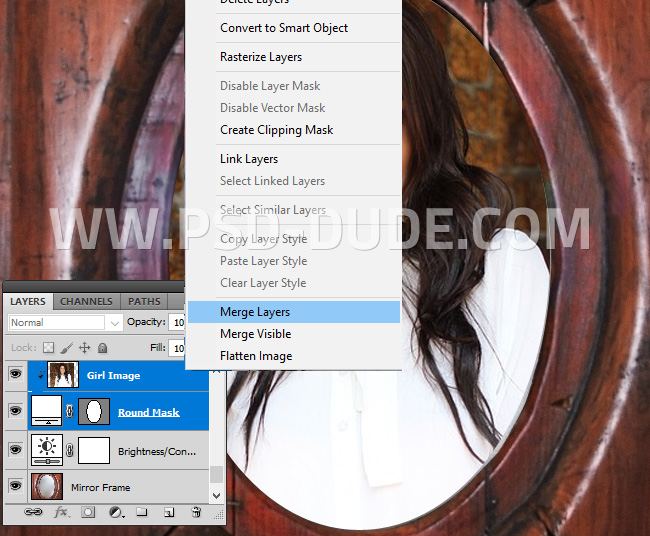
Keep the Shift key pressed and click to select the Girl Image layer and the Round Mask layer. Right click on the layers and choose Merge layers
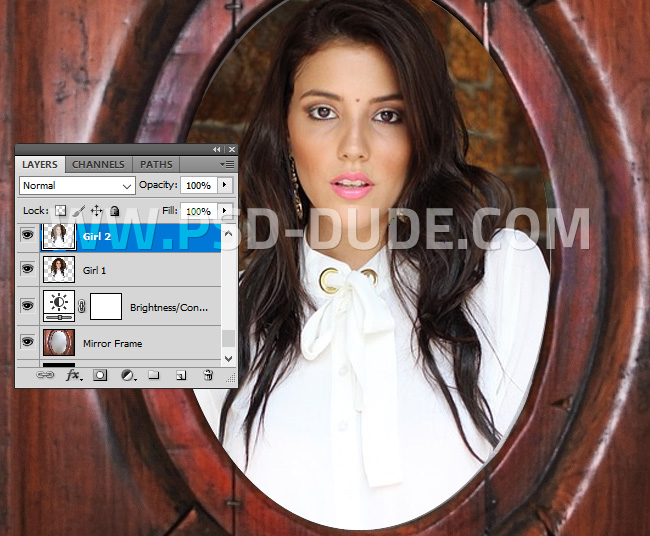
Name this new layer Girl 1. Press Control-J to duplicate the layer and call it Girl 2.
How to Use the Motion Blur Filter in Photoshop
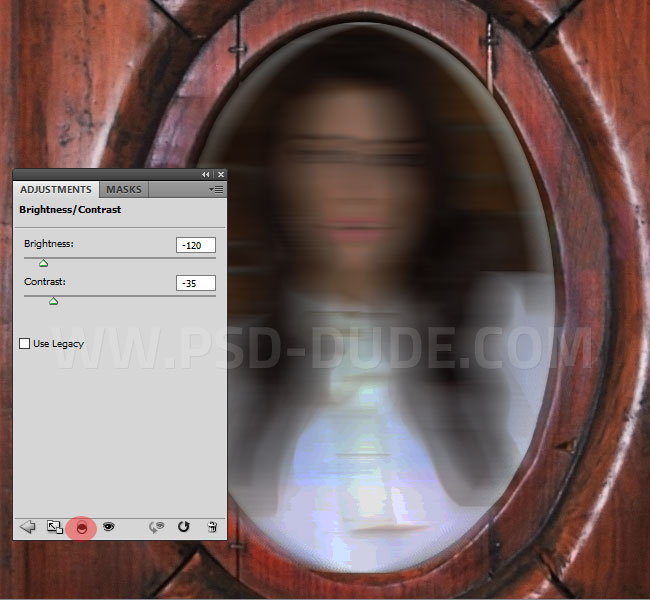
Apply the Motion Blur filter to the Girl 1 layer. Go to Filter > Blur > Motion Blur. If you want to add motion, speed or action to your images, use the Blur filters and especially Motion Blur and Radial Blur.

Add a Brightness/Contrast adjustment layer just for the Girl 1 layer, using a Clipping Mask.
If you want to learn more about blurring a photo in Photoshop check out our list of 17+ Radial Zoom Blur Effect Photoshop Tutorials. Alternatively you can blur photos online using MockoFun.
Set the blend mode of the Girl 2 layer to Screen, opacity 67%.
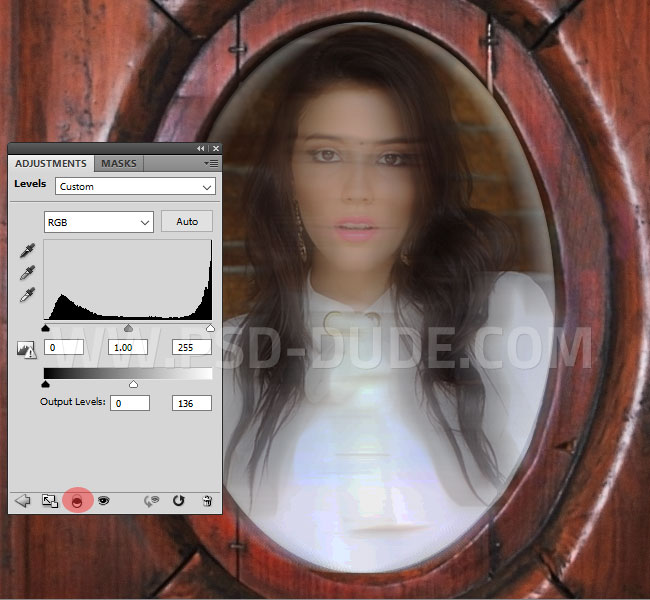
Add a Levels adjustment just for the Girl 2 layer, using a Clipping Mask.
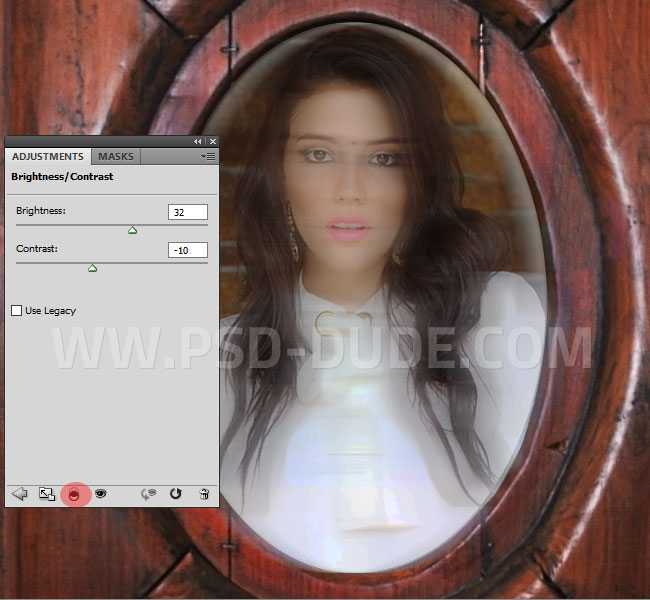
Add a Brightness/Contrast adjustment just for the Girl 2 layer, using a Clipping Mask.
Ghost Photoshop Effect: Create Ghost Eyes in Photoshop
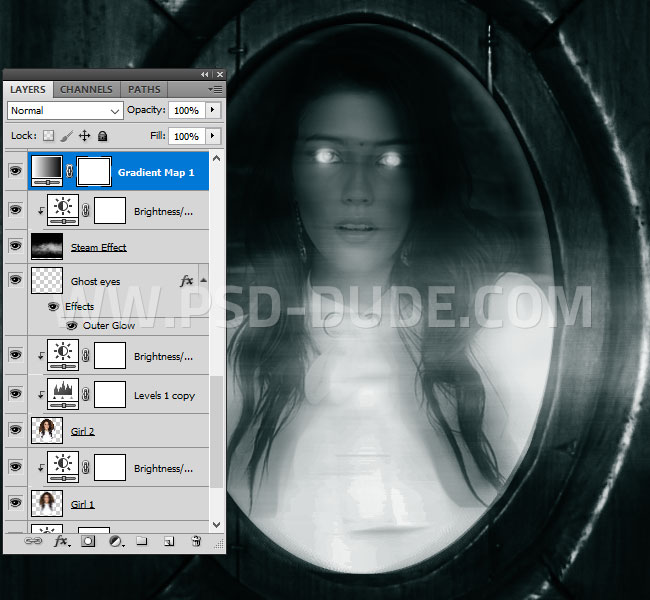
Create a new layer and use the Brush Tool, color white and a soft round brush to paint over the eye iris.
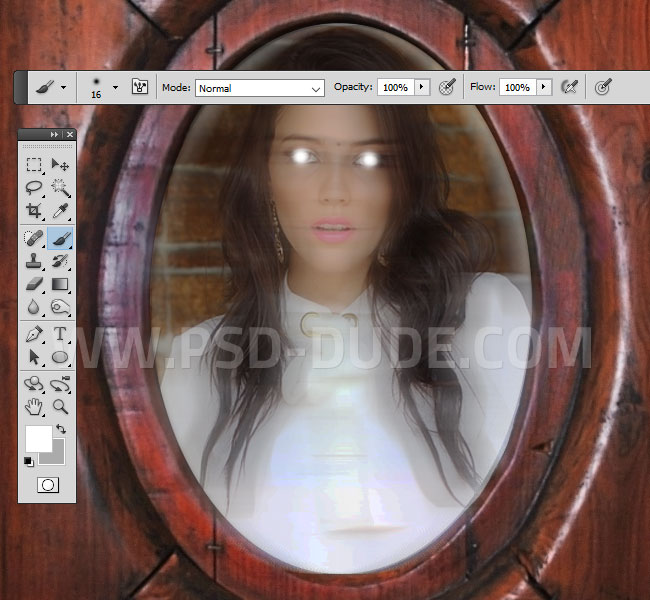
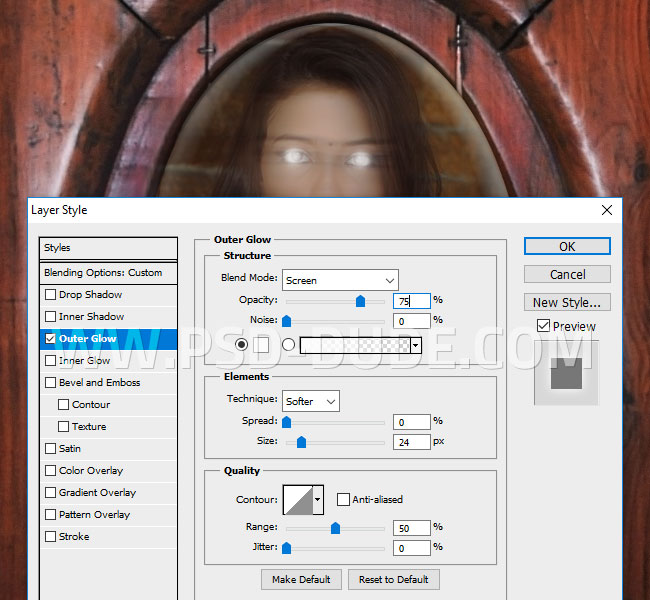
To create the white ghost eyes effect, reduce the opacity of the Ghost Eyes layer at 76%. Also add an Outer Glow layer style to create the glowing eyes effect.
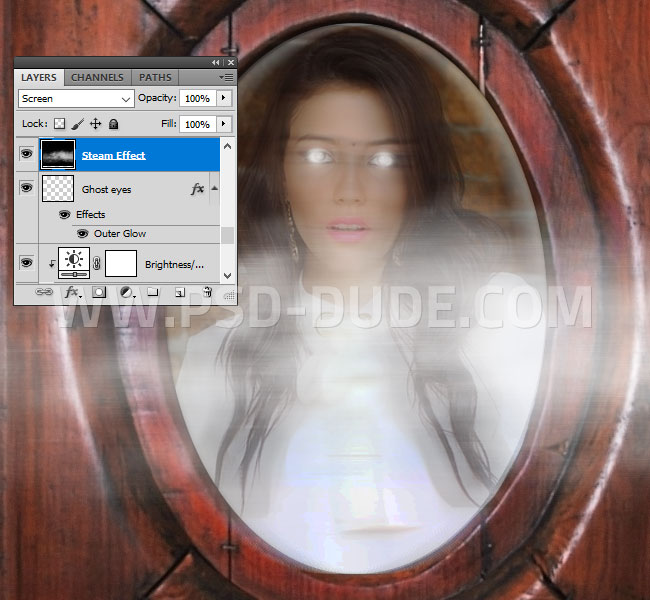
To create a steam effect, add this dust cloud texture overlay in a new layer ans set the blend mode to Screen.
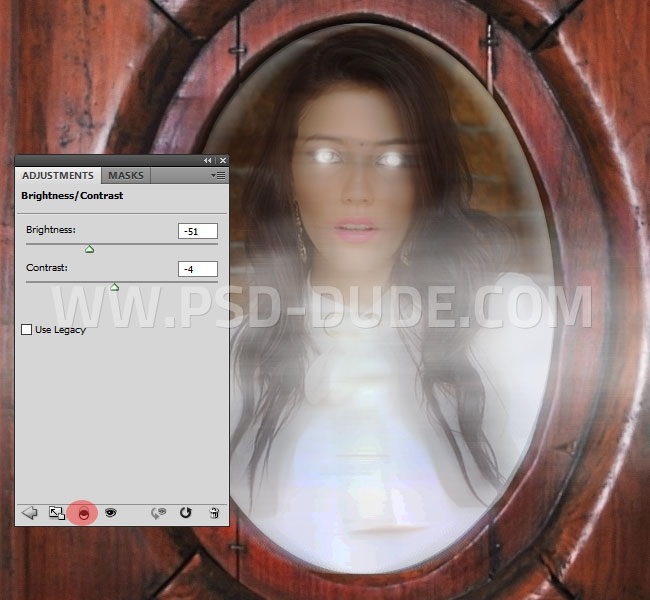
Add a Brightness/Contrast adjustment just for the Steam Effect layer, using a Clipping Mask.
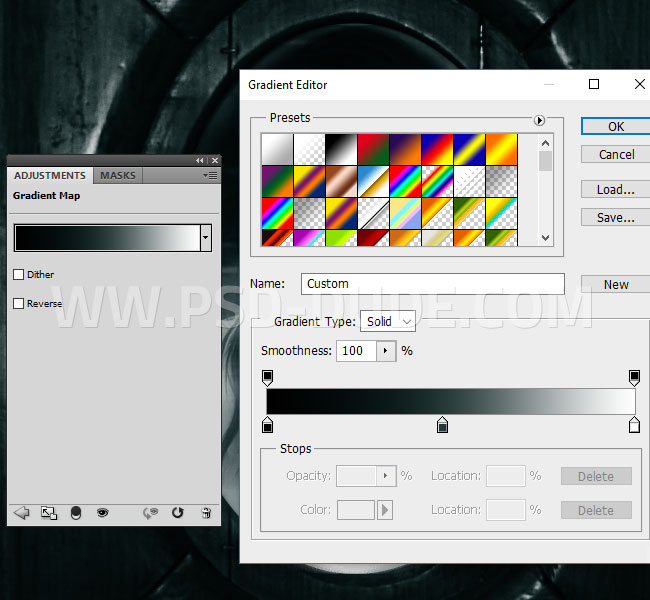
Add a Gradient Map using these color tones: #000000 (location 0%), #253737 (location 48%) and #ffffff (location 100%)
Add Blood Stains and Splatters in Photoshop
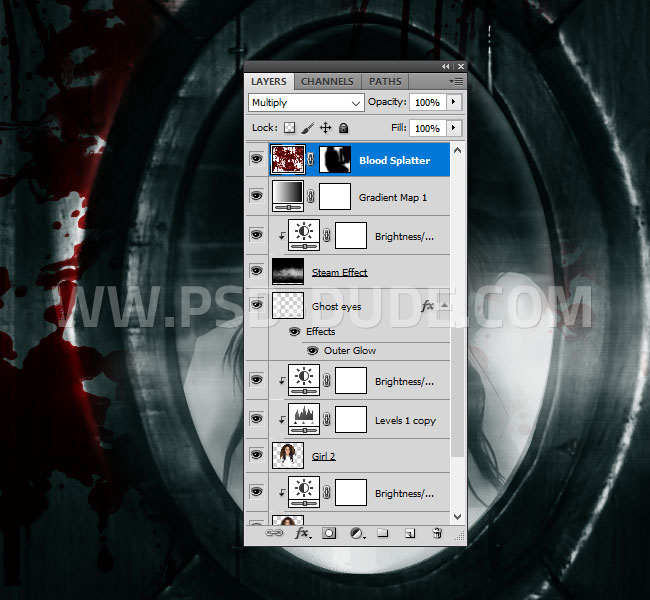
This image already looks like a ghost but I will add other creepy elements. For example I will add some blood stains and splatters on the wood frame.
Set the blend mode to Multiply and add a Layer Mask to hide some areas. Use the color black to paint inside the mask.
Create Time Effect Using a Watch/Clock Image
Create a new layer with blend mode Multiply and add this pocket watch .
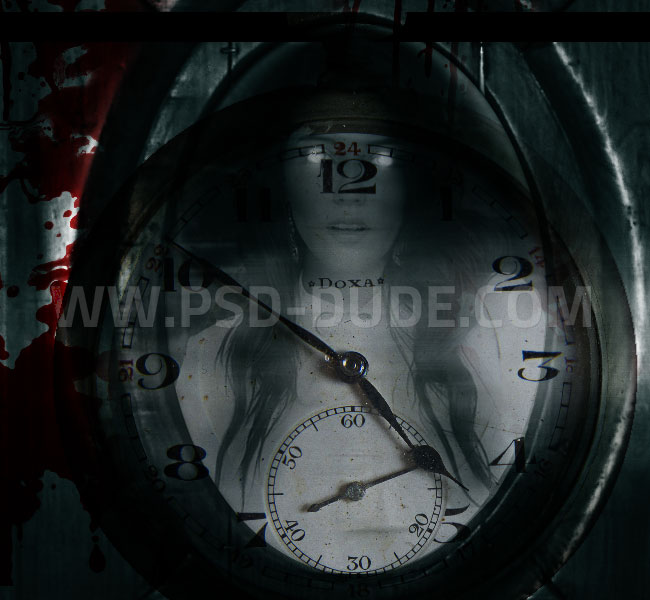
Add a Layer Mask to hide the edge of the watch. Use the color black to paint inside the mask.
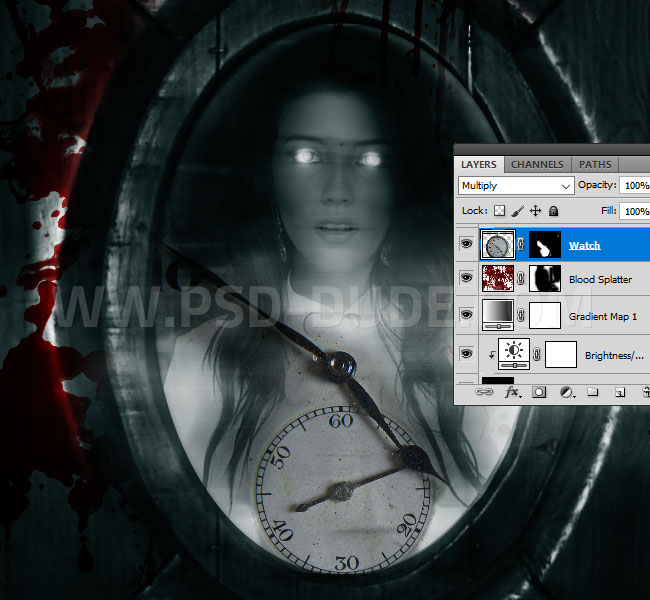
Add a Brightness/Contrast adjustment just for the Watch layer, using a Clipping Mask.
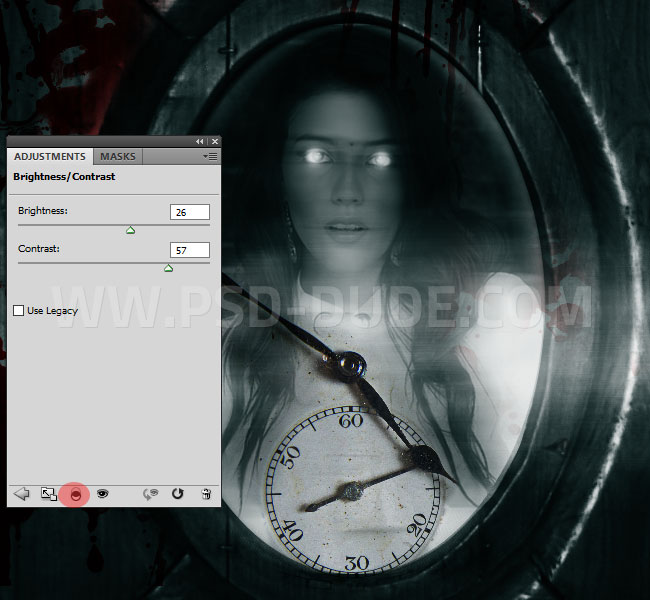
Create Ripped Curtains in Photoshop
In a new layer add this ripped curtain fabric PNG image. Set the blend mode to Screen. Add a Brightness/Contrast adjustment just for the Ripped Curtain layer, using a Clipping Mask.
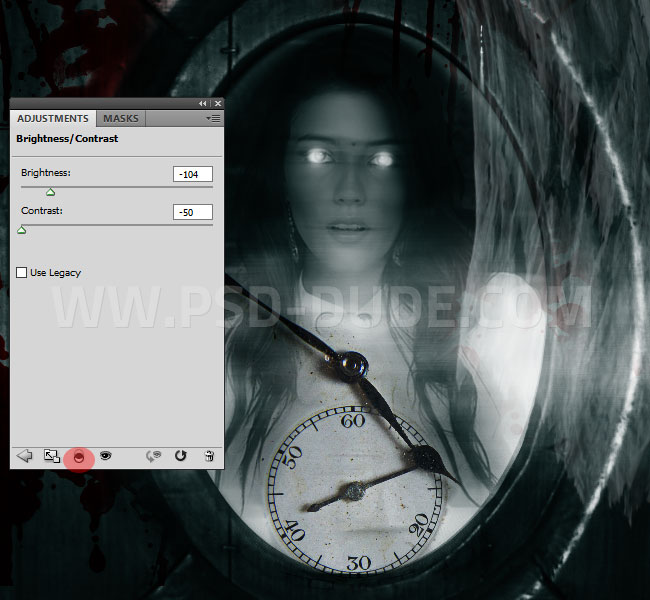
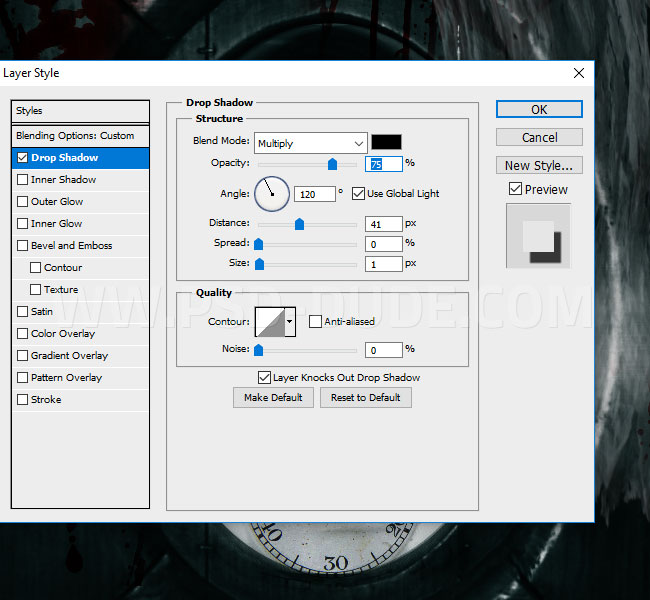
Add a Drop Shadow layer style to create the depth effect.
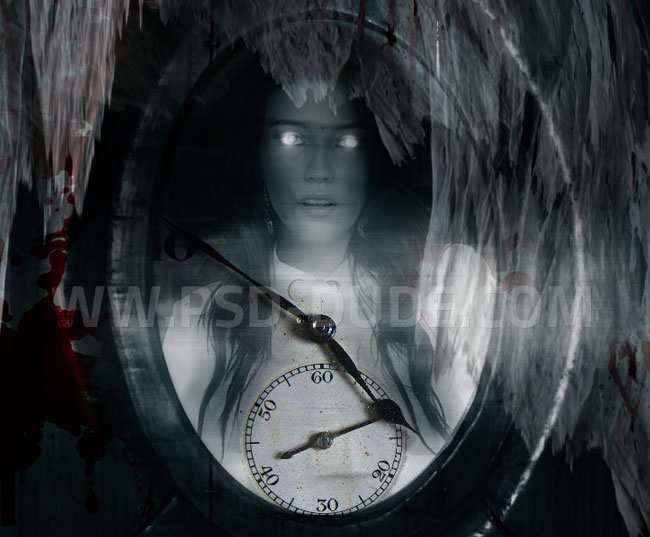
I duplicate the Ripped Curtain layer with the Brightness/Contrast adjustment multiple times. PLace them in different parts of the image. Play with the opacity of the layer and also with the opacity and the distance of the Drop Shadow layer style.
How to Apply Textures to Images Using Photoshop
To create a grunge vintage photo effect, copy this grunge texture in a new layer and set the blend mode to Soft Light and opacity 44%.
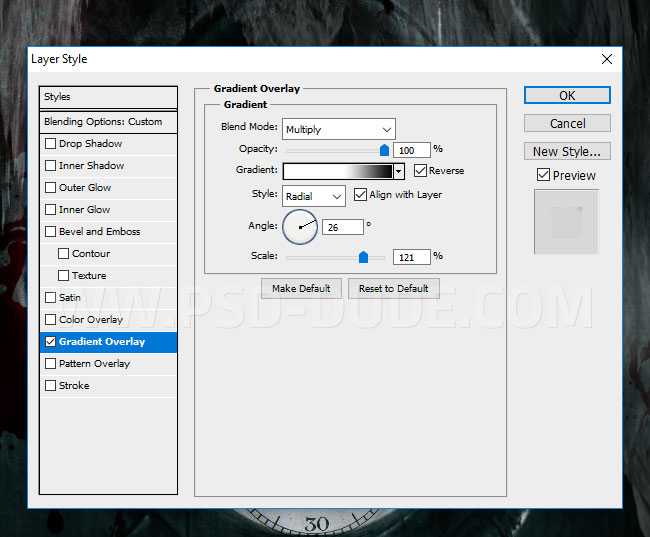
Also add a Gradient Overlay to the Grunge Texture layer to create a vignette effect: #000000 (location 0%) and #ffffff (location 46%)
Add Lens Flare Effect in Photoshop
Add this lens flare texture overlay in a new layer. Set the blend mode to Screen
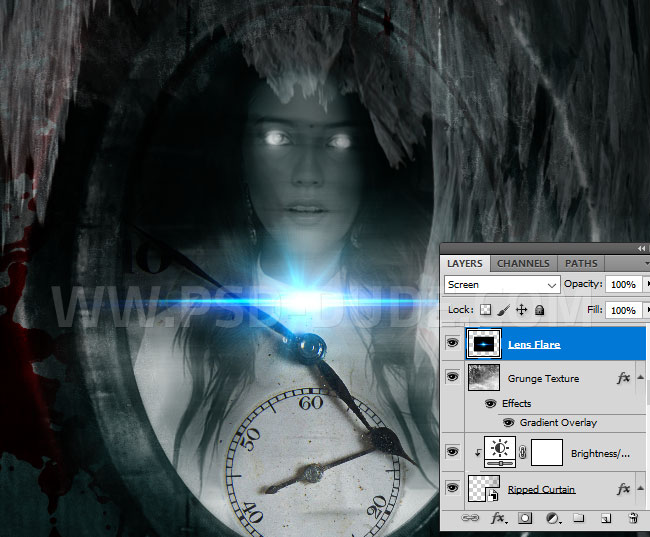
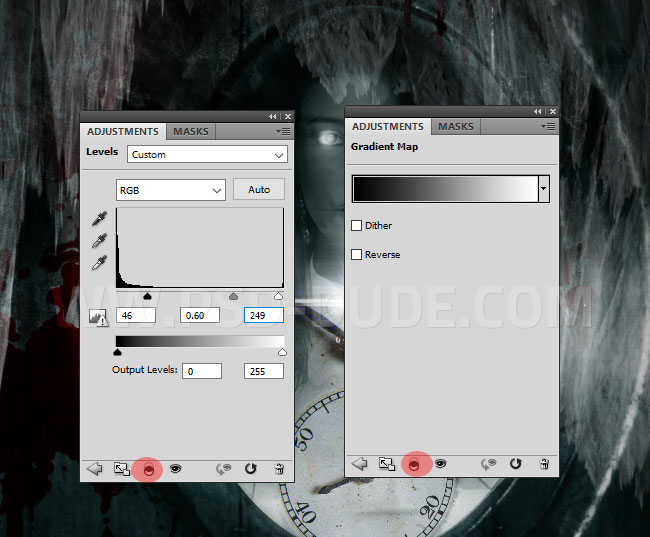
Add a Levels and a Gradient Map(blend mode: Hue) adjustments to this layer only using Clipping Masks.
Dramatic Color Effect in Photoshop
For the final touches I will first add a Curves adjustment for all the layers.
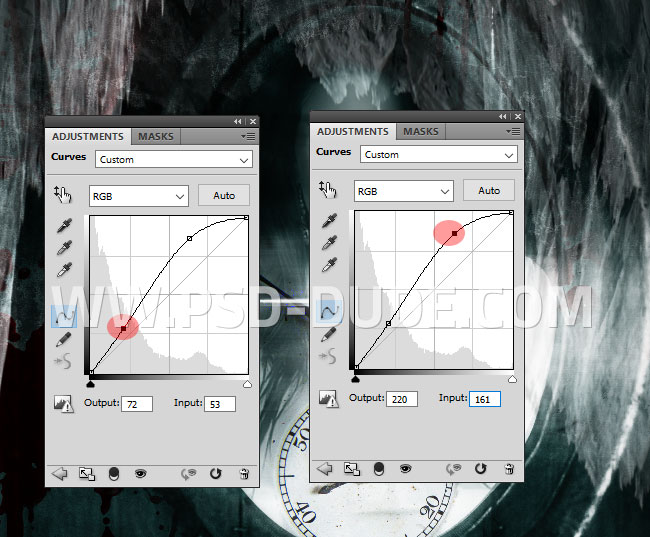
One of the methods for creating a dramatic color effect in Photoshop is to use a Gradient Map. I will set the blend mode to Soft Light. I will use color tones of red and cyan for the gradient are: #e41313 (location 0%), #3dbdbb (location 34%) and #ffffff (location 100%). You can of course use any color variations you want.
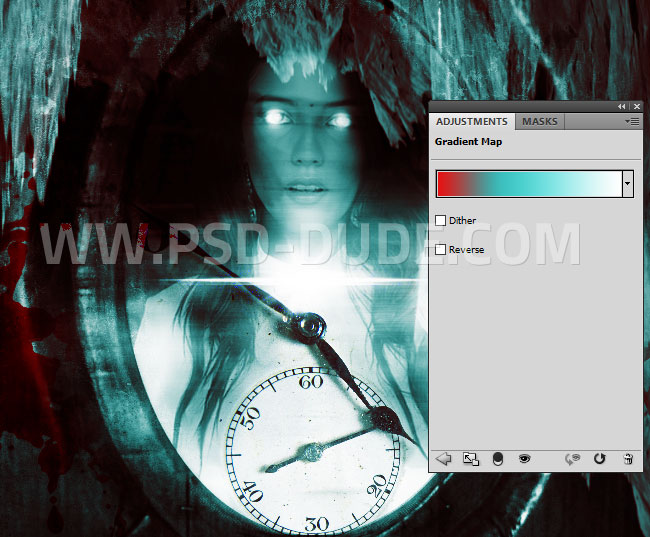
If you want a more sharpen crisp look you can use the High Pass Filter technique from this tutorials.
Congratulations, You Made It!
So here is the final result for ghost an image Photoshop effect. You can apply this ghost effect to a human and even to an animal.

Animated Ghost Photoshop Halloween Action
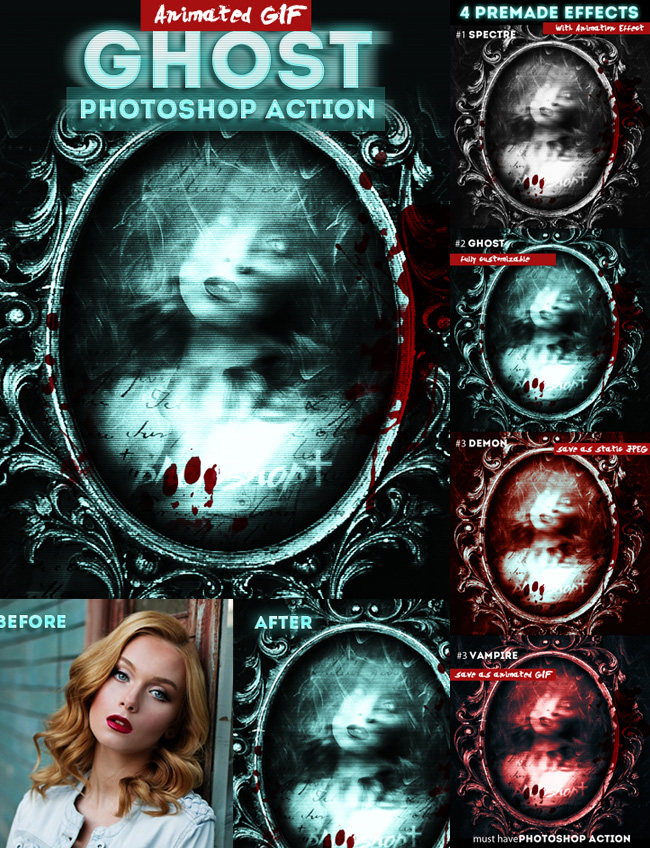
If you want to create an animated GIF ghost effect you can try this cool Photoshop action that is perfect for Halloween. You can create static images and save them as JPEG or you can create animated GIFs. Surprise your Facebook friends with a ghost animation of yourself.


No comment(s) for "Ghost an Image and Create Photoshop Spirit Effect"