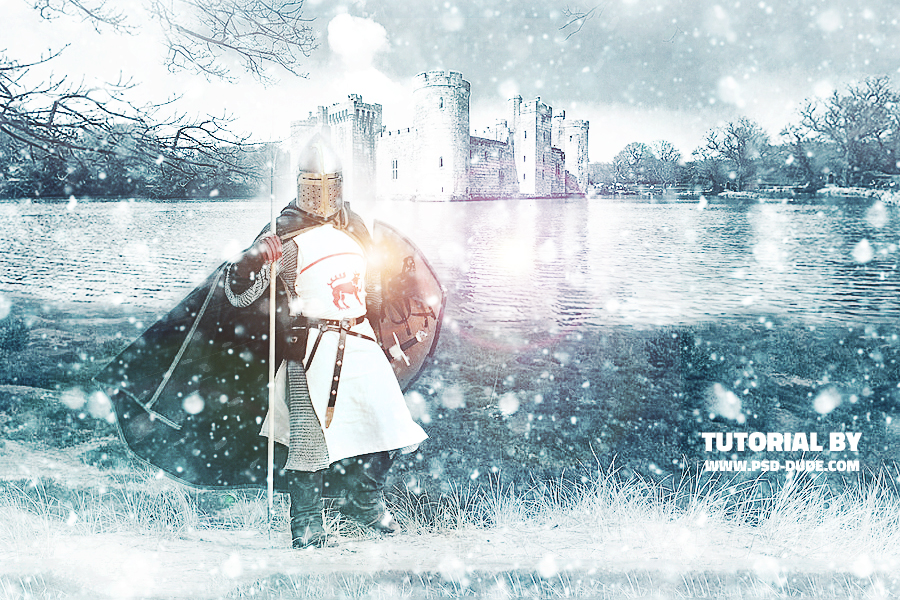
In this tutorial you will learn how to create a winter season photo manipulation with realistic snow and snowfall effects. I was inspired by the popular Game of Thrones fantasy drama television series. You can apply the winter effect to any other photo with the same great results.
Let's start with this photo of a beautiful medieval castle on a lake. Call this layer Castle Background.
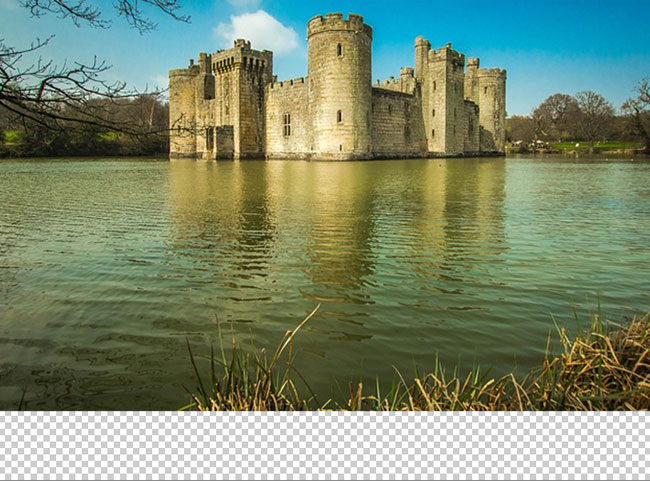
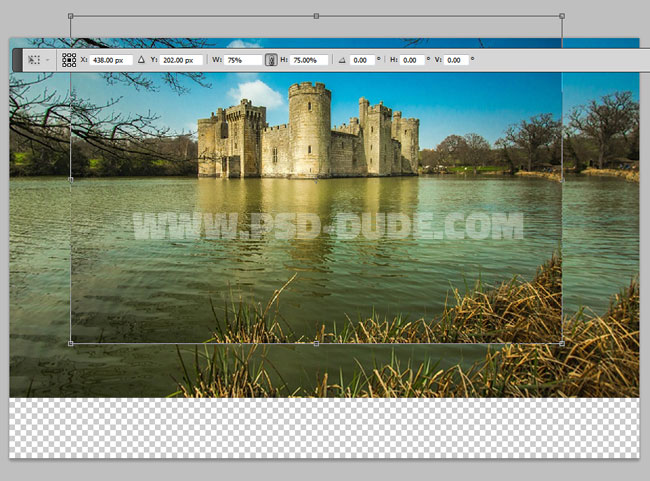
Duplicate the Castle Background layer and rename it Castle layer. Resize it to 75% like shown in the image.
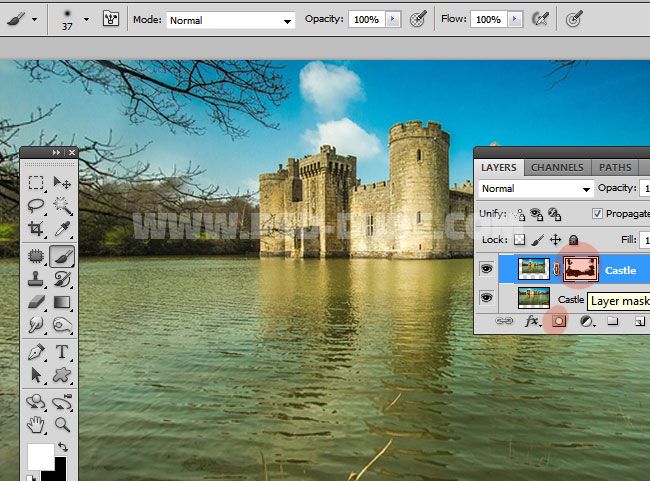
Add a layer mask to the Castle layer.
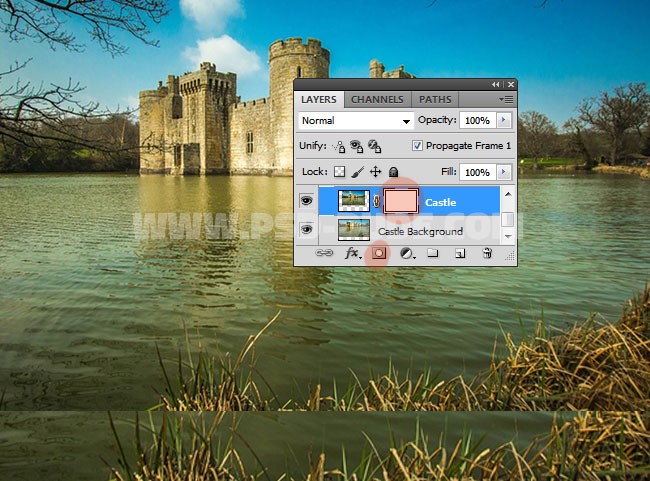
Use the Brush Tool, color black and a soft round brush to make the transition between the 2 layers seamless. You have to paint over the lake and the surrounding area of the castle. Play with different opacity levels and also change the brush size to obtain good results. The layer mask is a non-destructive way to hide parts of an image. With black color you hide and with white color you show certain areas.
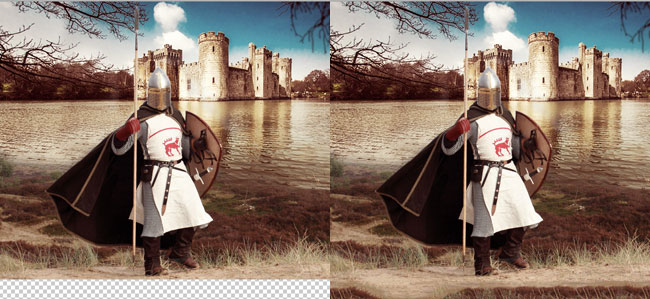
To extend the bottom area of the image you can use the Clone Stamp Tool or you can use the Edit>Fill, Content-Aware which is a new CS5 feature.
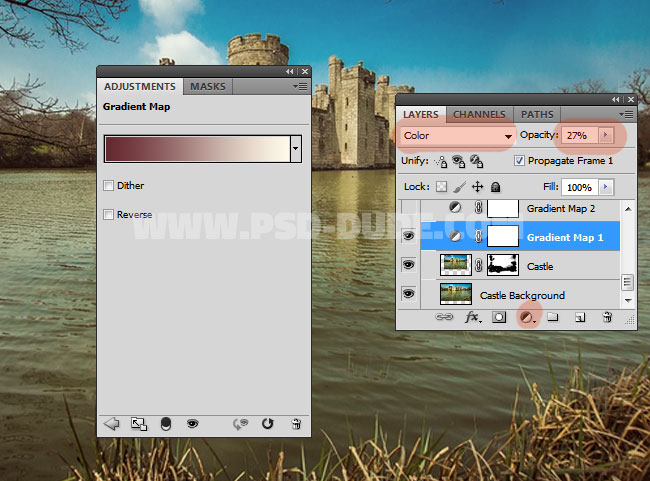
In this next step I will add a Gradient Map adjustment layer to change the color tones of the castle photo. For the gradient choose these two colors #65282f / #fef9e8 and also set the blend mode to Color, opacity 27% .
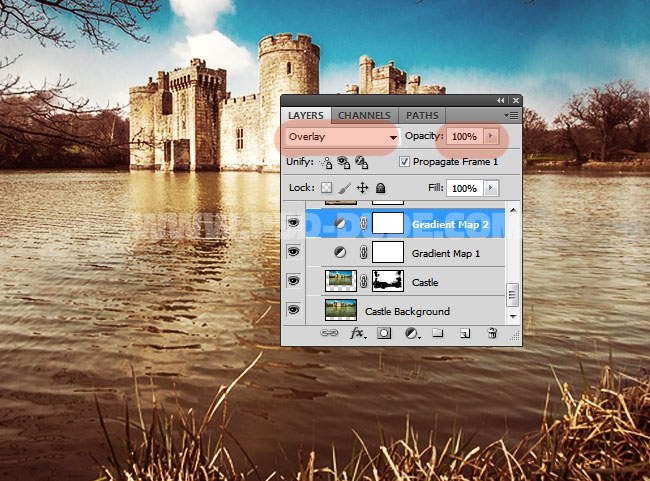
Duplicate the Gradient Map layer. Set the blend mode to Overlay and opacity to 100% to obtain a similar result.
In this step we'll add this medieval knight in a new layer. Add a layer mask for this layer.
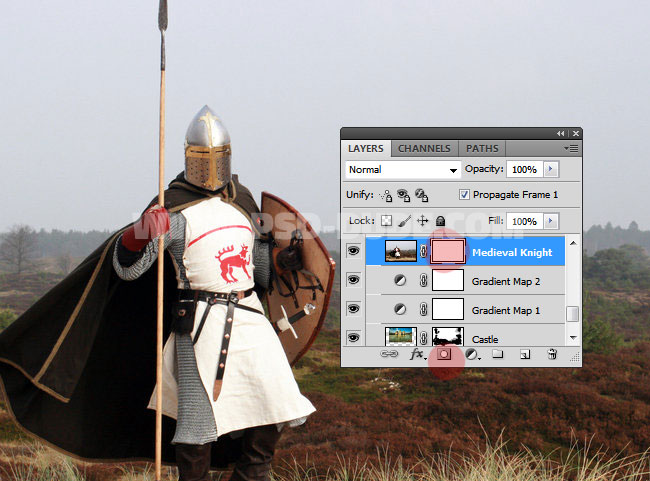
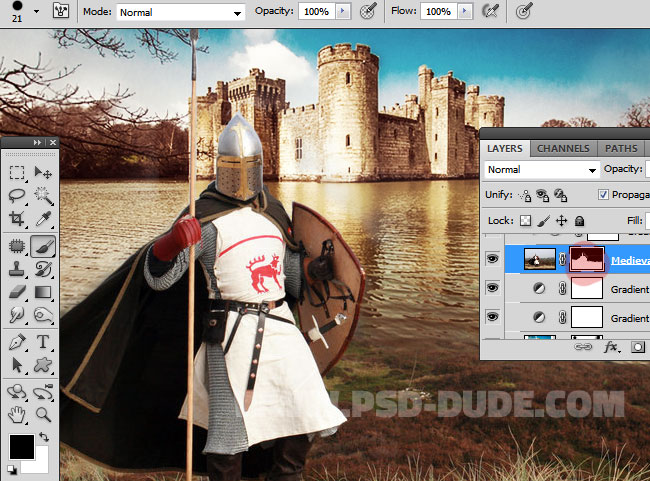
Use the Brush Tool again with color black and different opacity levels to hide some areas like shown in the preview. Around the knight use a hard round brush to make a precise cut. Around other areas use a soft round brush to create a seamless effect.
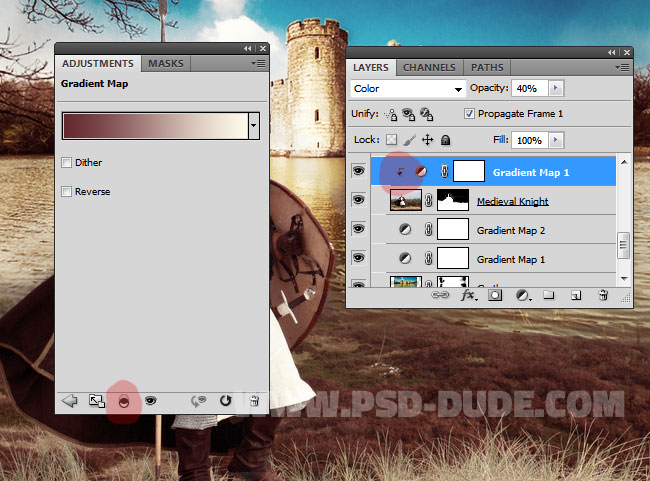
Add a Gradient Map with the same colors used for the castle. Set the blend mode to Color, opacity 40% and also add this adjustment as a clipping mask.
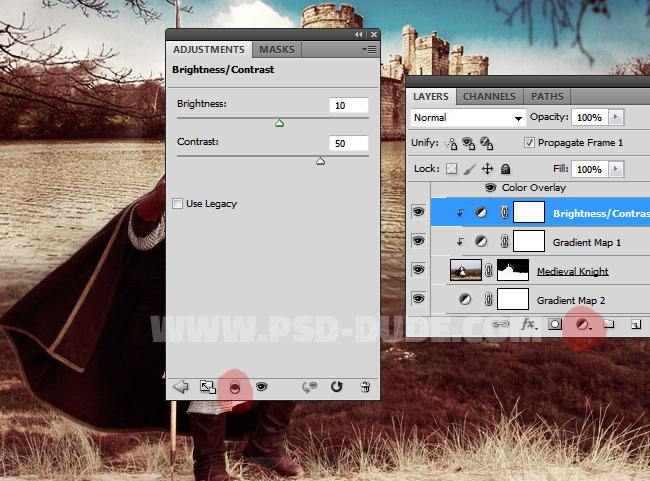
Add a Brightness/Contrast adjustment layer. Add this adjustment as a clipping mask for the Medieval Knight layer.
Above all the other layers add a new Gradient Map with the same colors: #65282f / #fef9e8 and set the blend mode to Color, opacity 27% .
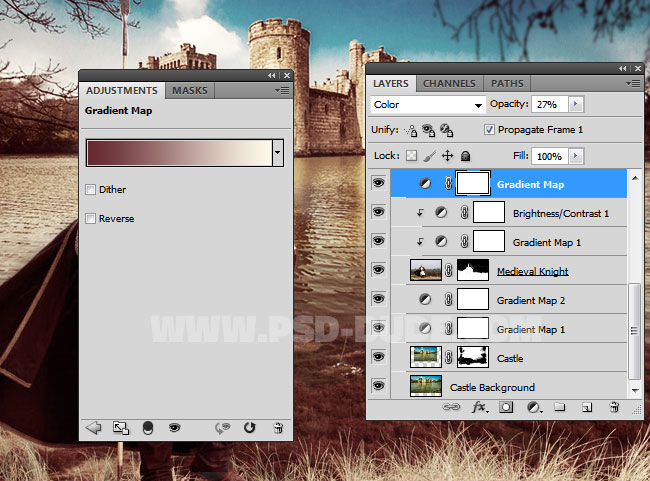
Create Winter Photo Effect in Photoshop
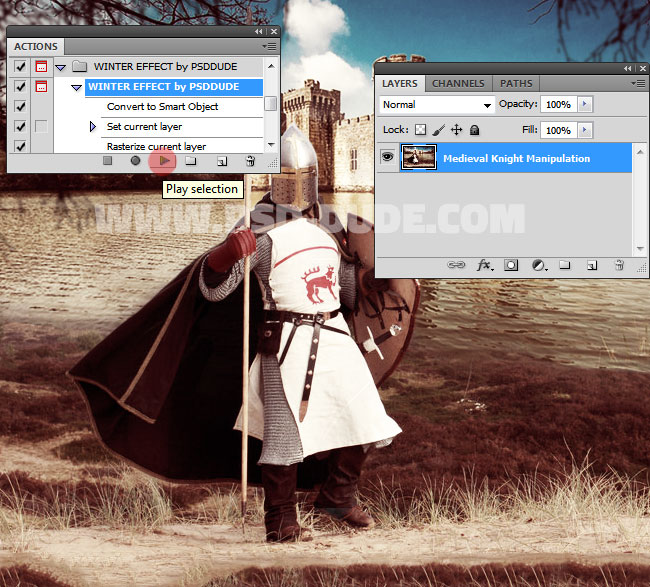
Create a new layer above all the other layers called Medieval Knight Manipulation and press SHIFT+CTRL+ALT+E to make a merged copy of all the layers. Duplicate this layer in a new PSD file.
For a quick and realistic winter transformation you will need the Winter is Coming Photoshop Action tool. So download the action and load the PAT and ATN files. Go to Window>Actions to open the actions tab. Choose the "WINTER EFFECT by PSDDUDE" action and click play.
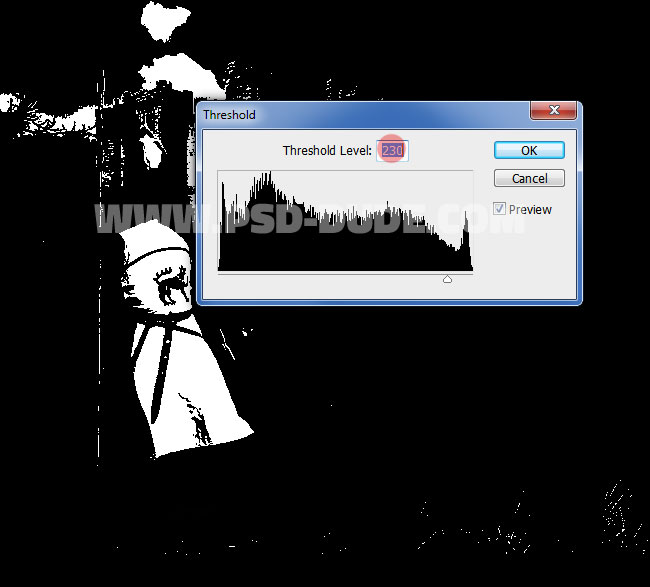
The action stops for you to set the Threshold Level. Set it to 230; the idea is to have a few white details, not too much. Press OK to continue.
The action stops for you to "Paint over the area that you want to reaveal and resume play!". Use the Brush Tool, color white and paint over the knight. You can adjust the effect after the action ends so you don't have to pay much attention. Resume Play!
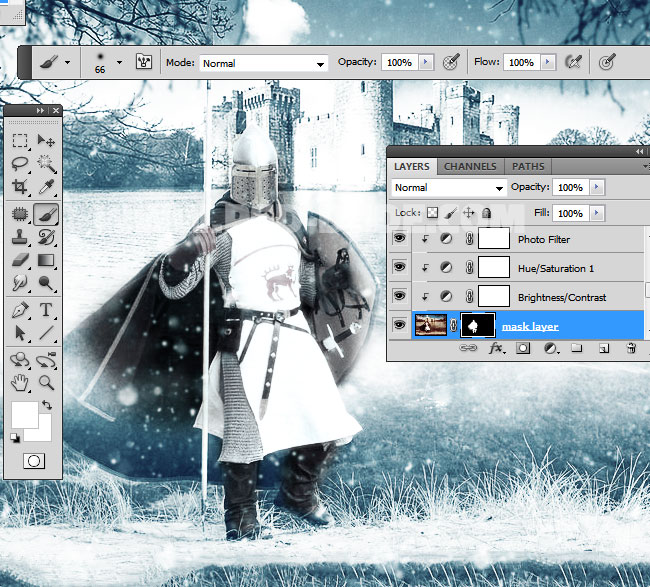
The action stops for you to "Paint over the areas that you want to be more colorful and resume play!". Use the Brush Tool, color black this time and paint over the same knight area. You can adjust the effect after the action ends so again you don't have to pay much attention. Resume Play!
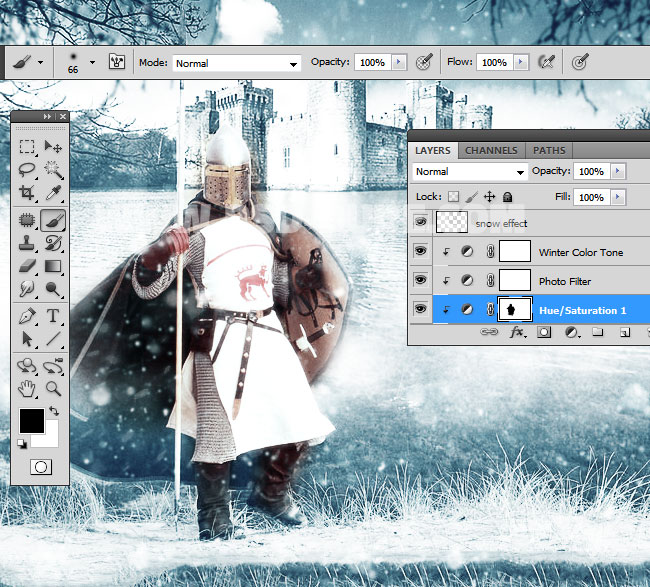
The action stops with this Pattern Overlay layer style. Drag and drop on the screen to move the pattern and to change the fog effect.
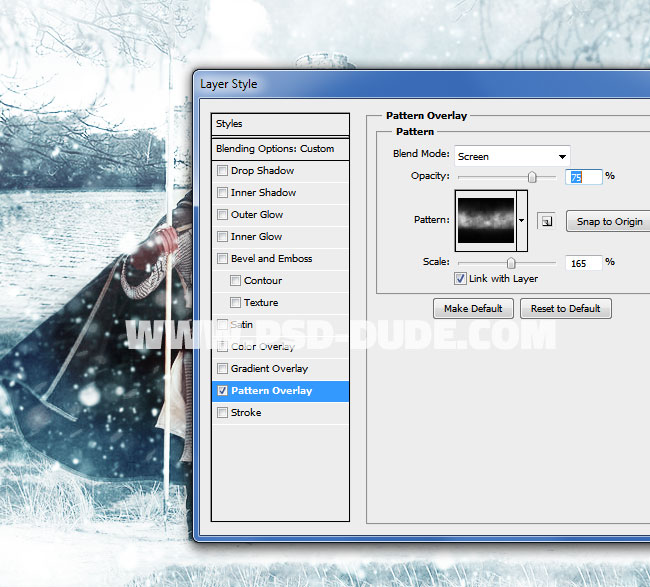
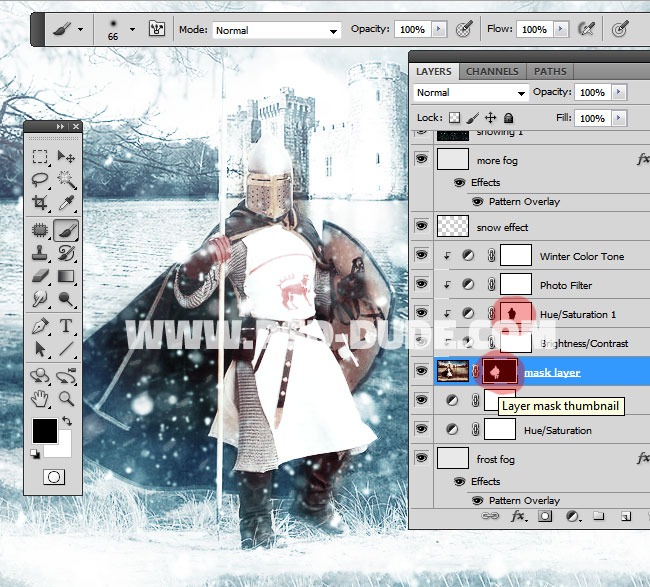
After the action ends you have all the layers intact so you can customize the result. To adjust the knight you have to paint inside the mask layer with white to reveal and black to hide. Click on the layer mask thumbnail and simply paint over the image. To adjust the knight original color effect you have to paint inside the Hue/Saturation 1 with black to reveal and white to hide. Click on the layer mask thumbnail and simply paint over the image.
If you don't want to use the action you can try some of these great tutorials for creating winter and snow effect in Photoshop but it will be a more time-consuming process.
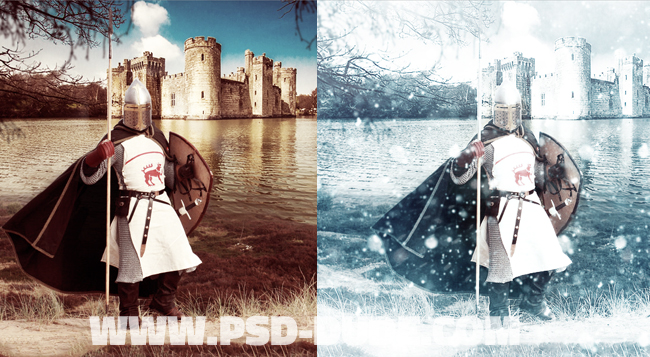
To add sun flare effect I used this Rays of Light Photoshop Creator ; with a little bit of customization and hiding some adjustments I obtained this result. You can use one of these lens flare textures with Screen or Lighten blend mode. Alternatively there are other lens flare textures that you can use. Learn how to add lens flare in Photoshop from this quick tutorial.
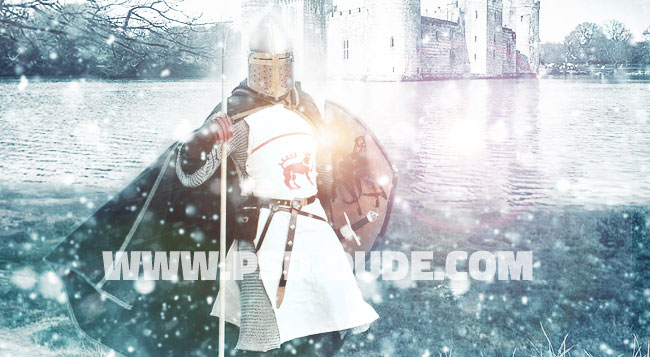
For the final touches I have used the Photoshop High Pass Filter to sharpen the image and to obtain an icy crisp effect. So here is the final result for our winter is coming Phtoshop manipulation. I hope you enjoyed this new Photoshop tutorial!

6 comment(s) for "Winter is Coming Photoshop Manipulation Tutorial"
The original image is this one http://fifthchukka.deviantart.com/art/Medieval-I-169218263
and I might say that the transformation is huge.
Thank you :)
DOWNLOAD HERE:
http://graphicriver.net/item/summer-to-winter-v1-photoshop-action/16647282?ref=psddude