Graffiti Old Paint on Wall Effect
Want to learn how to add text on a wall in Photoshop?
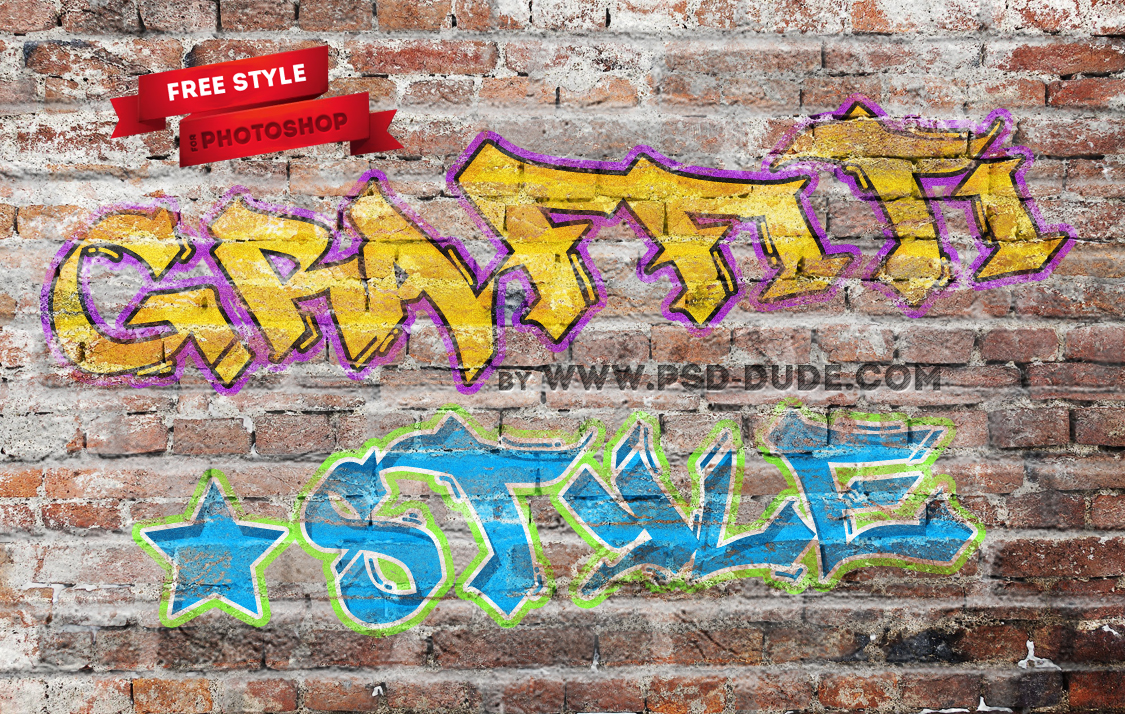
Let's take a quick look at the image that we are about to create. This paint grunge effect it is really easy to obtained even by a Photoshop beginner. We only have to apply some layer styles and filters to achieve the spray effect.
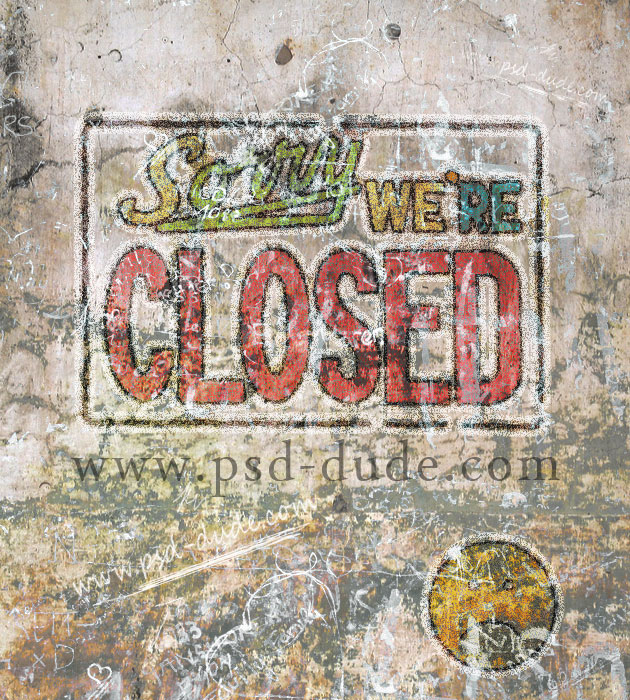
Here is a quick tutorial on how to create a Photoshop wall painting effect using a logo, text or a simple shape. This effect it is similar to a graffiti effect and it can be used on different background textures or surfaces like wood, wall, cement or asphalt texture. It looks great on a multitude of textures but they have to be old grunge textures.
Start Creating The Wall Painting Effect
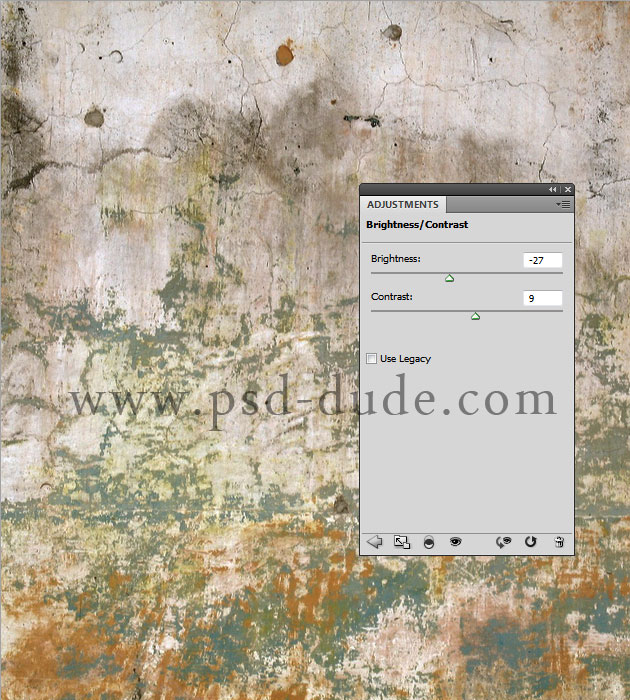
Ok so open this old wall texture in Photoshop and call it Wall Layer. Alternatively you can use any wall texture from our huge Wall Textures Photoshop Collection. Use a Brightness/Contrast adjustment layer to darken the image like shown in the preview. If you don't know how, check out this Photoshop adjustments guide for beginners.
Add Some Graffiti Effect Using Photshop Blending Modes
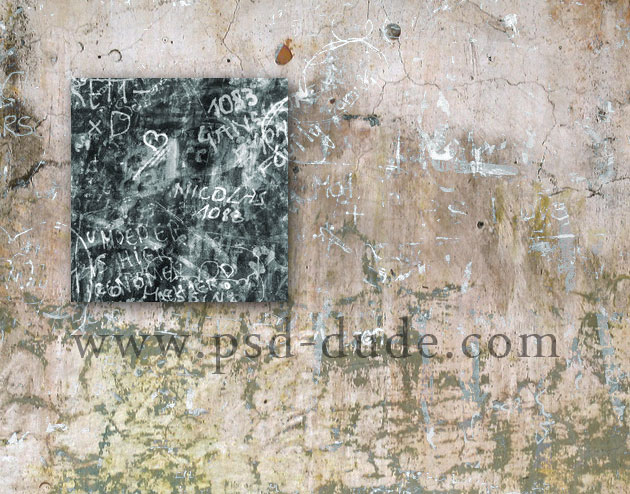
Copy this written wall texture in a new layer and change its blend mode to Lighten to make the wall look more grungy.
Add Logo Design On The Wall
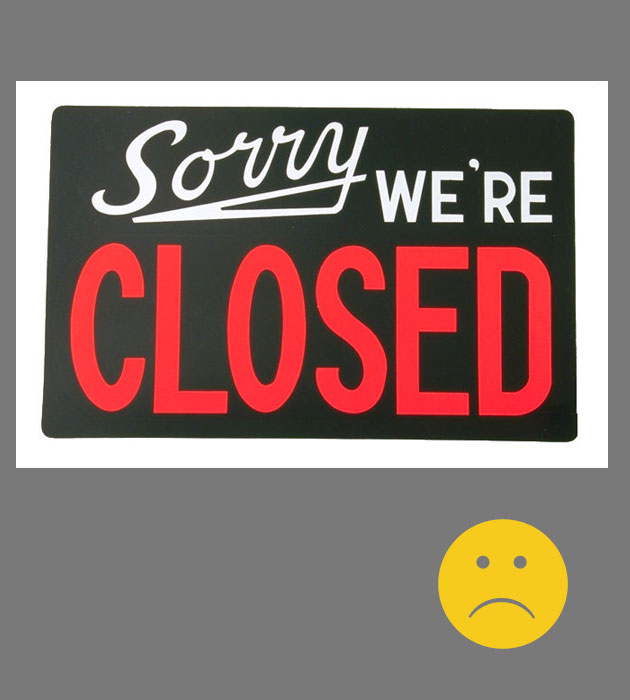
Time to add a text, logo, shape, etc. You can use whatever you want aslong as you follow these steps. I will use this closed sign combined with a sad emoticon shape.
How To Remove The Background Of The Logo In Photoshop
There are a lot of ways in which you can remove backgrounds in Photoshop. If you don't know how to remove background in Photoshop, I will show you one of the simplest ways. For more advanced techniques you can use this awesome Remove Background Photoshop Action.
Using the Magic Wand Tool, select the black areas from the "closed sign" and remove it. Uncheck Contiguous so that you select the black area inside the letters.
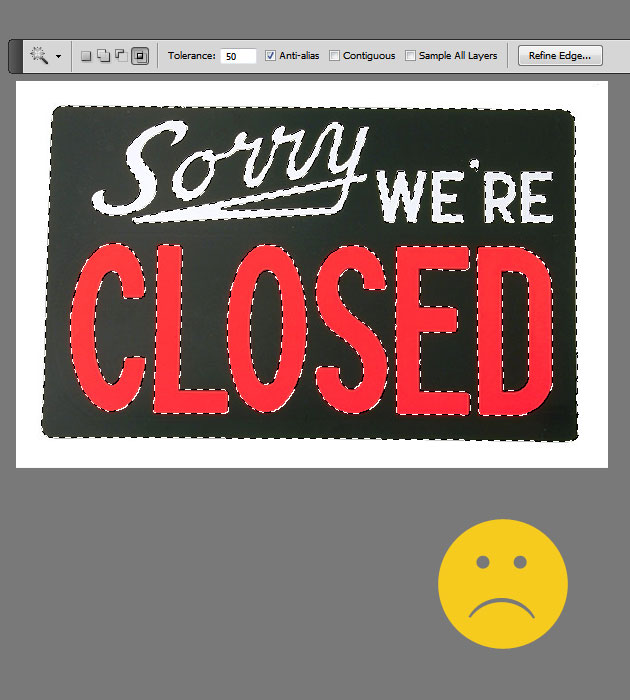
Using the Magic Wand Tool, select the white areas from the "closed sign" and remove it. Check Contiguous so that you do not select the letters that are also white.
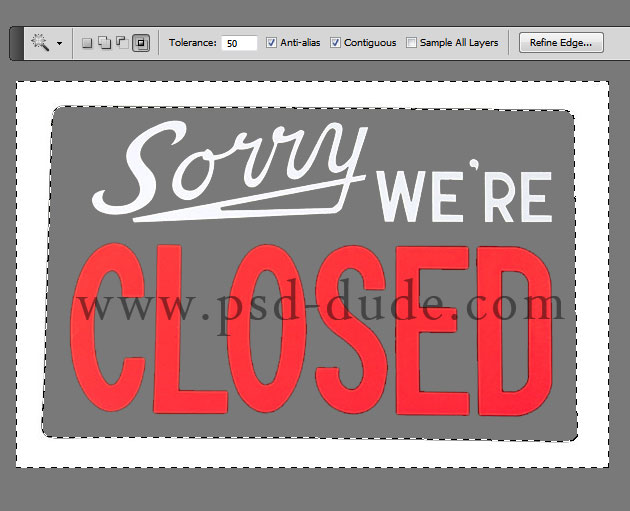
Fill the sad emoticon with a yellow color and also the letters from the closed sign using brite yellow, green, orange and blue colors. To fill the letters you can use the Paint Bucket Tool. You should obtain a similar result.

Add a black Stroke of around 3px to both layers(closed sign and sad emoticon). Select the two layers and convert them into a Smart Object or rasterize them it is up to you. The difference is that as smart object you will be able to edit them later on. Call the new layer Logo Layer.
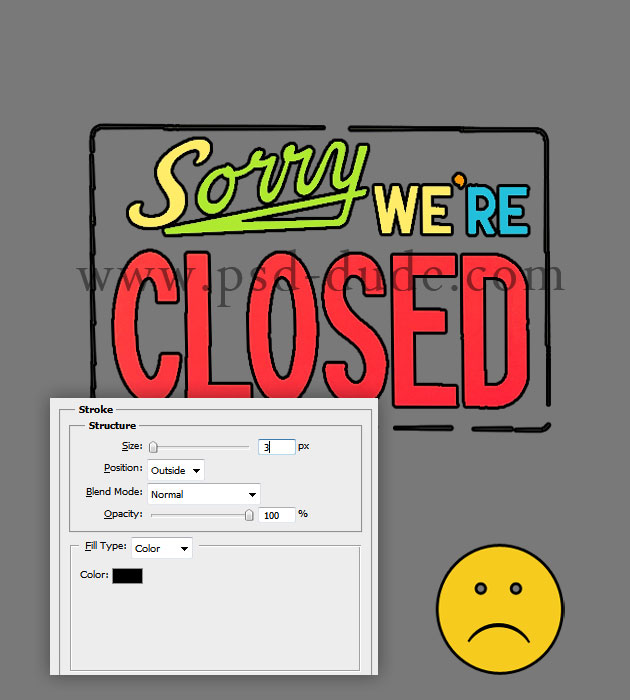
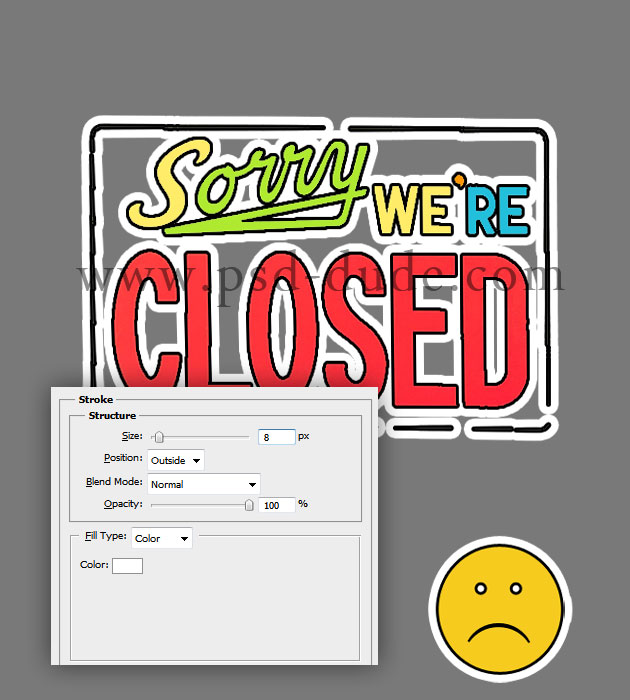
Open the layer style window of the new Logo Layer and add a white Stroke of around 8px.
How To Create The Text Paint Effect Photoshop
To make the text look like it's been painted on the wall, we will create a very simple spray paint effect in Photoshop (you can also check out our paint effect Photoshop tutorials).
Select the Logo Layer, right click and convert it again in smart object. Keep the same name Logo Layer. Go to Filter, Brush Strokes and choose Spatter to add the spray effect especially on the logo edges. You can at any time edit this smart filter.
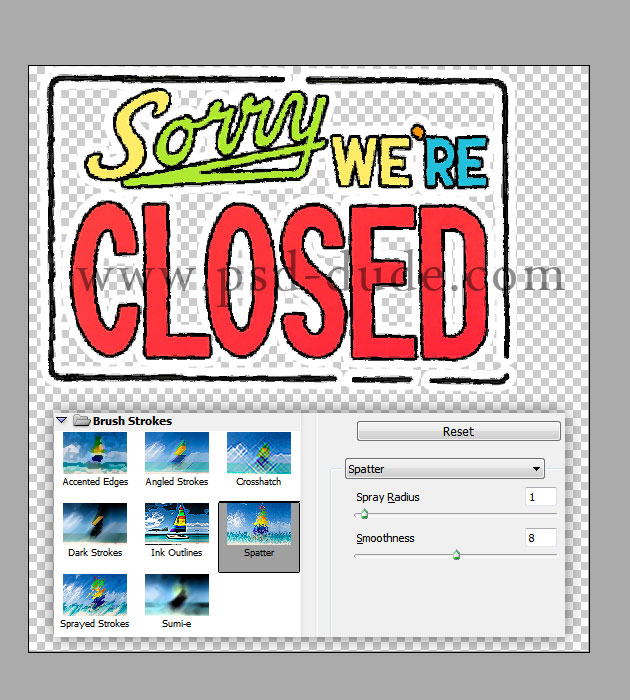
Add a layer mask to the Logo Layer; if you are not sure how to add a layer mask in Photoshop find out all there is to know about Photoshop mask from this tutorial - Photoshop mask for beginners.
After you added the mask, make sure you have the mask selected(click on the mask thumbnail), go to the Filter, Noise menu and choose Add Noise. As you can see we obtain a spray effect like the one used for graffiti art works.
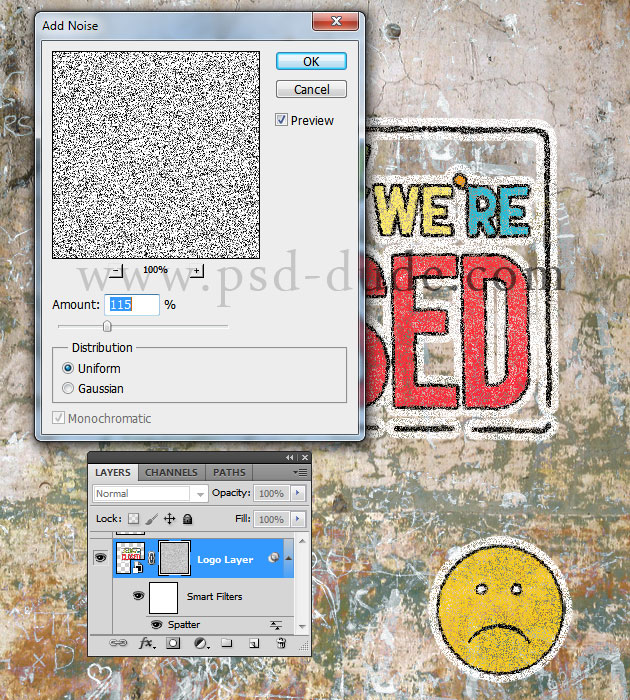
Finish Up The Wall Painting Effect
Change the blend mode of the Logo Layer to Overlay, 74% opacity level.
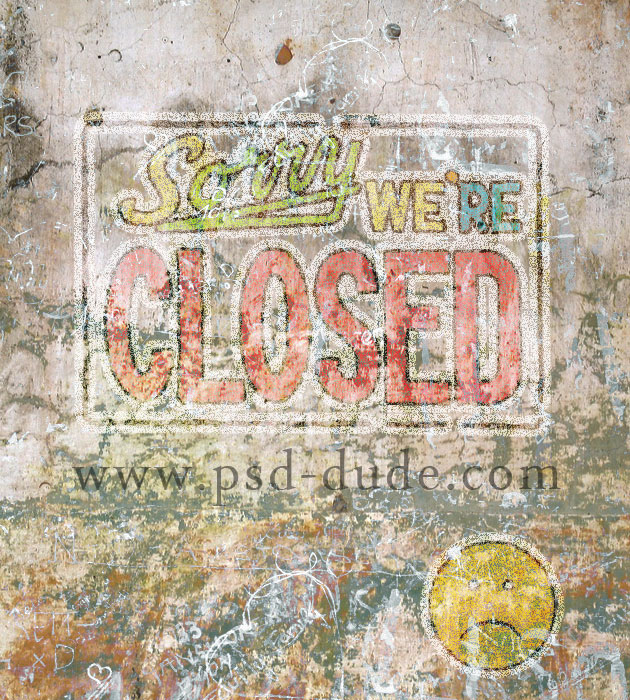
Let's make the painting on the wall more visible.
Add a Brightness/Contrast adjustment layer above the Wall Layer. Make a selection out of the Logo Layer(press CTRL and click on the layer thumbnail). Contract the selection with around 5px.
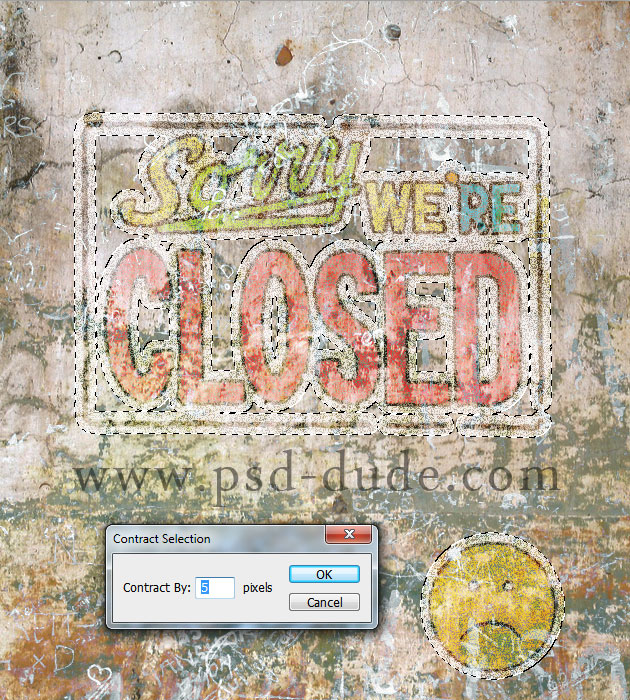
With this selection return to the Brightness/Contrast adjustment layer made above the Wall Layer and add a layer mask. You will see that the layer mask is
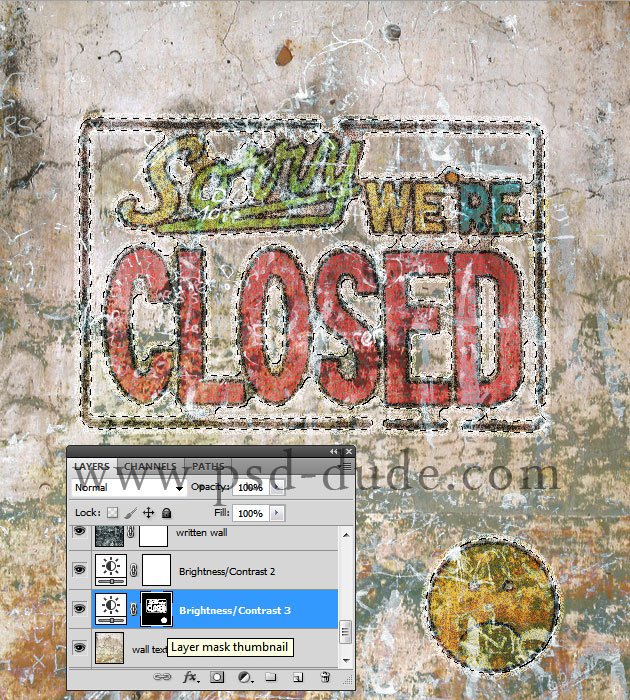
For the final touches you can desaturate some areas of the final image result to make it look even nore old, you can add some more scribble and doodle brushes and so on. Here is the final result for the wall paint, graffiti effect as you want to call it. Hope you like it and I am waiting to see your results.

Need Wall Textures For Photoshop Projects
Check out our awesome Wall Textures Photoshop Collection where you can download for free tons of wall textures.




No comment(s) for "Paint on Wall Photoshop Effect Tutorial"