How To Create The Love Text Layer Style
First download this ZIP file(3.18MB) that includes the prerequisites for this tutorial, the brushes, patterns and also the sample PSD file. Inside the PSD file you can find the diamonds text style with the layer styles intact.
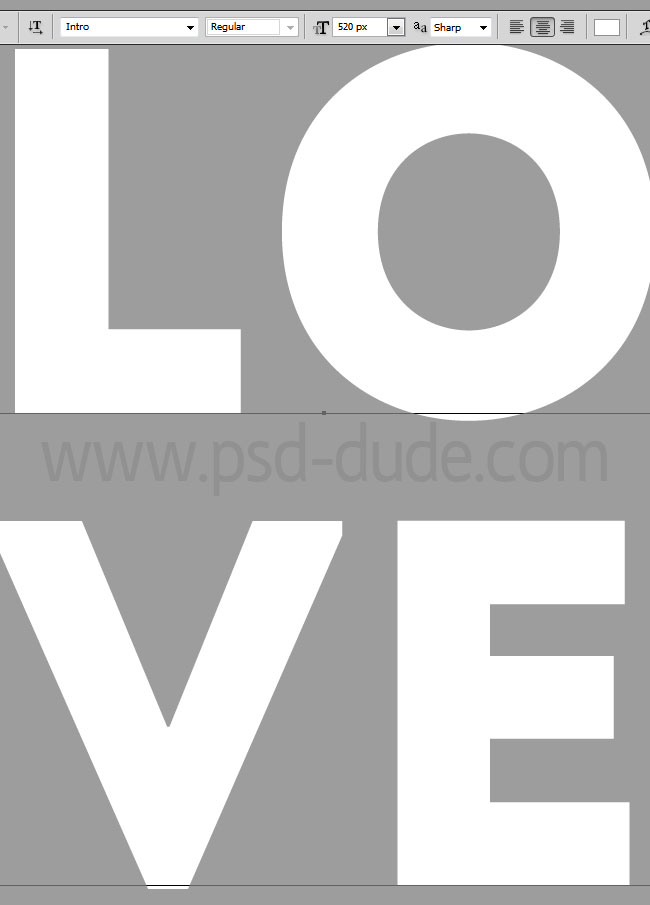
Let's start this tutorial with the luxury Photoshop text style. First we have to choose the font type; I will work with the Intro font type, which is a free font. You can of course use any font type you want. Here is a tutorial on how you can install font in Photoshop .
Type a text that you like. Because I am making a Valentine party flyer, I will write "love" on two lines like shown in the preview.
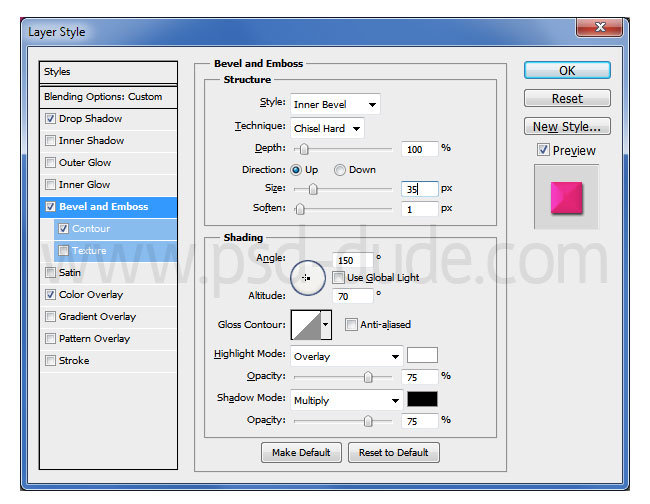
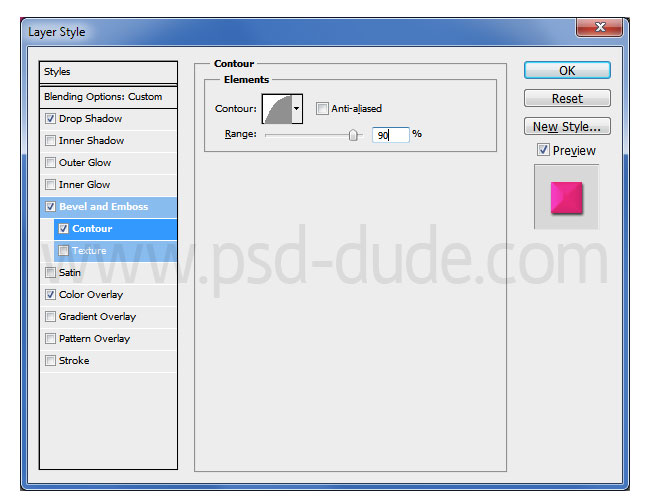
Add the following layer styles to the Love Text layer: Drop Shadow, Bevel and Emboss and Color Overlay.

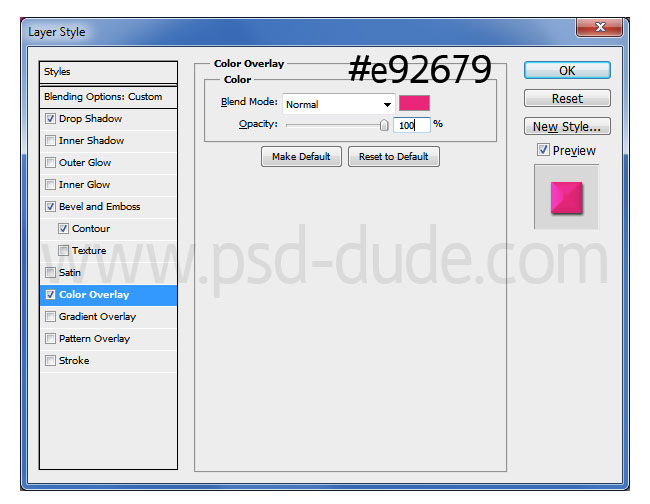
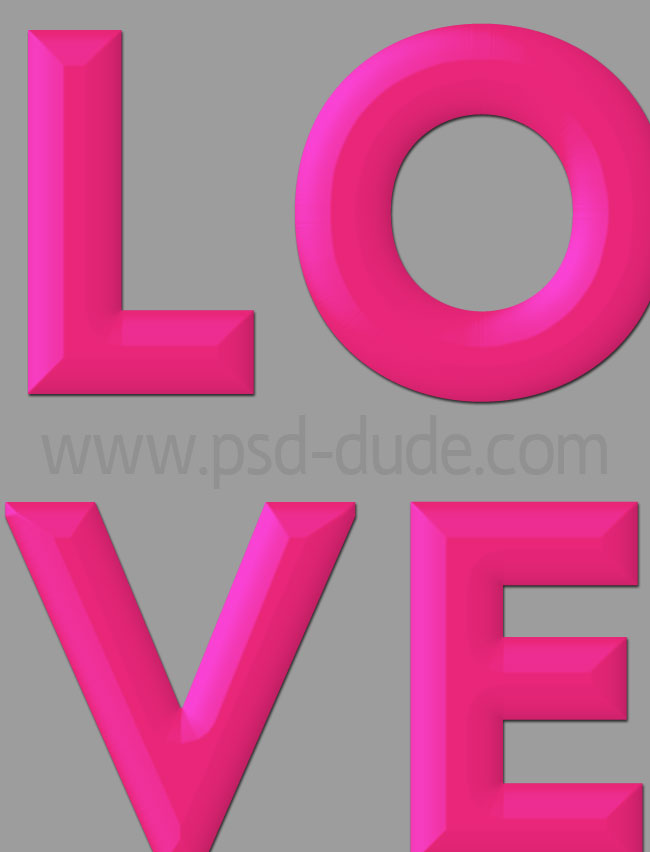
Your love text style should now look like this. You can of course change the Color Overlay and choose anoyher color like red for example.
How To Add Diamonds On The Text Letters
Create a new layer above the Love Text Layer and call it Diamonds Layer. Use the Love Text Layer to create work path and stroke path using the "dotted line brush" that you can download from here.
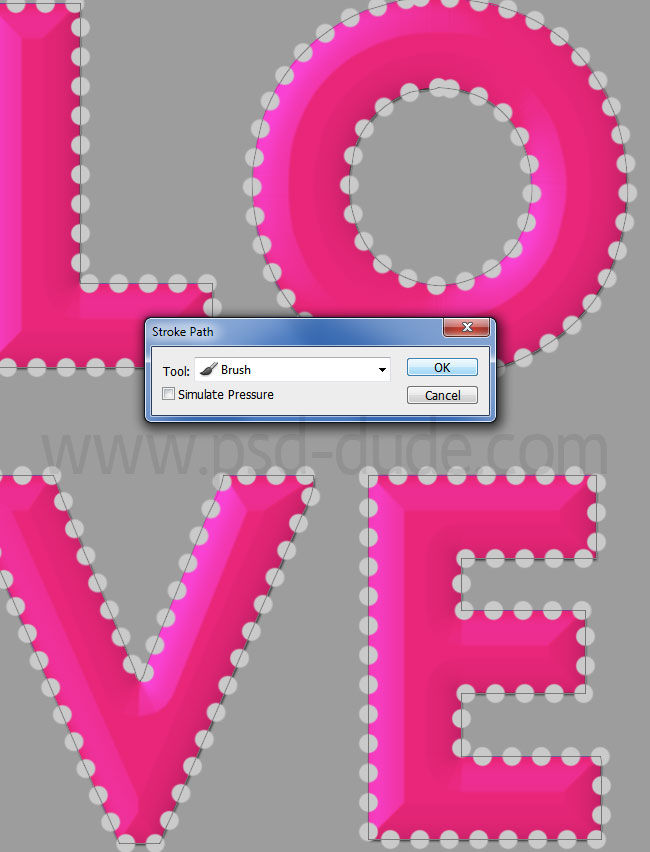
Quick Tip: Make Work Path and Stroke Path
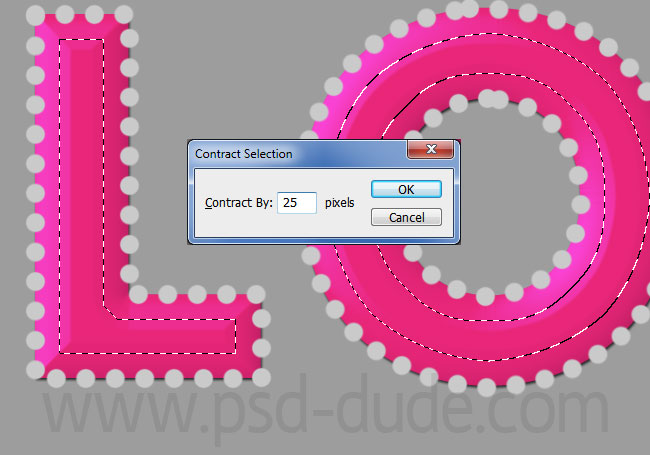
You have to delete the work path before going to the new step. Again make a new work path like in the previous step but you have to first Contract Selection with 25px less or more depending on your text diameter. Go to Select>Modify and choose Contract.
Create the work path from the selection and stroke path using again the "dotted line brush" in the same Diamonds Layer.
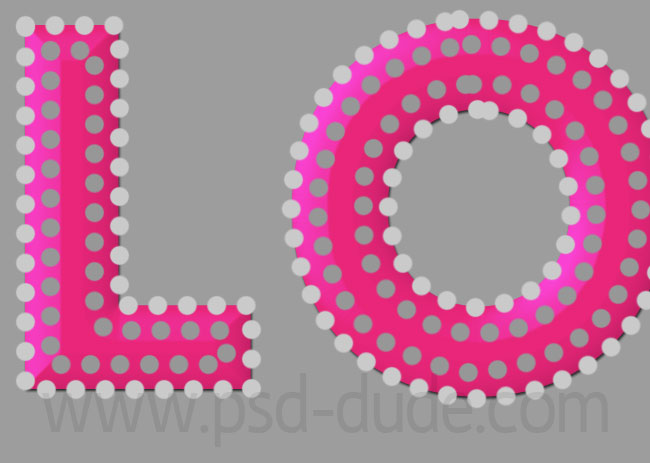
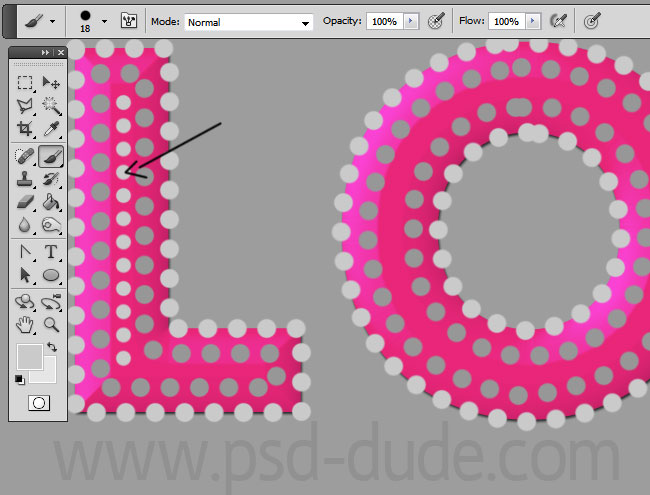
If you still have empty gaps you can either repeat the process again or you can simply add the dots using the Brush Tool like shown in the image.
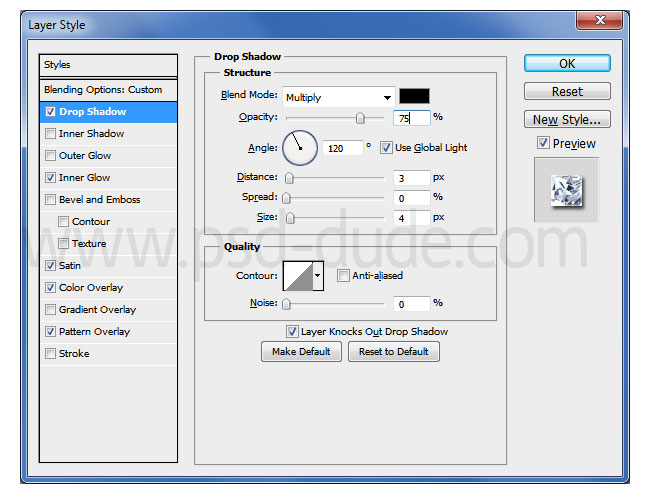
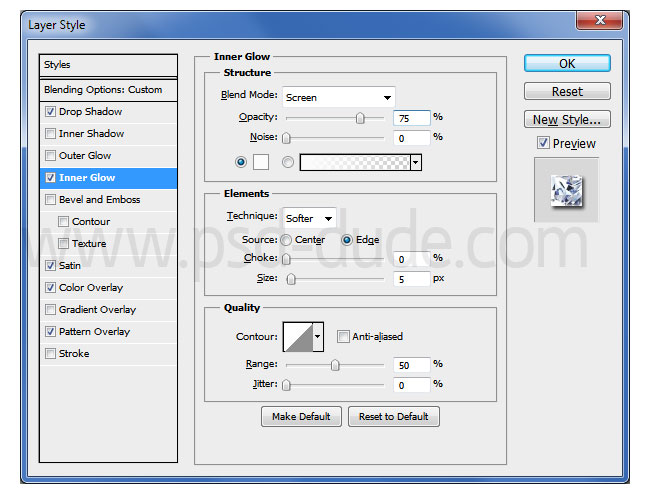
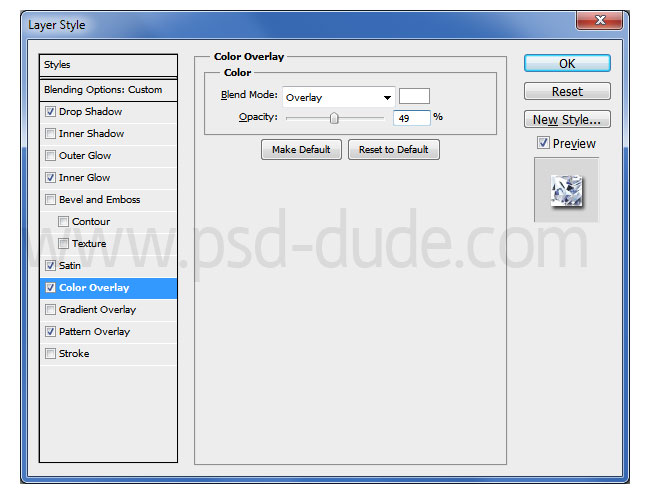
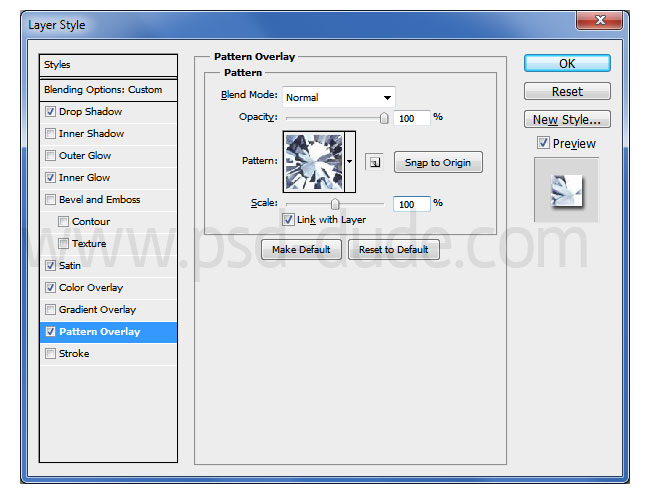
Add these layer styles to the Diamonds Layer. We'll create little diamonds using the diamonds pattern that is included in the download file.
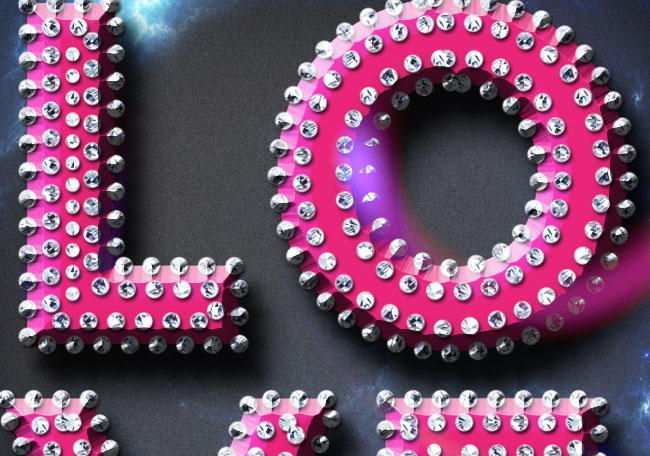
Your diamonds text style should now look like this:

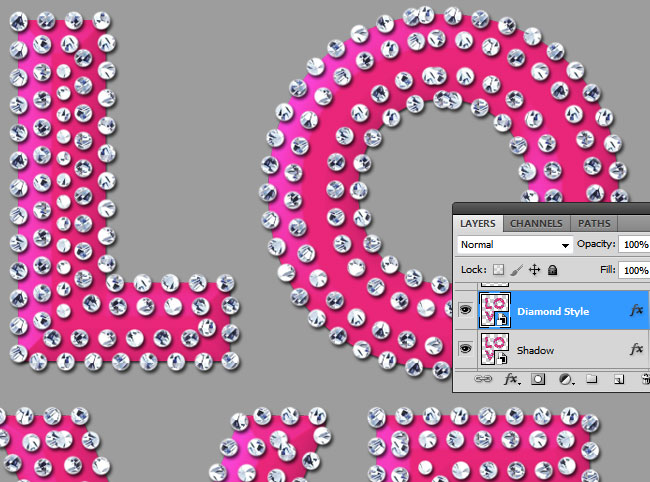
Select the two layers(Love Text Layer and Diamonds Layer) and convert them into a smart object and duplicate the new created smart object. Name the two smart objects Shadow(the original layer) and Diamond Style(the copy layer).
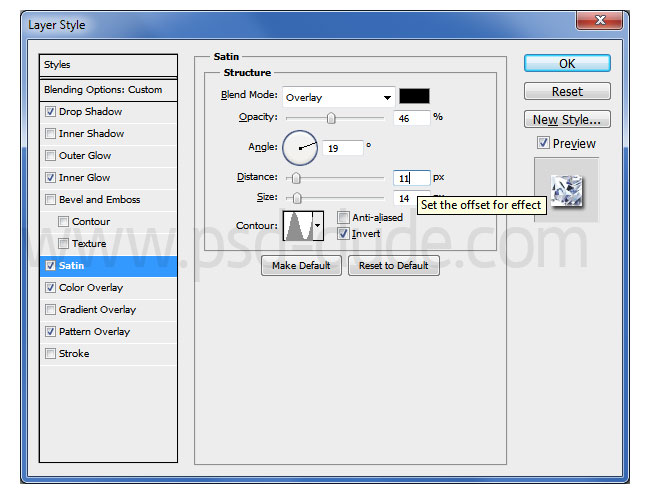
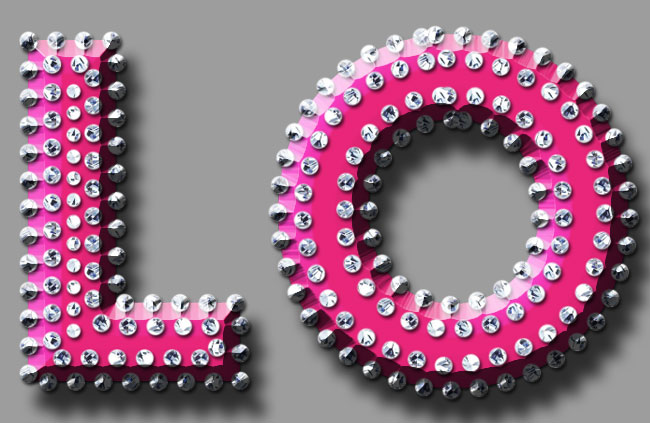
Add these layer styles to the Diamond Style layer to create a 3D text effect like shown in the preview.
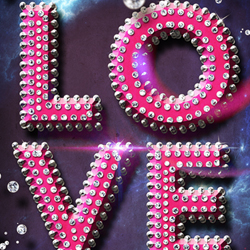
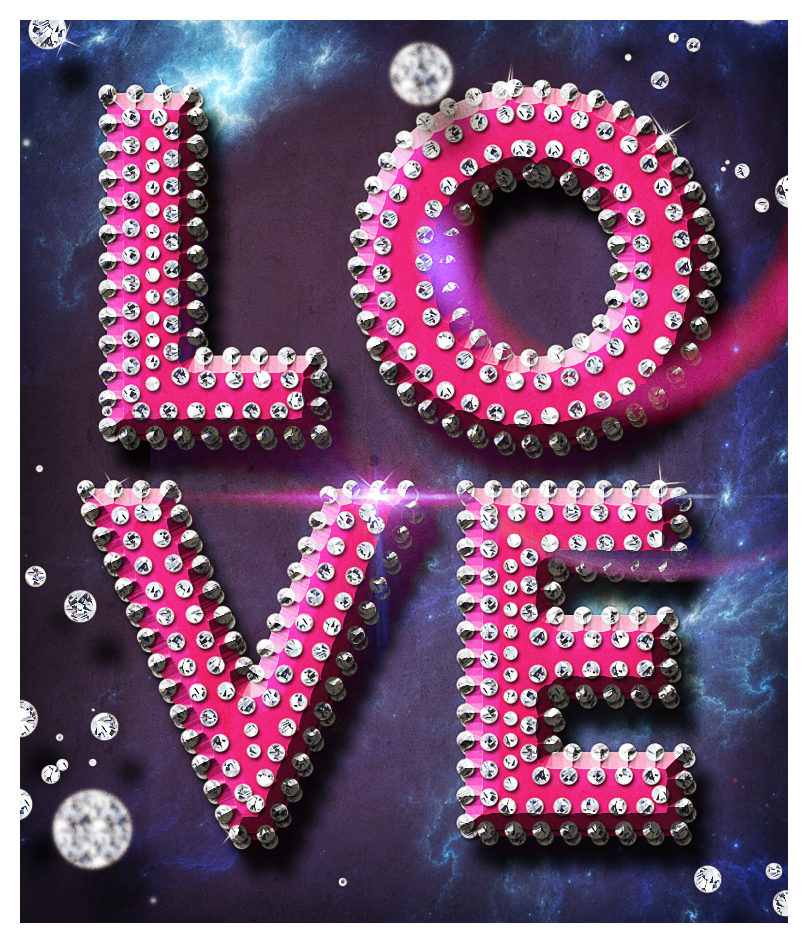
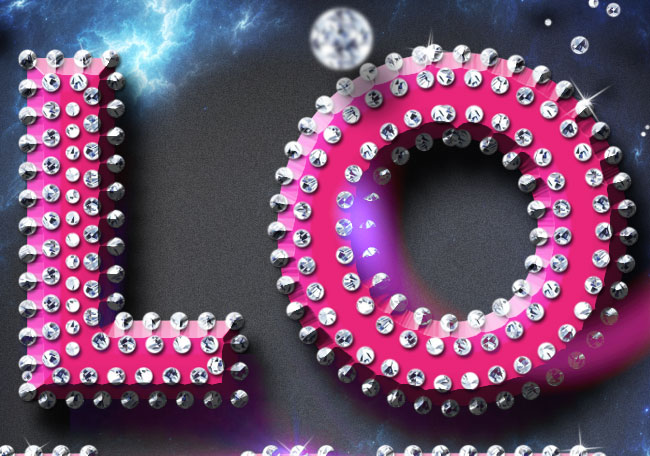
Your result should now look like this:
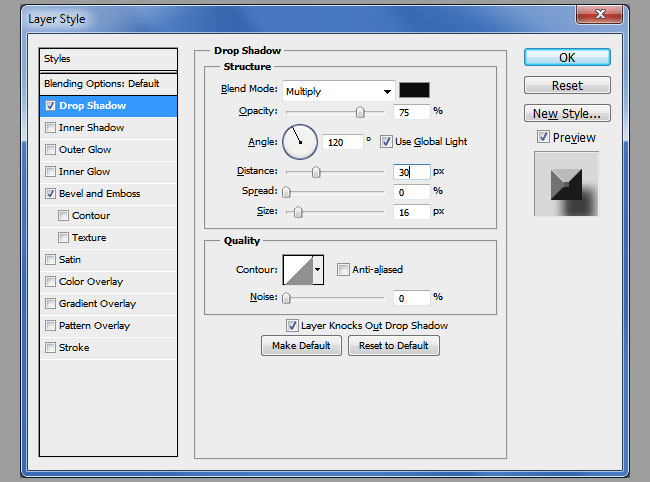
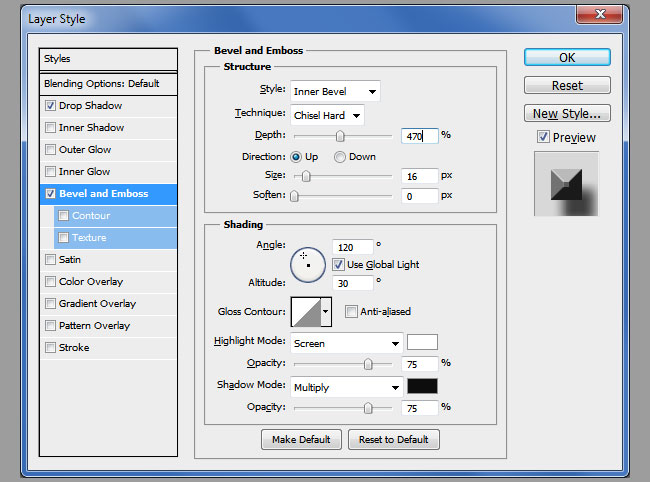
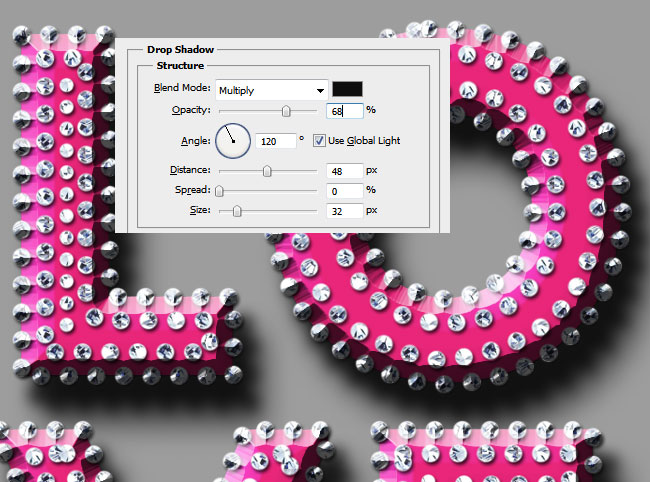
Add these layer styles to the Shadow layer to create another cast shadow effect.
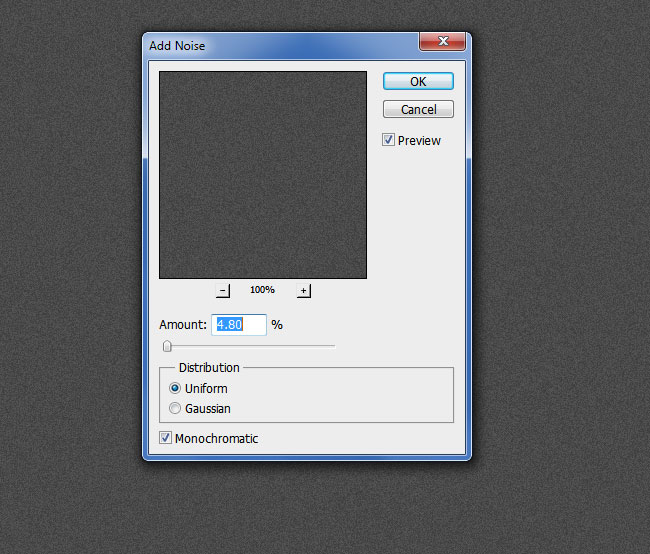
Now let's work with the background layer a little. Change the color of the background to #494949 and add a little noise effect using the Filter>Noise>Add Noise
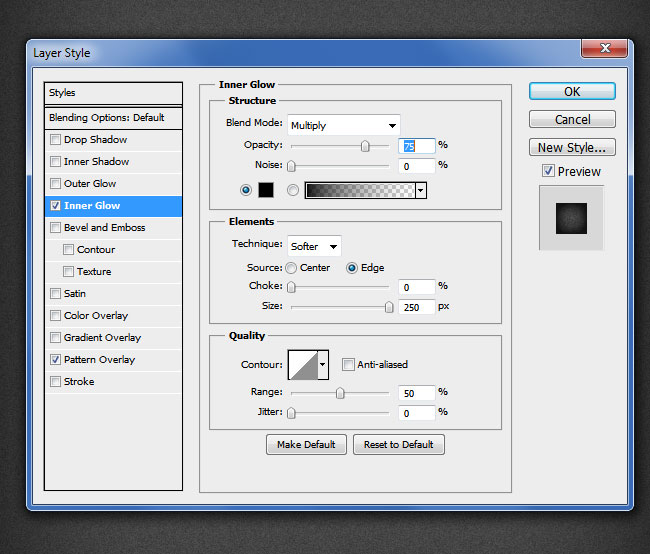
Add an Inner Glow layer style with the following settings. This is one of the ways in wich you can create a vignette effect in Photoshop.
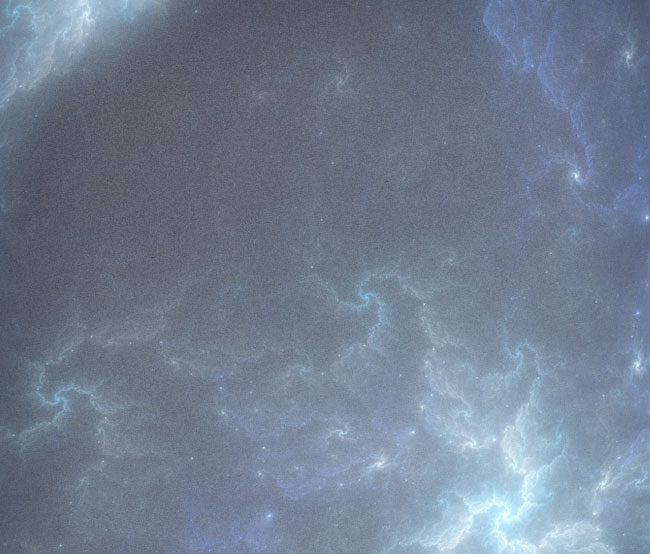
Add Fractal Sky Background
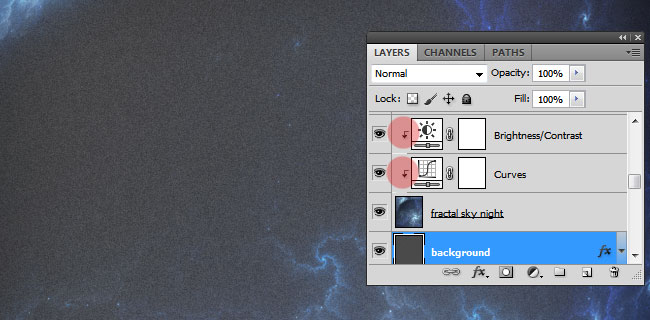
In a new layer above the background add this Fractal Sky Night stock image. Set the blend mode to Screen.
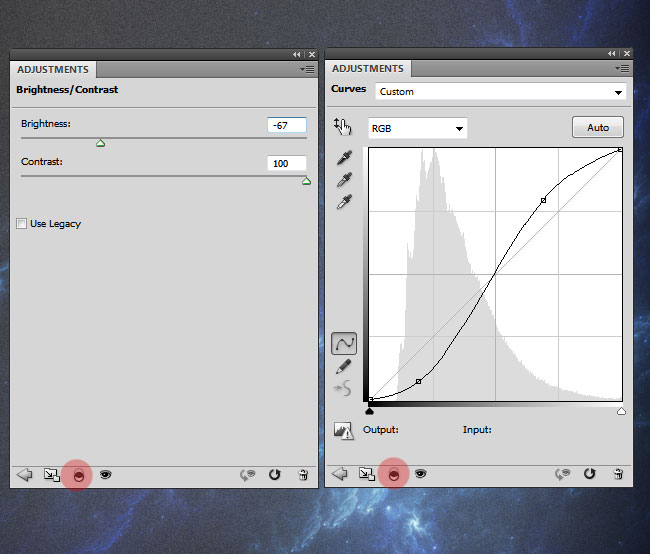
Add two adjustment layers(Curves and Brightness/Contrast) for the Fractal Sky Night layer using the Clipping Mask button.
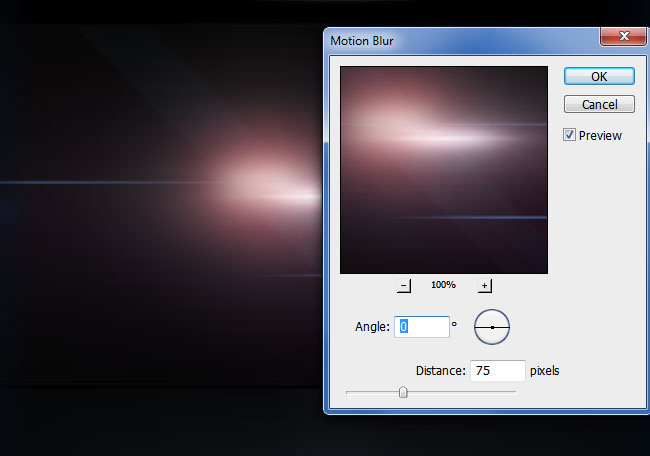
Create A Lens Flare And A Light Leak
In a new layer above all the other layers, including the text layers, add some lens flare textures. That way you will add interesting colorful light effects to your image. Simply pick a optical flare image that you like and use the Motion Blur(Filter>Blur menu) to create a soft blur look.
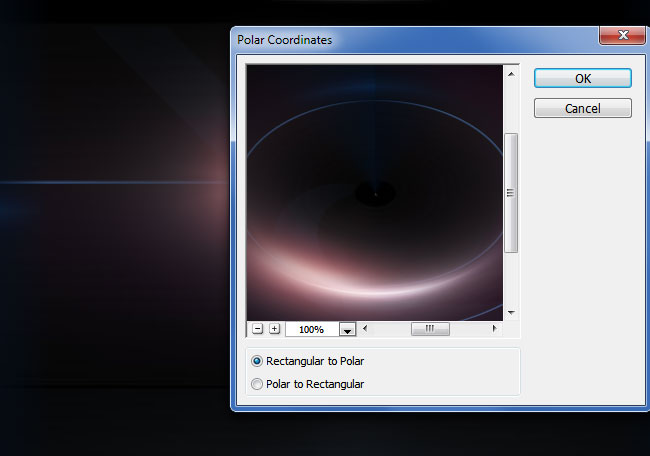
Go to Filter>Distort and choose Polar Coordinates to create a light leak effect. You might have to resize the image to a larger scale (300%) to obtain an abstract beam of light.
Now simply set the blend mode of this layer to Lighten or Screen.
You can add another optical lens flare, but this time leave it as it is, without any distortion. You might want to change its color tones by adding a Hue/Saturation adjustment with clipping mask. Again set the blend mode of this layer to Lighten or Screen.

In a new layer add more diamonds using the "scatter-dots" brush included in the ZIP file. Add the diamonds style to this layer to create falling diamonds. You can add another layer with larger scale diamonds; use the Gaussian Blur and/or the Motion Blur; this is an easy way to create depth of field and out of focus effects in Photoshop.

How To Add Sparkles To Diamonds In Photoshop
To create the bling bling effect, you can use these sparkle brushes or any other Photoshop sparkles brushes that you want.
How To Make A Valentine Party Flyer From Our Design
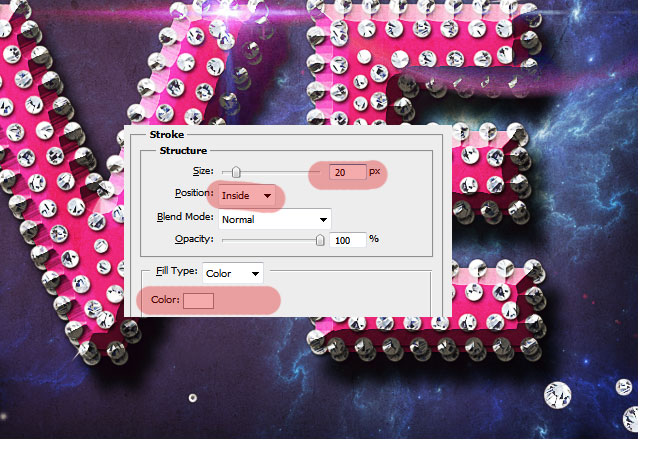
Press SHIFT+CTRL+ALT+E to create a copy of all the visible layers merged in one layer. If you want to create a party flyer look add a white border using the Stroke layer style. That way you create the paper print effect; you can even add a fold corner effect. Learn hw to create page curl in Photoshop from these simple tutorials for beginners.
To create a more sharpen look for the Valentine party flyer you have to use the Photoshop High Pass Filter technique. So here is the final result for the Luxury Text Style Valentine Party Flyer Photoshop tutorial. If you to print this, you have to create the PSD file at 300 dpi print size resolution otherwise it will other be too small or look blurry and unprofessional.
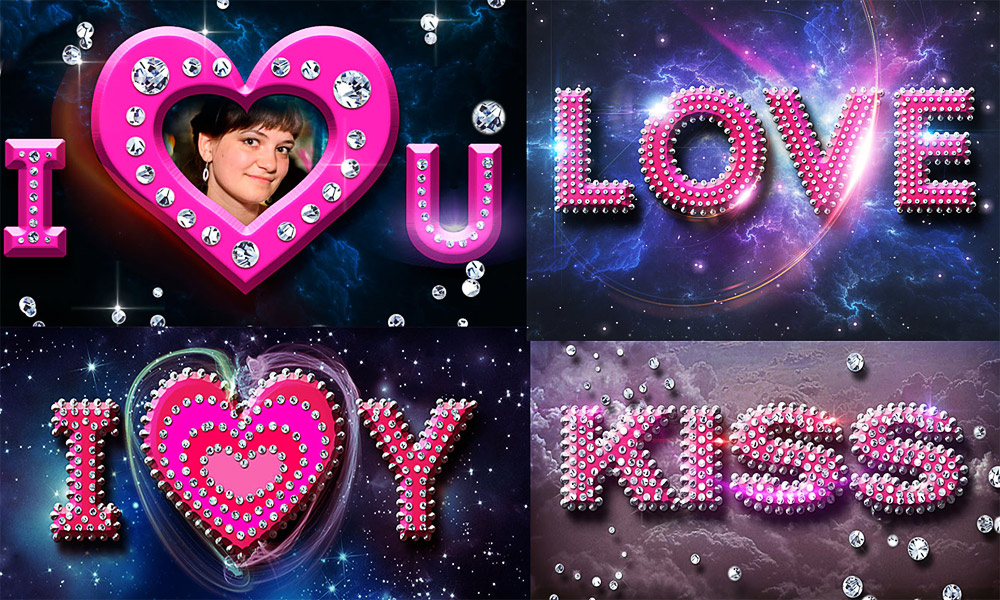
Beautiful Fan-Art Images Collage
If you need other interesting luxury Photoshop styles you can try these premium Photoshop actions. With 1-click you can create gold, diamond and pearls jewelry using text, shapes or even raster images.
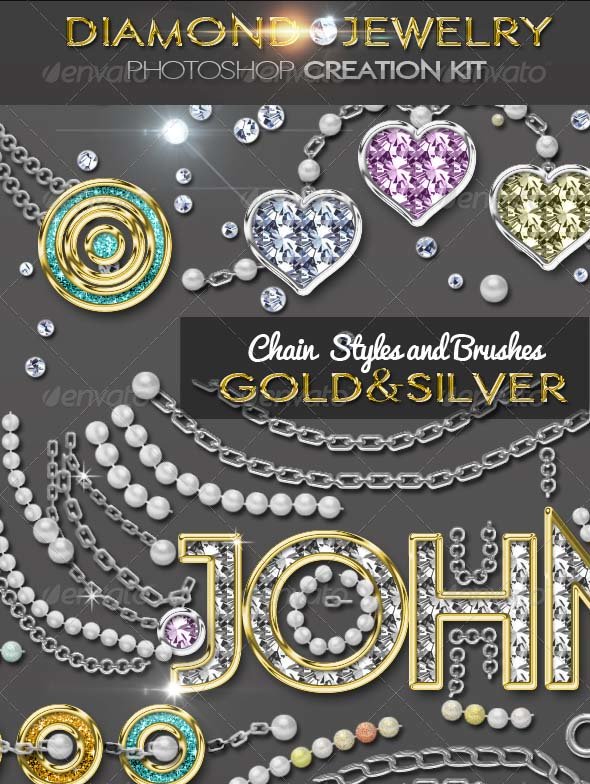
Jewelry Photoshop Creation Kit
The Jewelry Photoshop Creation Kit is a huge Diamond Gold Silver and Pearls Jewelry Creator that contains 5 Photoshop actions, 22 layer styles and 13 brushes to help you with the creation process. This pack will allow you to create realistic jewelry designs out of any text, shape, raster, selections, paths, etc.
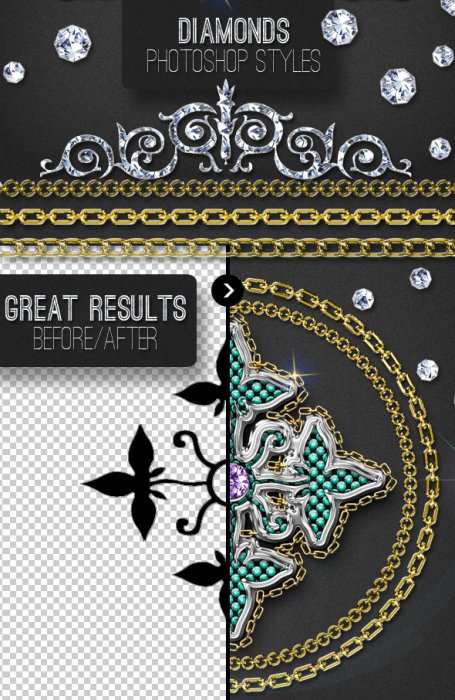
Bling Bling Diamond Photoshop Style Creator
Bling Bling Diamond Photoshop Style Creator contains 2 Photoshop actions with styles intact that will allow you to create bling bling diamonds effects out of any text or shape, plus 8 additional actions for customization purposes. The result contain easy to edit layers with layers styles intact so that you can customize the gold/silver/diamond effect, all the colors, bevel effect, stroke border size&color, etc.

1 comment(s) for "Luxury Text Style for Valentine Party Flyer Photoshop Tutorial"