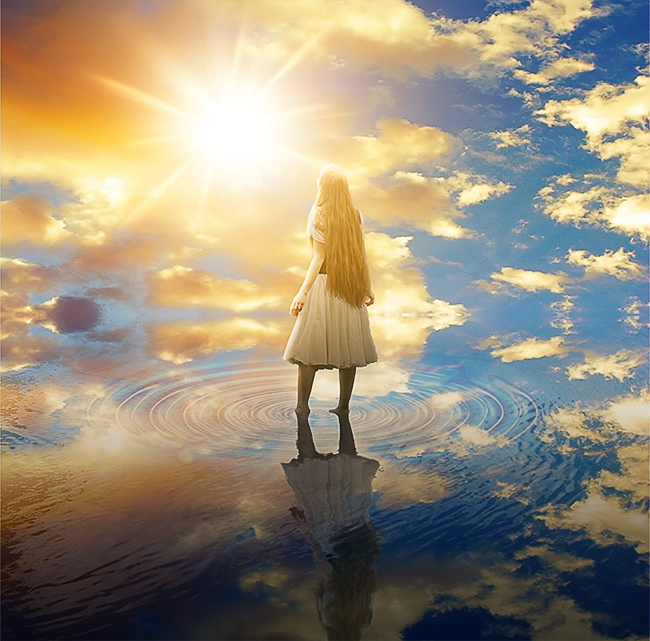
Add the Sky Texture
Create a new PSD file, size 800x780px. You can of course use a large size document but to give you an idea about the image proportions. Add this Sky Clouds Texture in a new layer. Press Control-T to scale the layer only on the vertical scale to 80-90%.
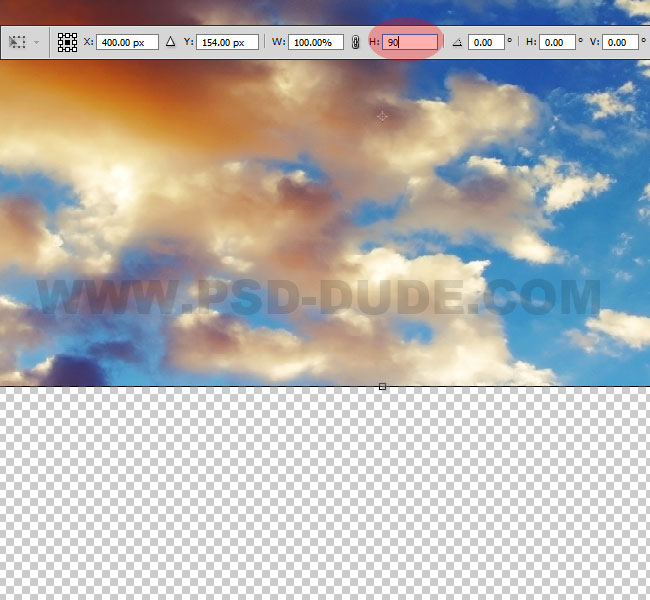
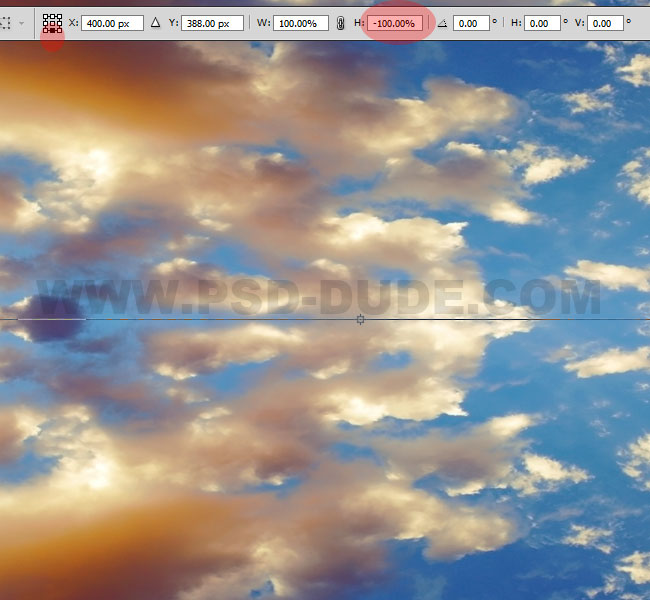
Duplicate the Sky Background layer. Press Control-T and flip the image on the vertical scale like shown in the preview. You might have to move the copy layer a pixel up.
Create Water Surface in Photoshop
Add this Ripple Water Texture in a new layer. Press Shift-Control-U to desaturate the image.
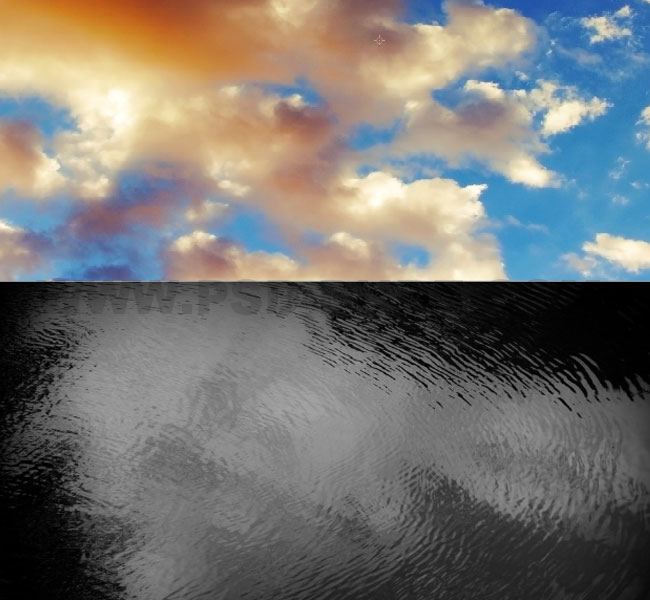
Add a Levels Adjustment by going to Image > Adjustments > Levels.
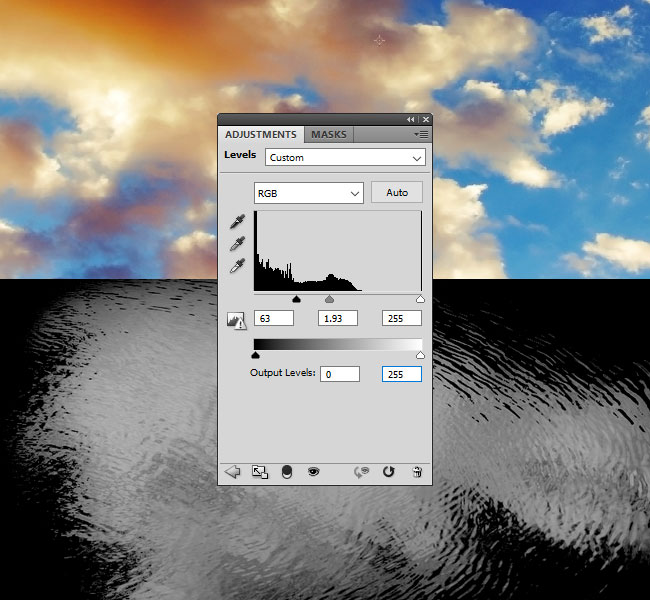
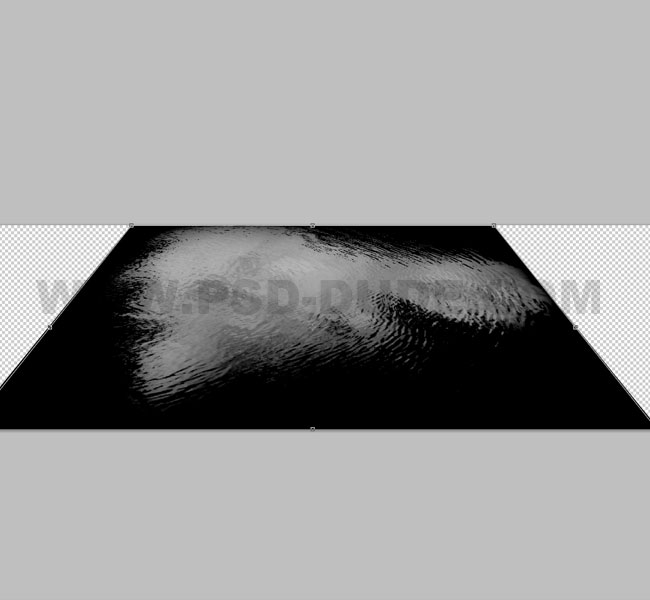
Go to Edit > Transform > Perspective and change the perspective of the image.
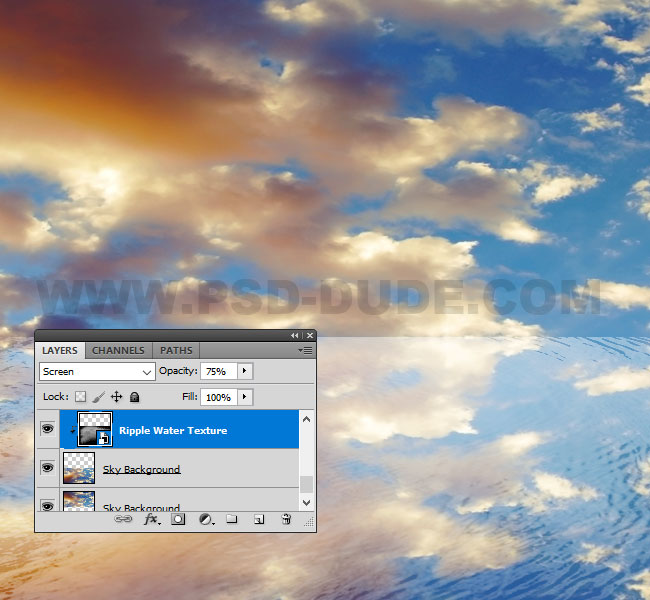
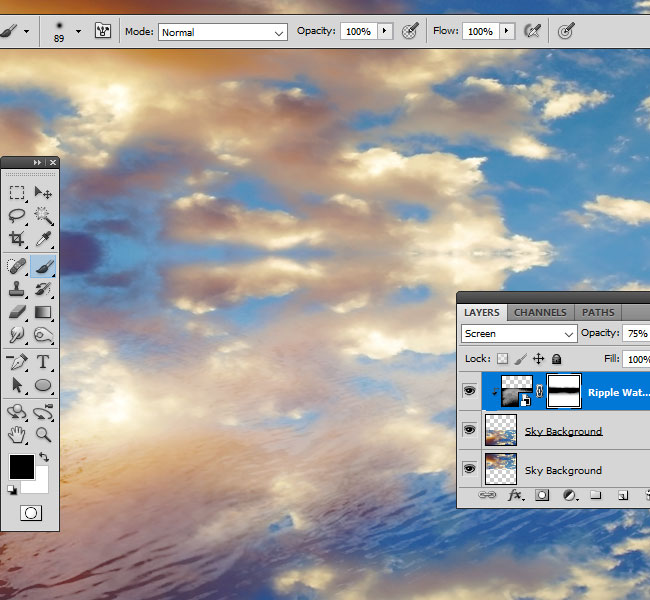
Right click on the Ripple Water Texture layer and choose Create Clipping Mask. Set the Blend Mode to Screen, opacity 75% .
Add a Layer Mask to the Ripple Water Texture layer.
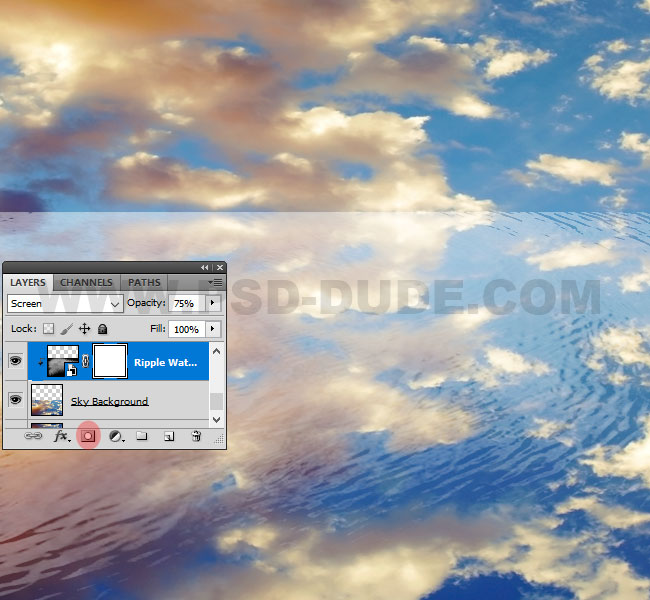
Set the Foreground Color to black. Pick the Brush Tool and with a soft round brush paint inside the mask to hide the line of the horizont
Create Water Rings in Photoshop
Add this Water Ring texture in a new layer. Change the Blend Mode to Screen.

Press Control-T to resize the Water Ring layer.
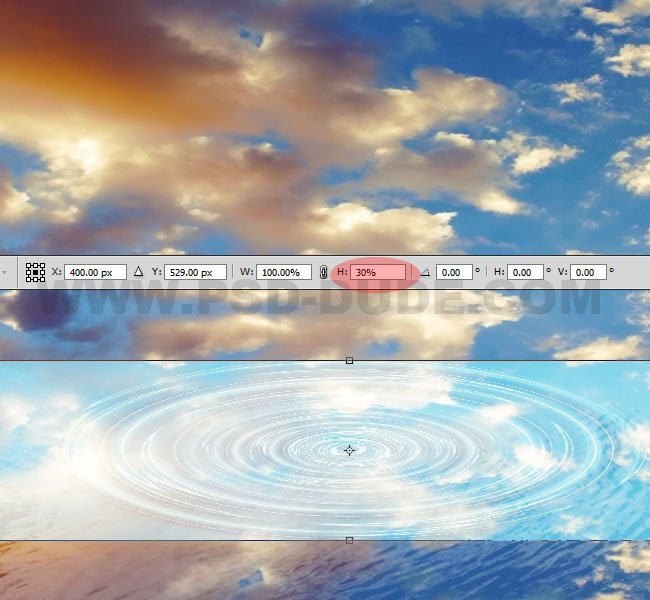
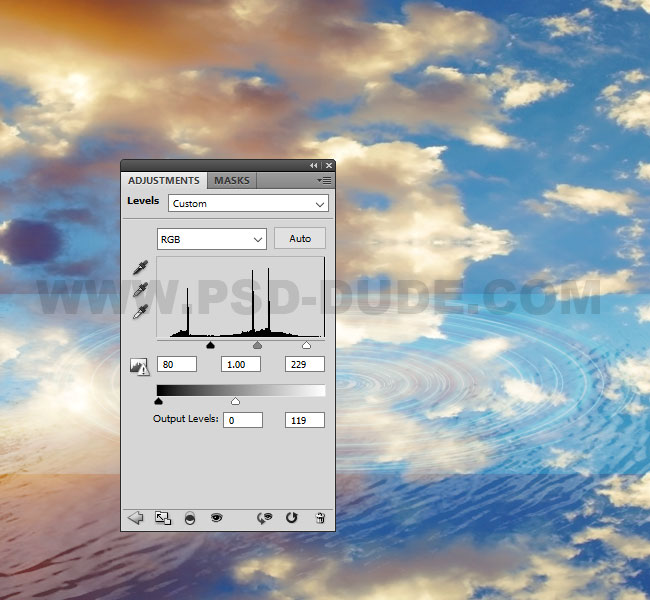
Add a Levels Adjustment by going to Image > Adjustments > Levels.
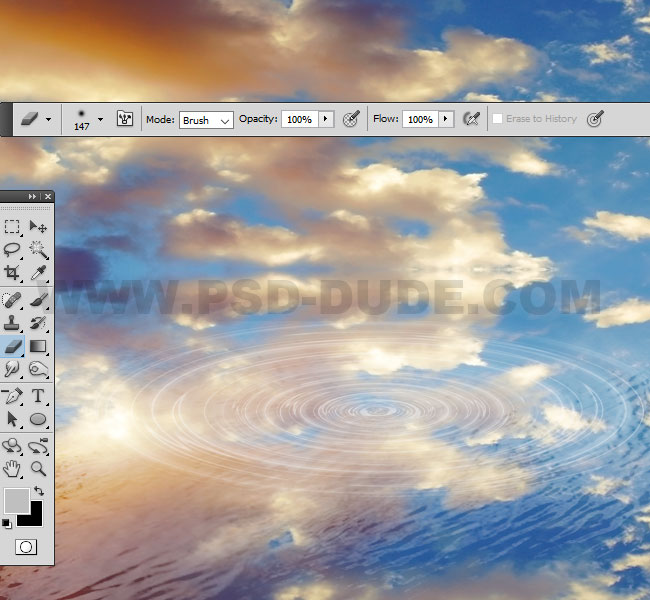
Press Shift-Control-U to desaturate the image and use the Eraser Tool with a soft round brush to delete the edges and create a smooth transition.
Create Person Water Reflection in Photoshop
Add the Girl Cut Out Stock Image in a new layer.
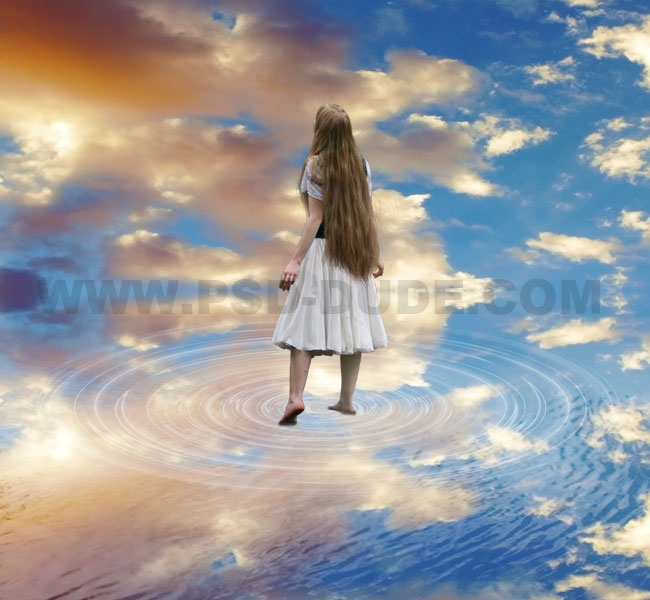
Add a Layer Mask to the Girl Layer. Set the Foreground Color to black. Pick the Brush Tool and with a soft round brush paint over the legs like in the preview.
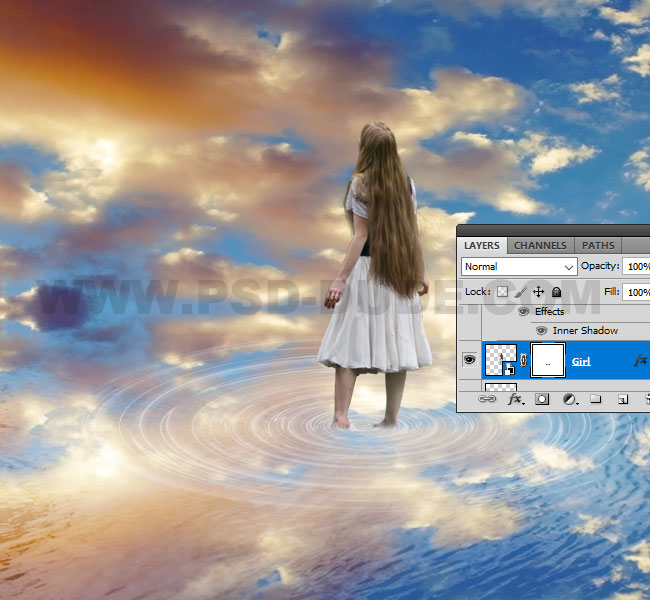
Duplicate the Girl Layer and flip it vertical. Call this layer Reflection.
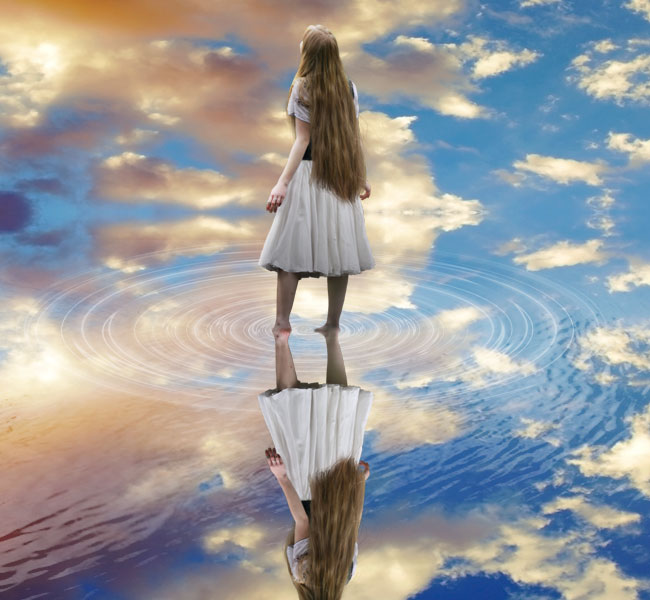
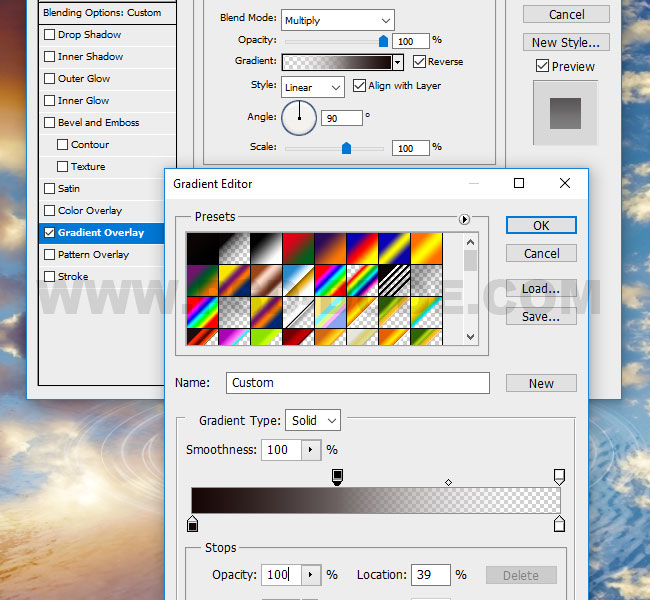
For the Girl Layer add this layer style with Inner Shadow(color white) and Gradient Overlay(color #0a0505 and white with opacity variations).
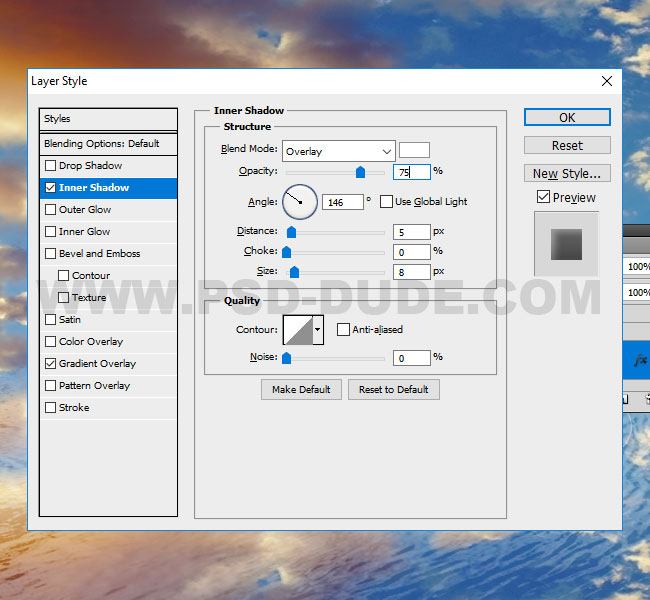
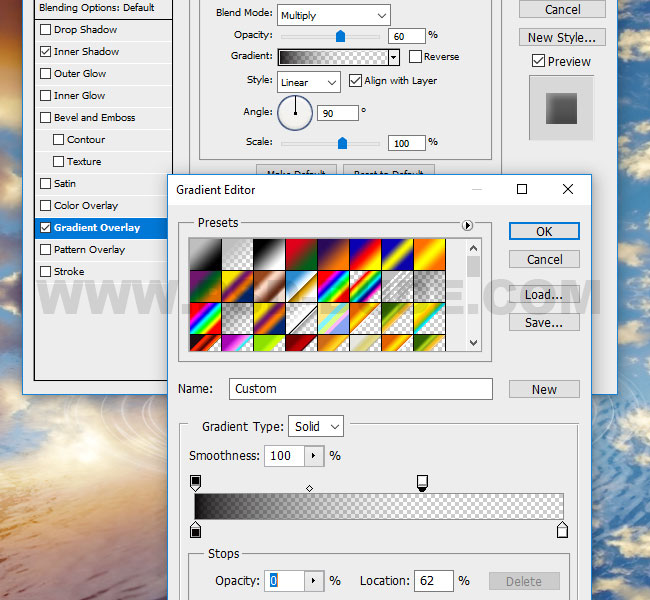
For the Reflection Layer add this layer style with Gradient Overlay(color #0a0505 and white with opacity variations). Also set the Opacity of this layer to 68% .
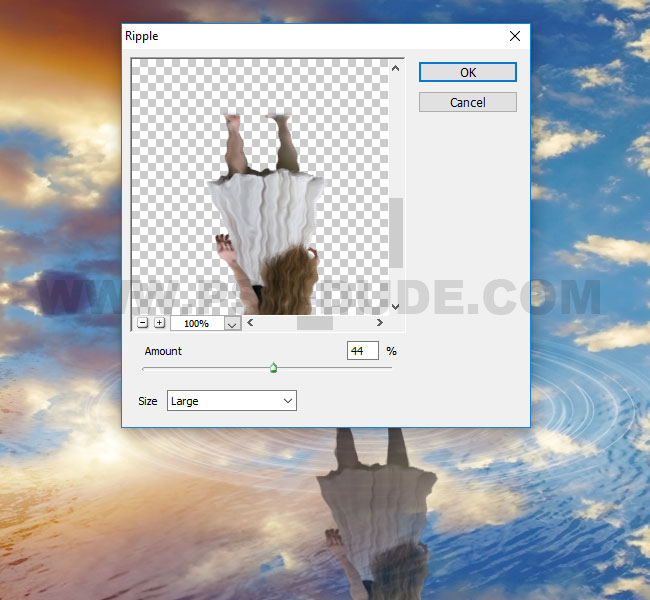
Go to Edit > Distort > Ripple and set the amount to around 44% to create the water ripple reflection effect.
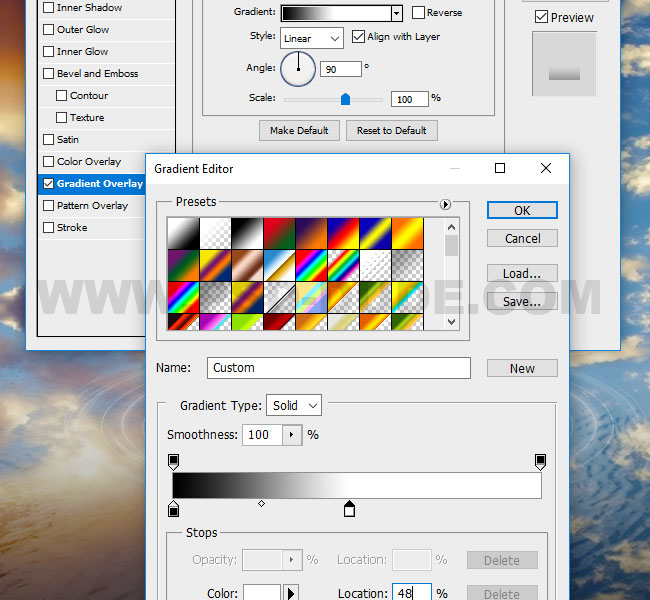
Create a new layer called Shadow and fill it with white color. Set the Fill to 0% and add a Gradient Overlay style.
Create Sunlight in Photoshop
Add this sun flare texture in a new layer and set the blend mode to Screen, opacity 65% .
Add a second Sunlight Photoshop Overlay texture and set the blend mode to Screen, opacity 100% .
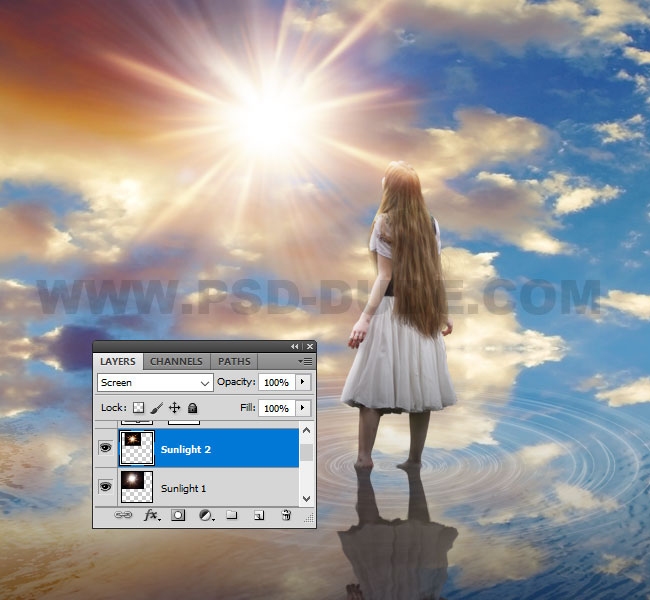
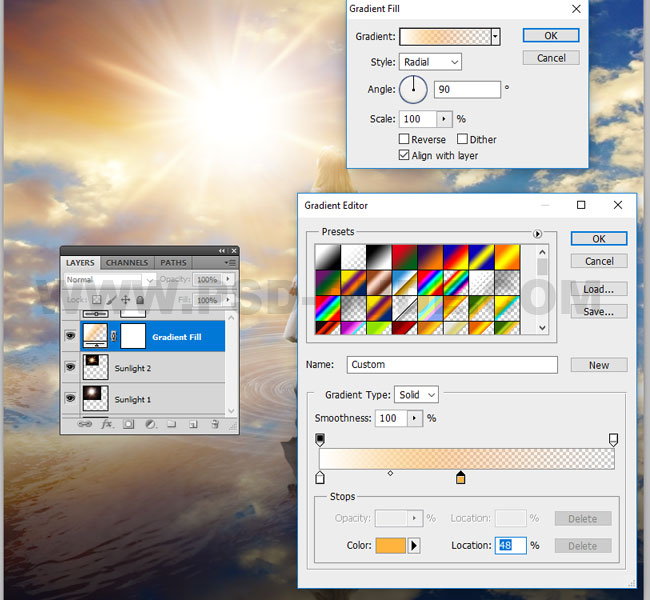
Go to Layer > New Fill Layer > Gradient and create a radial light effect. Drag the light on the screen over the sunlight.
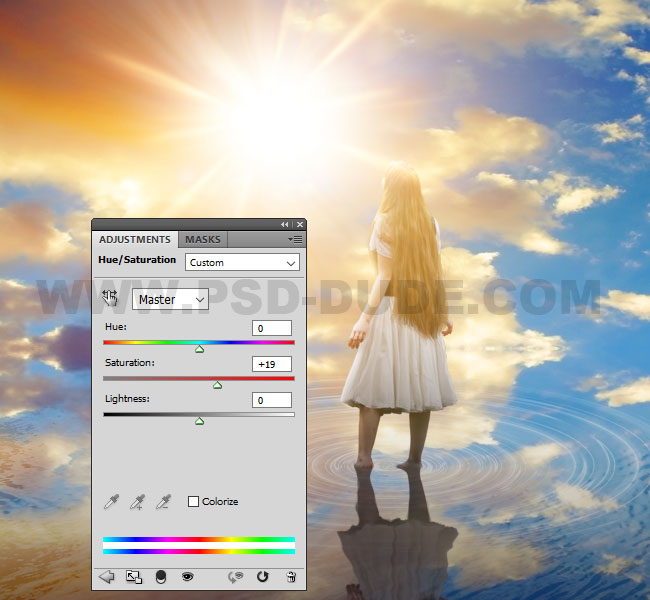
Go to Layer > New Adjustment Layer > Hue/Saturation.
Sharpen Image in Photoshop Tutorials
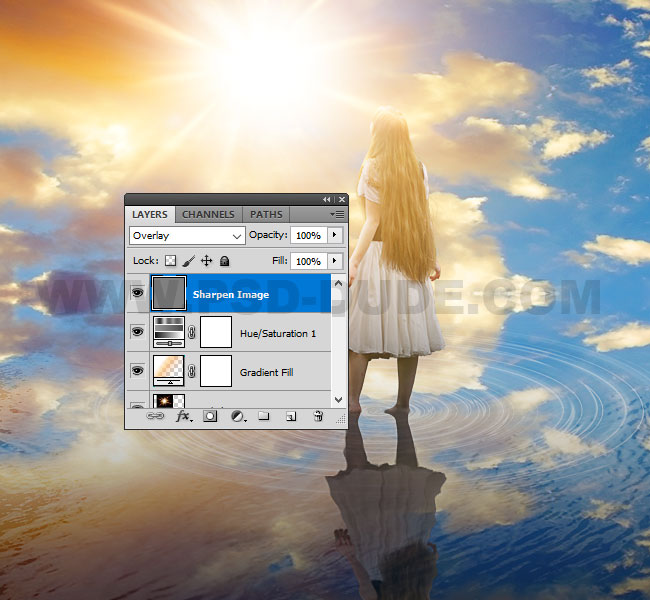
Press Shift-Control-Alt-E to make a copy of all the visible layers merged. Call this layer Sharpen Image. Go to Filter > Other > High Pass.
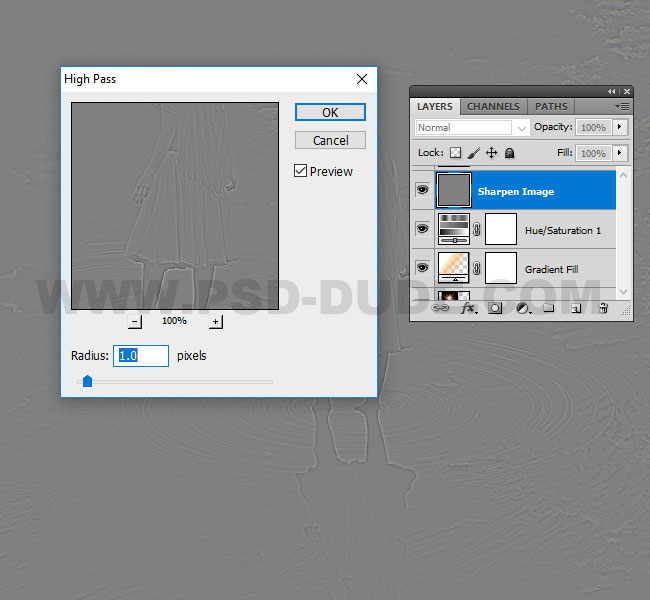
Set the blend mode of the layer Sharpen Image to Overlay.
Related Photoshop Tutorials and Resources
- 3D Advanced Reflection Photoshop Tutorials
- Reflection Photoshop Action Free Download
- Create Water Reflection In Photoshop



1 comment(s) for "Create a Water Reflection Effect in Photoshop"