


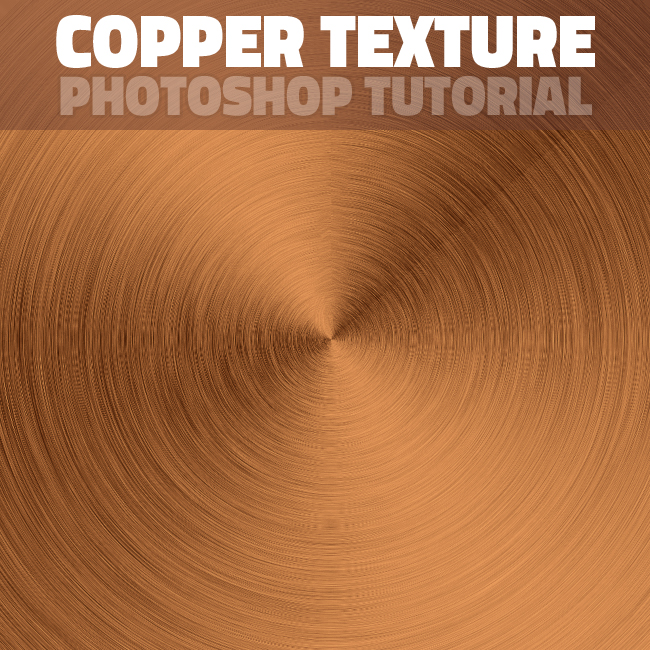
How to Create a Copper Metal Texture from Scratch in Adobe Photoshop
In this tutorial we are going to learn how to create a brushed copper texture in Photoshop from scratch using filters.
Create a new PSD file 1300x1300px. You can make the document larger/smaller in size but it is important to be a square and not a rectangle. That means that the width and the height have the same size. Create a new layer called Copper Texture and fill it with white color.
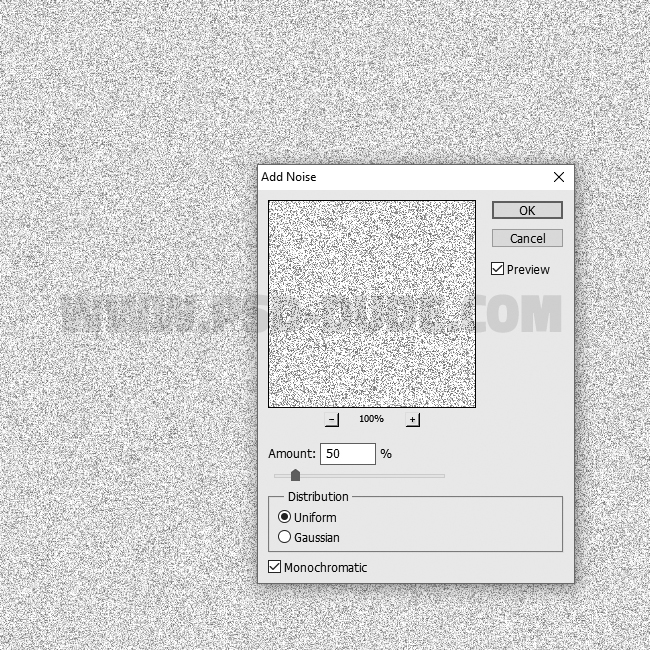
Go to Filter > Noise > Add Noise and set the Amount to 50%, Distribution Uniform and Monochromatic.
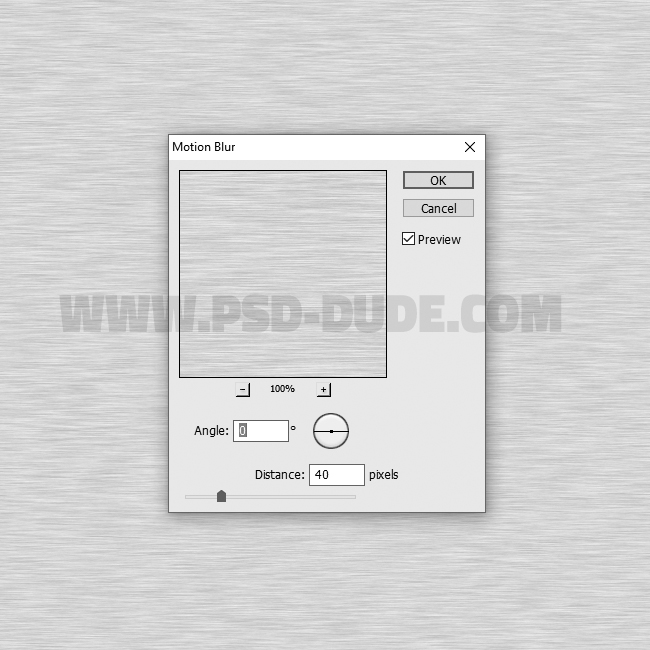
Go to Filter > Blur > Motion Blur. Set the Angle to 0 and the Distance around 40 pixels. The texture already has some horizontal stripe lines that start to look like brushed metal.
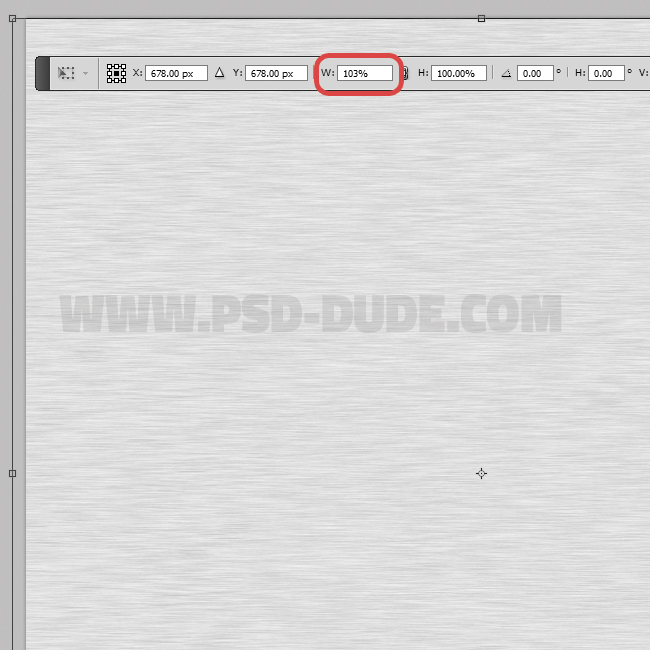
Press CTRL+T or go to Edit > Transform > Scale and set the horizontal scale to 103% or more depending on your canvas size.
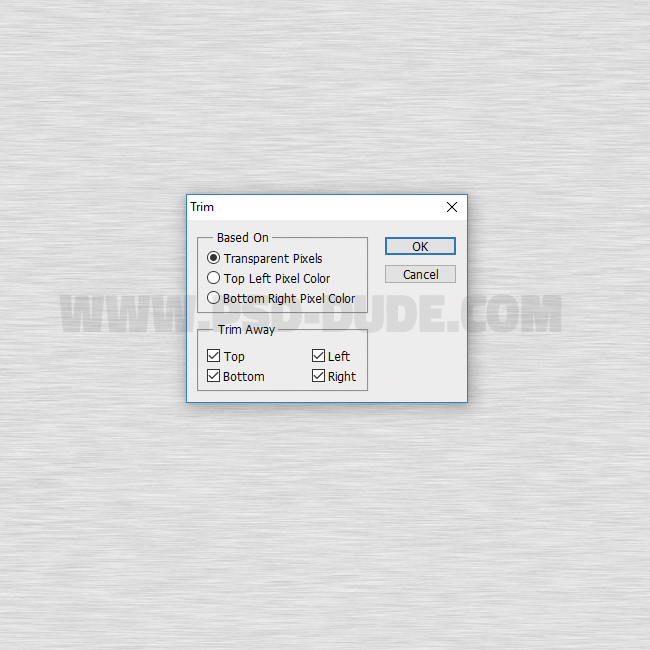
Go to Image > Trim and trim based on transparent pixels.
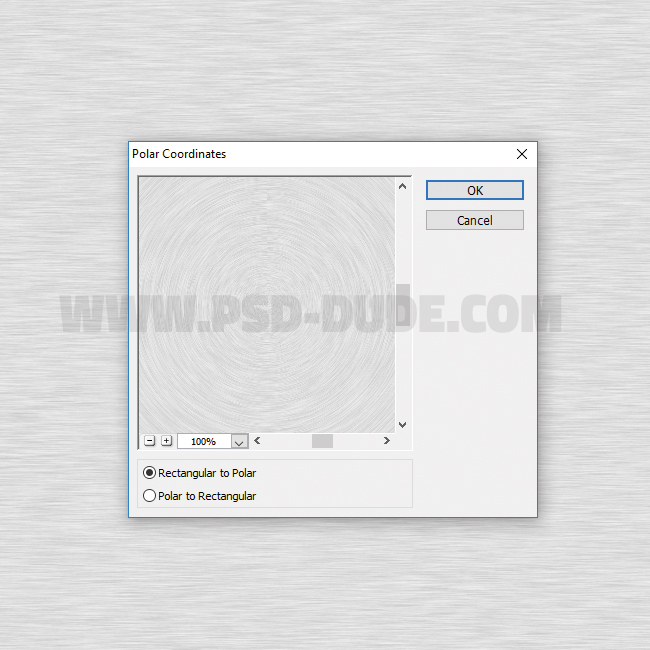
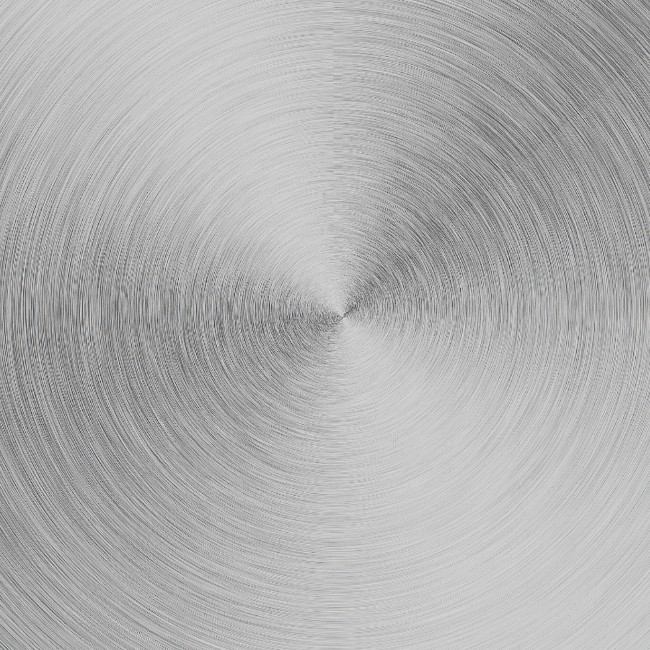
Go to Filter > Distort > Polar Coordiantes and choose Rectangular to Polar.
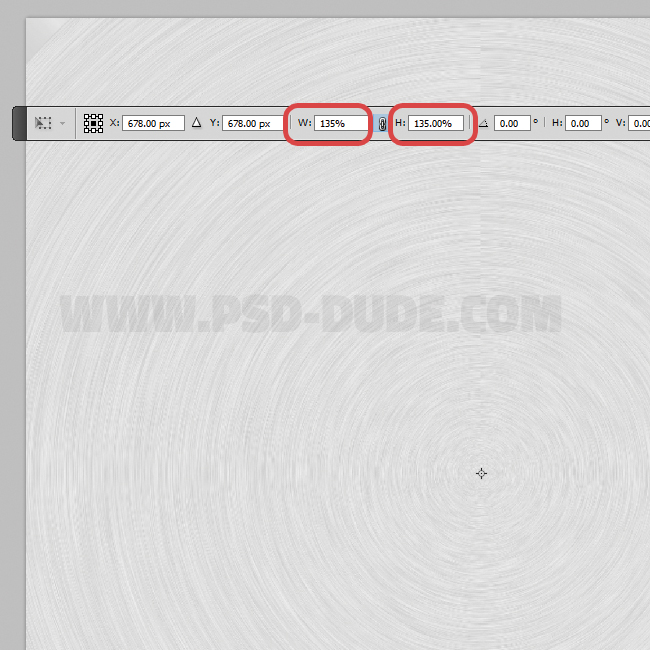
Press CTRL+T or go to Edit > Transform > Scale and set the horizontal and vertical scale to 135% or more depending on your canvas size.
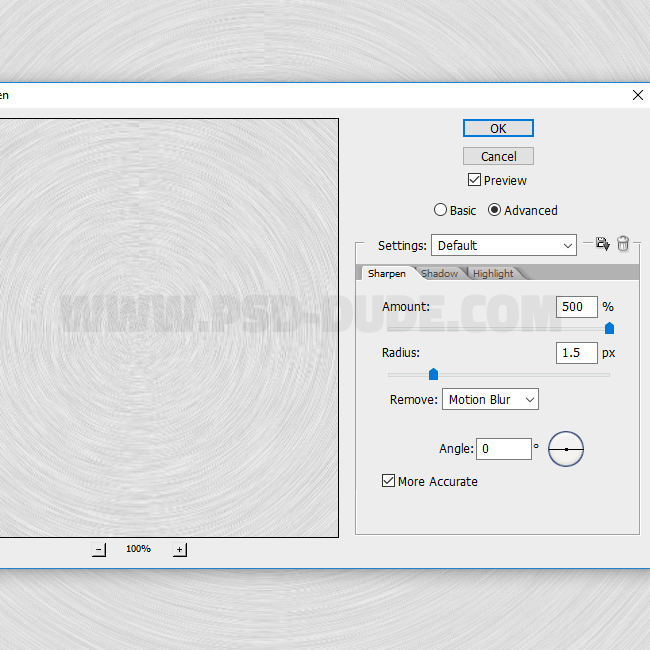
Go to Filter > Sharpen > Smart Sharpen and make these settings.
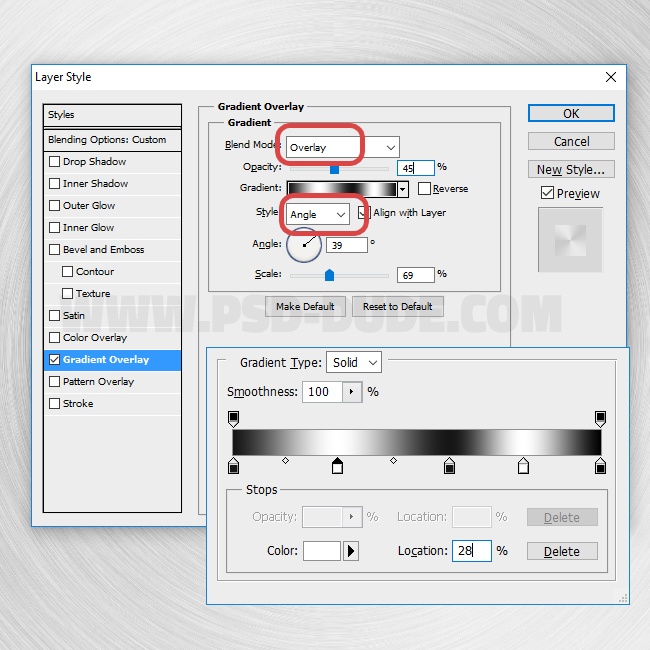
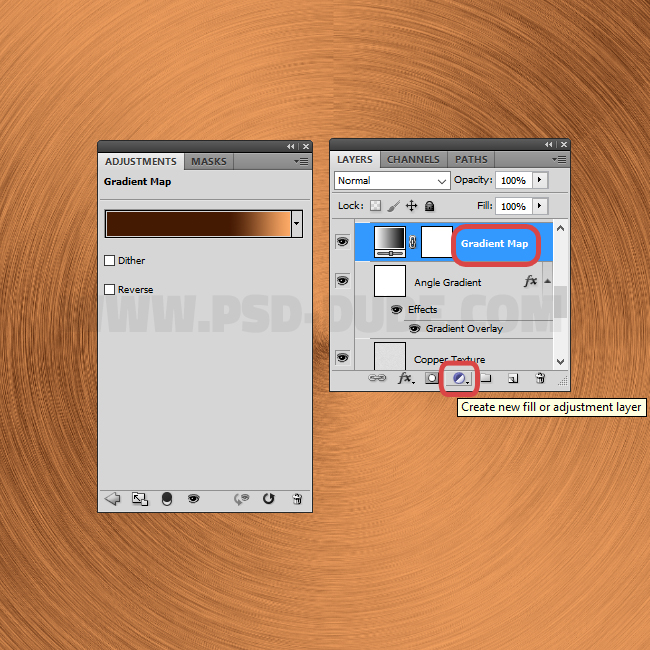
Create a new layer and call it Angle Gradient. Fill it with white color. Set the Fill to 0% and add a Gradient Overlay layer style.
Create the Copper Texture
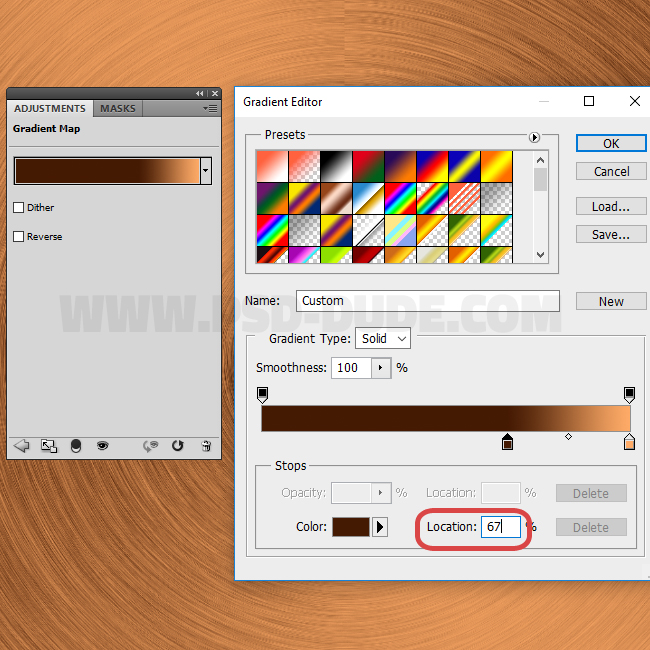
Now comes the interesting part in which we transform this brushes metal texture into copper. Add a Gradient Map adjustment layer.
Edit the Gradient Map and use color #451a03 / location 67% and color #ffab67 / location 100% .
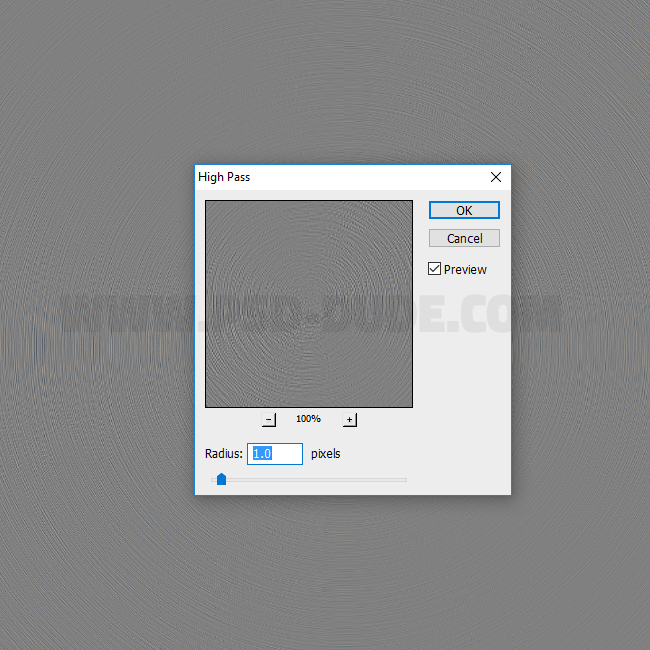
Press SHIFT+CTRL+ALT+E to make a copy of the merged visible layers. Call this layer Sharpen Effect. Go to Filter > Other > High Pass.
Set the blend mode of the Sharpen Effect layer to Overlay and 100% opacity level.
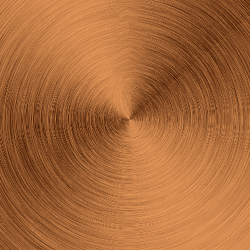
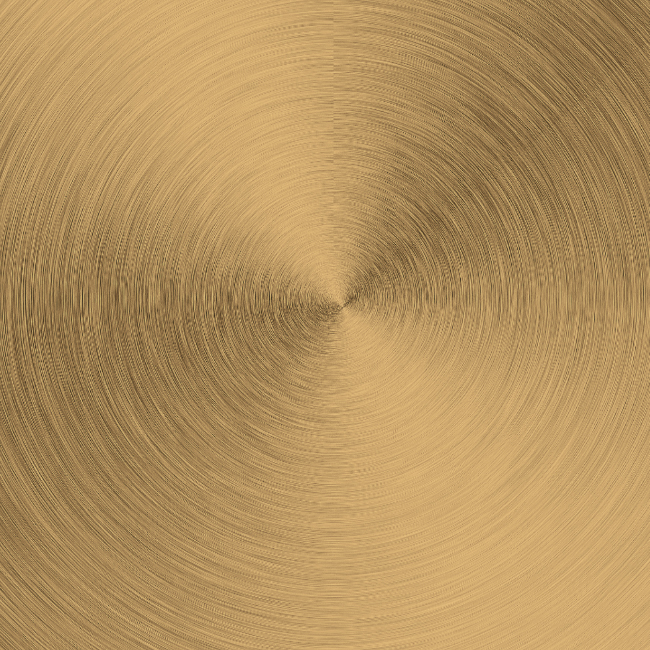
That is all! So here is the final result for the copper texture Photoshop tutorial. If you are looking for photorealistic copper textures you can check out this list with with Free Copper Textures For Designers for designers.

If you add a Hue/Saturation adjustment and change the Hue and/or the Saturation you can create silver texture, bronze texture, aluminium texture.
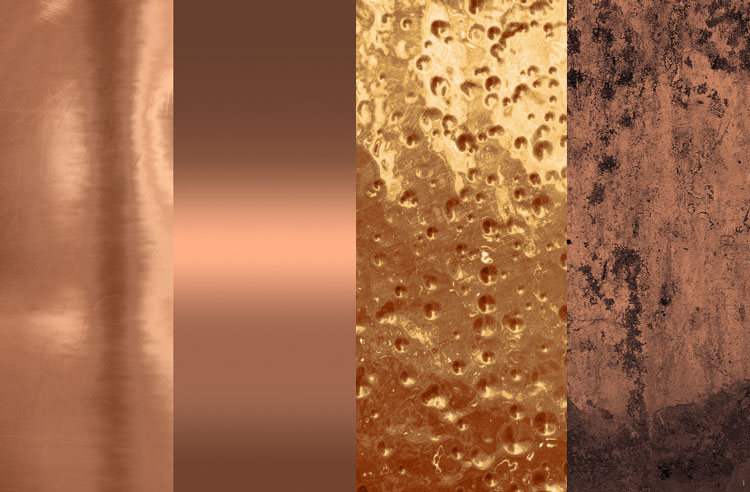
You can download Free Copper Textures from this collection of free textures for designers.

4 comment(s) for "Create a Copper Texture in Photoshop"