Painted Wood Photoshop Action Comics Book Photoshop Action Infographic JS Library Textures for Photoshop Online Label Maker

Notebook Paper Text Photoshop Tutorial

www.psd-dude.com
Tutorials Text Effects 73949 September 16th, 2018

This is a back to school Photoshop tutorial that you can use to create truly unique text effects using your own name for example. I was inspired by a notebook icon that I found on deviantArt and decided to make a Photoshop text effect out of it. I really hope you will enjoy our new Photoshop tutorial and decide to practice it. Even if it looks like an advanced tutorial it can be also made by Photoshop beginners.

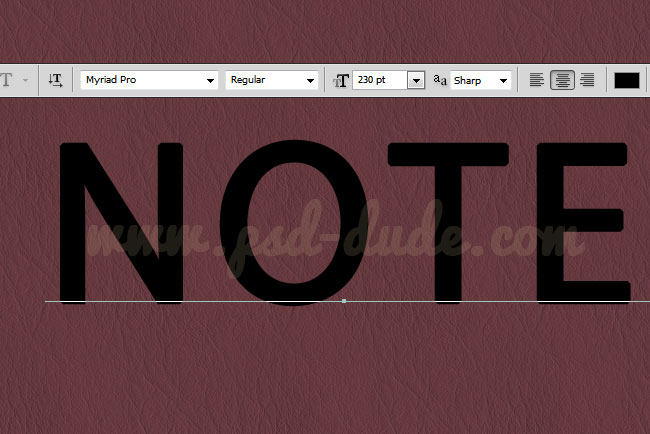
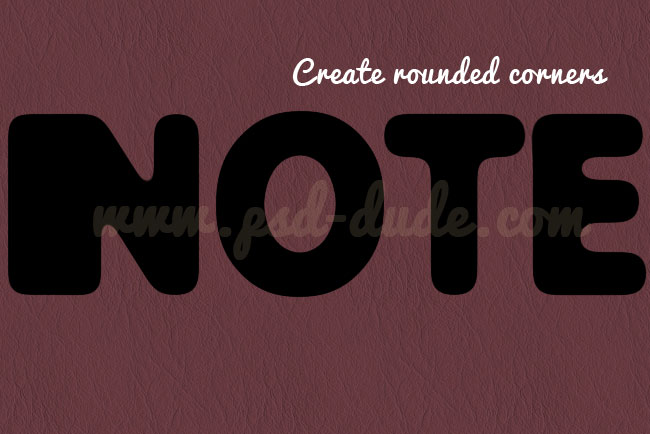
I will start by writing a text using capital letters. The font used is MyriadPro that comes with CS4.

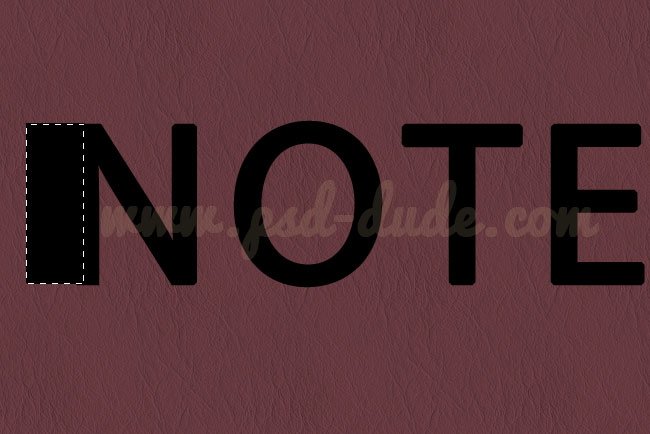
Rasterize the text layer and using the Rectangular Marquee Tool add a rectangle shape to the N letter as shown in the image. Fill the selection with the same color.

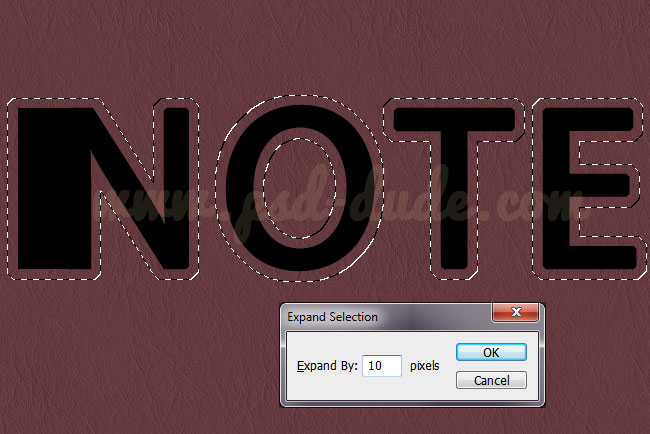
Keep the CTRL key pressed and click on the layer thumbnail to make a selection. Expand the selection by 10px. Go to Select>Modify and choose Expand. Fill the selection with the same color.

Now I will create a rounded edge effect using this quick tutorial Rounded Corners in Photoshop

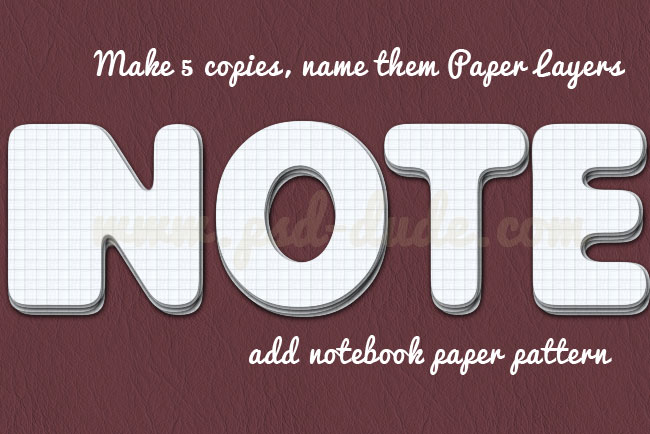
Now we have to duplicate this layer a couple of times. Make 5 copies and rename them Paper Layers and maybe group them. Add a notebook pattern and a Drop Shadow layer style. You can move each layer to look like notebook pages.

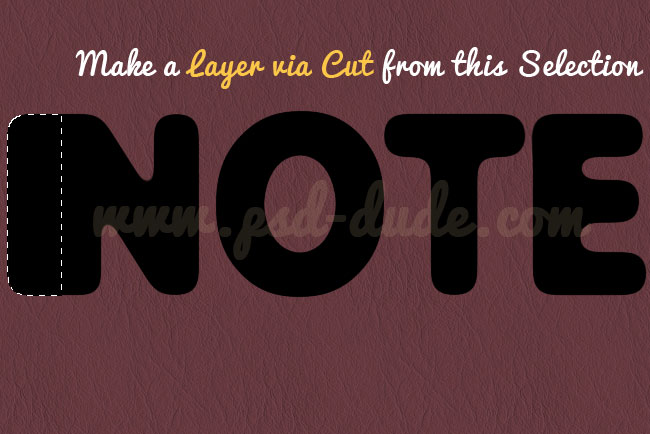
Now I will use one of the copies to create the notebook cover. For that I will split this layer in two layers; make a selection like in the image and press CTRL+X and CTRL+V to make a Layer via Cut. Call these layers Cover 1 and Cover 2.

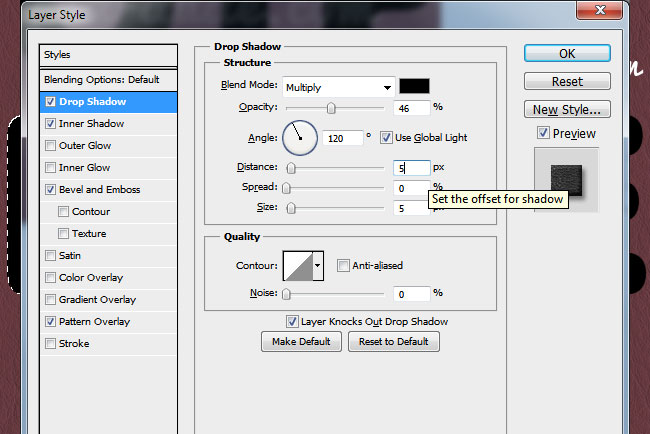
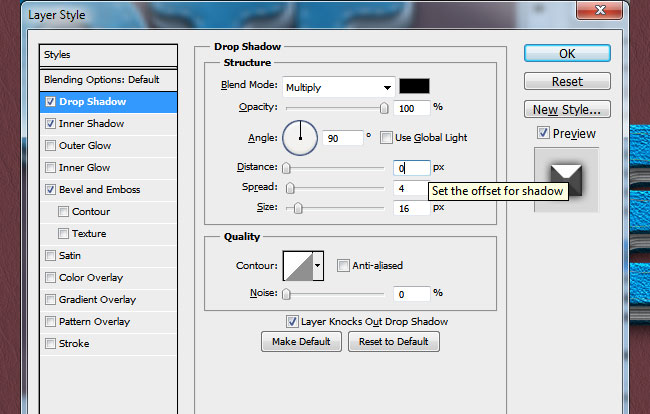
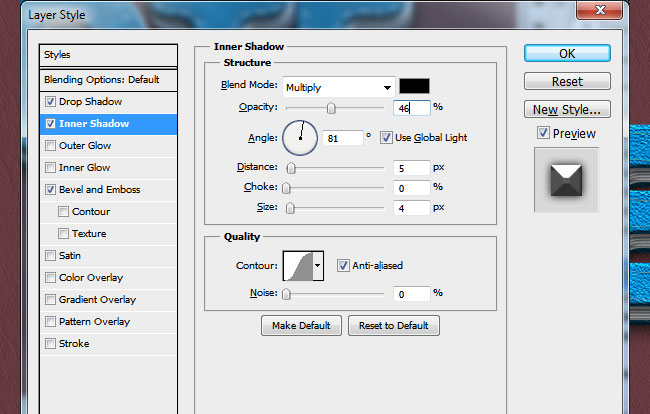
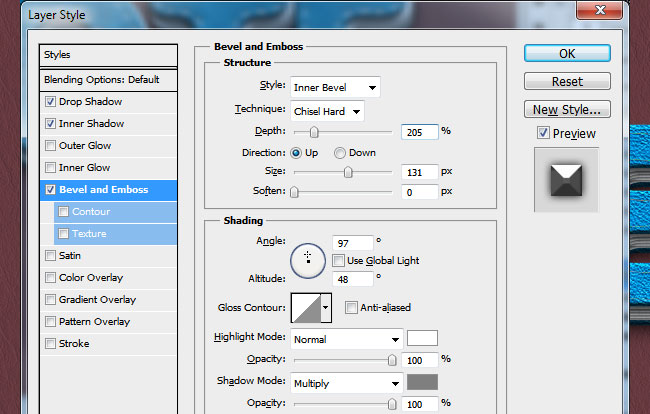
OPen the layer style of one of the Cover Layers and add the following styles:

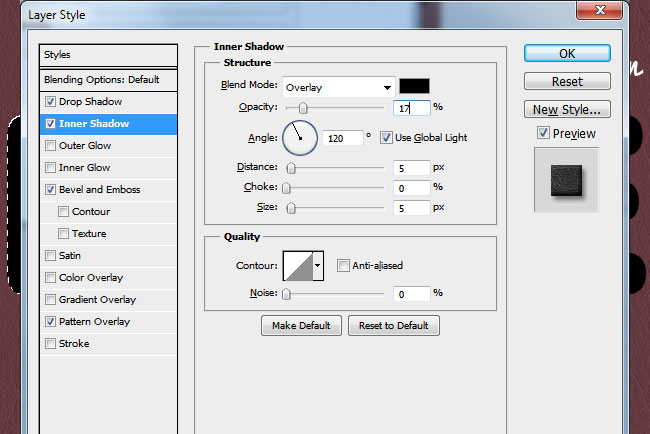
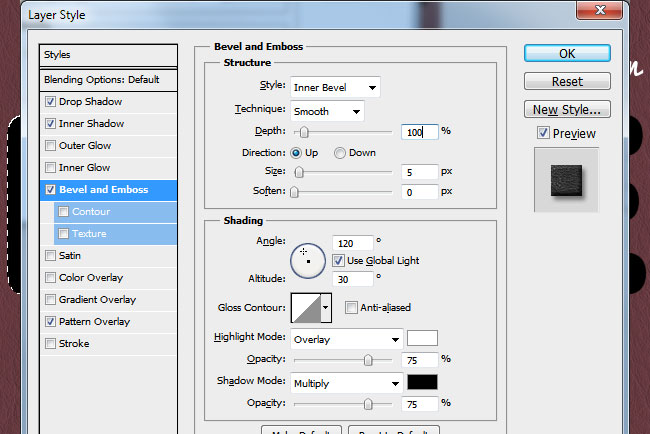
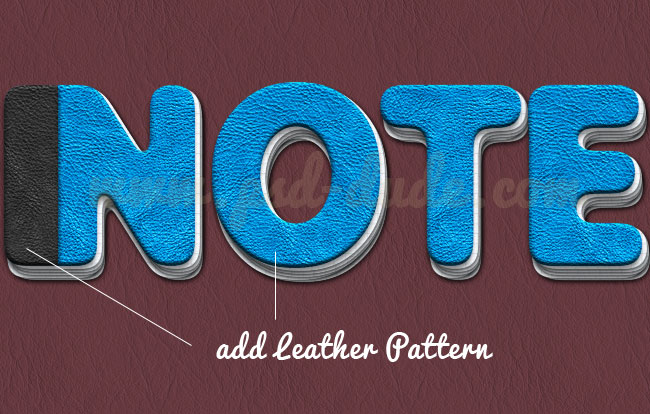
Now for each of the layers add Pattern Overlay using these leather patterns that I have used. You can of course use other leather textures with different colors.

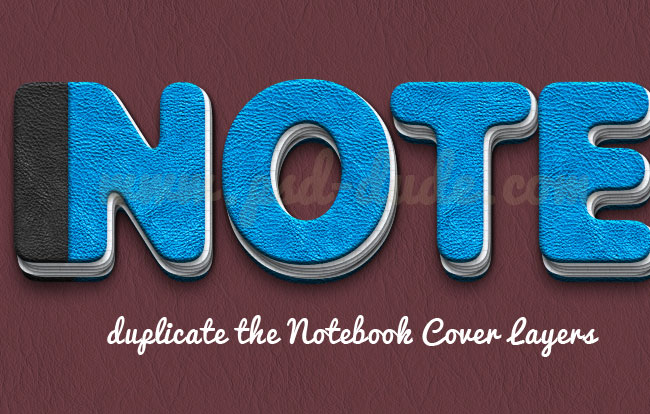
Duplicate the Notebook Cover Layers and place them behinde all the other layers.

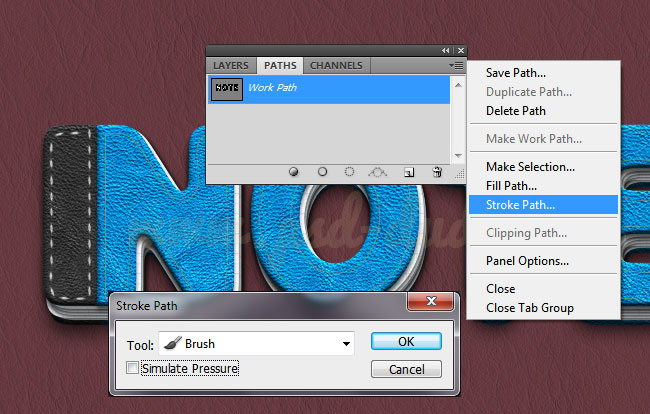
Quick Tip: Make Work Path and Stroke Path

I will now add some stitched details on the notebook covers using some stitch brushes. Choose the size of the brush according to your text size. Make a selection out of the first cover layer and contract it by 7-10 px depending on your text thickness. Create work path using this selection and stroke path using one of the stitch brushes. I picked a very simple one.

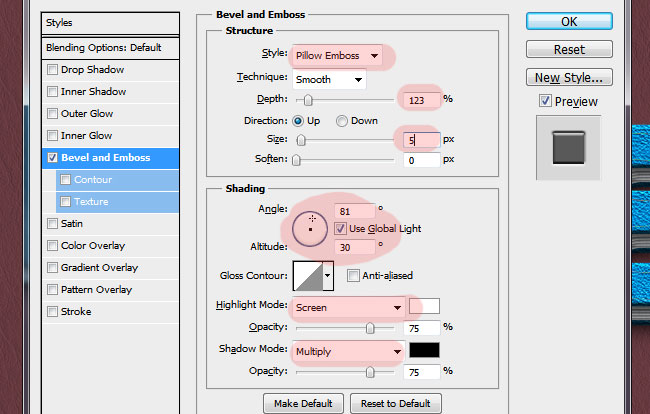
Open the layer style window of the Stitch Layer and add Bevel and Emboss style.

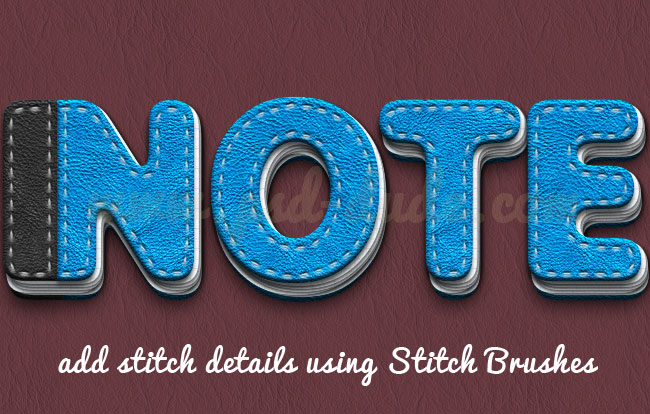
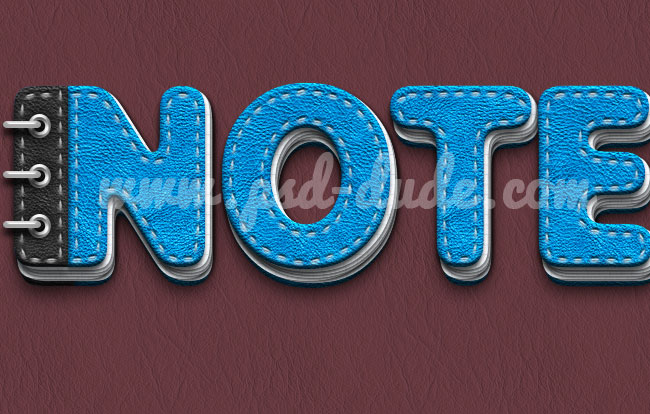
So your text effect should now look like this with leather texture and stitch details.

Use the Ellipse Tool to create some metal details. Make a circle and duplicate it in the same layer. Resize to 50% and subtract shape from the initial circle. Duplicate the result two times in the same layer.

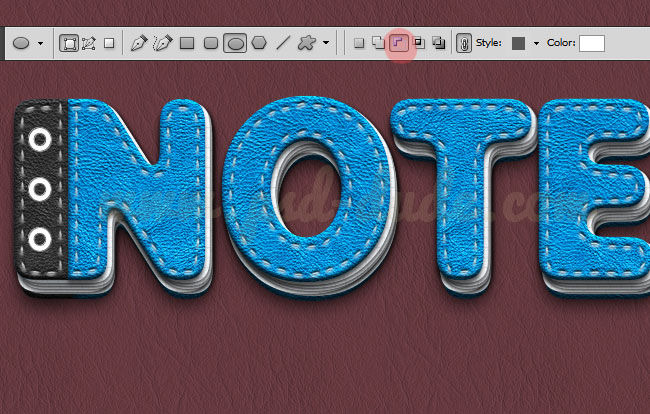
Add the following layer styles to make the circles look like shiny metal.

Now the paper leather stitched text should look similar to this image:

For the final touches you can add for example a vertical vector ribbon choosing one from this list. Or you can crete one yourself like I did. You can also add other paper details like colorful notes, scotch tape brushes or other stationery elements.

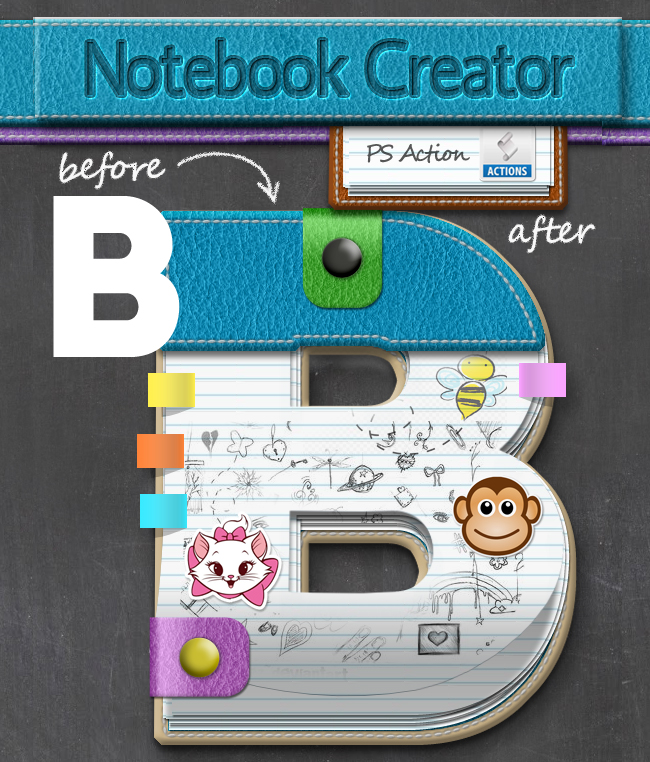
So here is the final result for the notebook paper text with stitched leather cover. I really hope you have enjoyed this new text effect tutorial and that you will decide to practice it.

Leather Notebook Text Photoshop Creator

If you want to skip all these steps and obtain a similar result you can use this 1-click Photoshop action - Leather Notebook Text Photoshop Creator for only 4$ .

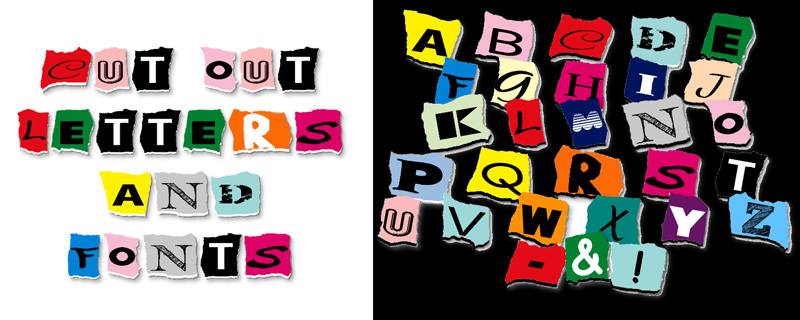
Newspaper Letters [Online Fonts]

If you are looking for newspaper letters, cut out letters or magazine letters, you can use these online text effects.

5 ( 104 votes)

If you're looking for amazing textures and backgrounds for Photoshop, explore Textures4Photoshop where you can find 1000+ unique images. You can download all these textures and backgrounds for free to use in personal or commercial projects!

Be a Cool Dude!

With your donation you can help us maintain this website and keep producing free resources many months to come! Any amount counts

42 comment(s) for "Notebook Paper Text Photoshop Tutorial"

Nilesh Parmar
Nilesh Parmar
9:02 AM Monday, September 9, 2013
This is cool, thanks. reply
John
8:47 AM Thursday, September 12, 2013
This is really a nice notebook paper inspired text effect by my tutorial (source: http://odcfamily.blog.fc2.com/) reply
Yner
Yner
8:58 AM Thursday, September 12, 2013
This is adorable! Thanks for writing it.
"using these leather patterns" what leather patterns? You don't say. You do suggest "use other leather textures" but you don't say where you got the one you used or how you made it blue. reply
John
9:02 AM Thursday, September 12, 2013
You are right I have kind of missed this step. So you can for example use this http://mytherea.deviantart.com/art/Leather-Texture-Pack-2-150629142 texture, the beige leather from the right and add a Hue/Saturation and a Brightness/Contrast adjustment layers. You can make it any color you like! reply
Yner
Yner
12:32 PM Thursday, September 12, 2013
Thanks so much! reply
John
1:41 AM Friday, September 20, 2013
Very beautiful result as always Mireille D :) your notebook text effect looks great with that red and black leather combination. reply
John
11:21 AM Saturday, September 21, 2013
Another great leather text inspired by this tutorial made by Frank (https://www.facebook.com/franco.giovo.9) reply
John
12:44 PM Tuesday, October 8, 2013
You can also try this cool Photoshop tutorial for creating note card text effect using your favorite notebook pattern

http://textuts.com/note-cards-text-effect/ reply
Alena R
Alena R
8:42 AM Wednesday, October 16, 2013
Very nice tutorial, thanks a lot! I'm impressed and inspired... reply
John
8:46 AM Wednesday, October 16, 2013
Thank you for your kind words Alena :) Your notebook text effect inspired by our Photoshop tutorial is very beautiful! reply
John
2:44 AM Saturday, November 2, 2013
Another great leather stitch text with metal details made in Photoshop by maria0505 reply
Ksusha
Ksusha
1:06 AM Saturday, November 30, 2013
Thanks a lot. The result looks great. I really enjoyed doing your tutorial. reply
John
1:10 AM Saturday, November 30, 2013
Your notebook text effect looks really nice! Keep up the good work :) reply
DhaarVatti
DhaarVatti
8:43 AM Friday, January 3, 2014
Thanks, very nice tutorial. reply
John
8:50 AM Friday, January 3, 2014
Very creative Photoshop made notebook! I love all the details especially the heart shape notebook :) reply
Samantha
Samantha
7:33 AM Friday, May 9, 2014
I am having a trouble with the stitches. I create the path just fine but when I go to stroke the path, the direction of the stitch isn't following the direction of the path. It isn't following the curves of the letters. Any idea what I am doing wrong? reply
John
7:35 AM Friday, May 9, 2014
Please upload an image to see the stitch brush and the path that you created. reply
John
1:56 AM Wednesday, June 18, 2014
Your Photoshop Notebook inspired text effect looks great! I like the color scheme palette a lot, perfect for a school notebook :) reply
Pink
Pink
3:19 AM Tuesday, June 24, 2014
Great Tut. As usual when I do tutorials, I do it a little different :D and I did a composition notebook instead. Thanks so much. reply
John
4:33 AM Tuesday, June 24, 2014
I am glad you like my notebook text Photoshop tutorial.
Keep up the good work! reply
Tarek
Tarek
8:50 AM Monday, October 27, 2014
Hello, would you please help me with the 4th step of part 2? I really don't understand how you did this part. I'm a beginner in photoshop. Thanks in advance. reply
PSDDude
8:55 AM Monday, October 27, 2014
If you are not familiar with vector shapes you can use the Brush Tool, hard round brush and simply draw the shapes.
For the circles use the Eraser Tool, hard round brush lower size to create the empty circle shape. reply
Elisa
Elisa
8:31 AM Tuesday, February 10, 2015
Thanks a lot for the beautiful tutorial reply
PSDDude
8:34 AM Tuesday, February 10, 2015
It's such a cute girly notebook text effect, I love it! I like the pink accent color :) reply
lhannzky
lhannzky
5:14 AM Thursday, July 21, 2016
how to change the color of the cover page with pattern overlay? reply
PSDDude
5:17 AM Thursday, July 21, 2016
To change the color of the cover page you can add a Color Overlay layer style with the color that you like and set the blend mode to Hue or Color. reply
Yahav
Yahav
11:28 AM Monday, October 17, 2016
hey ,
my name is yahav and I'm trying to do this but stuck at some part. What do you mean by make a selection? reply
PSDDude
11:29 AM Monday, October 17, 2016
To create a selection from a layer in Photoshop, keep the CTRL key pressed and click on the layer thumbnail to make the selection. reply
yahav nitzan
yahav nitzan
1:53 AM Sunday, November 6, 2016
hey there /
it's me yahav again and thanks for your time and for making us tutorials '
i'm trying to expand the selection by 10 pixel like you do ' using the same font and the same weight but im getting an error saying "could not fill because there are not enough opaque source pixels" what am i doing wrong ? please answer i love you tuts but can't get over this error reply
PSDDude
1:57 AM Sunday, November 6, 2016
"Could not fill because there are not enough opaque source pixels" Photoshop error.

Press SHIFT+F5 to fill the selection using Foreground Color and opacity 100% like shown in the screenshot. reply
Radhit
Radhit
12:43 PM Tuesday, June 6, 2017
Hi, I actually got stumped at the work path and stroke path step. I dont know if I'm doing it right. Could you please explain it? reply
PSDDude
12:56 PM Tuesday, June 6, 2017
You have the tutorial on how top create the Work Path:

http://www.psd-dude.com/tutorials/create-work-path-in-photoshop.aspx

Here you have the tutorial on how to Stroke Path using brushes:

http://www.psd-dude.com/tutorials/stroke-path-in-photoshop.aspx reply
Jos??e
Jos??e
8:17 AM Wednesday, June 28, 2017
Hi, I'be bought the action for the notebook. Do you have a video tutorial? For the step 2, how can we add a text layer, a custom layer and a raster image? Do we need to write our word (ex.: NOTE) before play the action? Thanks!

Jos??e reply
PSDDude
8:20 AM Wednesday, June 28, 2017
For the GraphicRiver action support you have to write a message there, on the comments section:
http://graphicriver.net/item/leather-notebook-photoshop-creator/12284179?ref=psddude

reply
Matthew
Matthew
8:42 AM Friday, August 25, 2017
I am really confused, two things. My font and everything is really pixelated around the edges. But mainly i dont have a stitch layer for the bevel and emboss. I made the work path and added the stitching into the stroke but theres no layer that was created with it reply
Mireille D
Mireille D
1:06 PM Monday, April 29, 2019
Thank you for this nice tutorial to work.
My Notebook:
http://www.chez-mireilled.com/article-effet-de-texte-cuir-avec-photoshop-120142857.html reply
Gabriel Somnath
Gabriel Somnath
1:06 PM Monday, April 29, 2019
really easy to follow tutorial. Thanks for sharing mate. I have tried this thought the outcome was not exactly the same but still somewhat okay reply
dewraaz
dewraaz
1:06 PM Monday, April 29, 2019
No words to explain the work..this is simply marvelous...you have reached the milestone... reply
Tina
Tina
1:06 PM Monday, April 29, 2019
Here's my first attempt. I got stumped at making a work path from a selection but muddled through! :) Thanks for the tut! reply
ISyamsun usa
ISyamsun usa
1:06 PM Monday, April 29, 2019
this is amazing effect. i like it. thank you so much :) reply
Ashley Wann
Ashley Wann
1:06 PM Monday, April 29, 2019
Nice, thanks for the tutorial! reply
Fallah Ansoryllah
Fallah Ansoryllah
1:06 PM Monday, April 29, 2019
Awesome! Thanks for The Tutorial :) reply

Have something to say? Leave us a comment

Click to Upload Fan Art!

Share your Psd Dude inspired works


Get new posts by email:
LIKE US ON FACEBOOK

      Online Photo Editor
top