


Horror Movie Poster in Photoshop
Learn how to create a dark horror movie poster in Photoshop perfect for the upcoming Halloween. I am not a big fan of horror movies but I really enjoy watching thrillers so you might say that this photo manipulation combines the two movie genre.
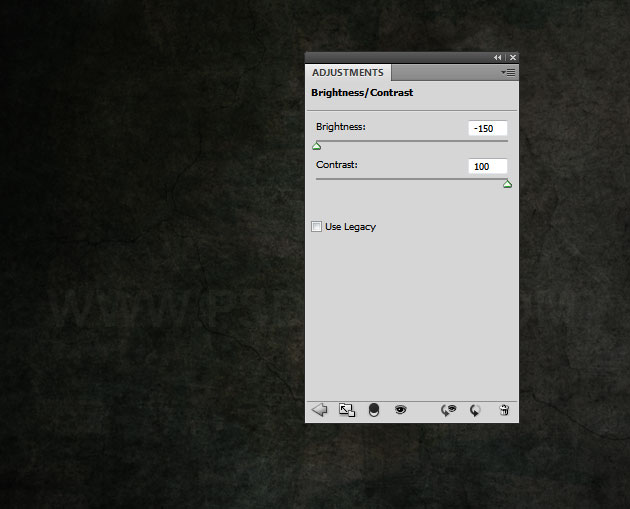
Open a new Photoshop canvas and copy this wall texture in the first layer. We'll use this as background. Call this first layer Wall Texture Layer. Add a Brightness/Contrast adjustment layer with thse settings. If you are not sure how to add adjustments read this Photoshop adjustments Guide for Beginners.
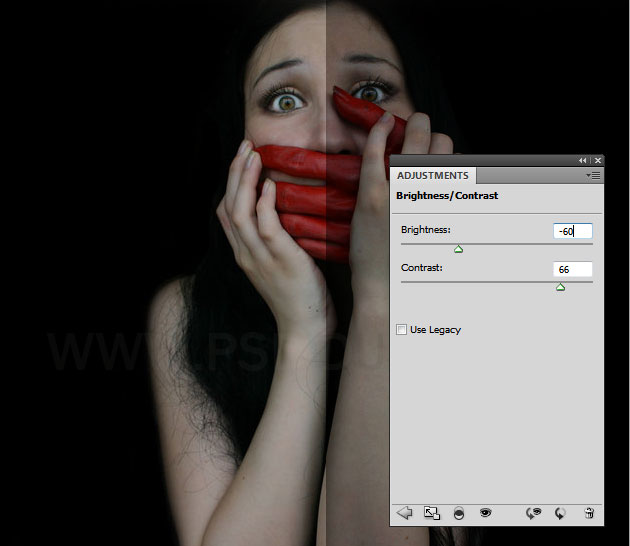
Now add this beautiful stock image in a new layer and call it Girl Layer. Add a Brightness/Contrast adjustment layer to darken the photo like shown in the image.
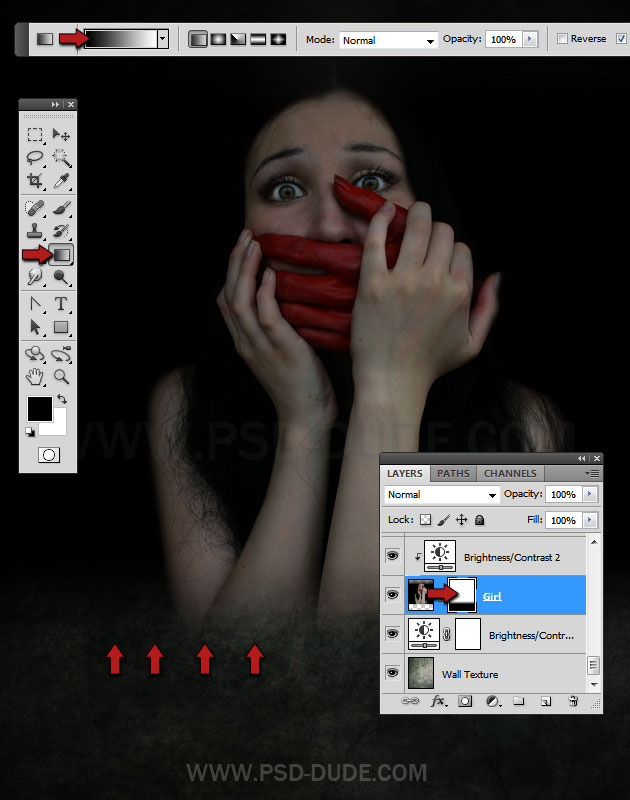
Add a layer mask to the Girl Layer. Pick the Gradient Tool and choose a simple black to white gradient, opacity 100%. In the layer mask use the Gradient Tool like shown in the image to hide the lower area of the Girl Layer. Read the Layer Mask Photoshop Guide if you are not familiar with this term.
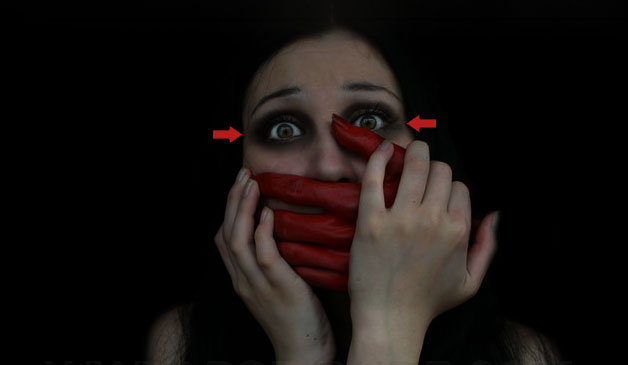
Create a new layer and call it Black Makeup. Use the Brush Tool, pick a soft round brush and black color. Simply paint around the eyes. Set the blend mode of this layer to Overlay 75% opacity level.
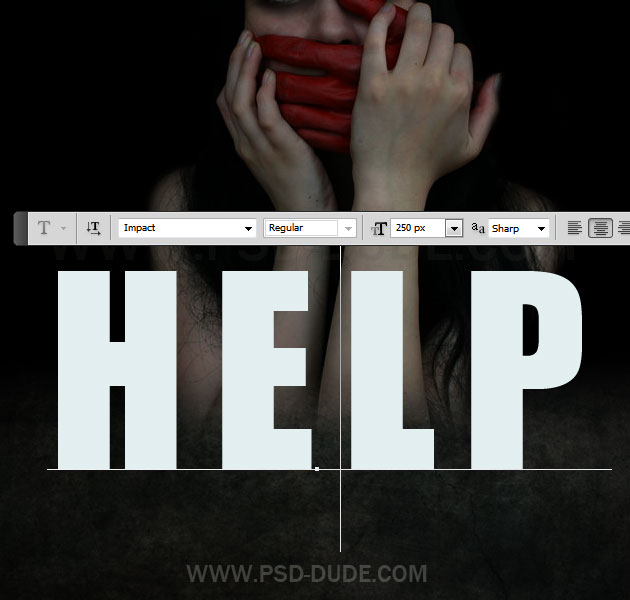
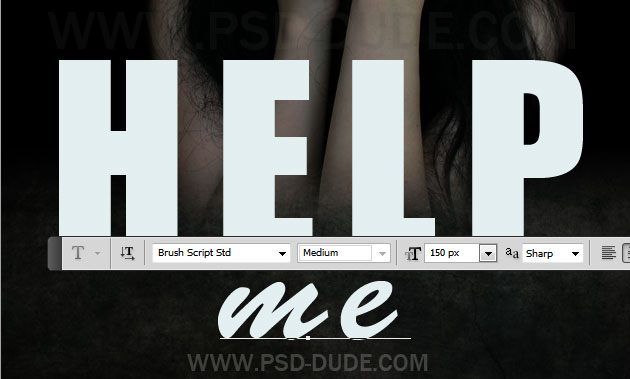
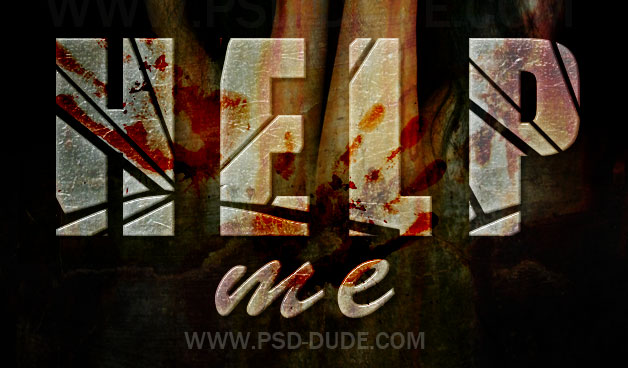
Add a text layer in the bottom area using Impact Font, size 250px like shown in the image. The color of the text is not important. You could also use an emblematic font like one from this list of fonts from movies.
Add another text layer with Brush Script Std Font. If you do not have this font you can download it from here. Learn how to install font in Photoshop from this simple tutorial.
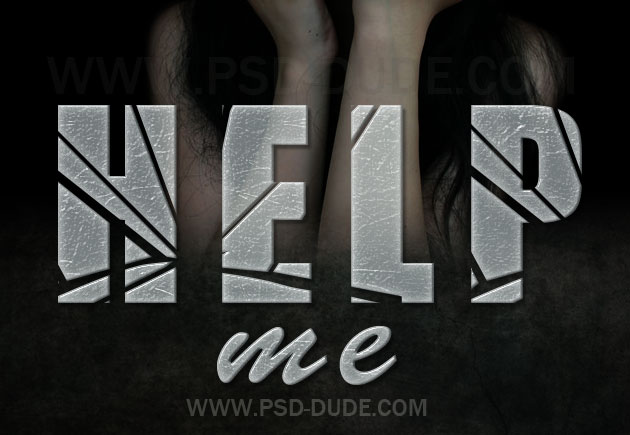
Learn how to add this broken glass text effect to our text by following the tutorial. Simply add the glass layer style to both text layers and make the "Help" text look like broken glass.
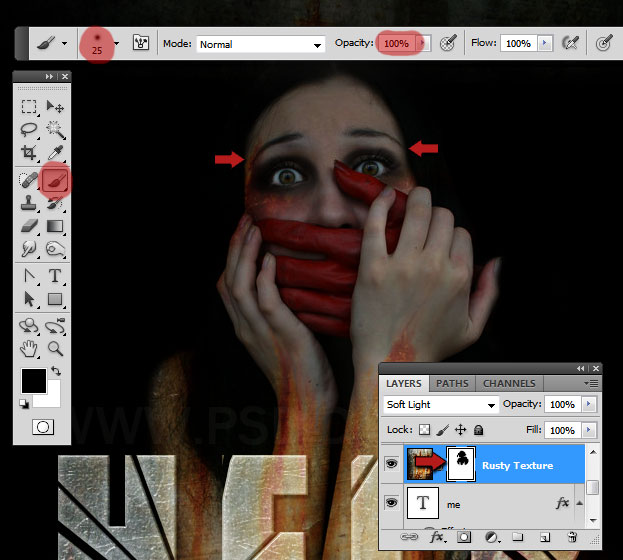
In a new layer above all the other layers copy this rusty wall texture and set the blend mode to Soft Light 100% opacity.
Add a layer mask to the Rusty Texture Layer and paint with black color inside the layer mask to cover the area of the girl face like shown in the image.
Copy this Bloody HandPrint in a new layer. Resize the image to fit; duplicate and Flip Horizontal one of the handprints like shown in the image.
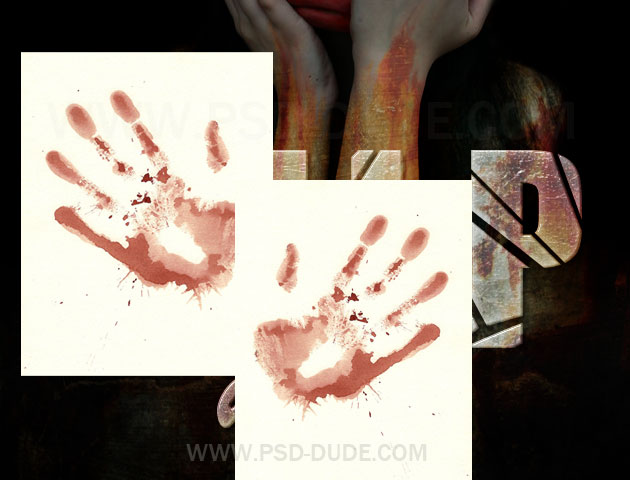
Merge the two images and call the layer Bloody Handprint. Change the blend mode to Color Burn 100% opacity level.
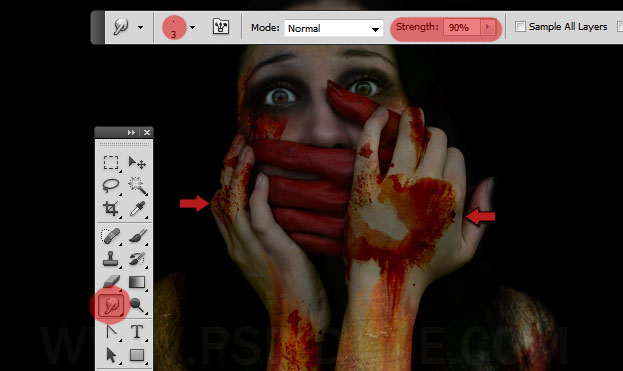
Duplicate the Bloody Handprint layer and place it above the girl's hands like shown in the image. Use the Eraser Tool to remove unwanted areas. And also use the Smudge Tool to create dripping blood effect.
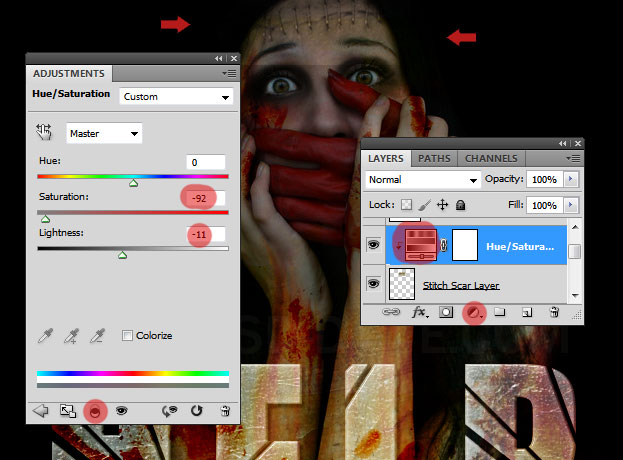
Add this Stitch Scar Photo in a new layer and resize it to fit on the girl's forehead.
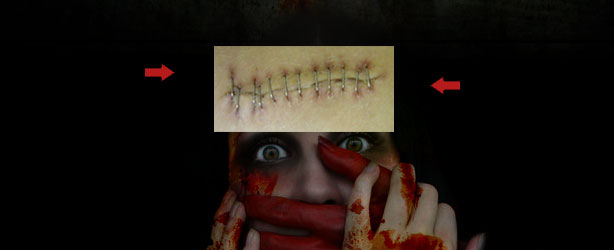
Change the blend mode of the Stitch Scar Layer to Overlay 100% opacity.
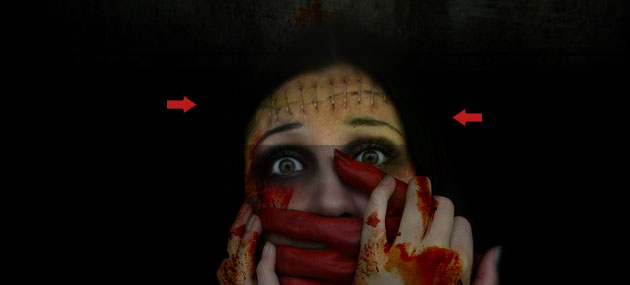
Add a Hue/Saturation adjustment layer to the Stitch Scar Layer and reduce the saturation level.
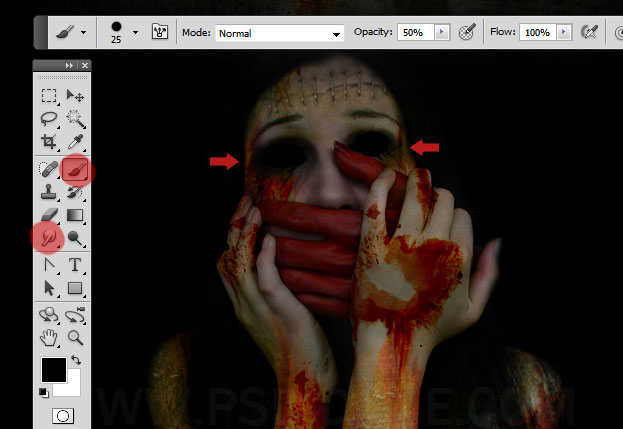
Use the Eraser Tool to blend the scar with the rest of the face. As a final touch I have decided to cover the girl's eyes. So in a new layer simply paint with black color using the Brush Tool. I have also use the Smudge Tool to make ink drips around the eyes.
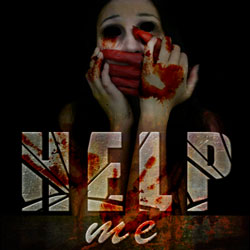
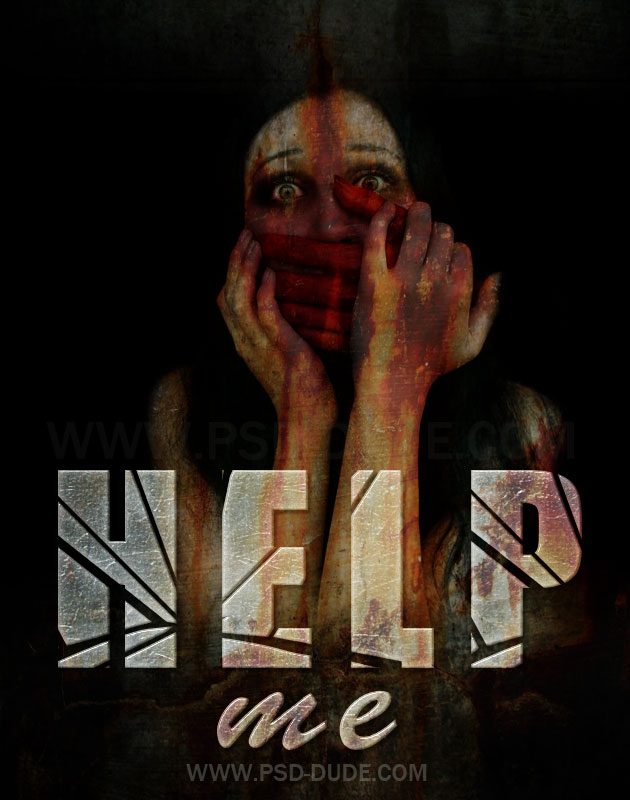
So here is the final result for the horror movie poster photo manipulation made in Photoshop. I can't wait to see your results; to create this kind of horror photo manipulation you can use blood textures and blood drips & horror brushes.
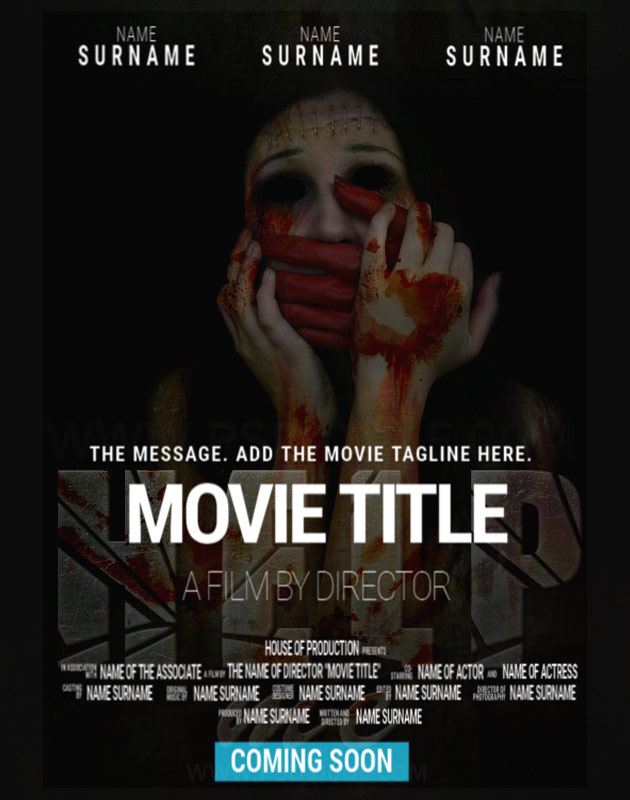
If you are an indie movie producer, or just want to give a proffessional look to your movie posters, the movie credits need to follow certain rules. Check out this movie poster credits PNG template that can be easily customized online: background image and color, text and font for the movie title, cast and other information.
You can upload your graphics in MockoFun, but you can also download the movie credits template as a PNG image and place it over your movie poster design using Photoshop. Here's the result I got when adding the movie credits.
Movie Poster With Credits Overlay

10 comment(s) for "Horror Movie Poster Photoshop Tutorial"
reply
Really great tutorial, easy to follow, loooove it :D
I changed the face of the girl with a crappy photo of myself, just to see how it would work...
Keep up the good work ^_^