What is Movember?
Movember is a recent annual event, during the month of November to raise awareness of men's health issues. The Movember rules involve the growing of moustaches and beards to promote cancer awareness.
The term "Movember" is a combination of the words "Mustache" and "November". It is also called 'No shave November'.
Tutorial Assets
For this tutorial you will need these stock images, textures and other resources.
- girl image
- rustic wood texture
- glasses PNG
- Opear Hat PNG
- newspaper texture
- grunge brushes
- old paper texture
- steampunk metal frame
Create the Wood Background
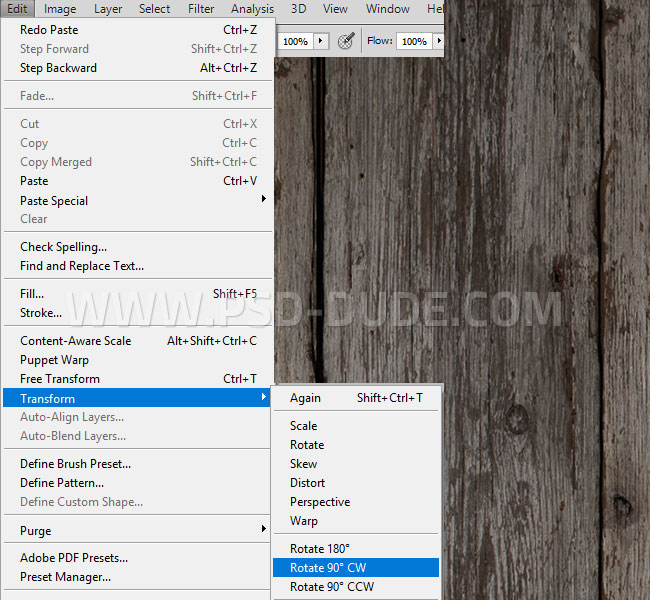
Add this rustic wood texture in a new layer. Go to Edit > Transform > Rotate 90 CW to rotate the image.
Add the Girl Image
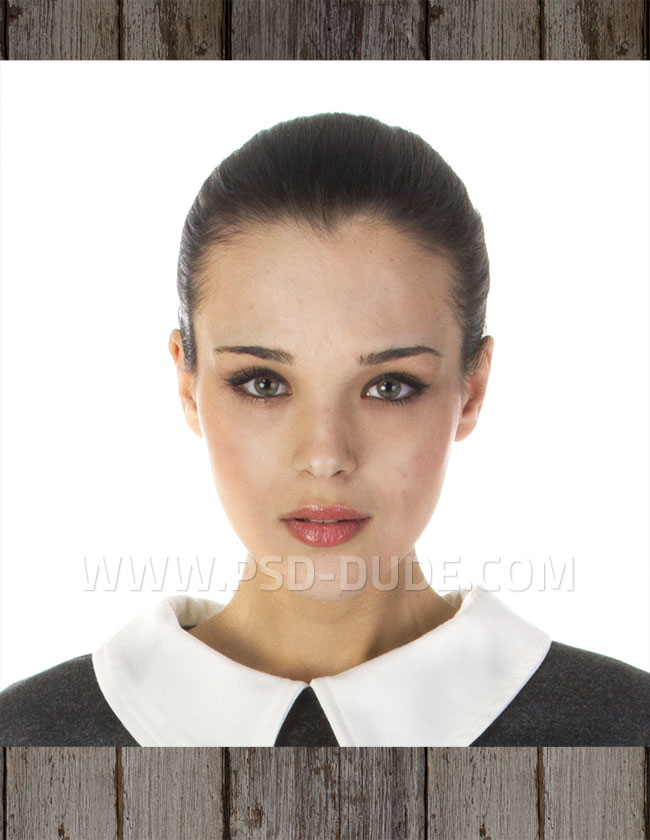
In a new layer add this girl image and cut the picture like shown in the preview. WE need only the girl portrait.
Remove Background in Photoshop
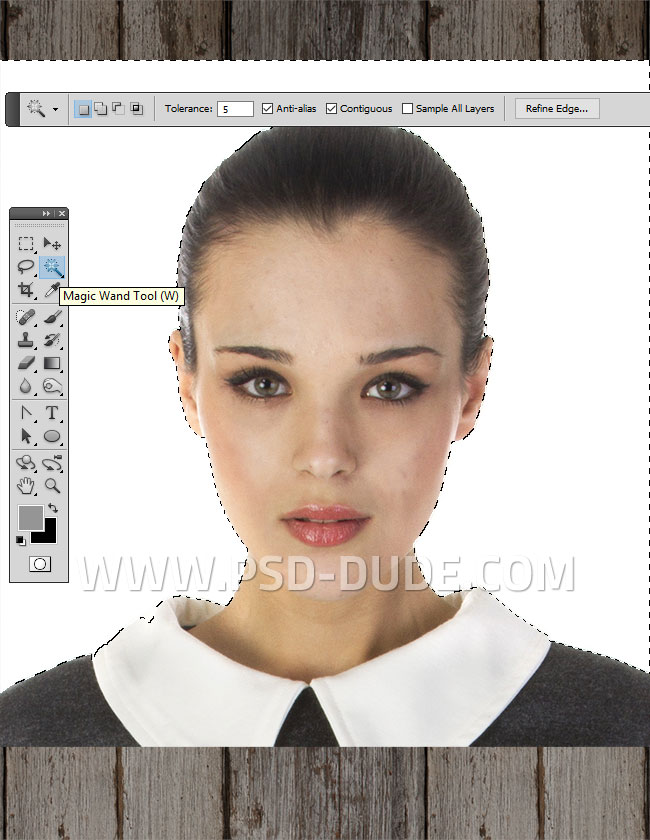
To quickly remove the background in Photoshop, I use one of the Selection Tools. This time I will use the Magic Wand Tool to remove the white background.
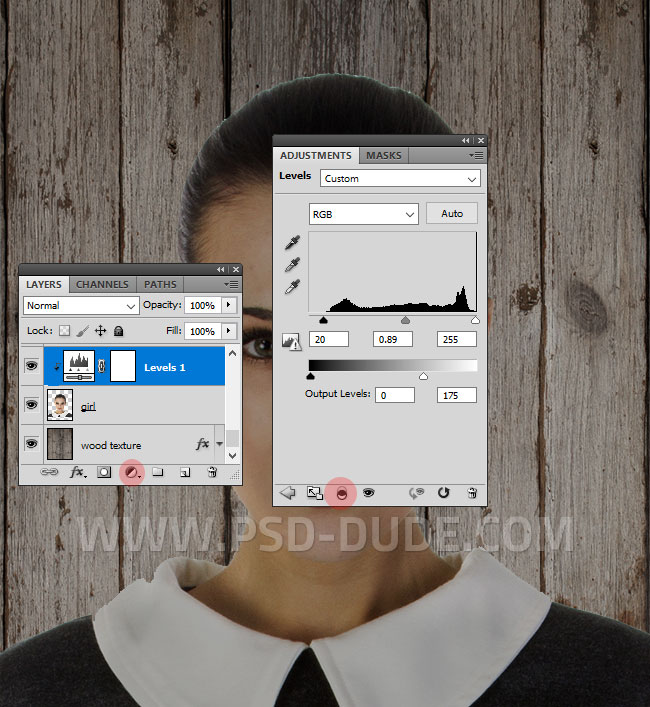
Add a Levels adjustment just for the Girl Layer using a Clipping Mask.
Add Glasses in Photoshop
Download the glasses PNG image and add them in a new layer.

Add a Tall Hat in Photoshop
Simply download this Opear Hat PNG image and add it in your PSD file. Press Control-T and rotate the hat.
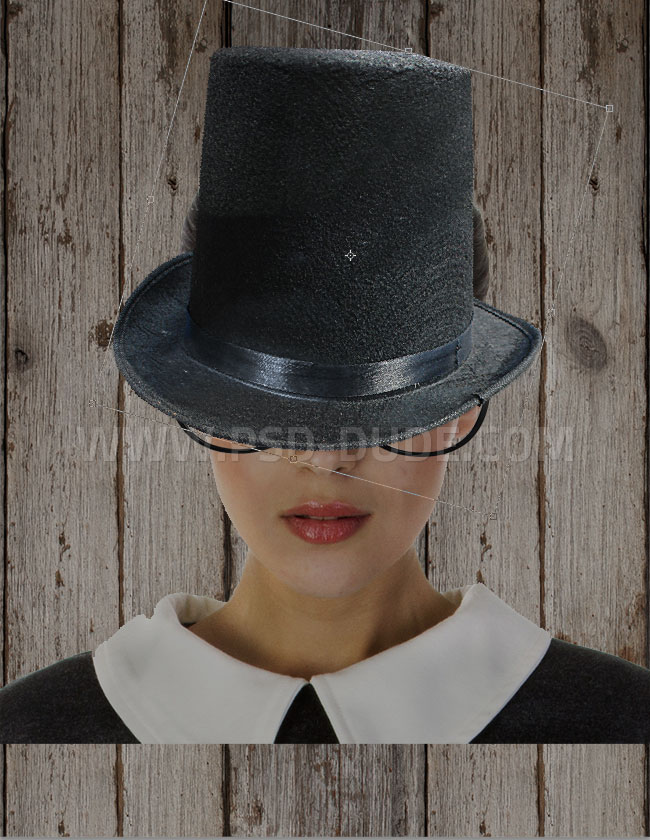
Press again Control-T and resize the hat on the vertical scale like shown in the screenshot.

Add a Moustache in Photoshop
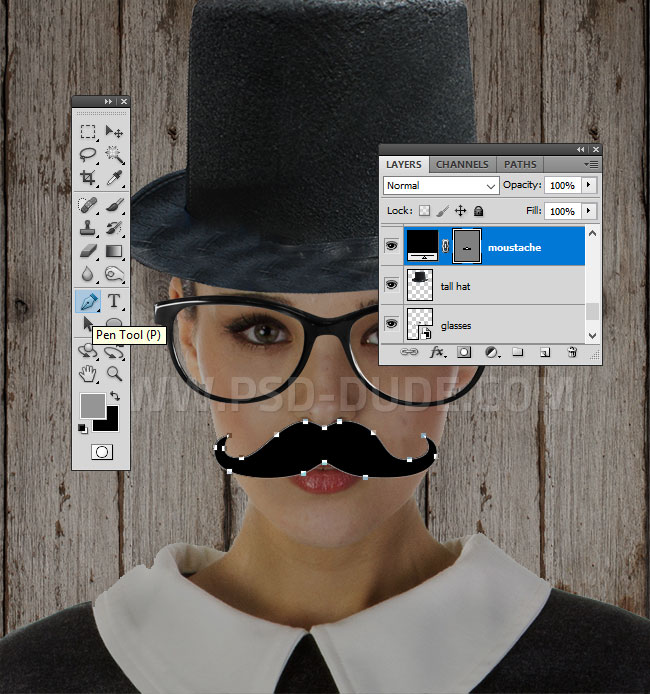
To create the moustache I used the Pen Tool to draw the shape. You can download the CSH file that contains the moustache vector silhouette. You can also use a Photoshop moustache brush if you want.
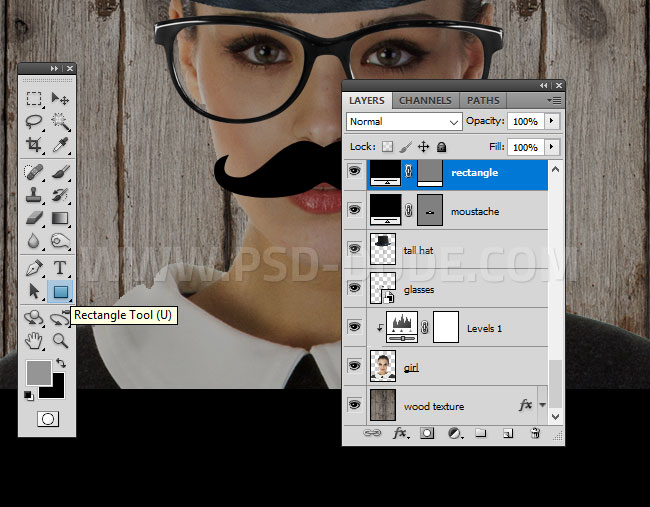
In a new layer use the Rectangle Tool to draw a black frame at the bottom of the image.
Create a layer from all layers in Photoshop
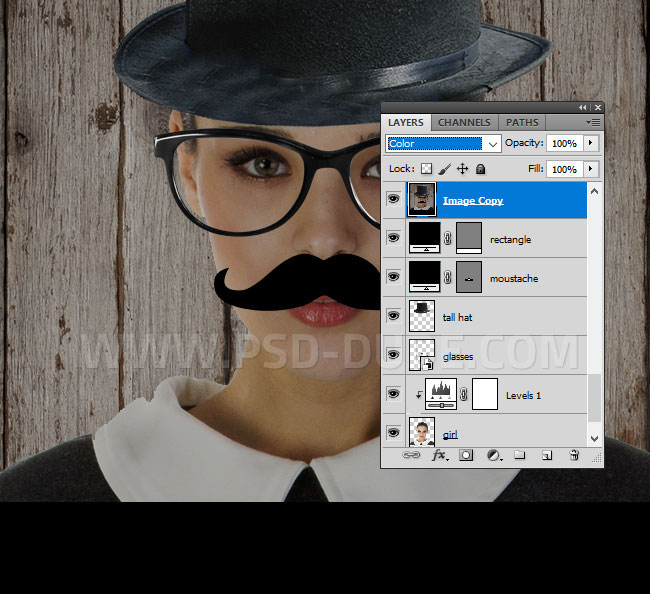
To copy all layers without merging in Photoshop, press Ctrl-Alt-Shift-E (or Command-Option-Shift-E for Mac). This will create a merged copy of all the visible layers even if they are above the selection point.
Call this new layer Image Copy and set the blend mode to Color.
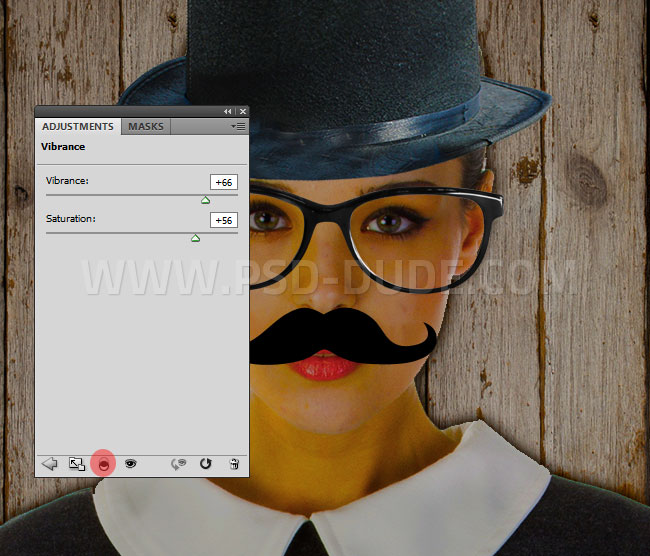
Add a Vibrance adjustment for the Image Copy layer.
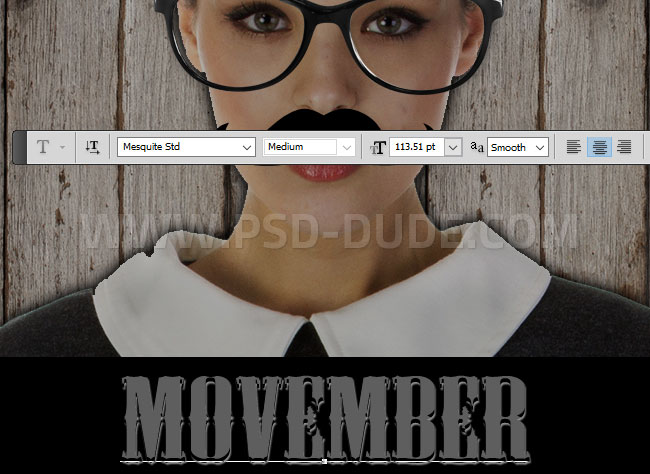
Add a text layer below the Image Copy layer, using the Mesquite font style. Write the text Movember.
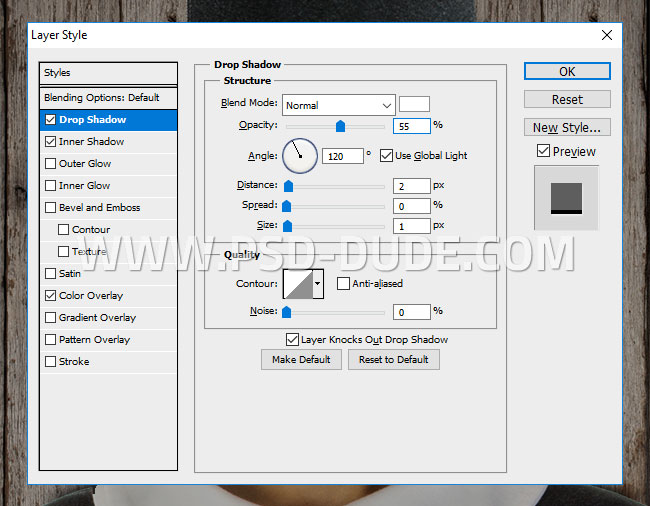
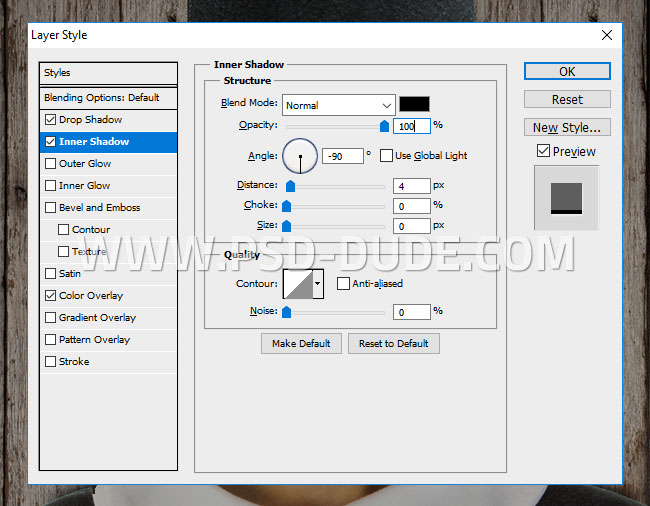
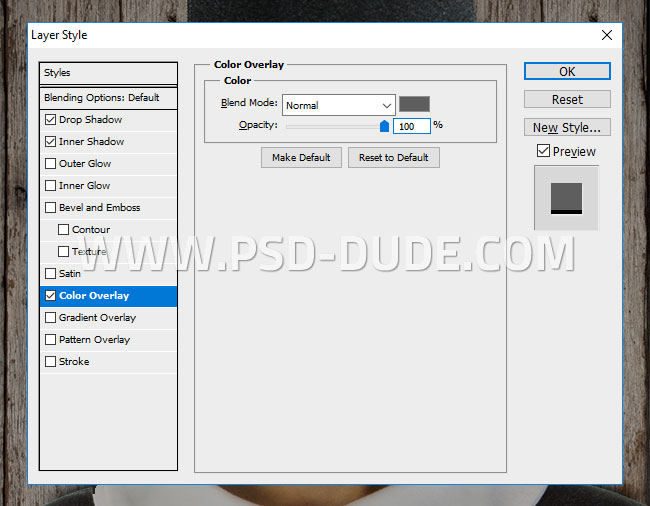
Add these layer styles to the text layer:Drop Shadow, Inner Shadow and Color Overlay (color #5e5e5e).
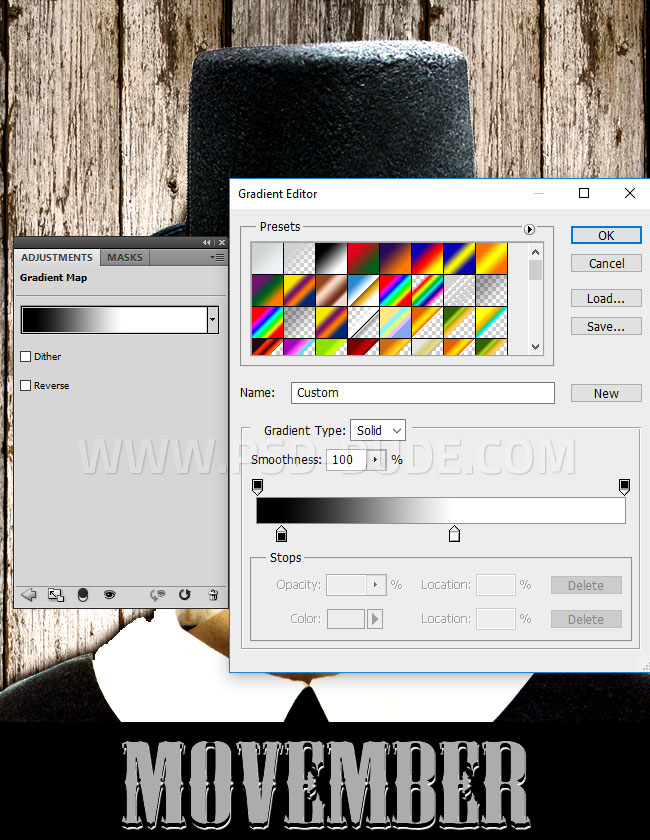
Add a Gradient Map below the Image Copy layer.
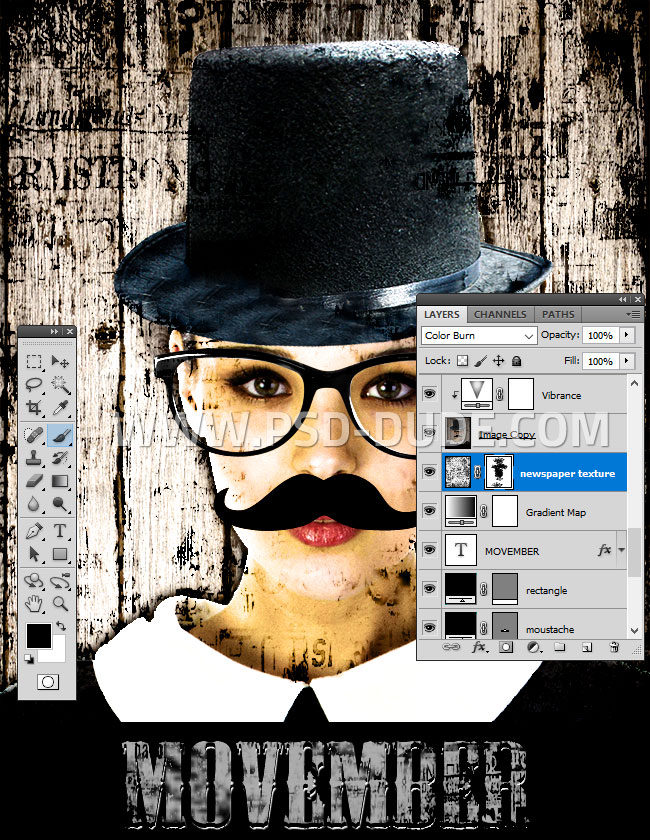
Add this grunge newspaper texture in a new layer below the Image Copy layer. Set the blend mode to Color Burn.
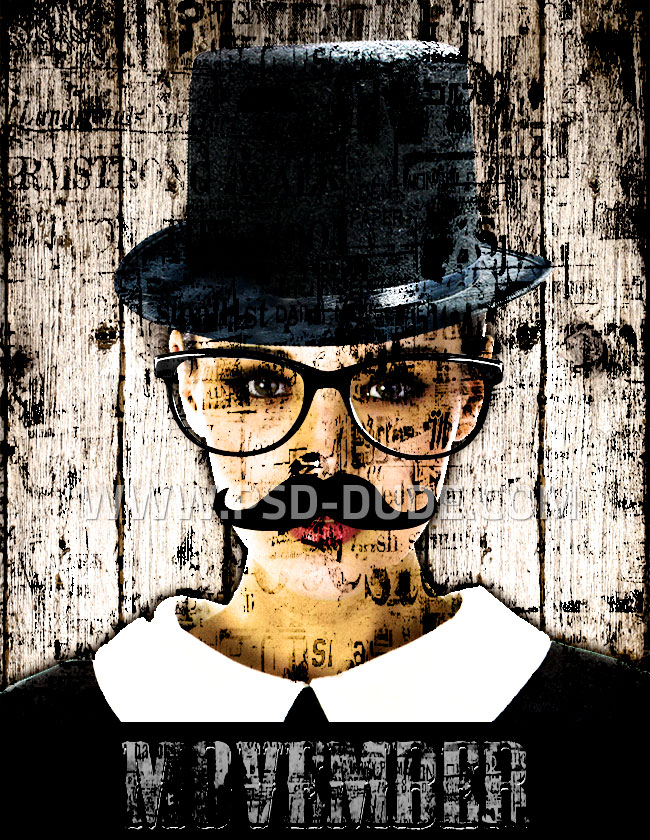
Add a layer mask to the Newspaper Texture layer. Pick the Brush Tool and use these grunge brushes to paint inside the mask. Use color black to paint over the girl portrait.
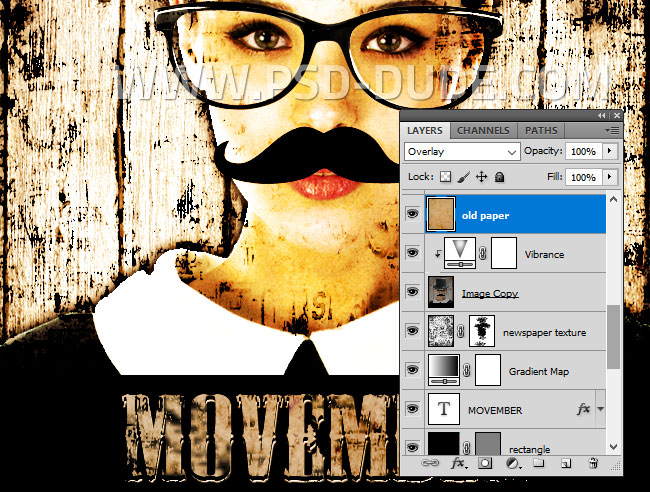
Add an old paper texture over the Vibrance adjustment of the Image Copy layer. Set the blend mode to Overlay.
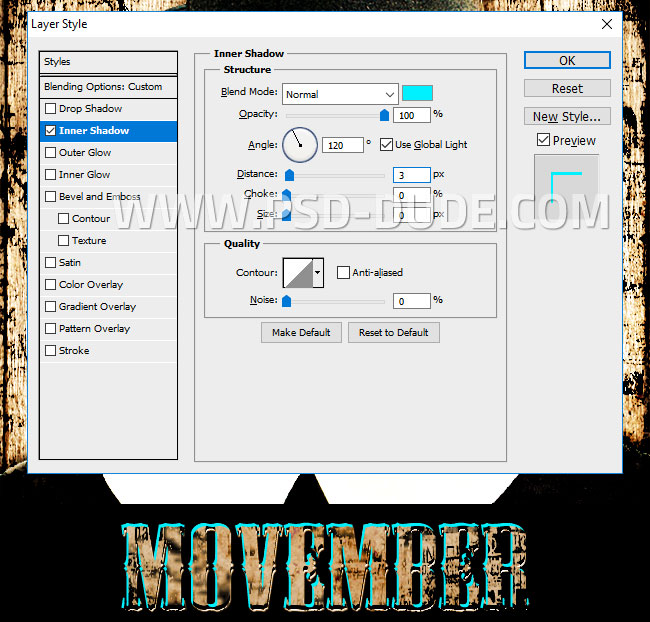
Duplicate the Text layer and move it over the Old Paper layer. Set the Fill to 0% and add an Inner Shadow layer style using color #00f0ff which is a tone of cyan color.
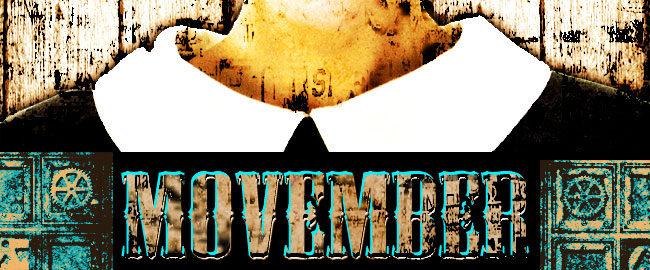
If you want you can use this steampunk metal frame to add more details in the corners. You have the gradient adjustments in the PSD file if you want to download.
Change Color Tone with Adjustment Layers in Photoshop
For the final touches I will add some adjustment layers. You will learn how to change color tone in Photoshop using Gradient Map adjustments.
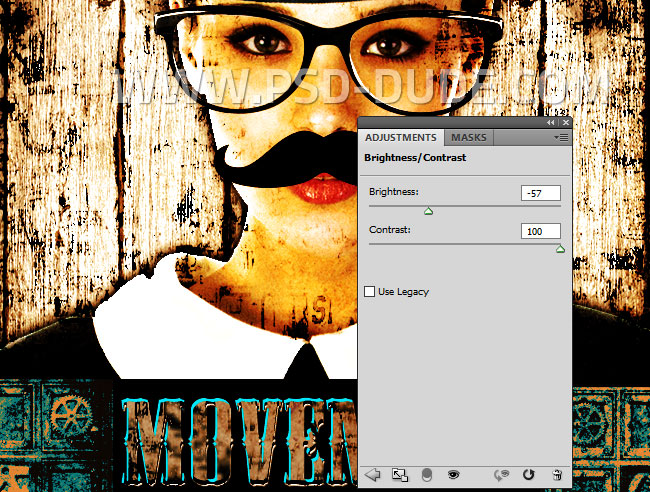
First let's add a Brightness and Contrast.
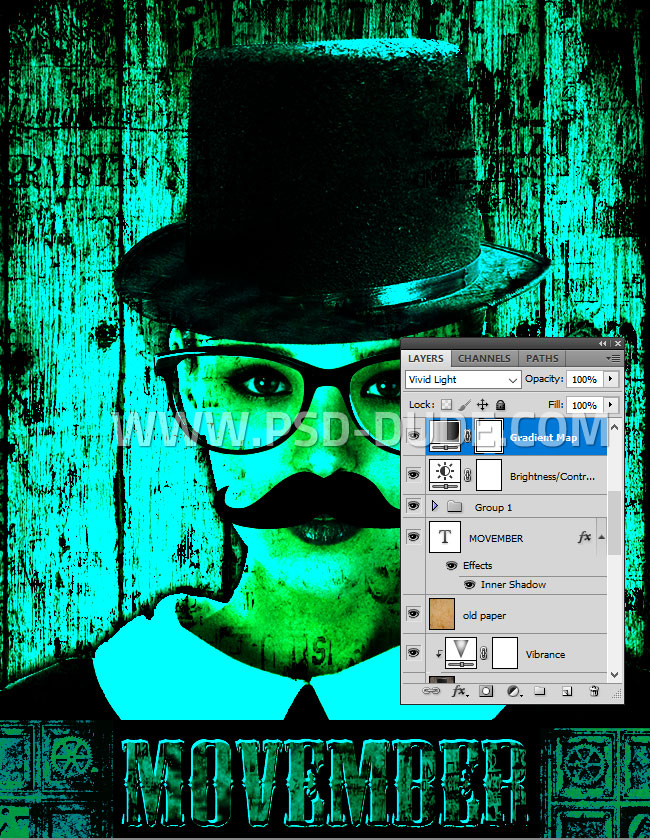
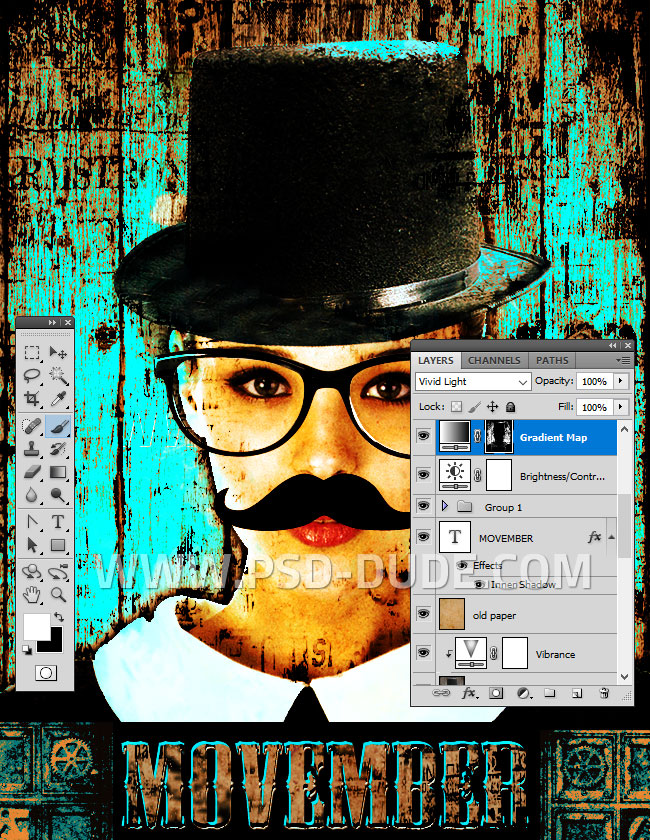
Add a Gradient Map using these color tones: #008385 and #009ab1; also set the blend mode to Vivid Light.
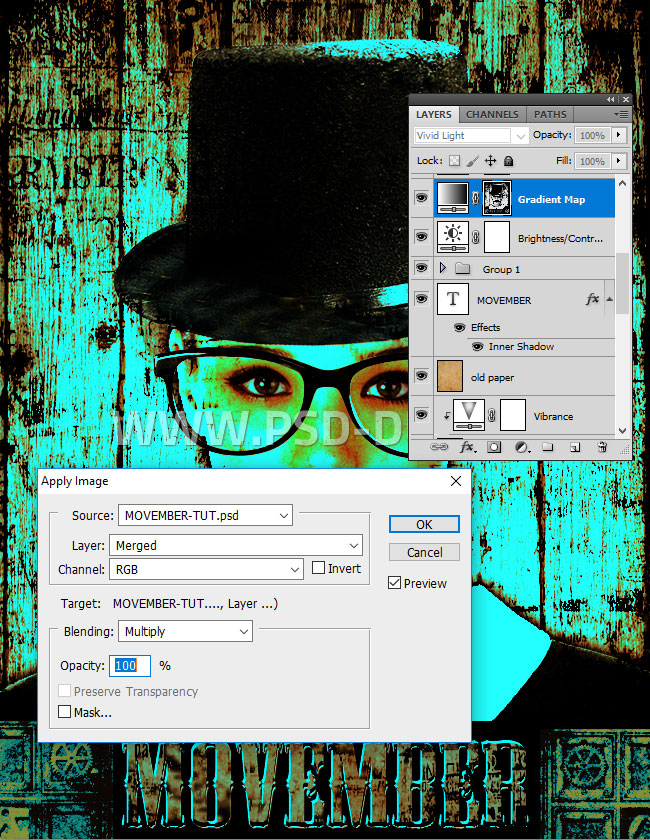
Click on the layer mask of the Gradient Map adjustment and go to Image > Apply Image.
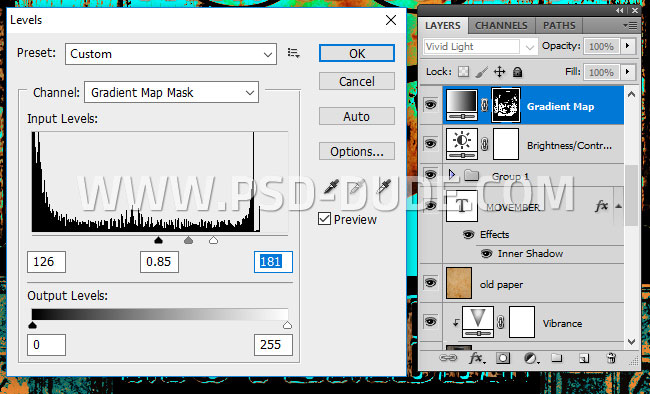
Go to Image Adjustments > Levels and make these settings.
Pick the Brush Tool and use again the grunge brushes to paint inside the mask. Use color black to paint over the girl portrait.
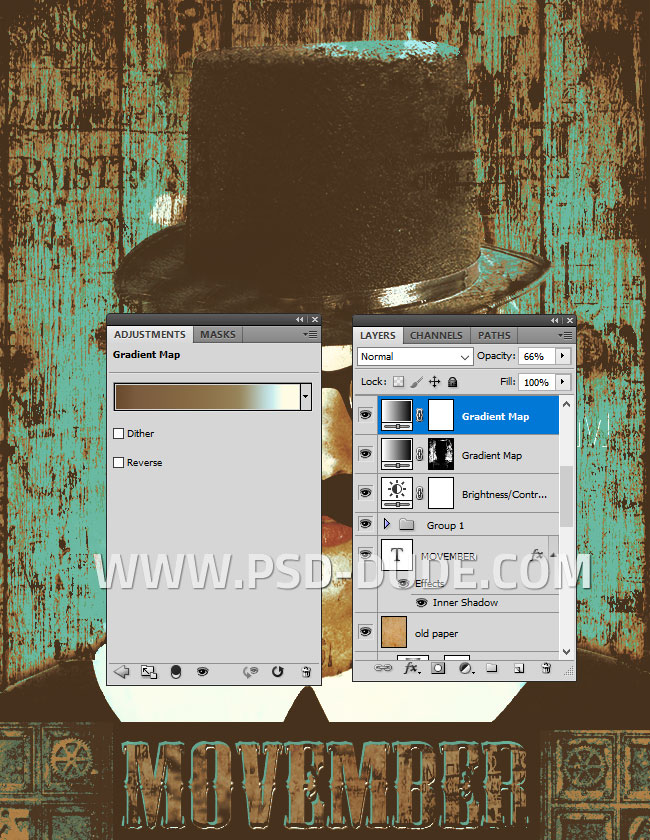
To create a grunge old photo effect I will add a second Gradient Map adjustment. Set the opacity to 66%. For the gradient I used these color tones: #6a4b2c(location 0%), #7a5b3d(location 11%), #97845a(location 66%), #caeaed(location 85%) and #fffce4(location 91%)
Sharpen Images with High Pass Filter
Press Control-Shift-Alt-E to make a copy of all visible layers without merging. Go to Filter > Other > High Pass.
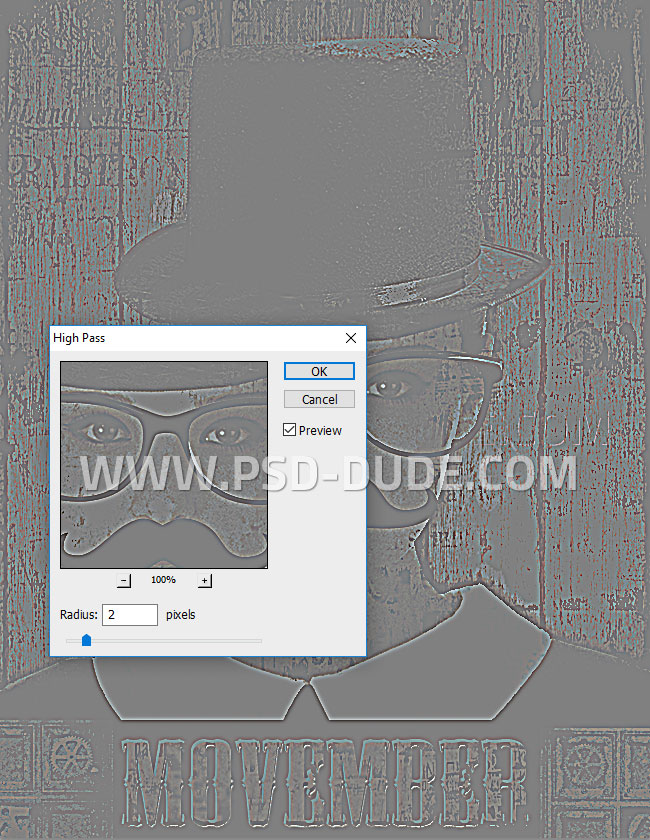
Set the blend mode to Soft Light. If you want more sharpen effect you can duplicate the layer. Also you can use the Burn Tool to paint inside this layer. You can darken some areas to give more contrast to the image.
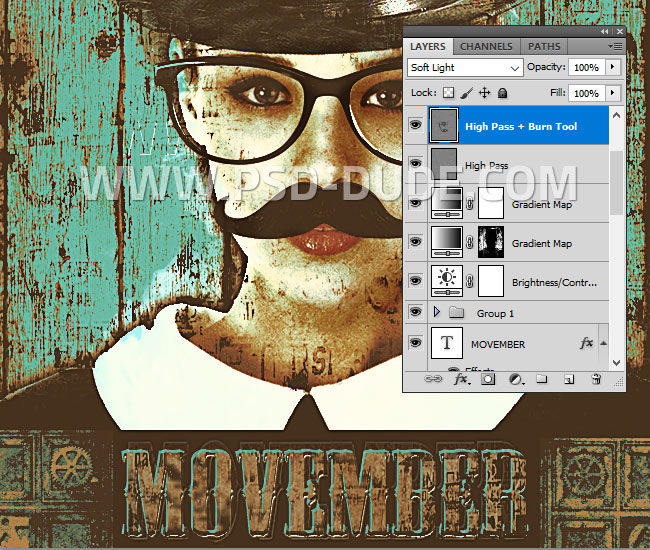
Congratulations, You Made It!
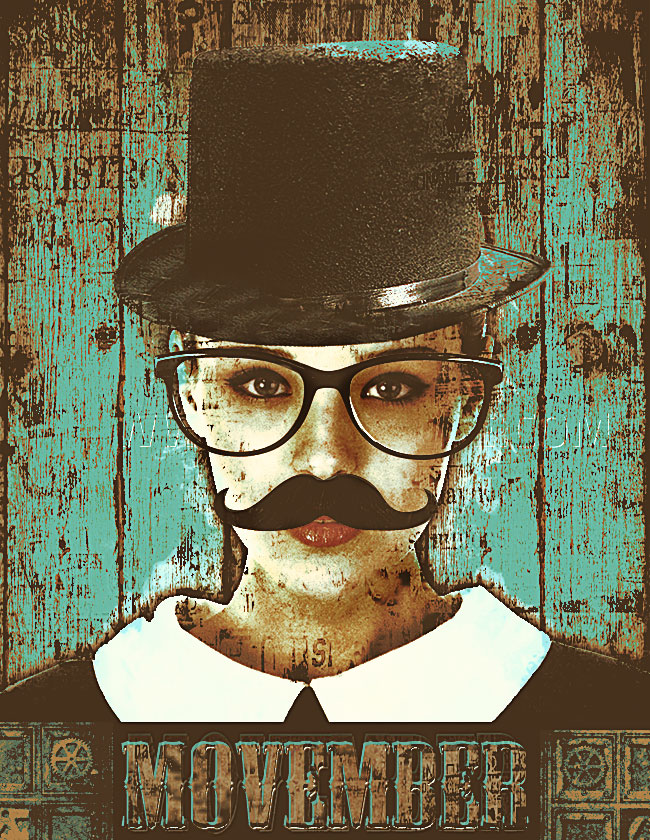
So here is the final result for the Movember Flyer Photoshop tutorial. I hope you enjoyed reading this new tutorial. If you want you can download the PSD source file.

Need A Movember Poster or Flyer Template?
If you need a Movember poster template that you can quickly edit and print for your Movember event, let me tell you about MockoFun.
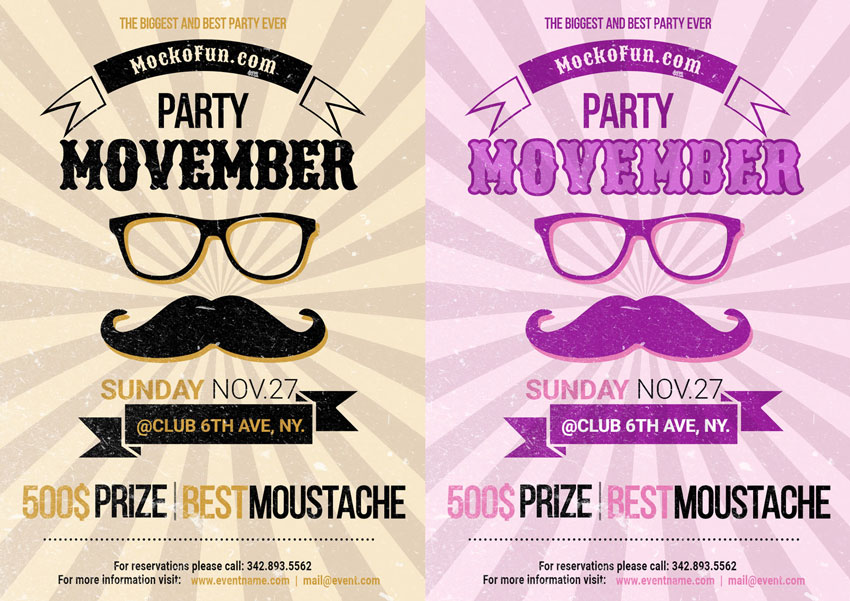
MockoFun is a free online graphic design tool. It comes with hundreds of premade templates including poster and flyer templates for Movember, the moustache men's health awarness event happening in November.
Here are 2 free MockoFun templates for Movember. You can customize:
- The Movember poster text font and colors
- Poster background color
- The position of the elements in the poster templates
Movember Party Poster Template
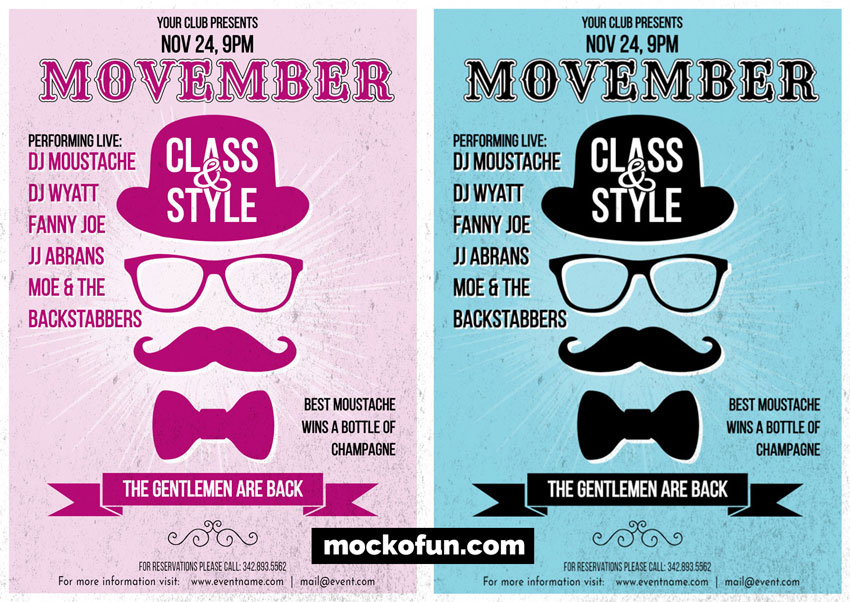
Movember Flyer Template


No comment(s) for "Movember Flyer Photoshop Tutorial"