Grunge Photoshop Tutorial Assets
For this tutorial you will nedd these stock images, textures and other resources. Make sure you download them.
- Sci-fi Metal Wall Panel texture
- Old Stone Block Pavement texture
- Seamless Metal Texture with Stars Pattern
- Grunge Rusty Metal Texture
- 3D Photoshop Action Generator
Create a Grunge Industrial Background in Photoshop
You could simply download a free grunge texture and apply it with some blending mode over your design, but here's how to do it from scratch.
Create a new PSD file size 650x515px just to make an idea about the proportions of the document. I strongly suggest you to use JPEG, small size images, around 650px with optimized quality around 200kb when uploading on your online portofolio, on social media pages, etc. In that way you can save a lot of energy just by optimizing your images and you can help reduce the global warmingb>.
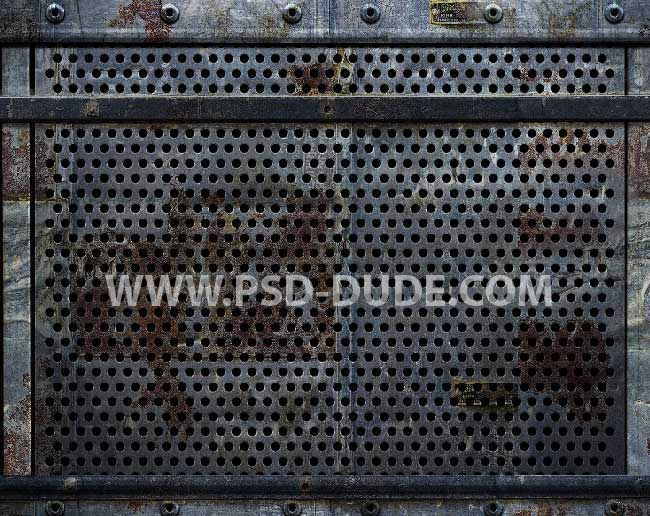
Copy this Sci-fi Metal Wall Panel texture in a new layer. This industrial metal background is made using perforated metal sheet texture, screws and metallic bars.
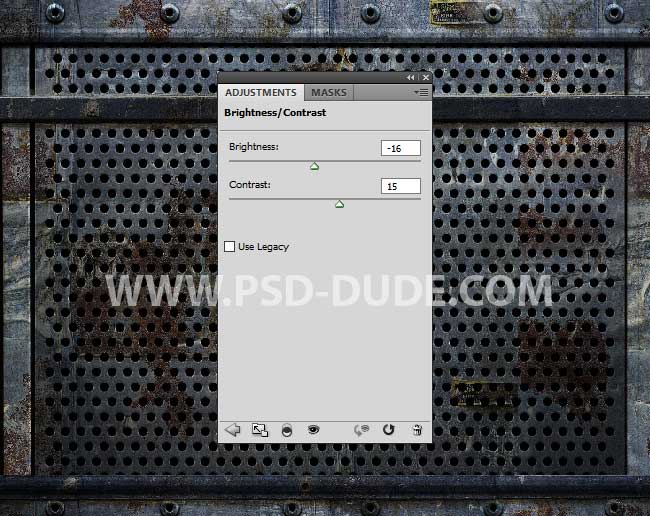
Add a Brightness/Contrast adjustment layer to darken the background.
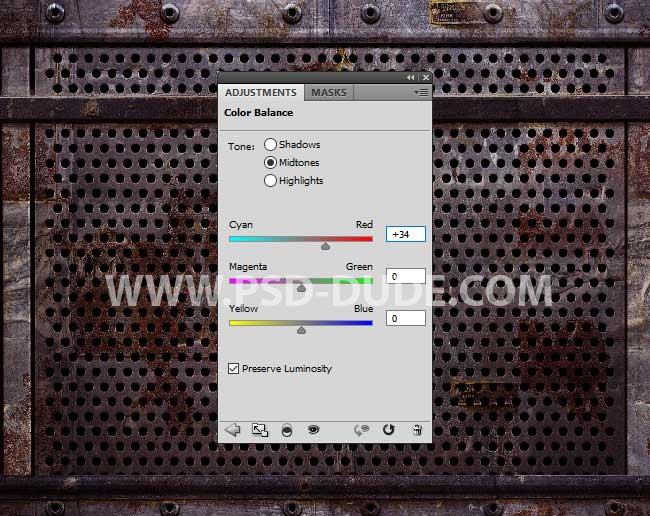
Add a Color Balance adjustment layer to increase the red color tones of the background.
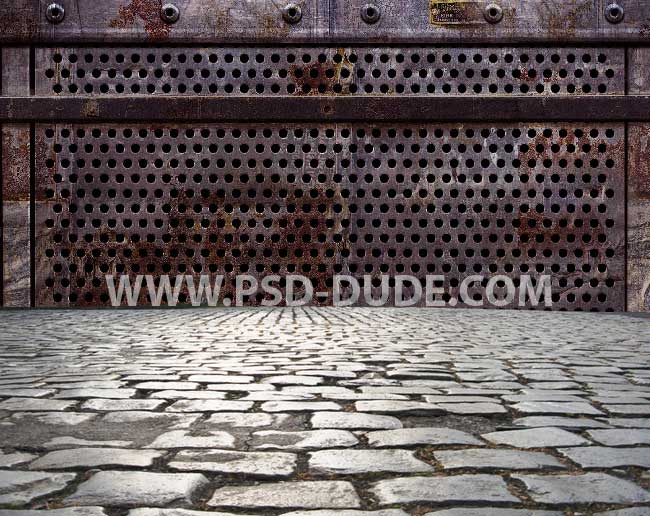
In a new layer add this Old Stone Block Pavement texture.
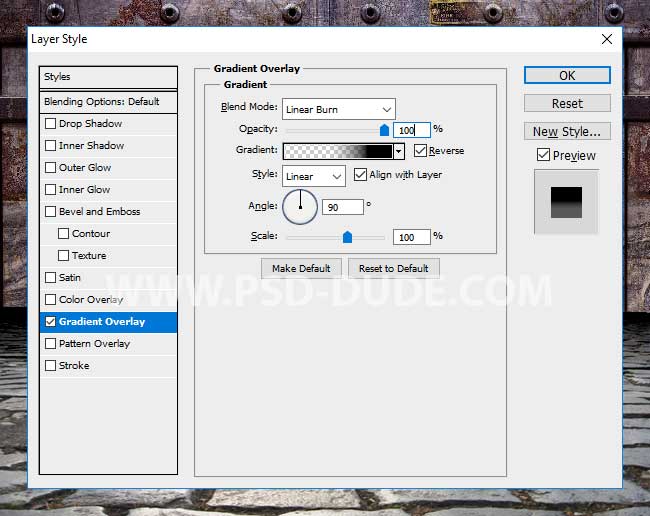
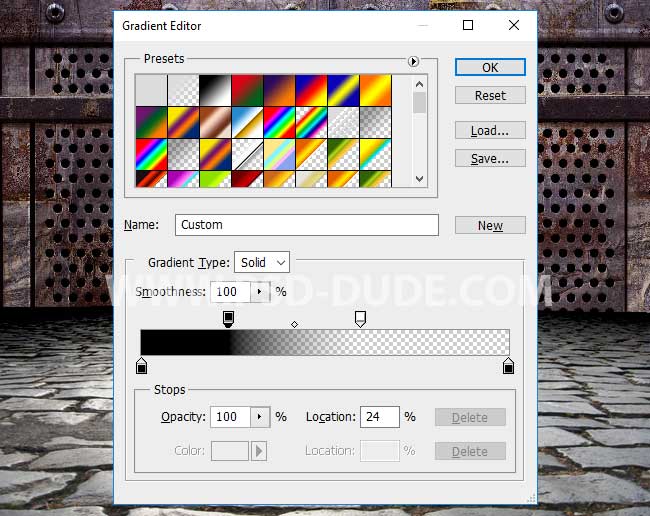
Add a Gradient Overlay to the Stone Pavement layer. The colors for the gradient are #000000(Location 0%) and #000000(Location 100%). Add two Opacity Stop. The first opacity stop is set to Opacity 100%, Location 24% and the second opacity stop is set to Opacity 0%, Location 60% .
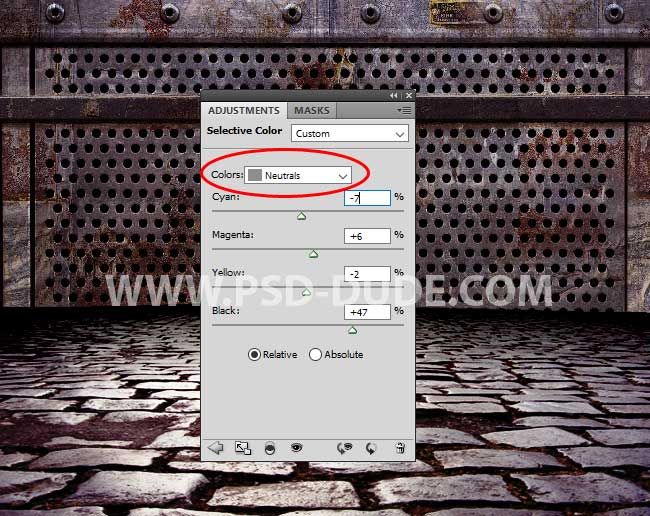
Add a Selective Color image adjustment just for the Stone Pavement layer using a Clipping Mask. From the Colors drop-down list choose Neutrals.
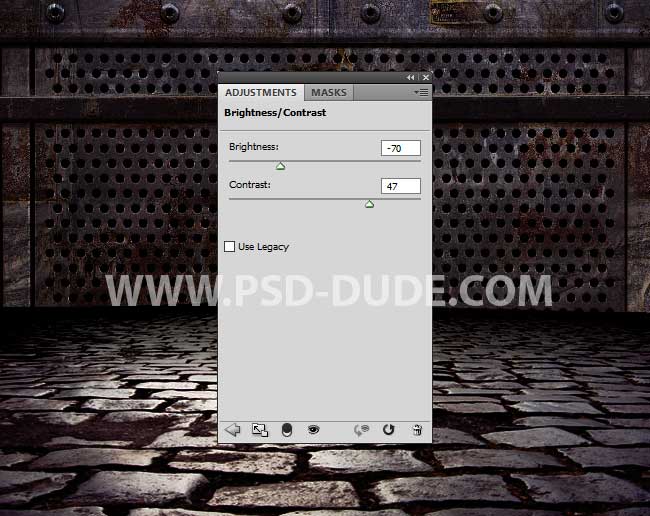
Above all the other layers add a Brightness/Contrast adjustment layer to darken the industrial background.
Create a Grunge Rusty Metal Text Effect in Photoshop
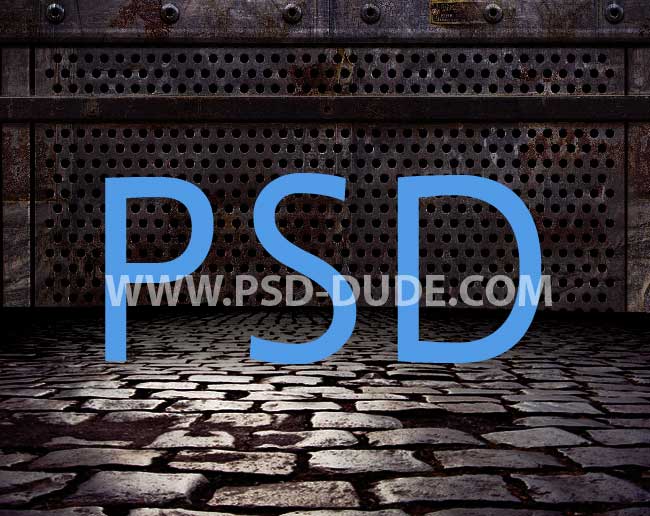
Add a text layer using any font you like. I used a font type called Ligurino, size 260pt; you can serch it online if you don't have it. Learn how to install font in Photoshop from this quick tutorial. Use any color for the text.
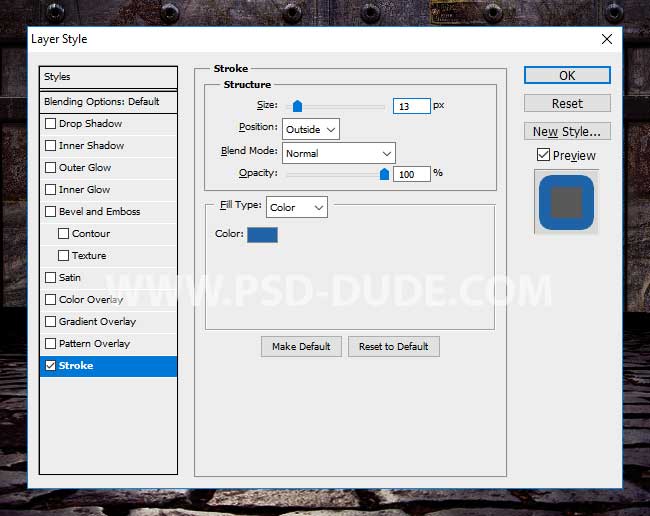
Add a Stroke layer style to the text layer, using any color you want.
Right click and Conver to Smart Object the text layer. Call This layer Rusty Text layer. Add this Seamless Metal Texture with Stars Pattern in a new layer above theRusty Text layer. Right click and choose Create Clipping Mask.
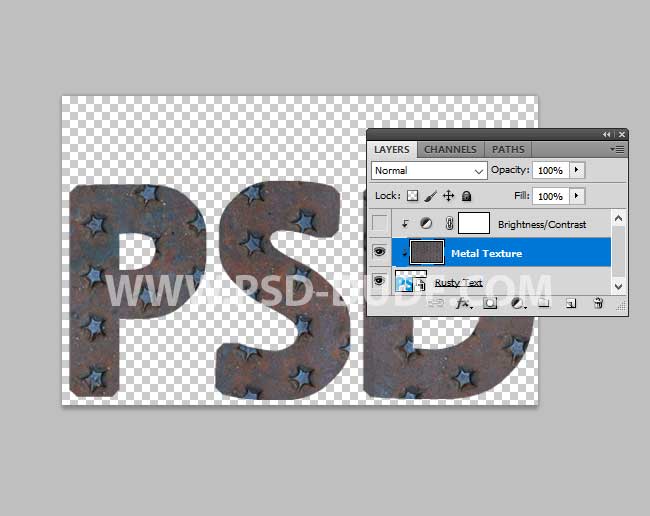
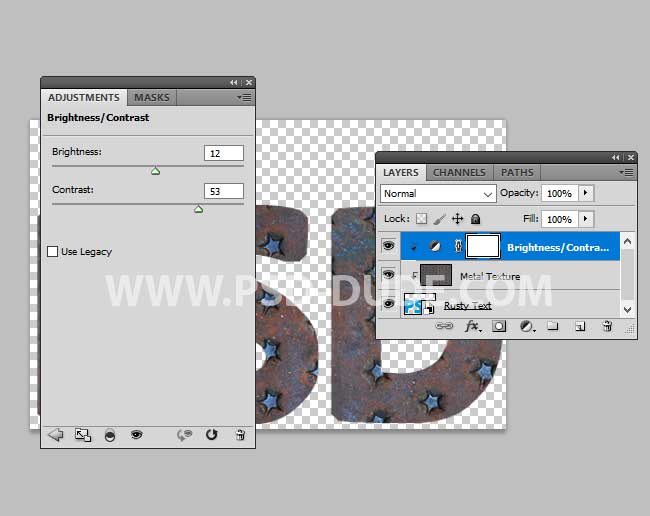
Add a Brightness/Contrast adjustment layer. Right click and choose Create Clipping Mask.
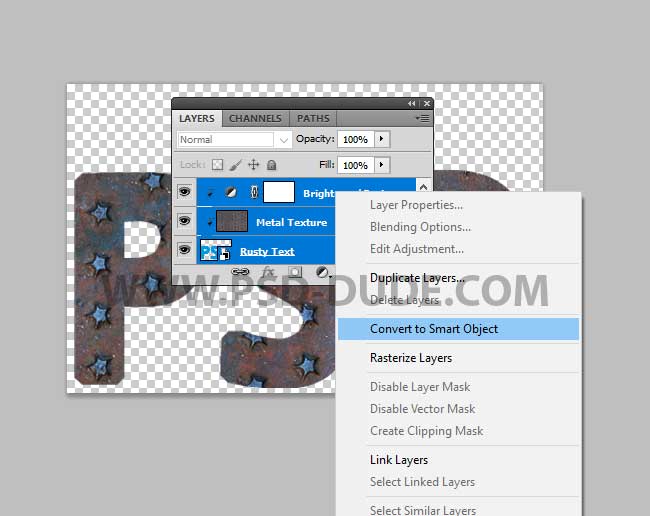
Select the Rusty Text layer and its two clipping masks. Right click and choose Convert to Smart Object. Rename the smart object Rusty Text Back.
Duplicate the Rusty Text Back layer and call it Rusty Text.
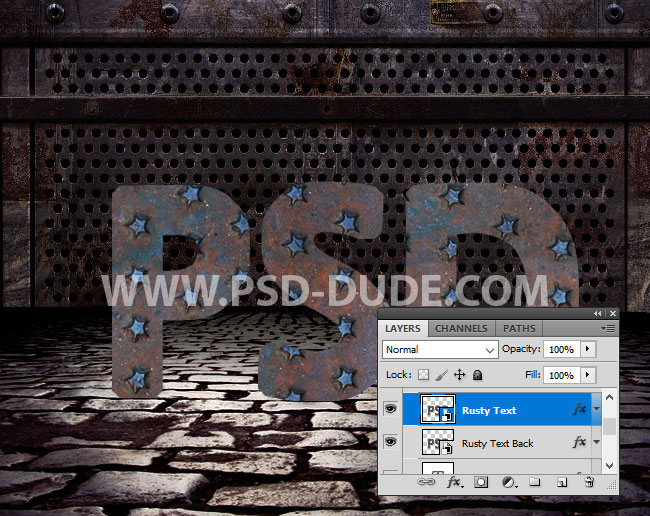
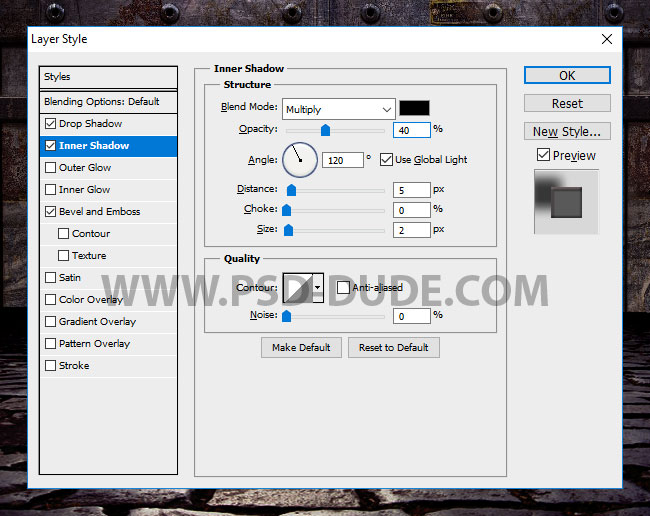
Add this layer style to the Rusty Text layer to create an embossed effect to look like a metal sign. For the Bevel and Emboss Highlight mode color I used #ff9d9d.
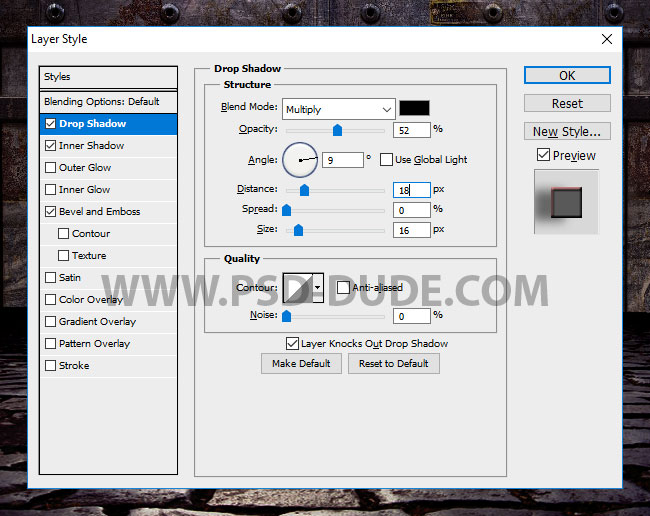
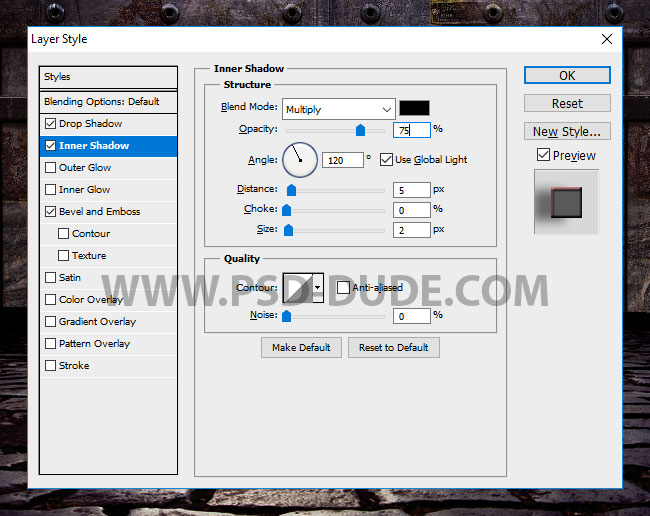
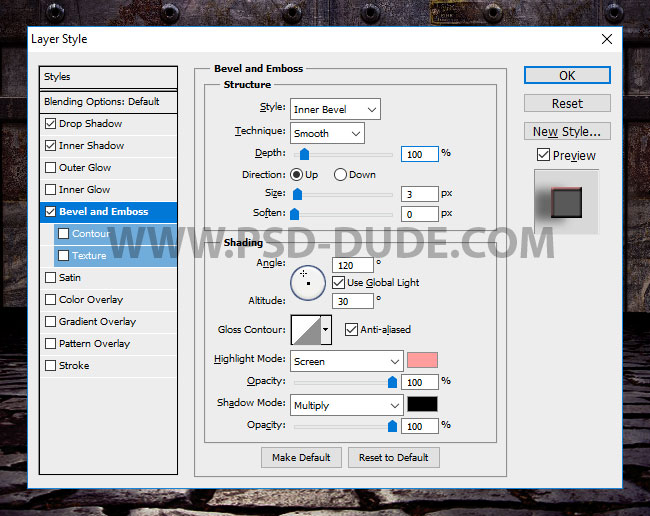
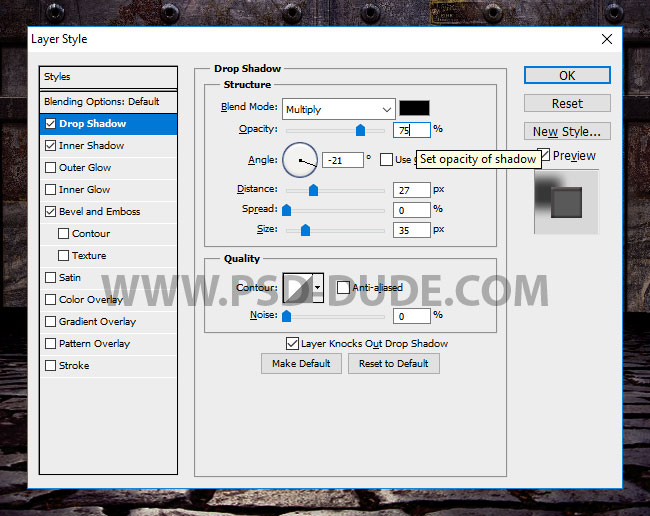
Add this layer style to the Rusty Text Back layer. For the Bevel and Emboss Highlight mode color I used #584444.
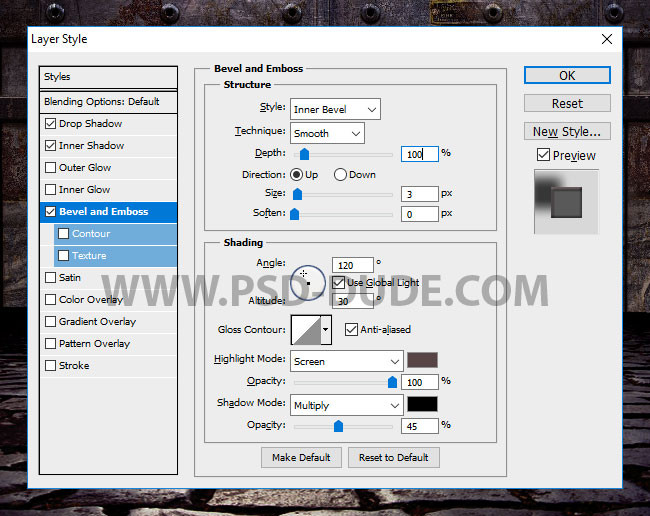
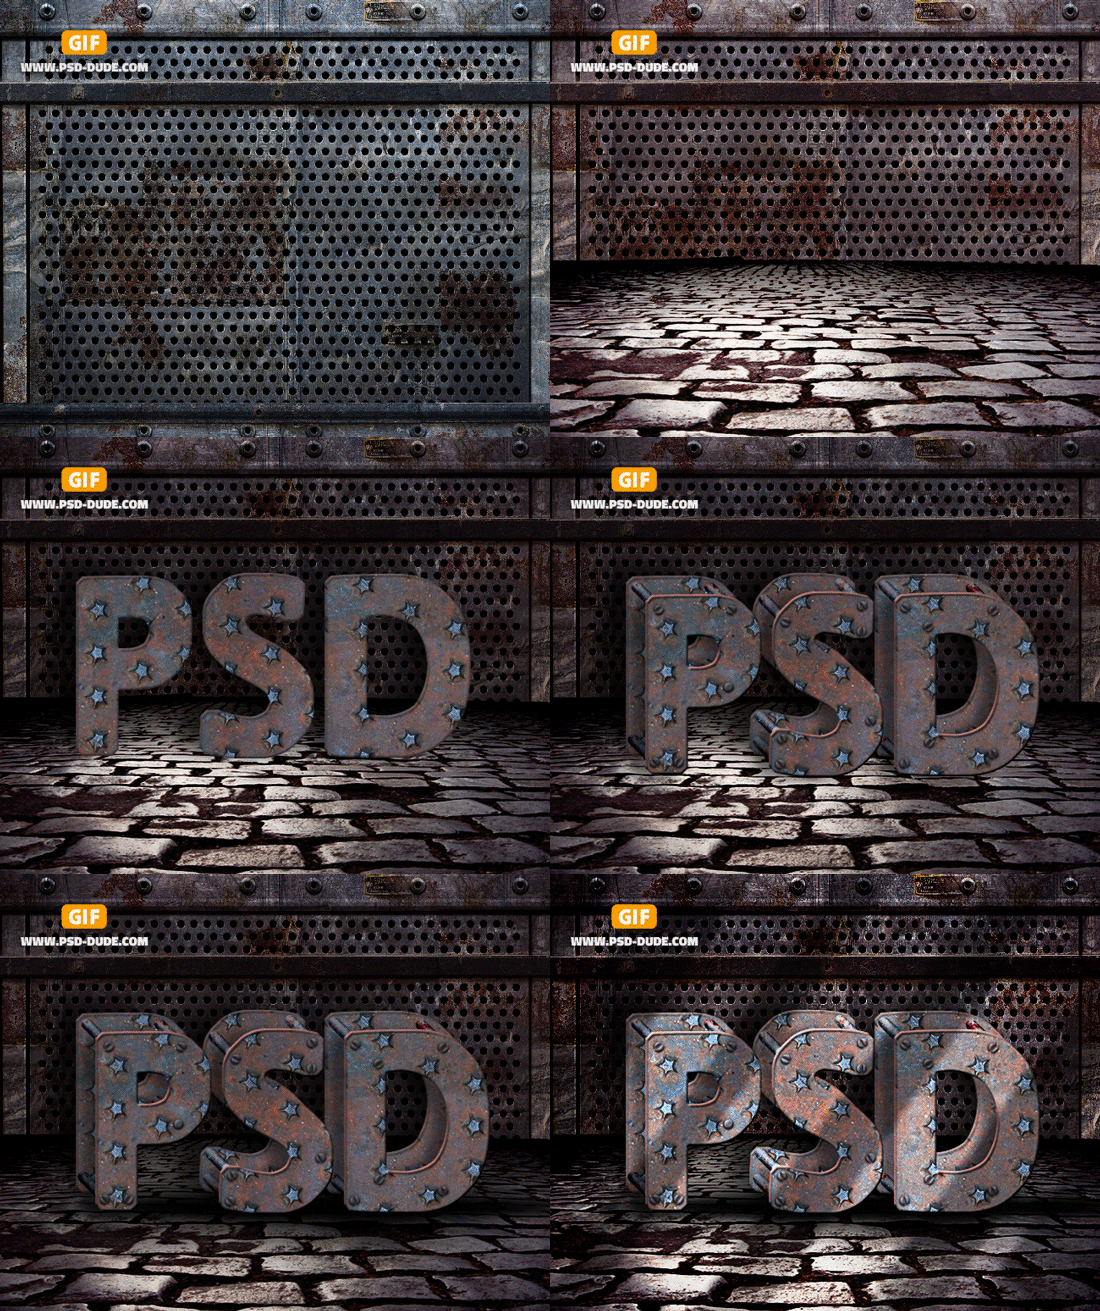
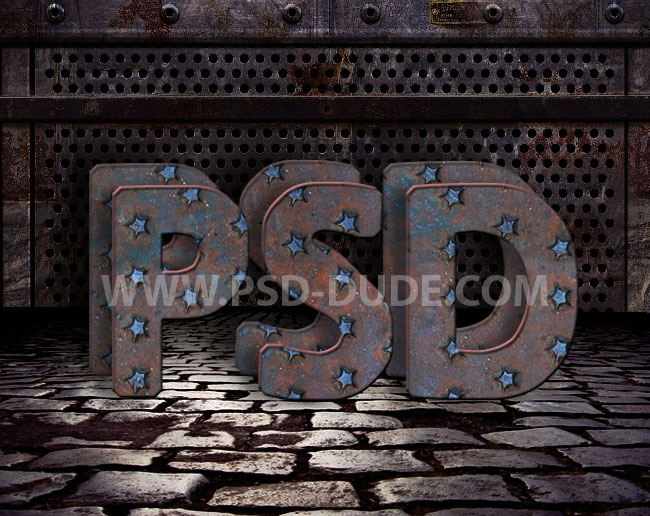
Move the Rusty Text Back layer like shown in the preview.
Create 3D Metal Bars in Photoshop
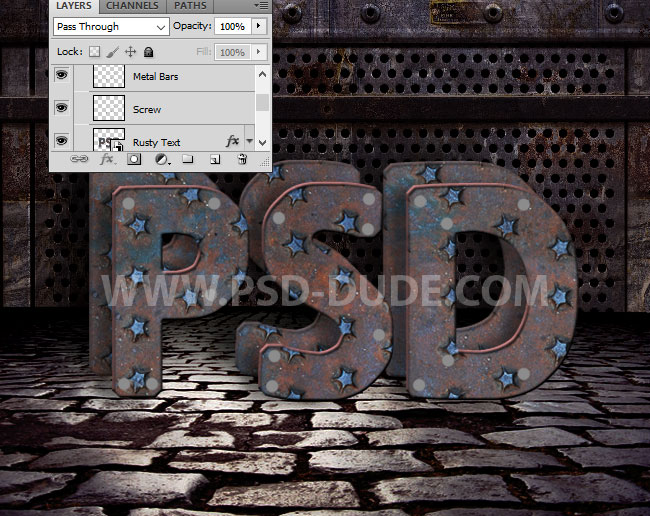
Create a new layer and use the Brush Tool and a hard round brush, color #8c8c8c and size 11px to add some dots. Call this layer Screws. Duplicate this layer and call it Metal Bars.
Download the 3D Photoshop Action Generator
Download this 3D Photoshop Action Generator and load the ATN file in Photoshop.
How to Use the 3D Photoshop Action
Right click on the Metal Bars layer and choose Conver to Smart Object. Double click on the Smart Object Thmbnail to open it.
Go to Window > Actions to open the actions panel. Click on the action that we loaded and choose Play.
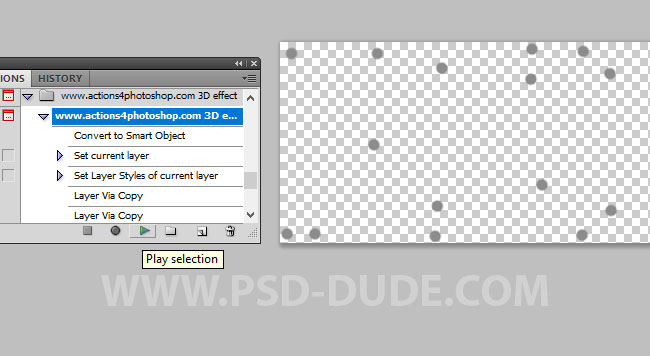
When the action stops go to Image > Reveal All.
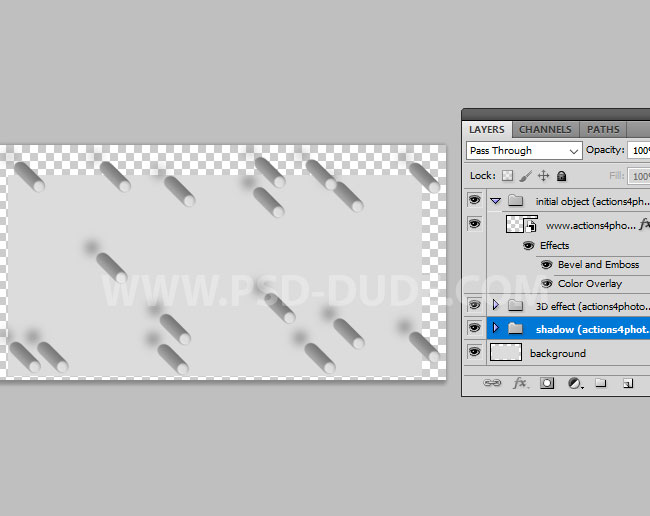
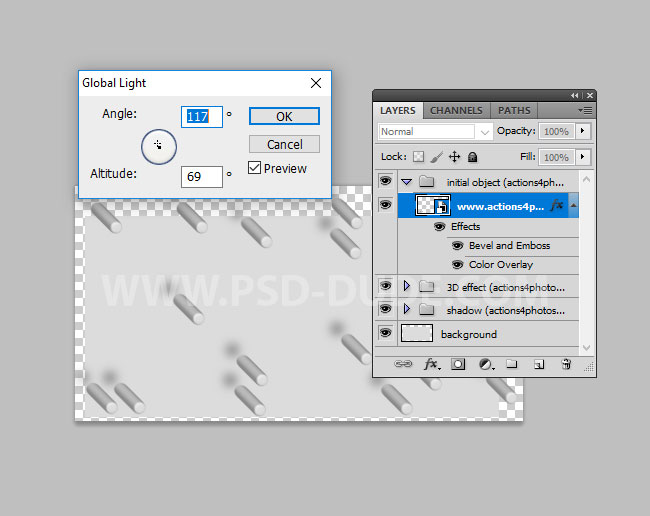
Click on the first layer and go to Layer > Layer Style > Global Light and make these settings.
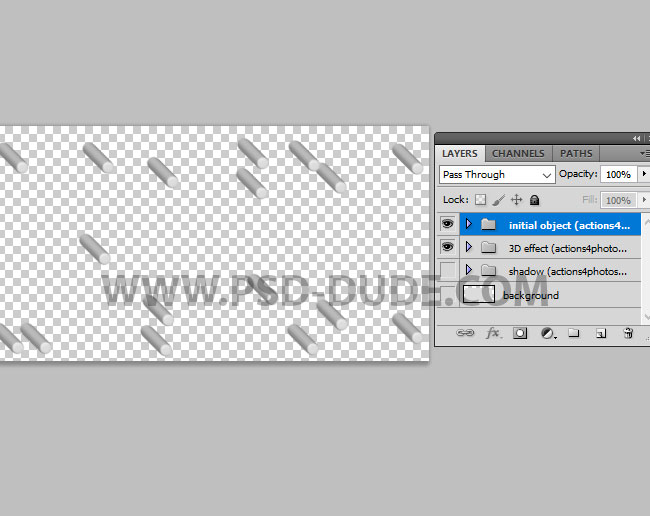
Hide the Background layer and the Shadow group. Save and close the smart object to return to the mai PSD file.
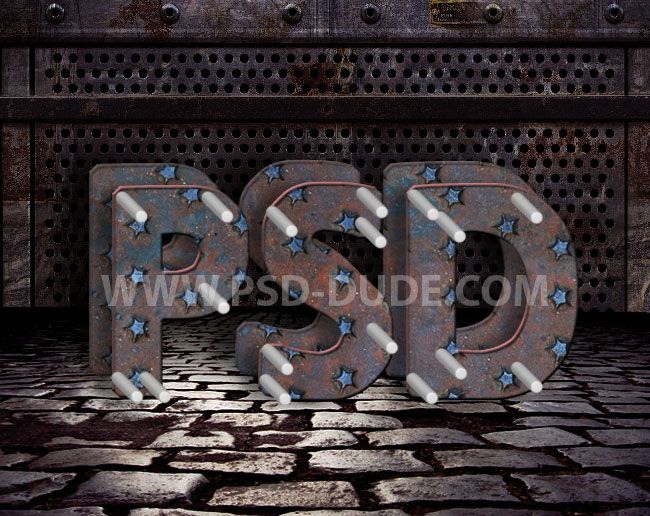
Add this Grunge Rusty Metal Texture in a new layer above the Metal Bars smart object. Right click and choose Create Clipping Mask and set the blend mode to Color Burn.
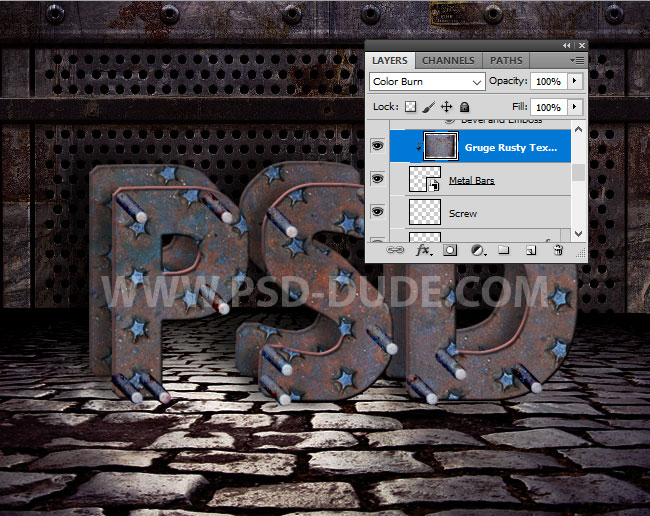
Select the Metal Bars and the Gruge Rusty Texture and move them right above the Rusty Text Back layer. Also move them to change the position on the canvas.
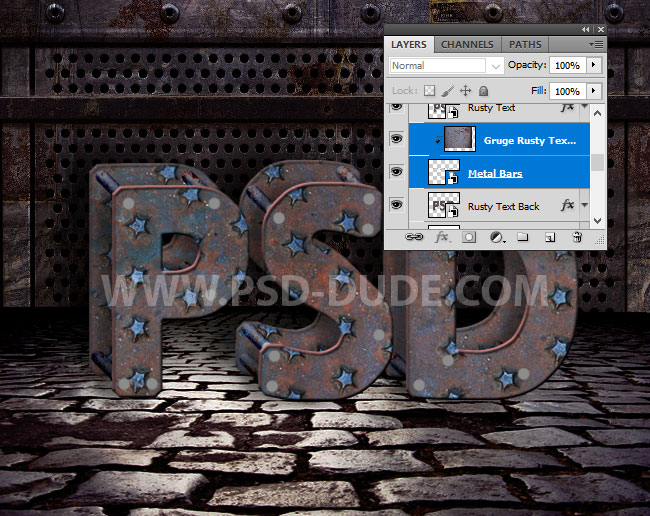
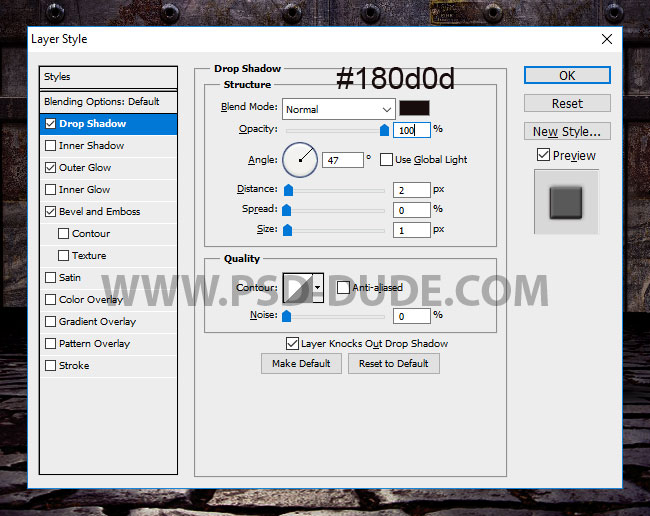
To create an emboss effect, add this layer style to the Screw layer.
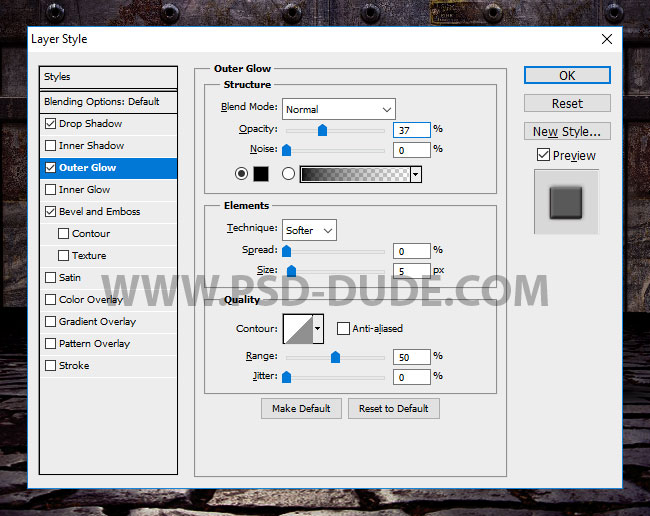
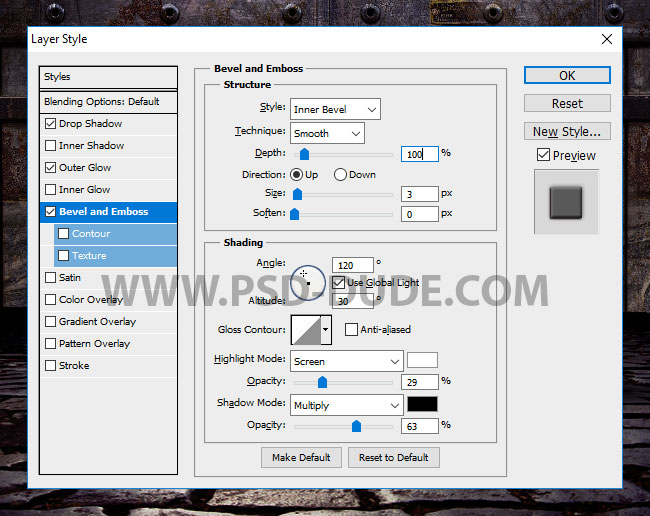
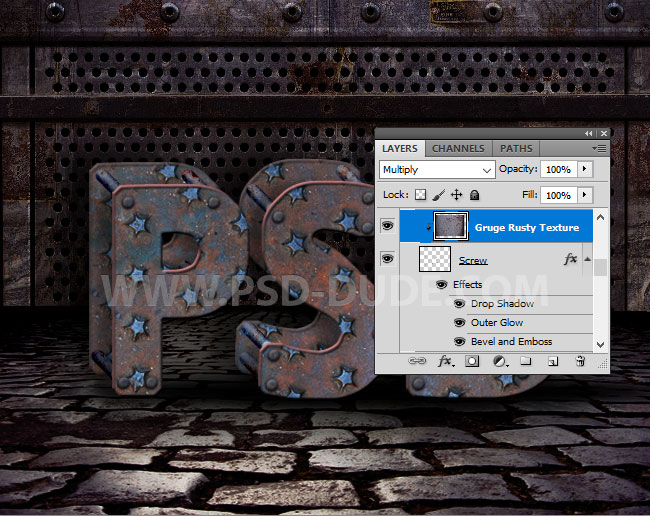
Add again the Grunge Rusty Metal Texture in a new layer above the Screw layer. Right click and choose Create Clipping Mask and set the blend mode to Multiply.
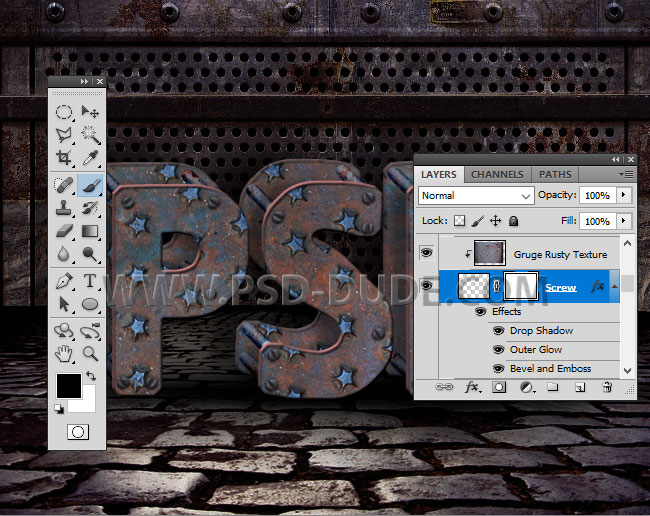
Add a layer mask to the Screw layer and use the Brush Tool, color black and a hard round brush, size 3px to create a realistic screw. Drag a line on the center of all the circles. Click and keep the Shift key pressed to draw a straight line.
Create Rays of Light in Photoshop
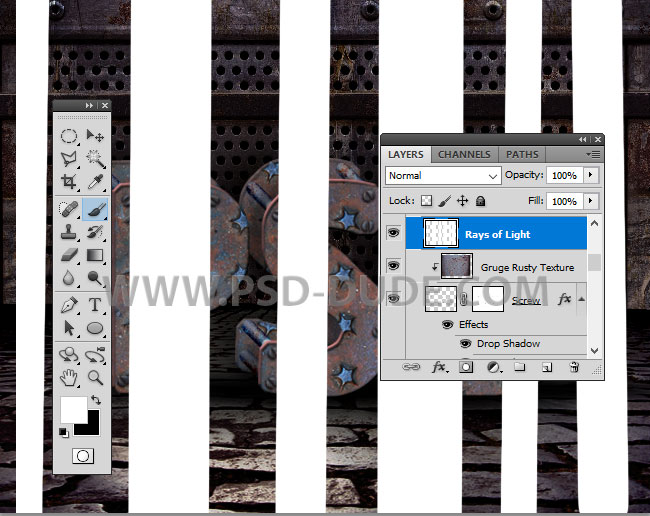
Create a new layer and call it Rays of Light. Use the Brush Tool, color white and a hard round brush, different sizes to create vertical lines. Click and keep the Shift key pressed to draw a straight line.
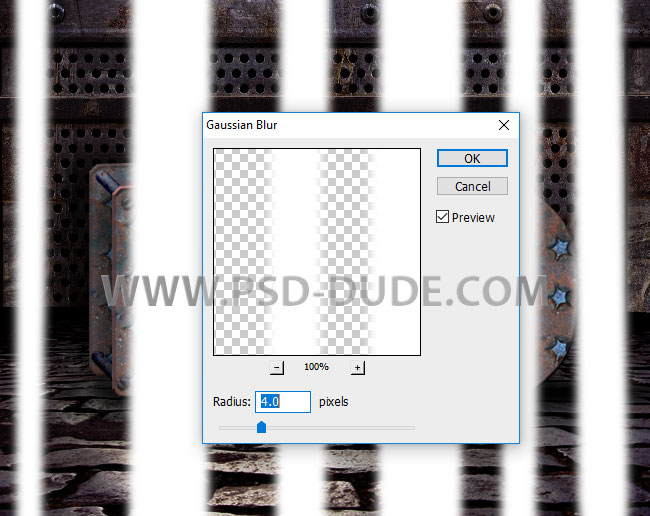
Go to Filter > Blur > Gaussian Blur.
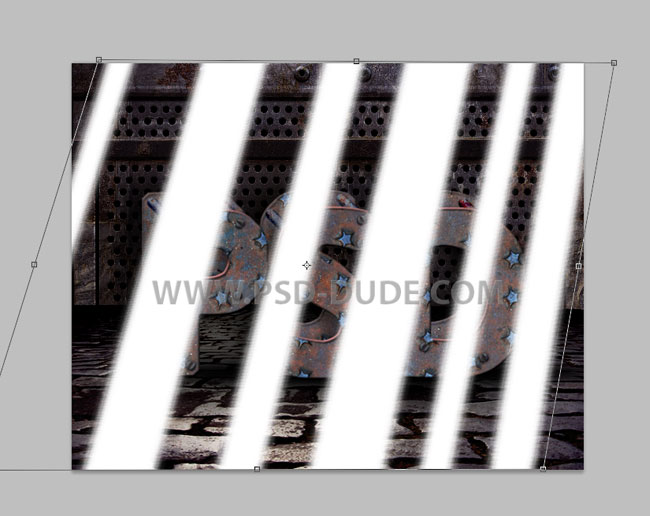
Go to Edit > Transform > Skew and distort the lines like shown in the preview.
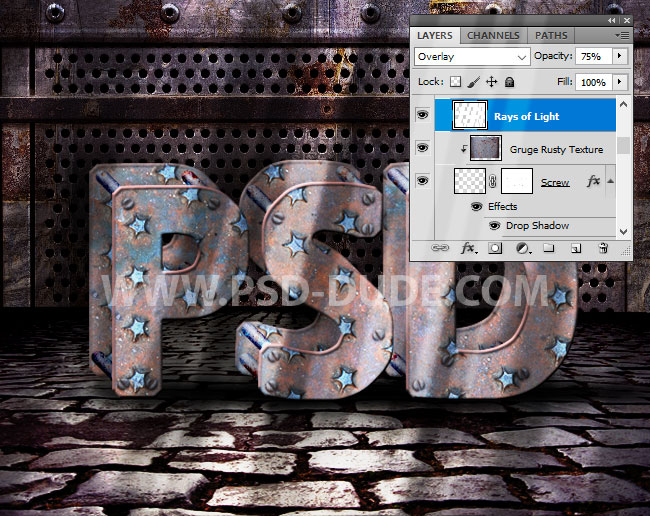
Set the blend mode to Overlay opacity around 75% or more. You can add more than one layer to create realistic rays of light.
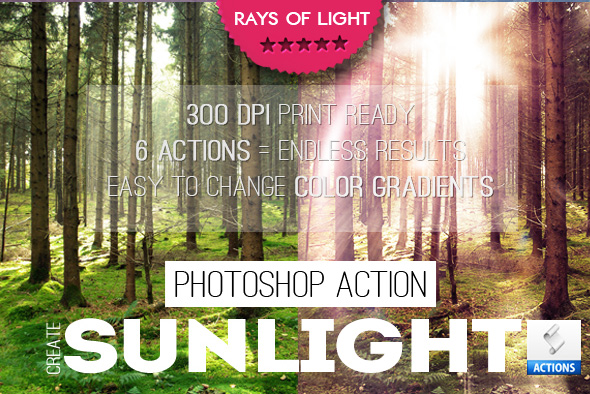
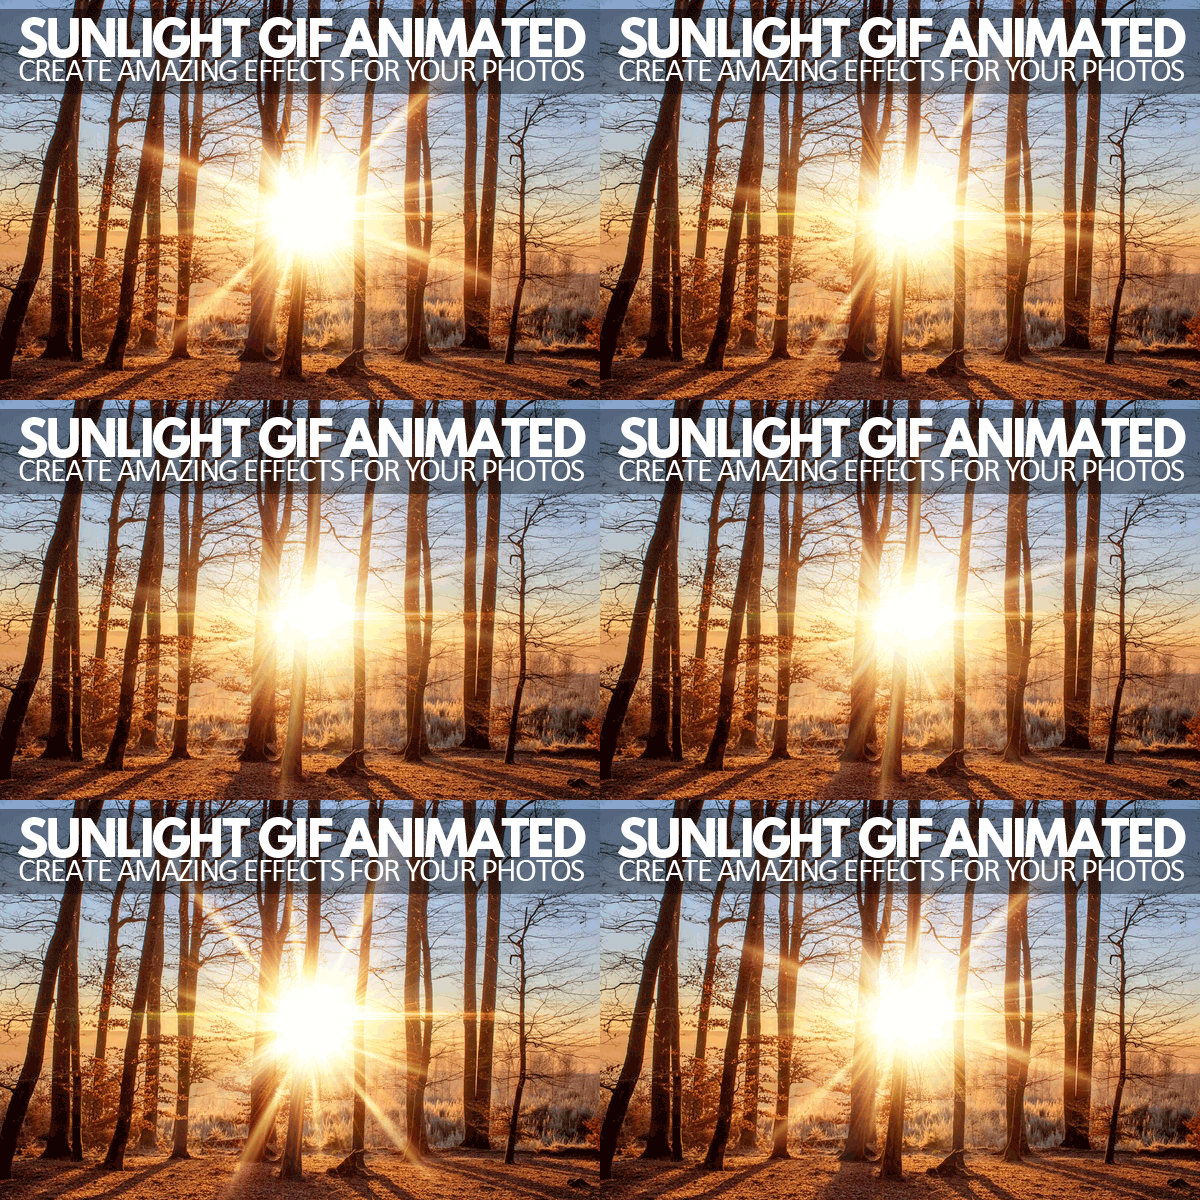
If you want to create rays of light for your images or sunlight effect in Photoshop you can use these 1-click Photoshop actions. You can even create realistic animated sunlight GIFs in Photoshop using your pictures.
Rays of Light Photoshop Action
Animated Sunlight Photoshop Premium Action
Sharpen Images with High Pass Photoshop Filter
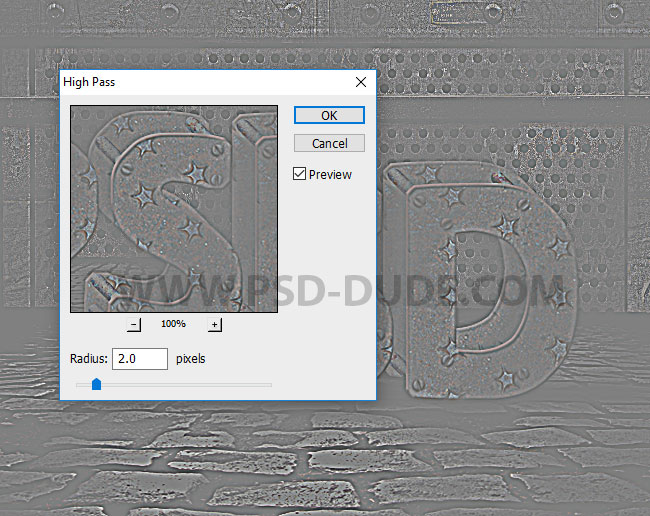
Press Shift-Control-Alt-E to make a copy of all the layers. Go to Filter > Other > High Pass. Set the blend mode of this layer to Soft Light.
Congratulations, You Made It!
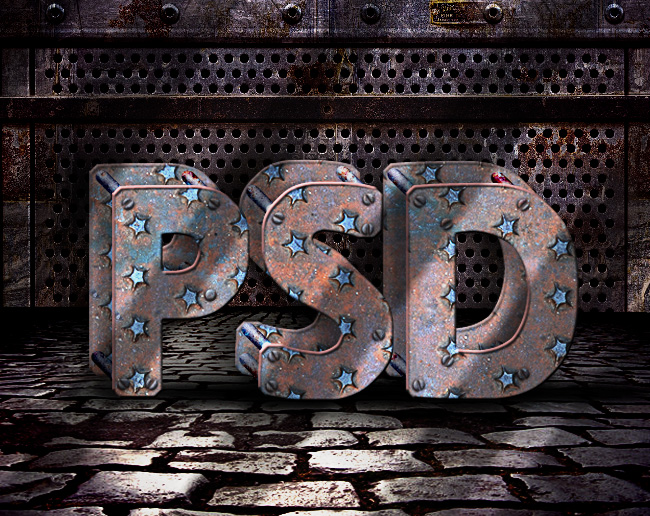
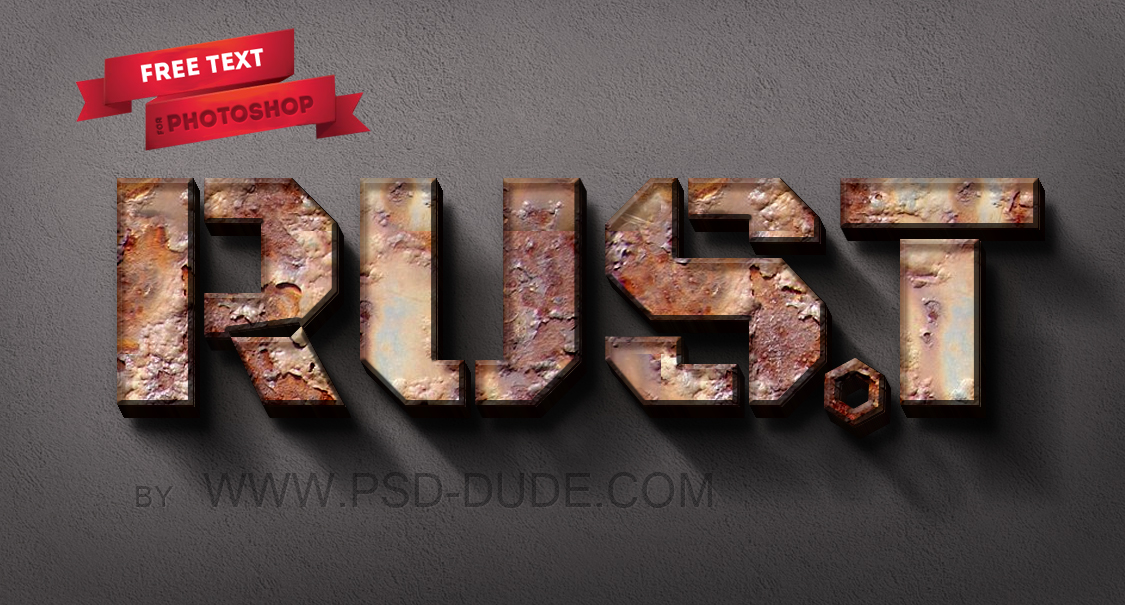
So here is the final result for the grunge rusty metal text made in Photoshop using textures.

Check out this other rusty metal Photoshop tutorial
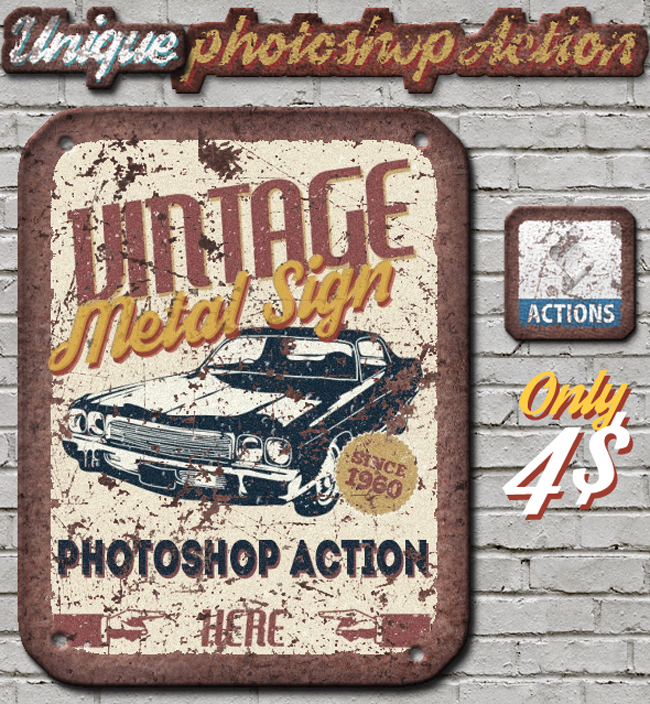
Vintage Metal Sign Photoshop Action - Premium Download


1 comment(s) for "Make a Grunge Rusty Metal Text in Adobe Photoshop"