In this tutorial I will show you how to create a dark fantasy Photoshop manipulation; we'll be uing stock images with some basic blending techniques . This tutorial can be practiced even by Photoshop beginners as it has lots of detailed steps and references to other basic tutorials.
First you have to downloaad all the stock images: dark background, wallpaper, water watch, sofa(I have received the permission to use this photo in my tutorial), girl, lily, lily, lace curtains, rays of light brushes, sparkle brushes, crack brushes, brambles, brambles,
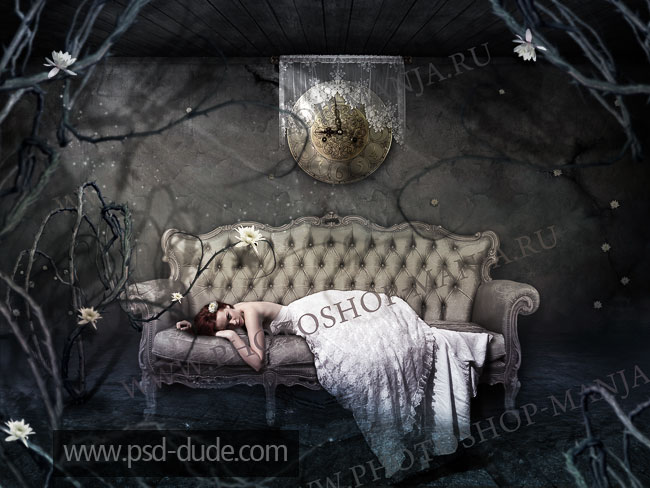
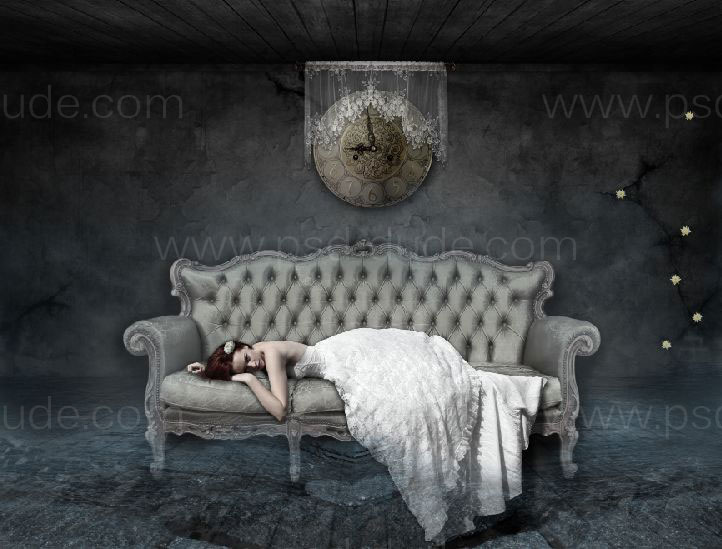
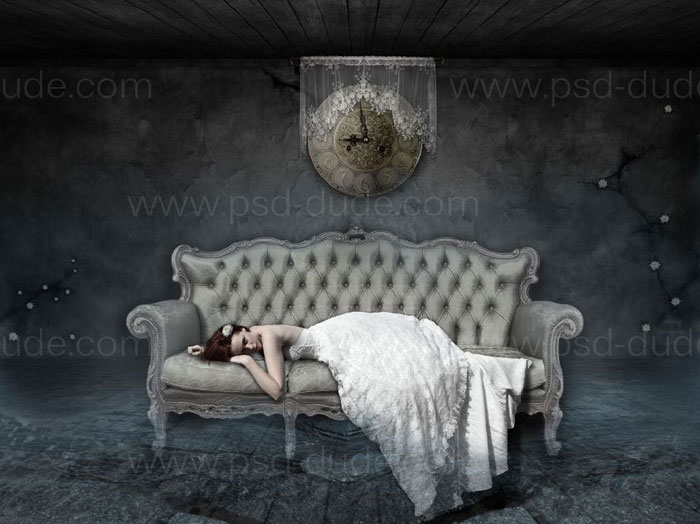
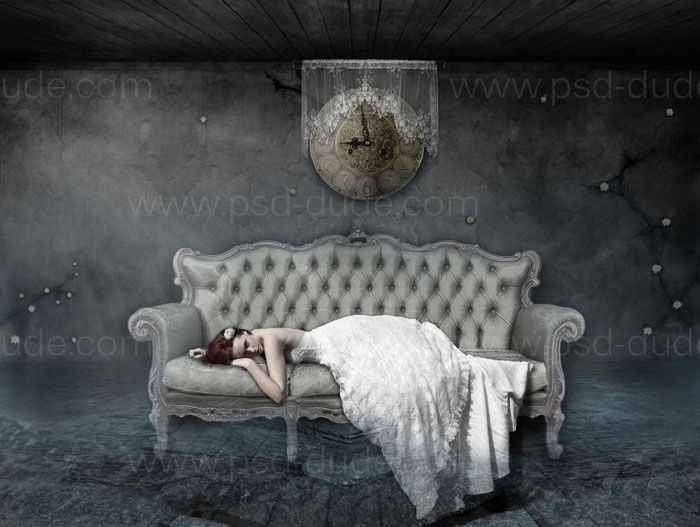
Let's take a quick look at the final result of this fantasy photo manipulation; as you can see the most important aspect is the color/saturation/brightness adustments to obtain a good result.
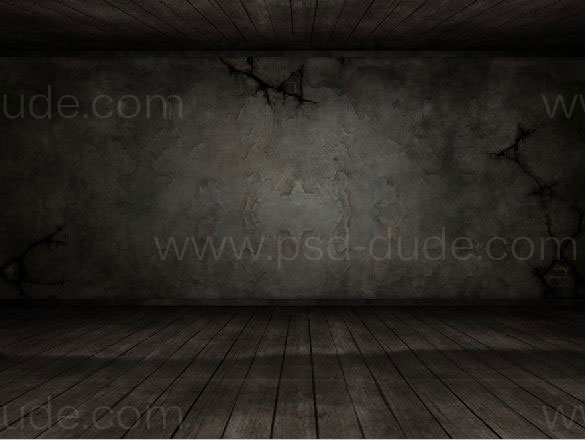
The image that we will create is big, but you can choose a smaller size. So, create a new document 7087х5315 pixels with resolution to 300 pixels (File – New). Now open the image of the dark background, select it (Ctrl + A), copy (Ctrl + C), go to the new document and paste (Ctrl + V):
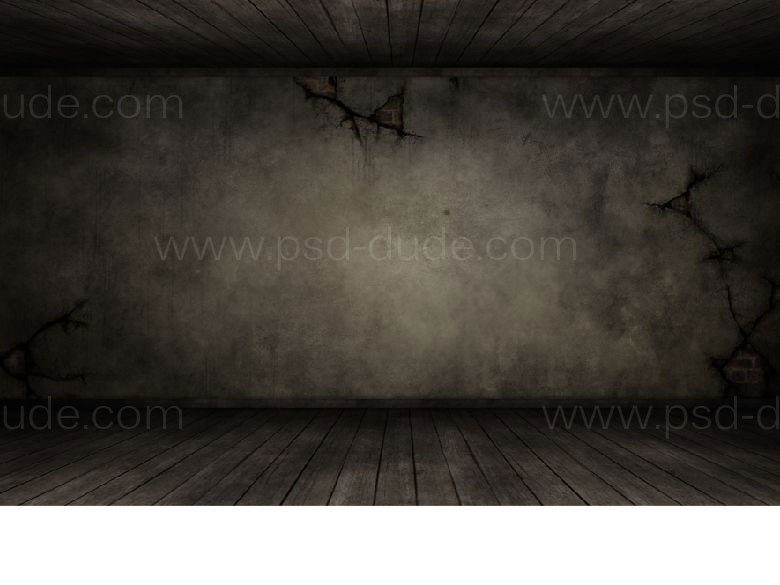
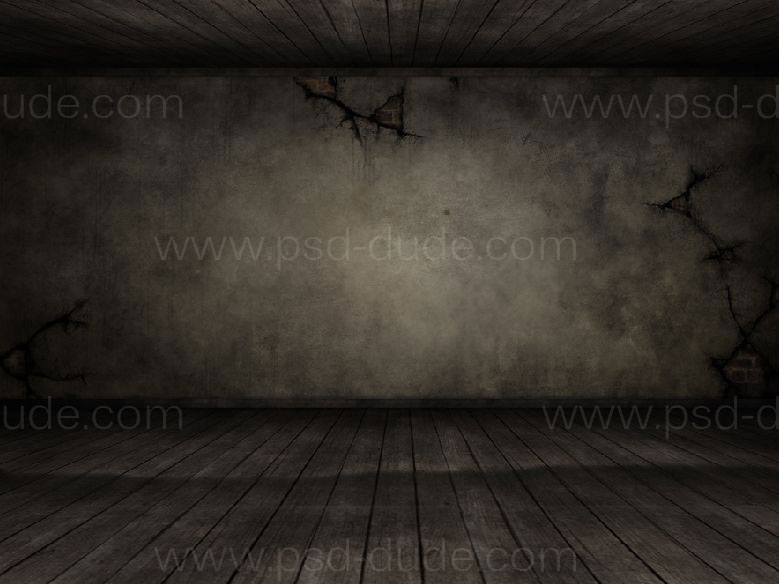
Dark background are smaller than the document. Propose to increase the area of the wooden floor. Select the Rectangular Marquee Tool (M), select a part of the floor and copy it to a new layer (Ctrl + J). Slightly increase the floor layer, add the Layer Mask and soft brush with black color to erase the top to combine it with a basic background.
On the wall add torn wallpaper. Open the wallpaper and move it to the main document. Increase layer of the wallpaper (Ctrl + T), copy (Ctrl + J) flip it horizontally (Edit - Transform - Flip Horizontal), then move it to the right. Again, copy the layer of wallpaper and flip it horizontally. Place all the layers of the wallpaper like the screenshot below:
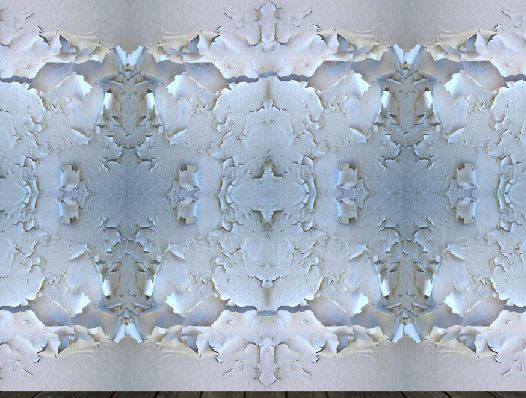
Merge layers of the wallpaper (Ctrl + E) add to the Layer Mask and a soft black brush erase the bottom of the wallpaper. Change the Blending Mode to Multiply and lower the opacity to 63%.
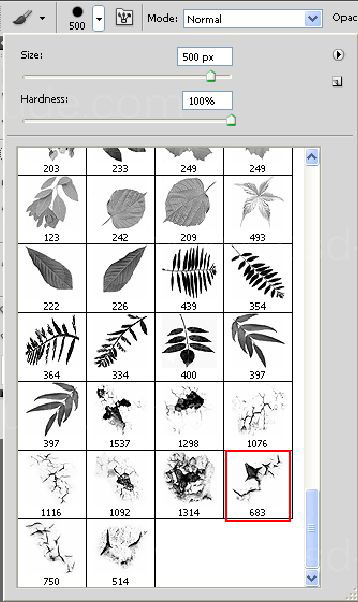
Set the brush Crack select the color # 1e2529 and click brush with number 683 once in the bottom part of the wall:
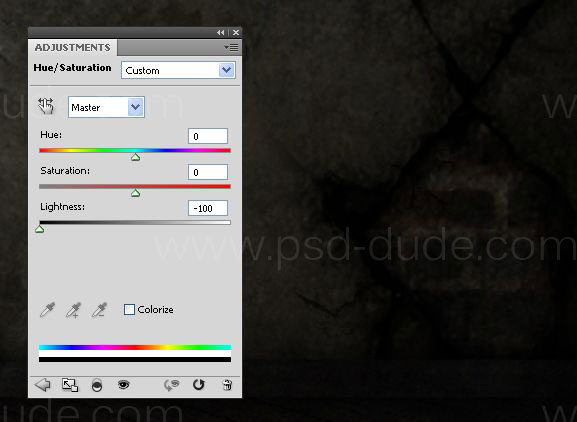
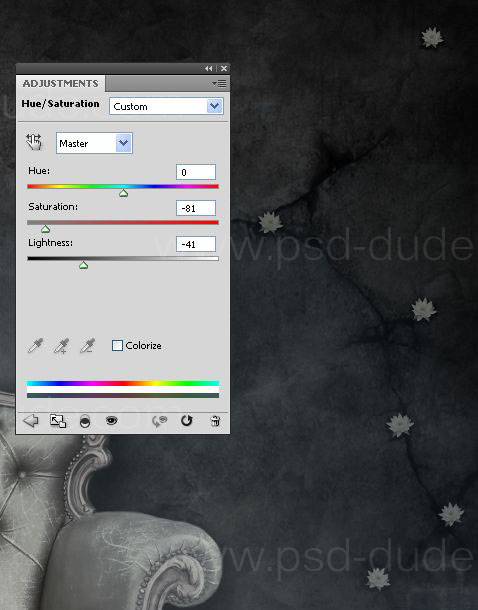
Reduce the brightness to the maximum, adding the adjustment layer Hue/Saturation with a Clipping Mask:
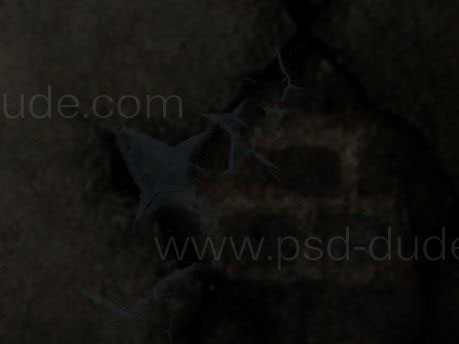
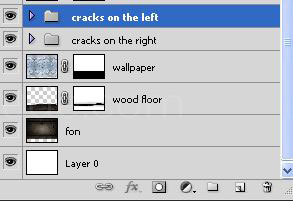
Layers with cracks on the right side of the wall place in a group (Ctrl + G) and name it "Cracks on the right side of the wall". In the same way add crack on the left side of the wall, with a group called "Cracks in the left side of the wall", only this time use a brush with the number 1092.
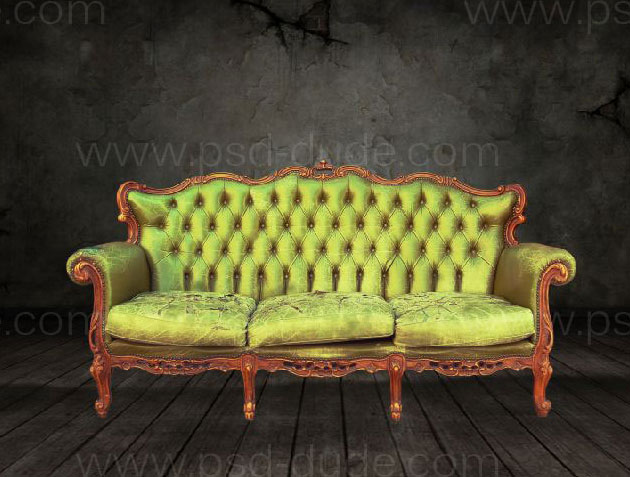
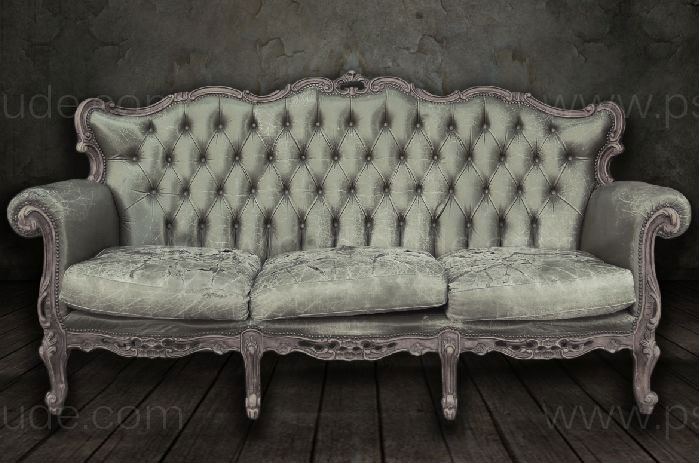
In the center of the room add a sofa. Open the image Sofa, Quick Mask (Q) select sofa, exit Quick Mask (Q) and inverse the selection (Select - Inverse). Move the sofa in the main document. Layer with a sofa place to the center of the room.
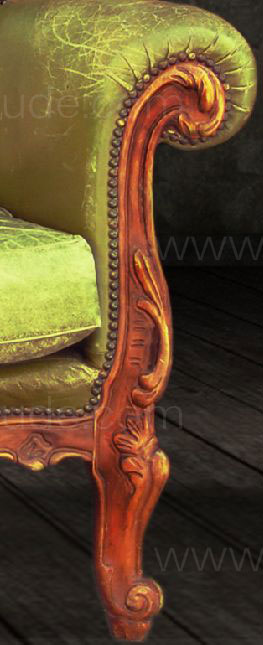
Above the layer with a sofa create a new layer (Shift + Ctrl + N) in the Blend Mode Overlay with gray 50% and apply a Clipping Mask. Name this layer "Darken" and the Burn Tool to darken the wood areas of the sofa. Use Range Midtones and Exposure 11%:

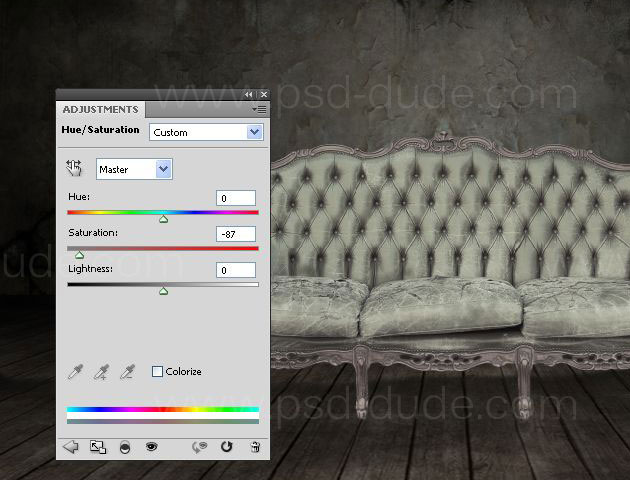
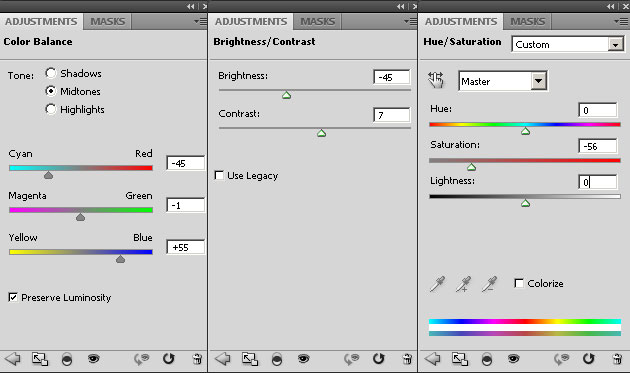
Over a layer of "Darken" add adjustment layer Hue/Saturation and reduce the saturation of the layer with a sofa. He must fit the color tone in the room.
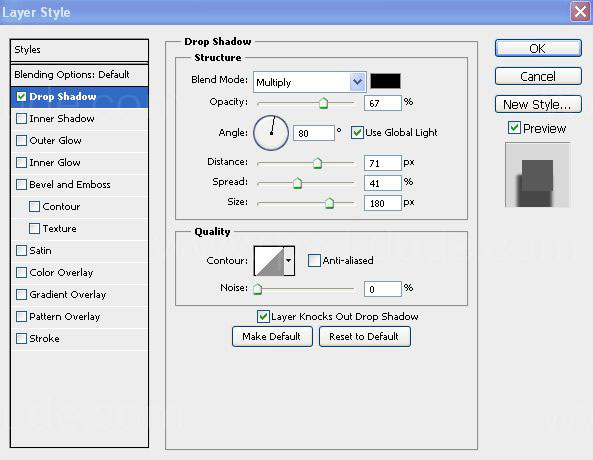
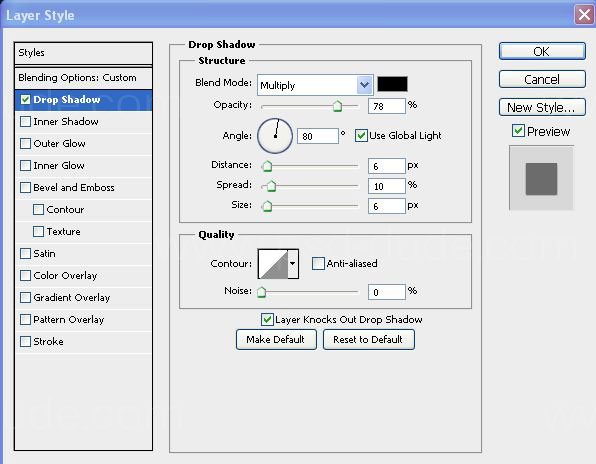
To create a feeling as if the sofa is on the floor, to layer with it, add a layer style Drop Shadow:
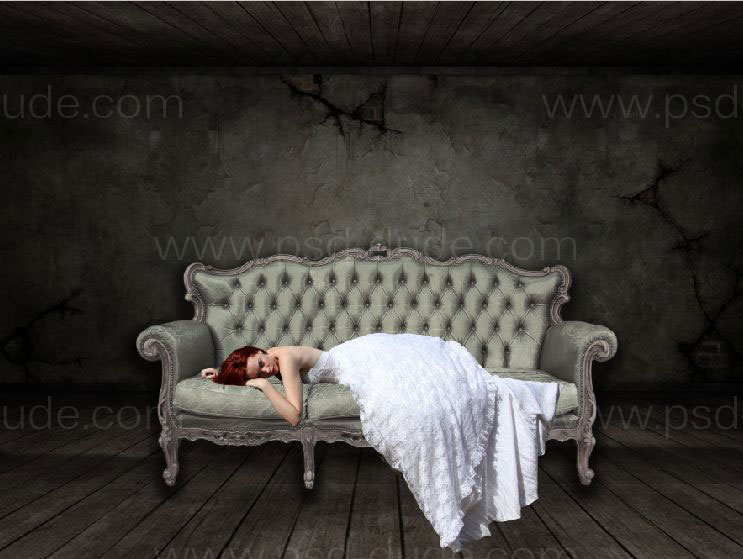
It is time to put a girl on the sofa. Select it with the Quick Mask (Q) and move into the main image. Put the girl on the sofa.
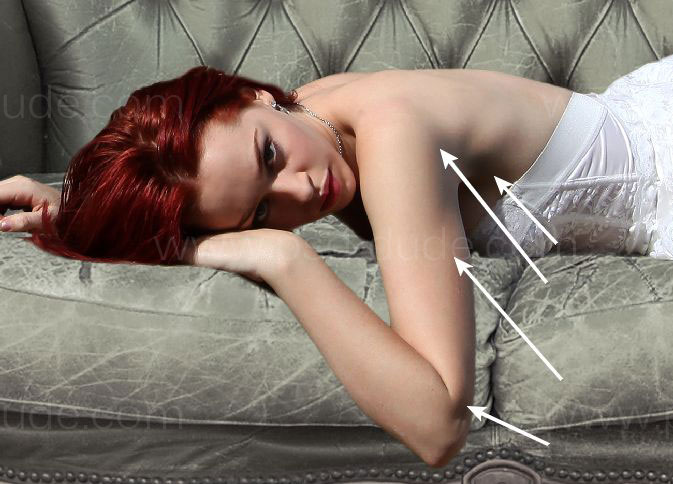
Create a new layer with fill 50% gray, add the Clipping Mask and burn those parts of the skin, to which the shadow, to make them more expressive:
Under the girl's layer add a shadow. Hold Ctrl, click the layer thumbnail to the girl, to make a selection around it, create a new layer below it and fill it with black.
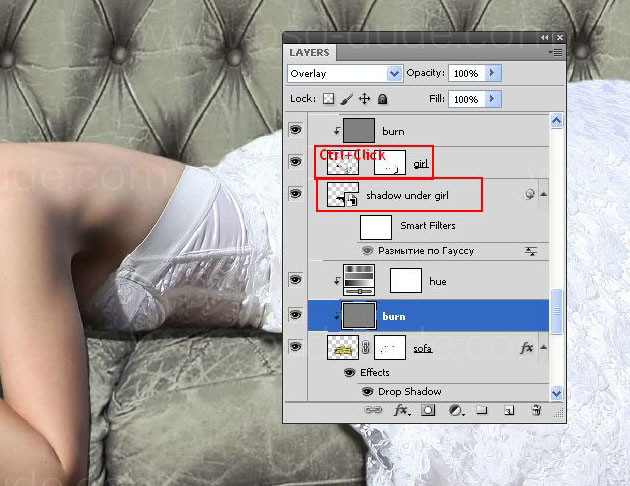
Convert the shadow layer under the girl to a smart object by clicking the right mouse button and selecting Convert to Smart Object. After converting the layer to a smart object, you will see a special icon:

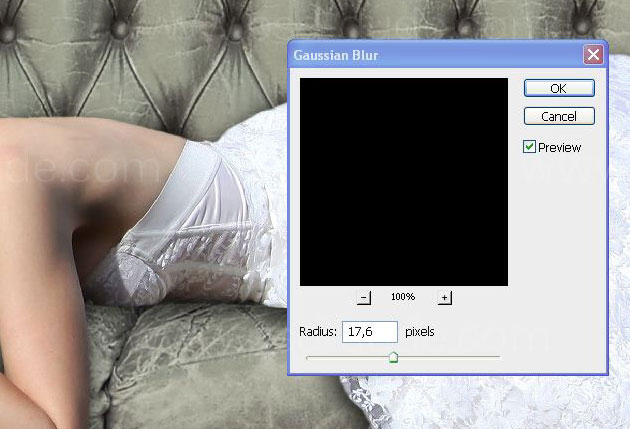
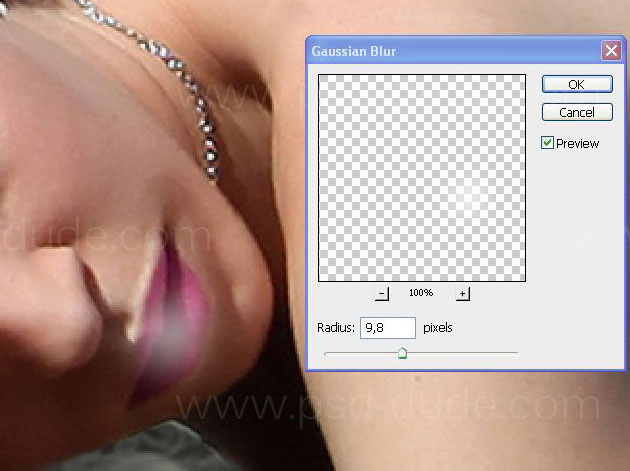
Now this layer apply smart filter Gaussian blur to make the shadow fluffy and light:
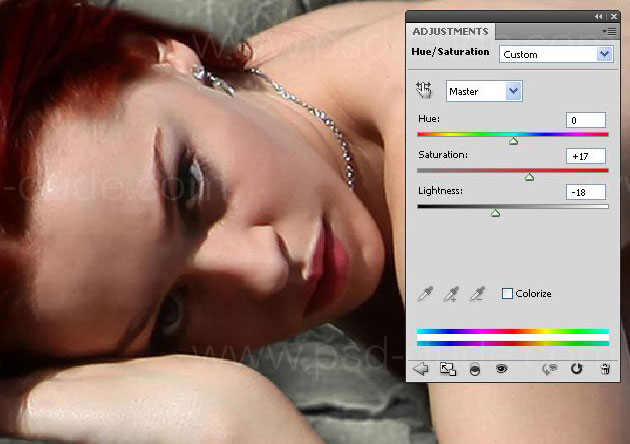
The girl has very bright red hair. I want to slightly reduce their intensity. Select the layer with the girl, selected hair Quick Mask, invert the selection and above the layer with burn add adjustment layer Hue/Saturation with a Clipping Mask.
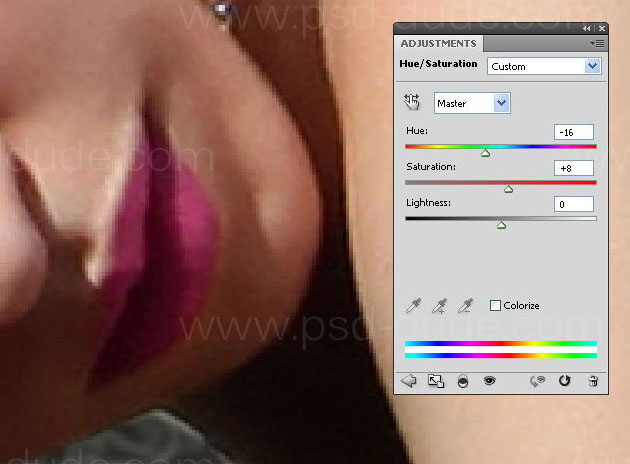
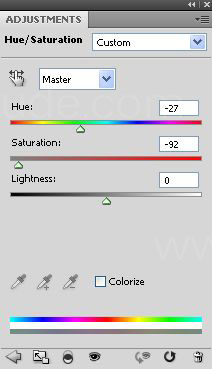
Also, change the color of the lips girl: select lips with Quick Mask (Q), invert the selection and above the layer of Hue/Saturation, which corrected the hair, add another adjustment layer Hue/Saturation with a Clipping Mask. Set the following values:
On the lips add light shine: create a new layer above the adjustment layer with which change color lips and paint white brush over the top and bottom lip. Convert this layer to a smart-object and apply a smart-filter Gaussian Blur. Then, lower the opacity of the glow to 6%.
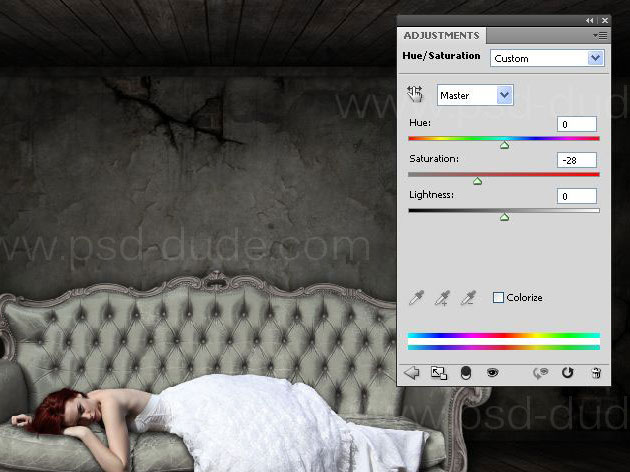
The girl looks too bright. Reduce the saturation of the layer with it. Above the layer with the shine on the lips add adjustment layer Hue/Saturation without Clipping Mask and reduce the saturation:
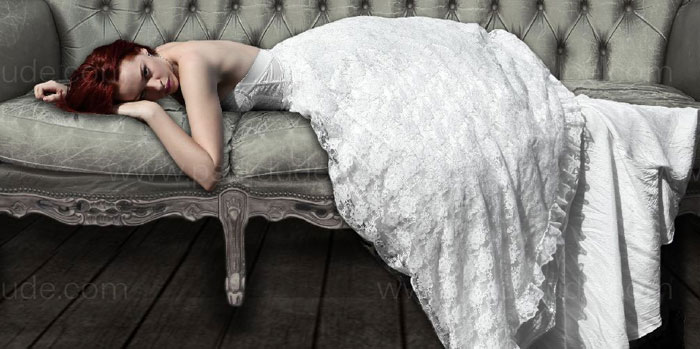
Dress the girl looks very white - we give him a light cream color. Select the layer with the girl Quick Mask (Q) paint a dress, invert the selection and copy the dress on a new layer (Ctrl + J). Over a layer of dress create a new layer with fill 50% gray, Blending Mode Overlay and a Clipping Mask and a soft brush Range Midtones with a small Exposure, paint the dress to darken it.
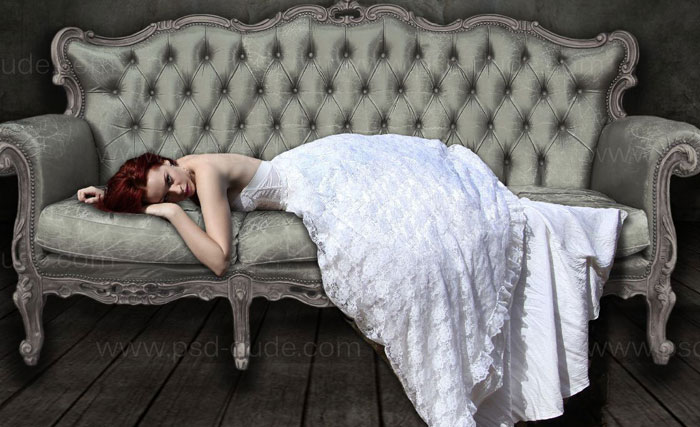
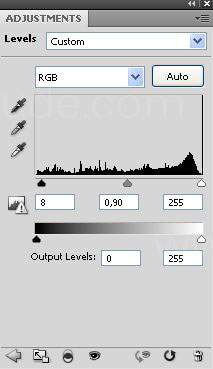
Above the layer with burn dress add two adjustment layers: Hue/Saturation and Levels to give it a creamy tone:
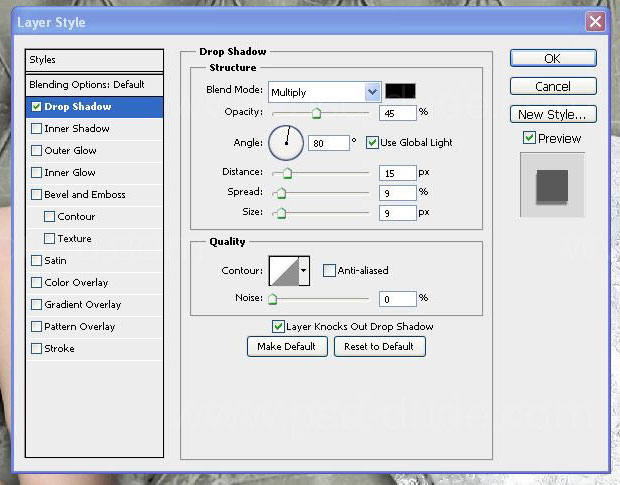
Open the picture Lily 1, separate from the background and put it on the girl's hair. To add a layer with a lily layer style Drop Shadow:
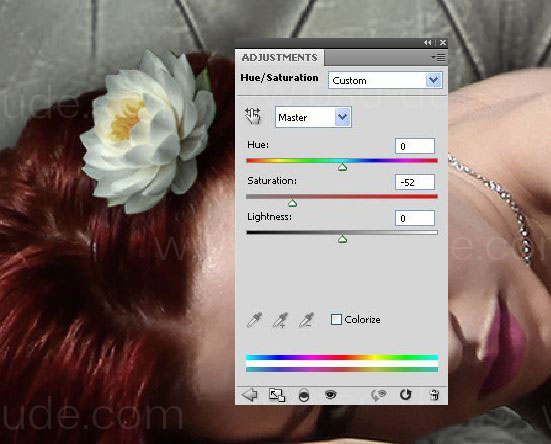
Reduce the saturation of lilies, adding a layer above girl adjustment layer Hue/Saturation with a Clipping Mask:
All layers are added in this step put in a group with the name "Woman". The wood floor add water, through which will show through the stones. Open the image with Stones and move them to the main document. Duplicate the layer with stones twice, add to each of them a Layer Mask and with a soft black brush erase the background, leaving only the stone. Place a layer of stones around the sofa and lower the opacity of each of them to 38 to 42%:
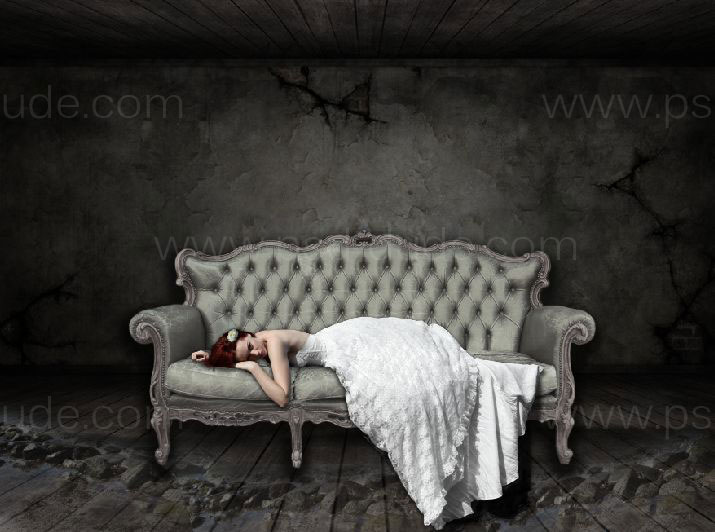
All the layers of stones put in a group with the name "Stones", add adjustment layer Hue/Saturation without Clipping Masks to make images a light blue tone.
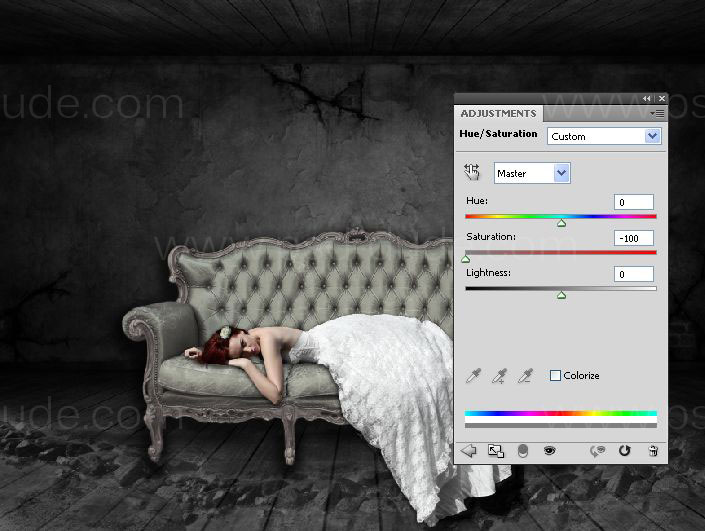
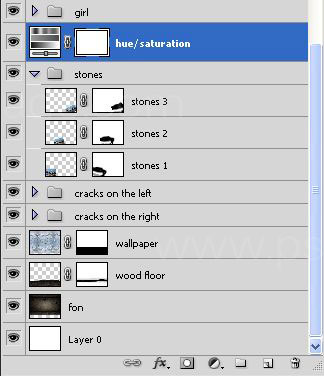
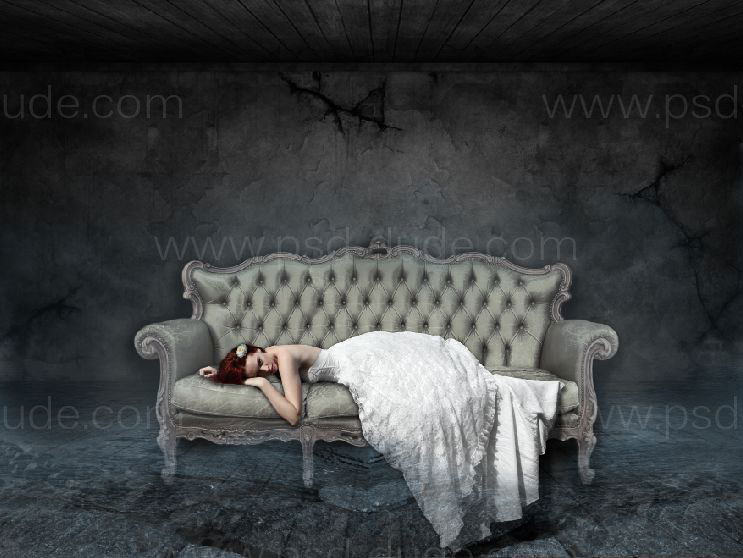
Open the image of water, bring it into the document and put it above a group of "Girl." Duplicate this layer (Ctrl + J), flip it horizontally and align these two layers so that the pattern matched stones. Change these layers places. A layer of water, which is located on the right side of the image, move a little under another layer of water and combine these two layers (select them by holding down Shift and press Ctrl + E). To this layer add a Layer Mask and a soft brush with a black color and opacity of about 50%, paint along the seam to smooth it. Then, reduce the opacity of the brush and erase the water, leaving only it’s light color and a bit of fog. Sofa and dress should be in the water:
The layer of water place in the group, which is called the "Water". Open the watch drag them to the document and a bit down the (Ctrl + T). Place the watch in the center of the wall above the sofa. Above the layer with the watch add adjustment layer Hue/Saturation with a Clipping Mask.
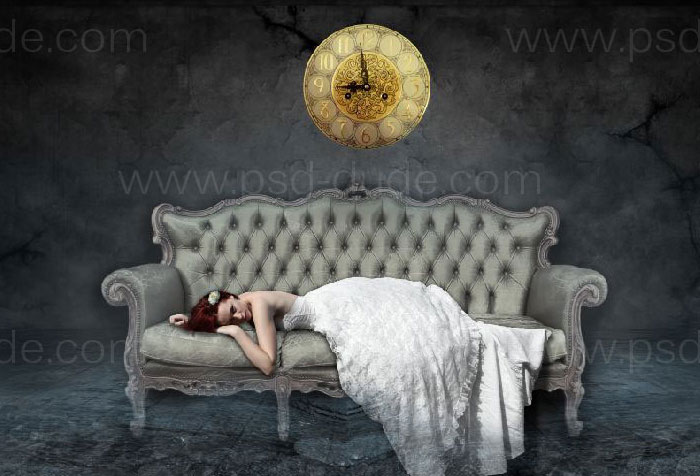
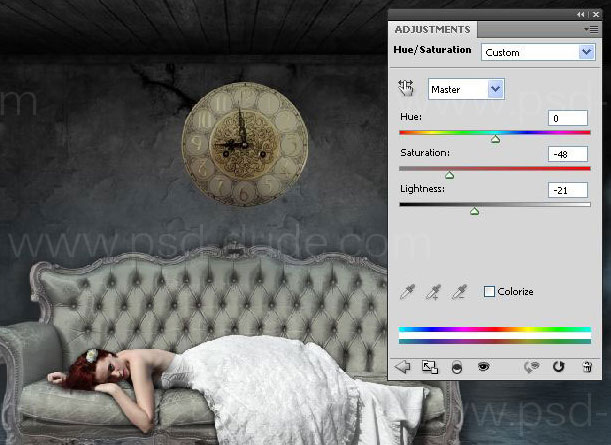
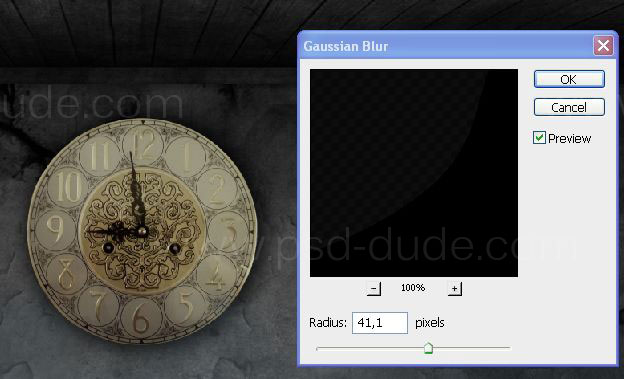
Under the layer of the watch create a new layer (Shift + Ctrl + N) and name it "Shadow under the watch". Ctrl + click the layer thumbnail to the watch to make a selection around it, go to the new layer and fill it with black. Move the shadow layer down and to the right, convert the layer "Shadow under the watch" to a smart object and apply a smart filter Gaussian Blur:
Since the light will fall on the left, you need to add to the left side of the watch a little flare, and on the right - a shadow. Above adjustment layer Hue/Saturation, which we used to watch, create a new layer and name it "Blick on the watch". Select a soft brush with a small opacity and paint the left side of the watch. Change the Blending Mode to Soft Light and reduce the Opacity of this layer to 31%. Over a layer of "Flare on the watch" create a new layer "Shadow of the watch" and a soft brush with black paint over the right side of the watch. Change the Blending Mode to Soft Light and lower the opacity to 96%:
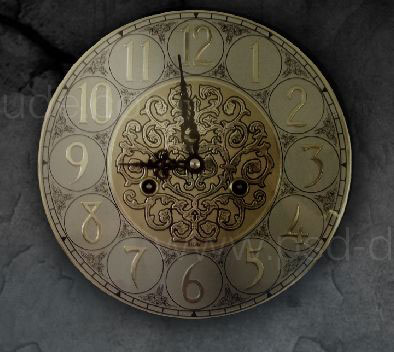
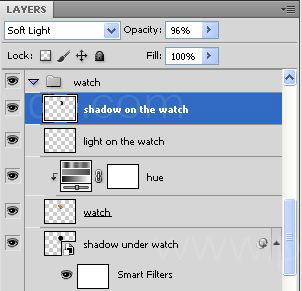
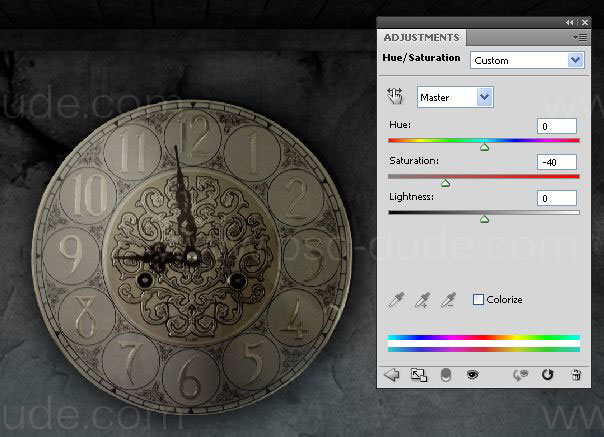
Layers of the watch, adjustment layer, shadows and highlights put into the group "Watch". Above a group of "Watch" add adjustment layer Hue/Saturation without Clipping Mask to add a dark shade of the watch:
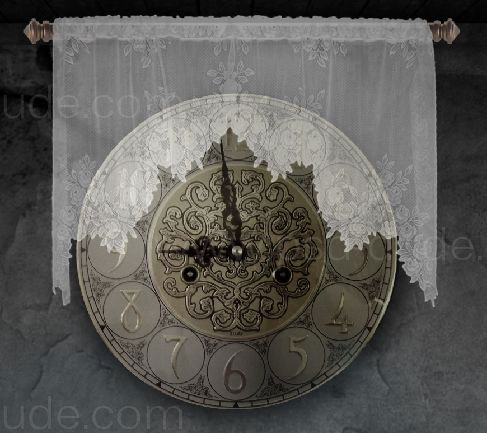
Over the watch add a white Lace Curtains. Open the curtains image, select one of them and move to the document.
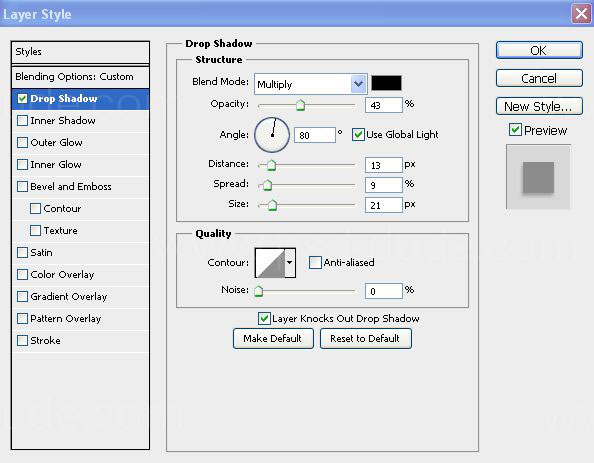
To the layer with curtains add layer style Drop Shadow:
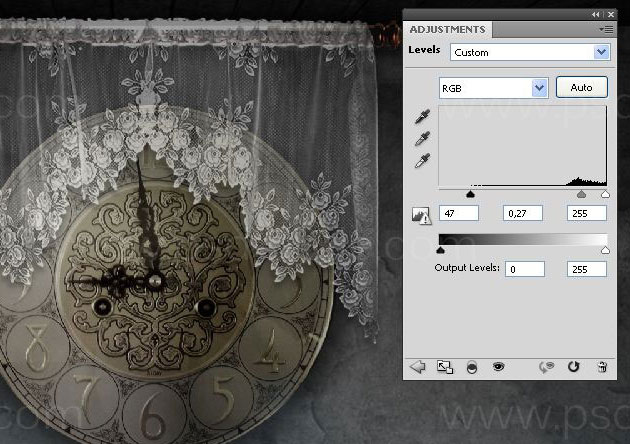
Make a curtains transparent adding a layer over it adjustment layer Levels with Clipping Mask:
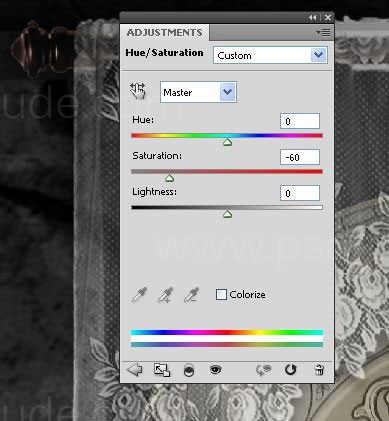
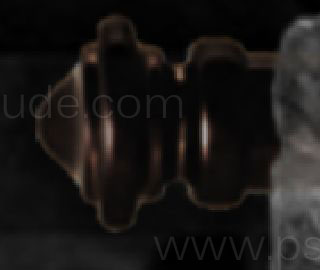
Cornice after application level was bright and distracting from the overall picture. With the Quick Mask (Q) select right and left side of the Cornice, above the Levels adjustment layer add adjustment layer Hue/Saturation with Clipping Mask and reduce the saturation:
Under a layer of curtains create a new layer (Shift + Ctrl + N) and a soft brush with black paint shade under each side the cornice. Change the Blending Mode to Multiply and lower the opacity to 33%.
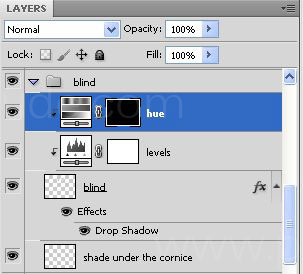
All layers are related to curtain, put a group of "Lace Curtains".
A crack on the right and left sides of the walls add lilies. Open the image Lily 2, separate it from the background and then move it to the document. Duplicate the layer with lily 5 times (Ctrl + J) and place on the crack, as shown in the screenshot:
For the first layer lily add layer style Drop Shadow, then right-click on the style in the Layers palette and select Copy Layer Style. Select the other layers with lily hold down Shift, right-click one of them and select Paste Layer Style. Reduce the opacity of each layer with a lily to 85%.
Over each layer with a lily add an adjustment layer Hue/Saturation with a Clipping Mask to reduce the saturation:
All layers with lilies and adjustment layers placed in a group with the name "Lily on the right". By the same principle add a lily on the left side of the wall and put them in a group with the name "Lily on the left". In the same way add a few lilies in the center of the wall.
Now add the light rays coming from the left side of the image. Set in Photoshop brush Rays of light, set the foreground color white and any of the brushes click once on the left side of the image. Place the brush as shown in the screenshot:
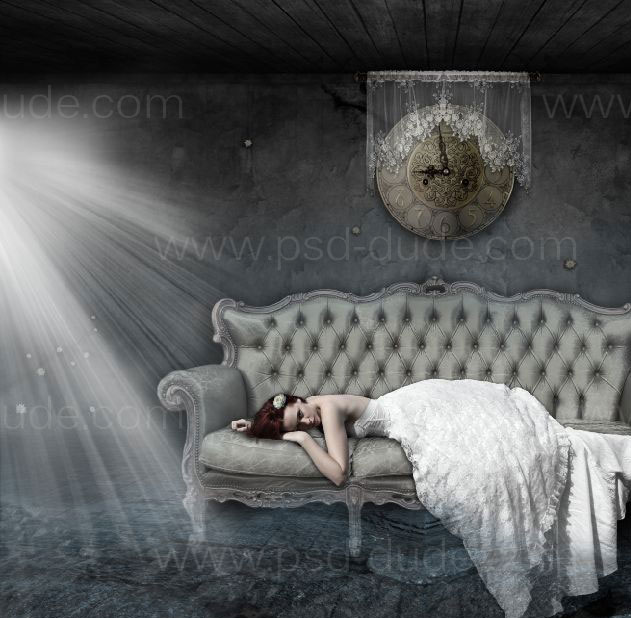
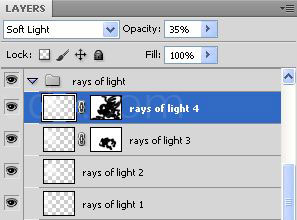
Change the Blending Mode to Soft Light and reduce the opacity to 26%. Duplicate the layer with the rays, increase it to the light of it fell on the couch and the girl, do not change the Blending Mode and reduce the opacity to 23%. Again duplicate layer with the rays - without changing the Blending Mode, increase the opacity to 79%, add a Layer Mask and erase the light that falls on the girl. Duplicate the layer again, lower the opacity to 35% and also erase unwanted light from the beam.
Layers with rays place in the group "The rays of light".
Under a group of "Rays of light" create a new layer and name it "Reflection of light" and soft brush to draw light on water:
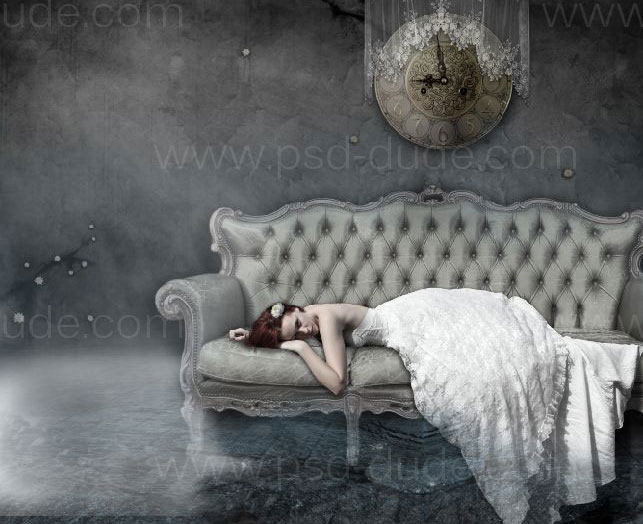
Change the Blending Mode of this layer to Soft Light and reduce the opacity to 41%. On water in the bottom of the image to add a light-blue glare. Set in Photoshop brushes Sparkle, above the layer "Reflection of light rays" create a new layer and draw a highlight on the water, near the sofa. To add this layer to the sparkle layer style Outer Glow:
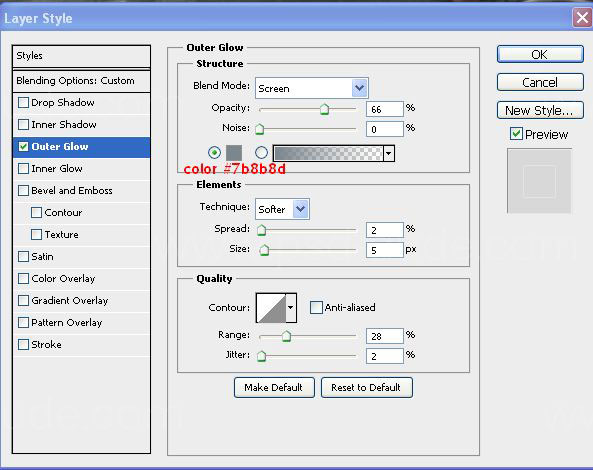
Duplicate layer with sparkle three times (Ctrl + J) and put them and the layer "Reflection of light rays" the group with the title "The reflection and sparkle".

We're almost done it remains to correct the color tone of the image. Above all layers and groups at the top of the Layers palette add a Gradient Map adjustment layer without Clipping Mask.
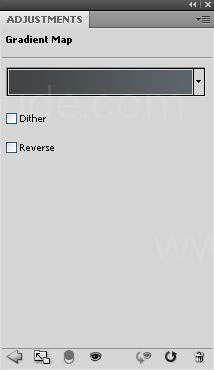
Click on the gradient bar to open the Gradient Editor and create a gradient from dark gray to light gray:
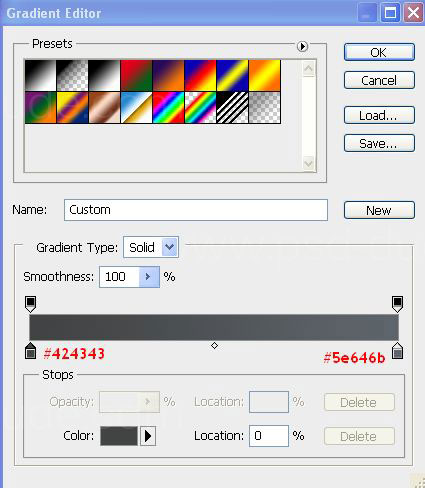
Change the Blending Mode of the adjustment layer Gradient Map to Soft Light and reduce the opacity to 59%. Soft black brush with a small opacity erase on the mask of the adjustment layer the center of the image leaving only the darkening around the edges. Use a small brush opacity. Duplicate the Gradient Map adjustment layer three times Blending Mode and opacity do not change.
i have decided to add some brambles in a creative way making a nature frame for the princess. You have to add a bramble and adjust the color, saturation, brightness, etc to match with the rest of the image.
Use a soft round brush to create a shadow underneath the bramble. Also you can add a Inner Shadow and a Gradient Overlay to add more contrast and make it more realistic. Duplicate the Bramble layer to create the shadow; learn how to cast shadow
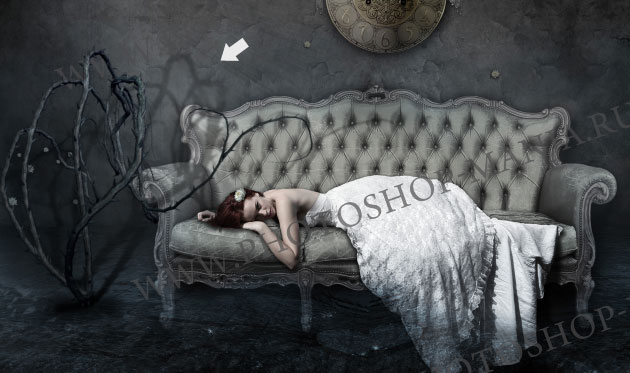
In the same way add other brambles to create a frame; use different contrast/brightness levels. And also add Gaussian Blur to some brambles to create depth of field.
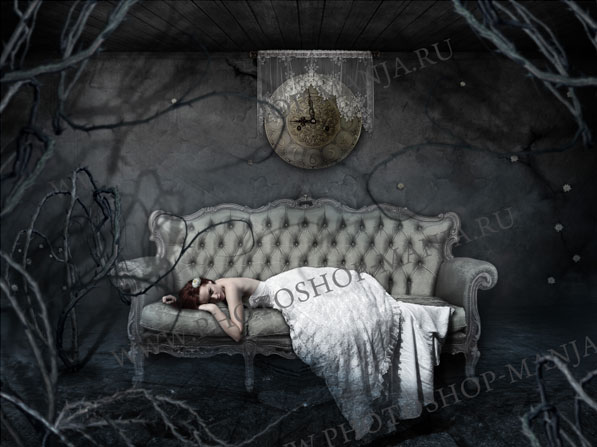
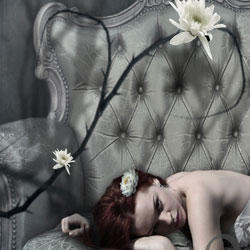
Use the lily flowers and add them to decorate the brambles like shown in the image; add shadow efect, diferent brightness levels and the same Gaussian Blur effect.
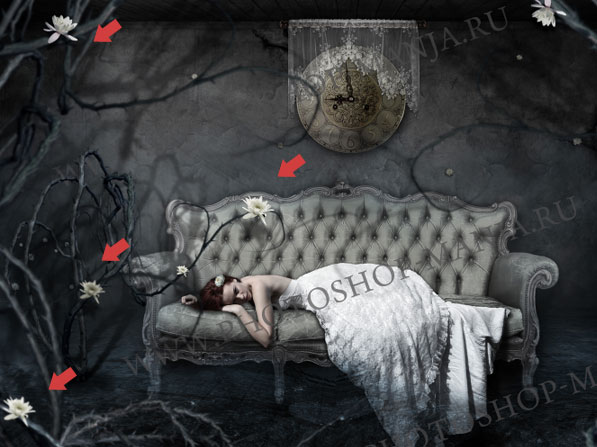
For the final touches I have added some rays of light ad also some sparkle brushes
If you want to add another color tones you can use a gradient map; so here is the final result for the lily pricess photo manipulation

About the Author

My name is Tatyana Girsh and I live in Russia. At the moment I am working as graphic designer but I also write tutorials and I have a Photoshop related website photoshop-manja.ru that you might want to visit.
13 comment(s) for "Lily Princess Fantasy Photoshop Tutorial"
Here is my realisation with you beautiful tuto, don't find the same curtain but...
Special thanks to the author - you are very clever Tanya ;)
My realization: