Quick Answer: How to Curve Text in Google Slides
To curve text in Google Slides:
- App Script method: Add a custom menu option to create more advanced curved text.
- External tool method: Create curved text in tools like MockoFun or Photoshop, then import as an image.
Choose based on your needs: App Script for integration, or external tools for more design control. Each method offers different levels of customization to enhance your presentations.
Here's step-by-step how to curve text in Google Slides using two simple methods:
Can you curve text in Google Slides?
Yes, you can! Let's find out how to curve text in Google Slides using two simple methods that are both easy & free.
The current version of Slides doesn't have a default curved text option yet. Other presentation software like PowerPoint have circle text and curved text. So, we have to find the best solutions to create this text effect.
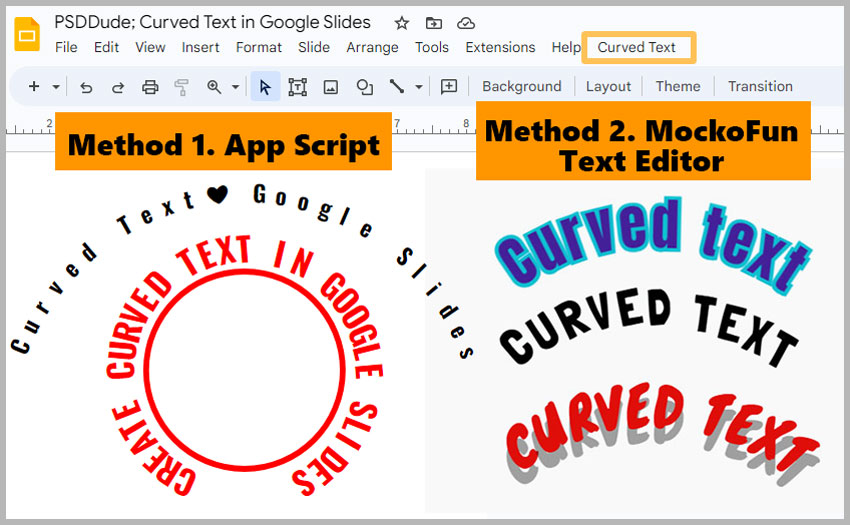
METHOD 1. Curve Text in Google Slides with App Script
In Google Slides you can use Add-ons and App Script code to add extra features within your Google Slides presentations. A good example is curved text, a feature that Google Slides does NOT have for now.
- Google Slides Add-ons are tools made by third parties not by Google itself. You can install these tools from the Google Space Marketplace.
- Google Apps Script allows you to add code for creating custom menus, dialogs, sidebars, etc.
FREE DOWNLOAD
Google Slides curved text script: DOWNLOAD!(4KB)The PSDDude team created an App Script that allows you to add curved text in Google Slides.
Step 1: Install The Google Slides Curved Text Script
- Open up a new Google Slides presentation
- Open Extensions > App Scripts in the top menu
- In the Code.gs file that gets opened copy/paste the content of the Code.gs file from this package
- Click the "+" icon next to the Files section and create a new HTML file called dlg.html
- Copy/paste the contents of dlg.html from this package to the dlg.html file you created
- Click the Save button (floppy disk icon) to save the extension


Step 2: Use The Google Slides Curved Text Script
When you return to the Google Slide you should see a new entry in the top menu Curved Text. Go to Curved Text > Add new....
Step 3: Authorize the Script
IMPORTANT: When you run an Apps Script for the first time, Google will ask you to authorize it. Authorization is the process by which you grant the script whatever access it needs to run. It's important to trust the developer when giving access otherwise your data might be at risk.
After authorization, a sidebar will appear on the right part of the screen.
Input your text and choose a curve radius then click the "Add" button to add a new curved text element. After the text is added you can still adjust the curve radius.
Step 4: Add Curved Text To Your Slide
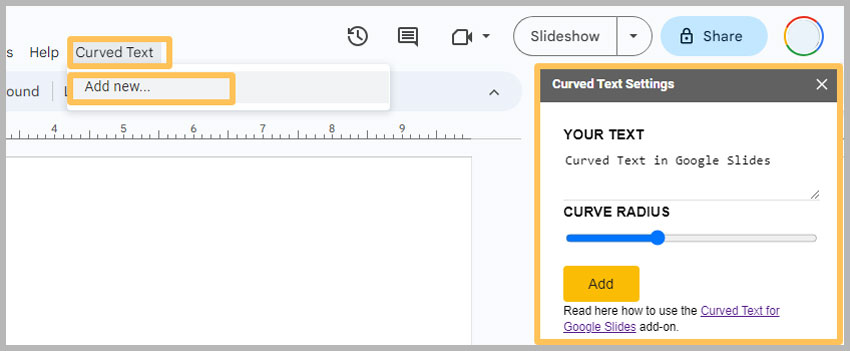
This method allows you to insert curved text in Google Slides but the downside is that it only has minimal customization. You can change the font, size, color and you can also adjust the curve path.
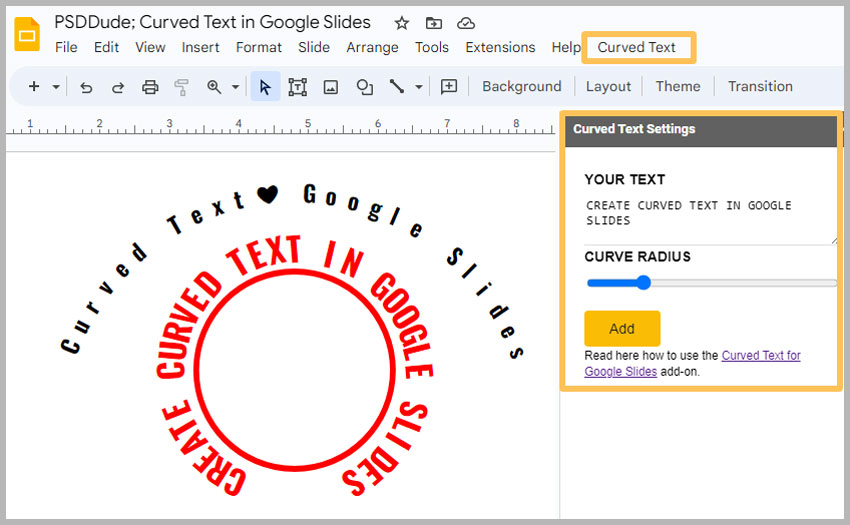
Note that if you want to have the Curved Text option in another presentation you have to copy the one that already has the script or you will have to install the script again.
The curved text box Google Slides script works pretty well but you can do so much more.
METHOD 2. Google Slides Curved Text Using MockoFUN
Use MockoFun if you want to make more creative text effects like curved text, circle text, spiral text, wavy text, etc.
You can draw a circle in Google Slides, but you can not create circle text in the default Slides version. To add really creative curved text and circle text in Google Slides use MockoFun.
To wrap text around a circle in Google Slides using MockoFun you have to follow these easy steps:
- Go to MockoFun and create a free account
- Click on the Create button to open the design tool
- Go to the Text > Curved Text menu on the left
- Choose Curved Text or Circle Text
- Double click on the text to edit it
- From the top menu you can edit the Curving > Curve Radius and the Spacing > Letter Spacing. Check out the Text on Circle tutorial to learn more tips & tricks.
- Optional, you can add Stroke (Outline Border), Drop Shadow, etc.
- Go to the Background menu and make sure it is transparent if you want to download the text as PNG file with transparency.
- You can Crop the image from the bottom right menu.
- Go to the Download menu and choose PNG from the drop-down list to download the curved text PNG.
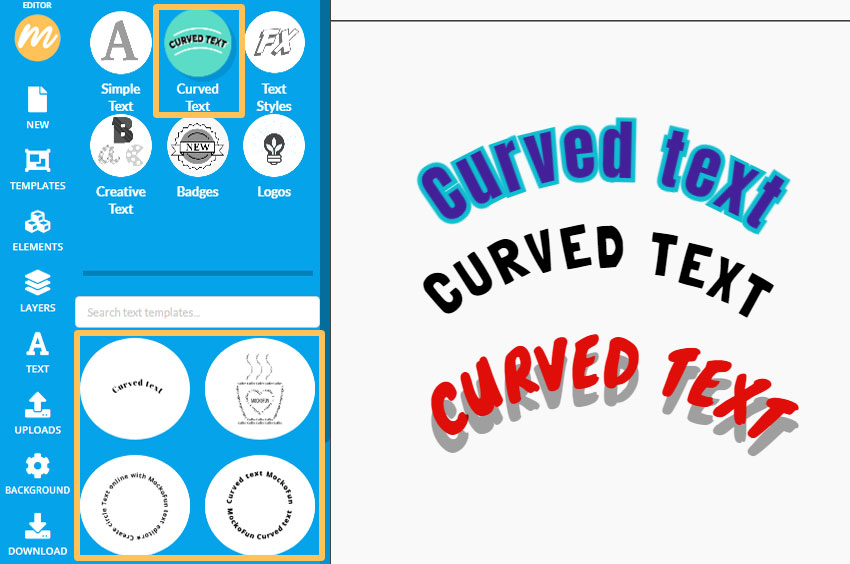
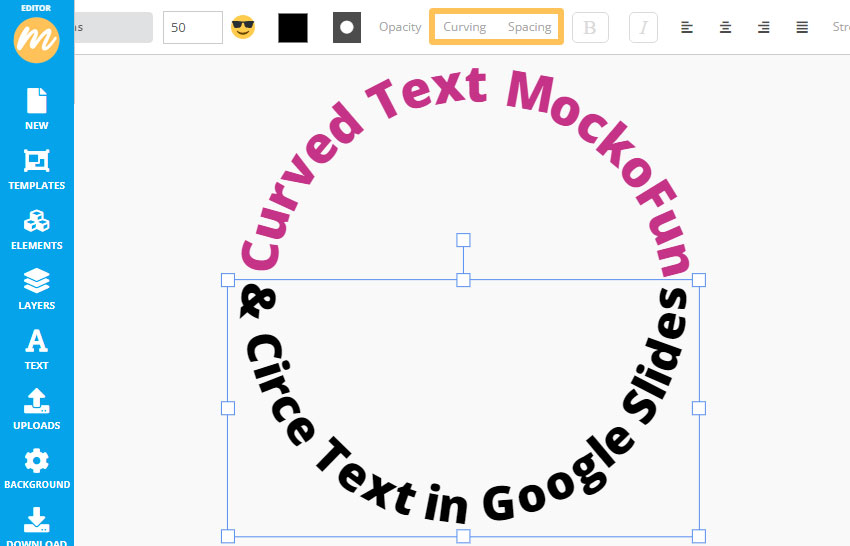
Now, it’s time to add the Google Slides circle text.
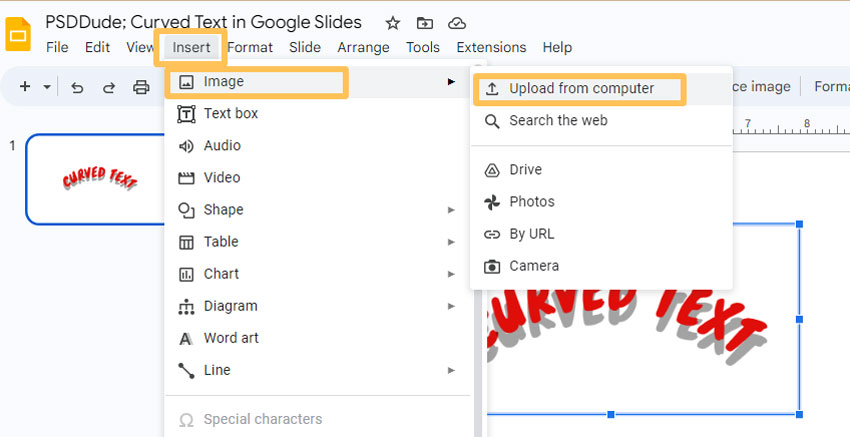
Return to Google Slides and go to Insert > Image > Upload from computer. Choose the curved text PNG image that you’ve made in MockoFun.
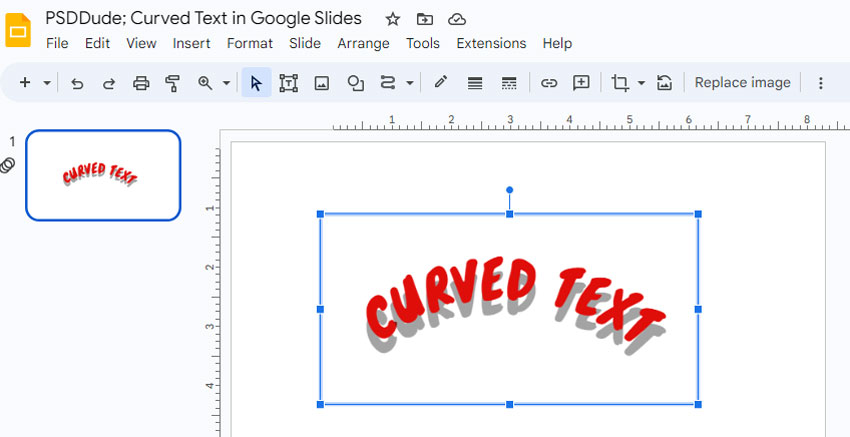
So, now you know how to curve text in Google Slides 2022 and to make your presentations more interesting & eye-catching for your audience.
Many websites suggests a third method: create curved text in PowerPoint and insert it in Google Slides. I find this solution redundant because the two toola are similar, not to mention that PowerPoint is not a free software.
You Might Also Like
If you are working with Slides for your presentations, you might also be interested in how to add GIF in Google Slides from this quick tutorial.
In Conclusion
Now you have two solutions for creating curved text in Google Slides. To make your presentations more eye catching, use Google slides circle text, curved text, etc. If you are using MockoFun text editor you can create even more text effects like wavy text, heart text and any other text on path effect.
I hope this article on how to transform text to circle on Google Slides was really useful and easy to follow. It's possible that the Google Slides 2023 to include the new curved text feature but until then, you should try these methods.


![How to Curve Text in Google Slides: Step-by-Step Tutorial [2025]](/tutorials/images/how-to-curve-text-in-google-slides.webp)

No comment(s) for "How to Curve Text in Google Slides"