Perler Beads Art Photoshop Action
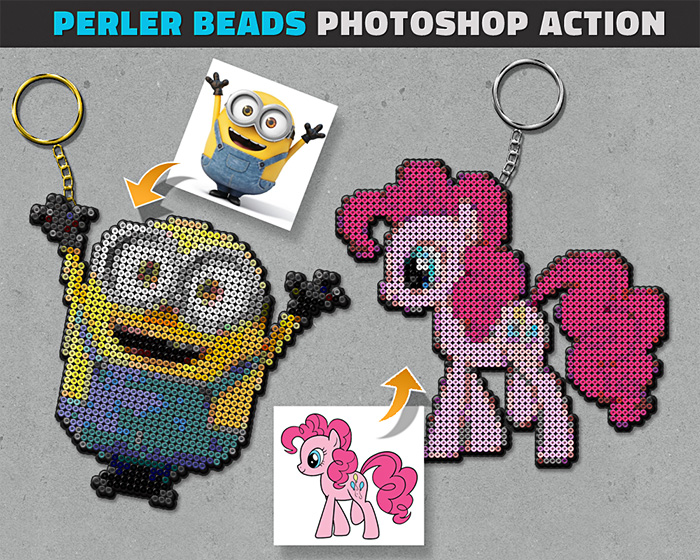
If you want to create perler beads art in just a few seconds, you can download this unique Photoshop action.
How to Create Perler Beads in Photoshop
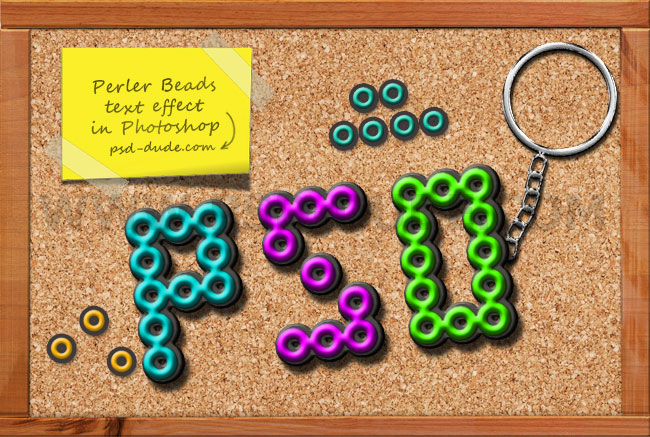
In this tutorial I will show you how to create a hama beads text effect in Adobe Photoshop from scratch.
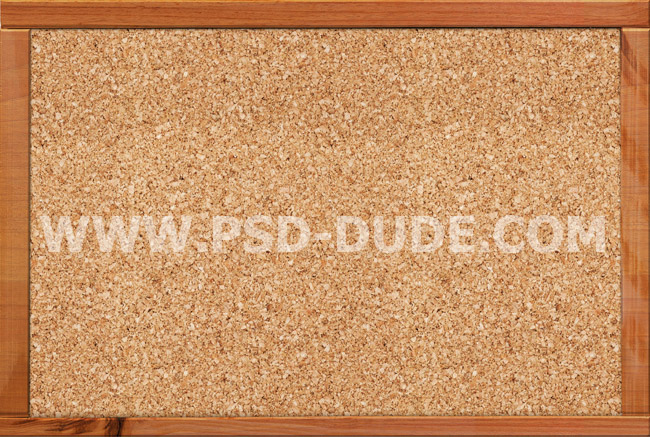
Add the Corkboard Background
First we have to create a background for our perler beads text effect. For a text style to look good, you have to choose a background that works well. For example the hama beads text would look good on wood texture or on paper texture (so here are some examples to choose from).
For this tutorial I will use this Corkboard Background that you can download for free.

Add the Dotted Font
Now I will show you how to make a perler beads font from any dotted font. This technique can also be applied to shapes with dotted outline. Here is a quick tutorial on how to create a dotted outline in Photoshop for shapes.
So, create a new Text Layer and use any dotted font that you like (I will use a font called "Fortuna Dot"). This is a free font type that you can find on many font websites. Here is how you can Install New Font in Photoshop if you don't already have it.
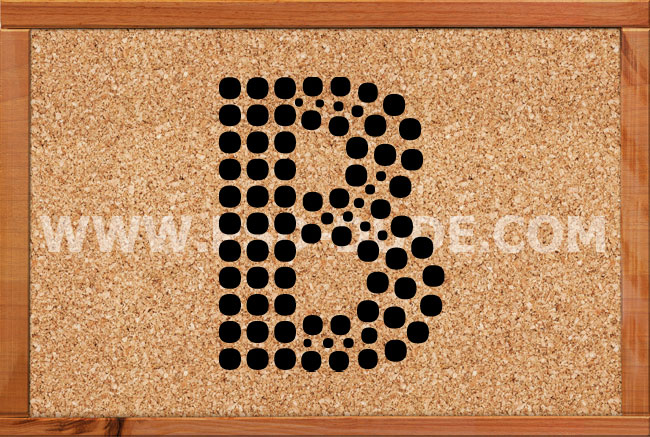
Add this layer style to the dotted font: Fill 0%, Stroke and Inner Glow optional depending on the font type that you have.
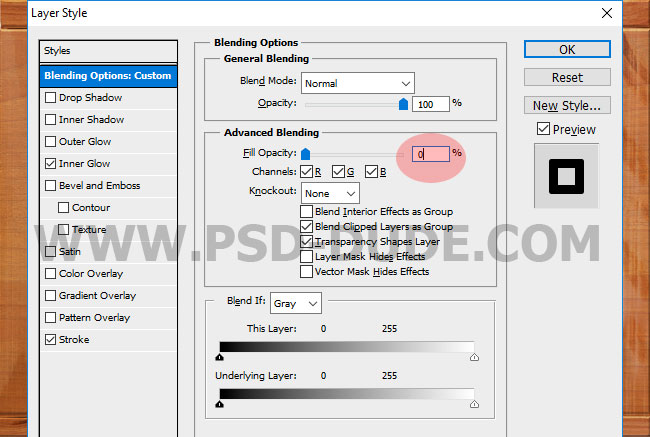
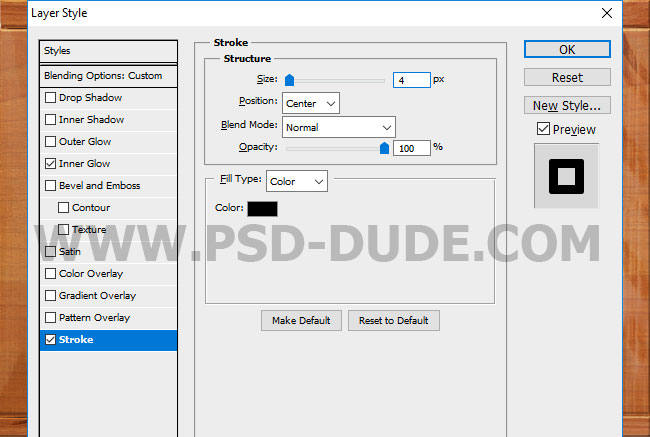
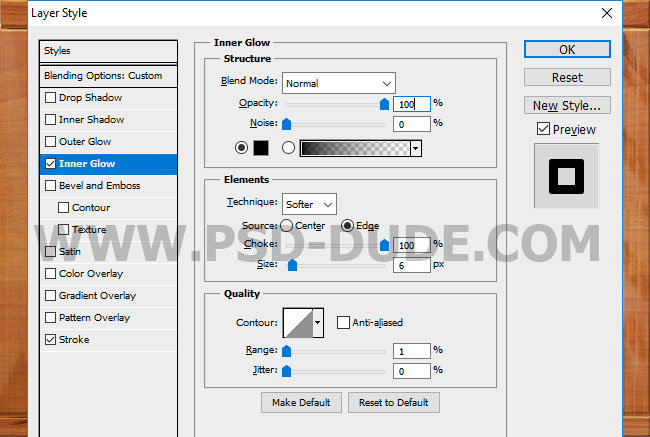
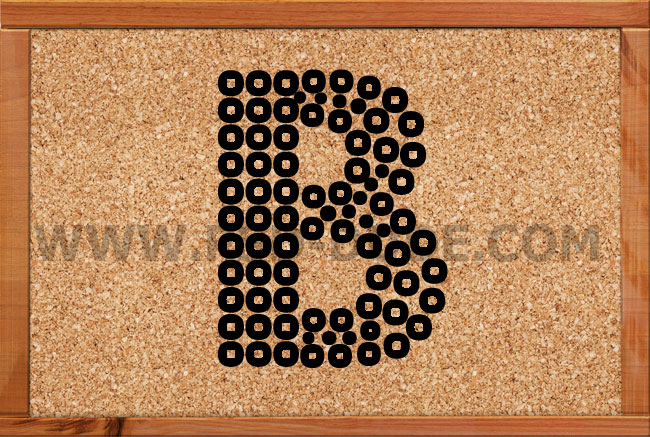
Right click on the layer and choose Conver to Smart Object. You can use the same technique for shapes that have a dotted outline made with Photoshop dotted brushes like shown in the screenshot.
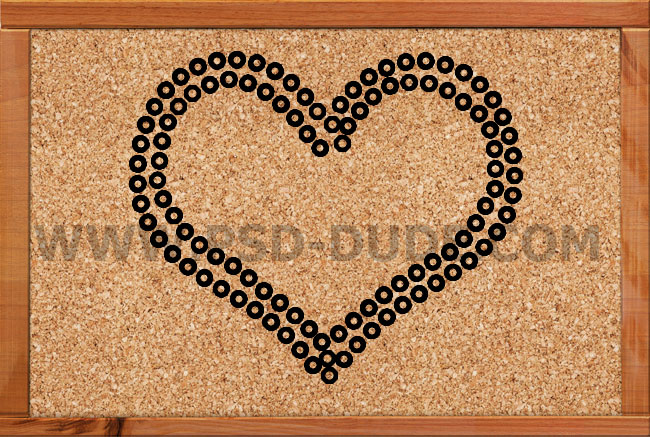
Perler Bead Font Type
For this tutorial I will use this pre-made Perler Bead Font but you can choose another one. Call this layer Perler Beads Text 1.
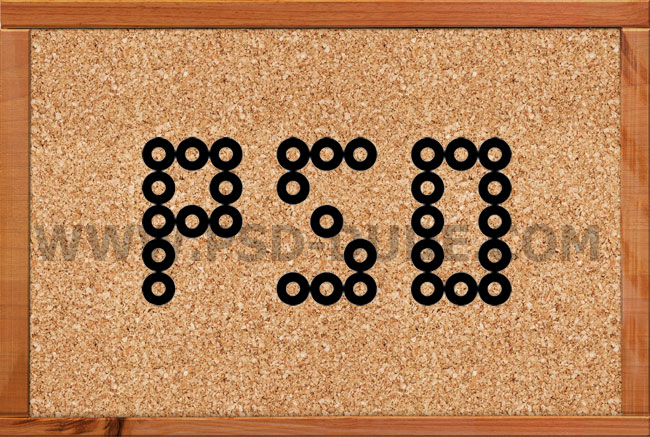
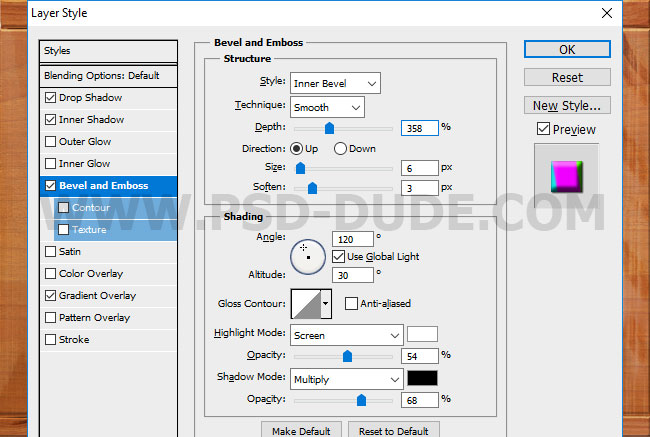
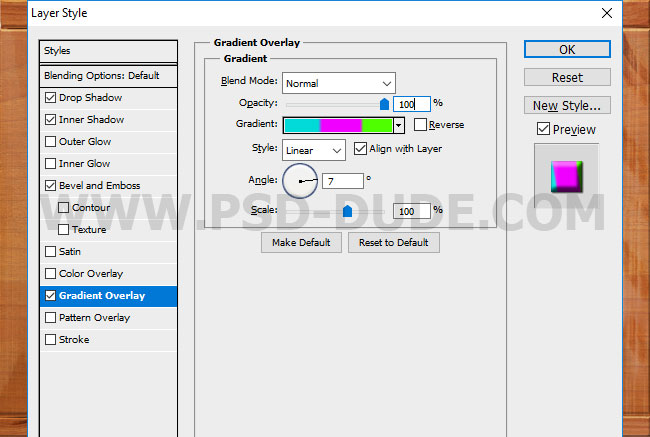
Duplicate the Perler Beads Text 1 and call it Perler Beads Text 2. Add this layer style to the Perler Beads Text 2 layer: Drop Shadow, Inner Shadow and Bevel and Emboss. For the Gradient Overlay you can choose the color tones that you like; you can make each letter a different color or you can choose only one color for the text.
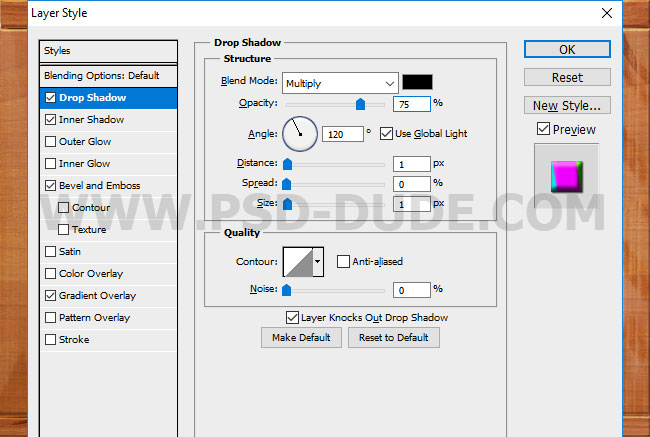
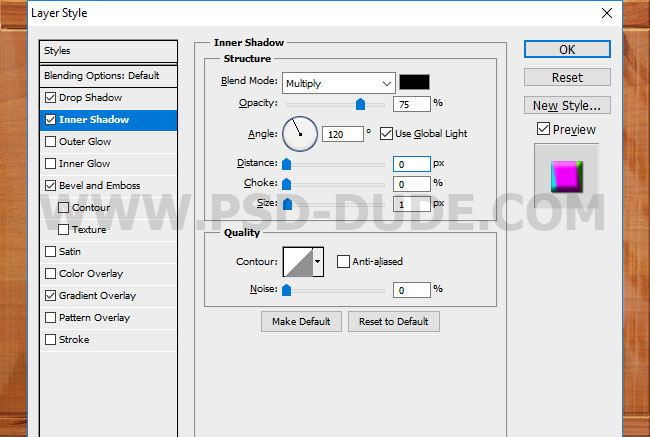
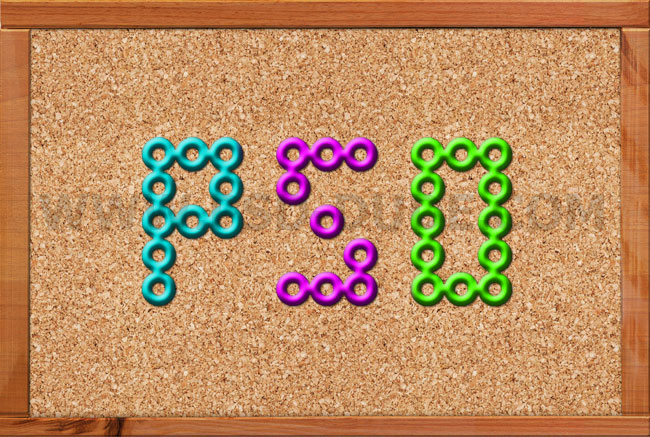
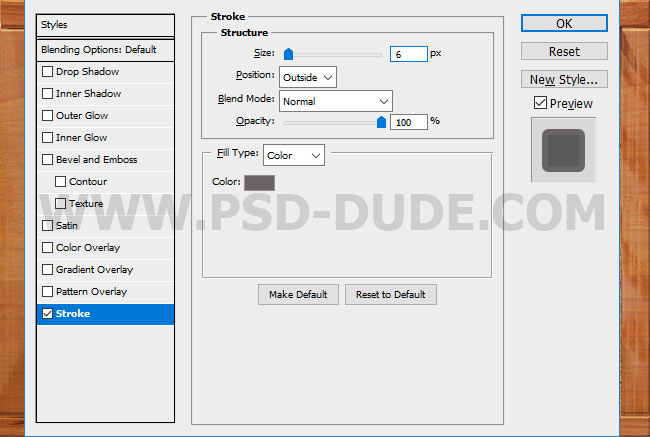
Add a Stroke layer style to the Perler Beads Text 1 layer. The color is not important.
Right click on the Perler Beads Text 1 layer and choose Conver to Smart Object. That way we can apply multiple layer styles to one layer. So add this new layer style to the Perler Beads Text 1 smart object: Drop Shadow, Inner Shadow, Bevel and Emboss and Color Overlay(color #4d4b46).
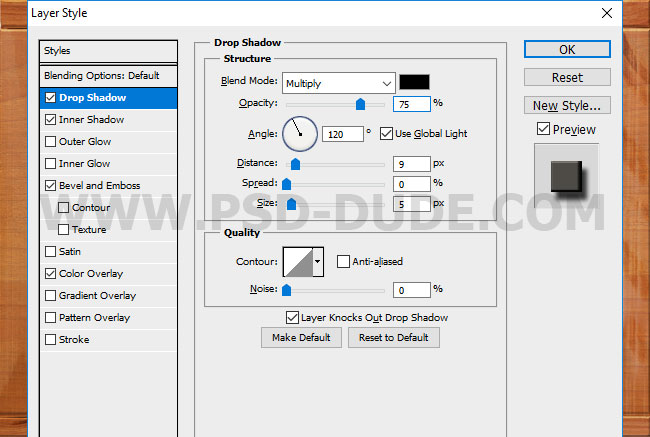
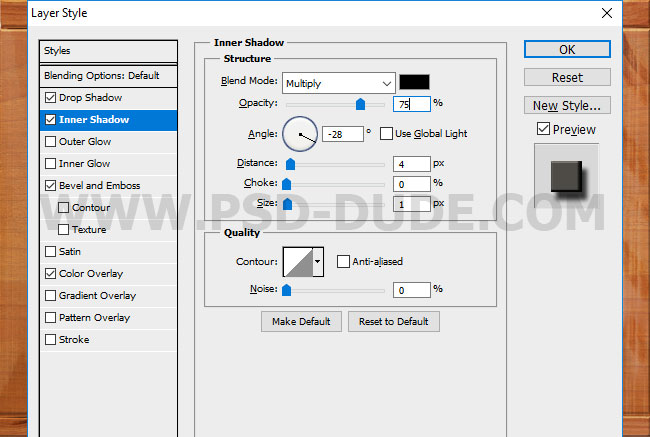
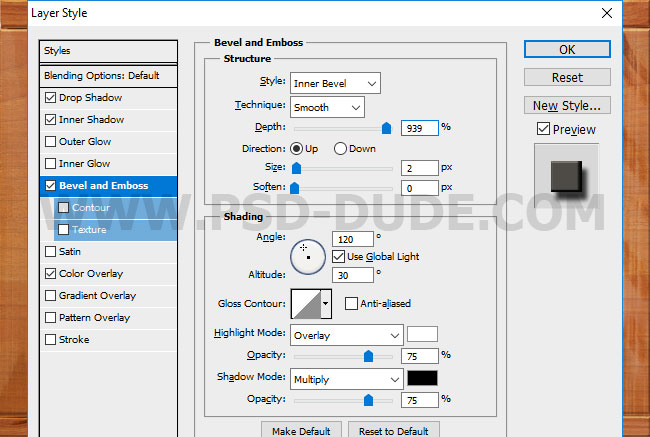
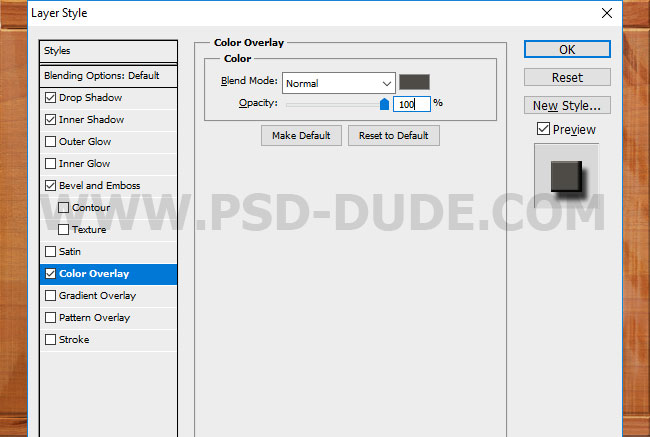
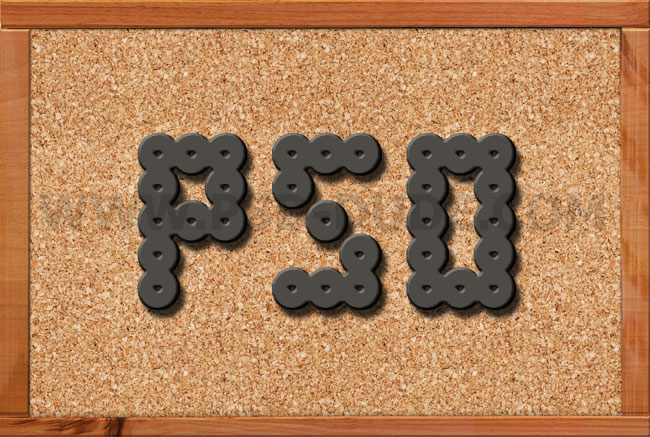
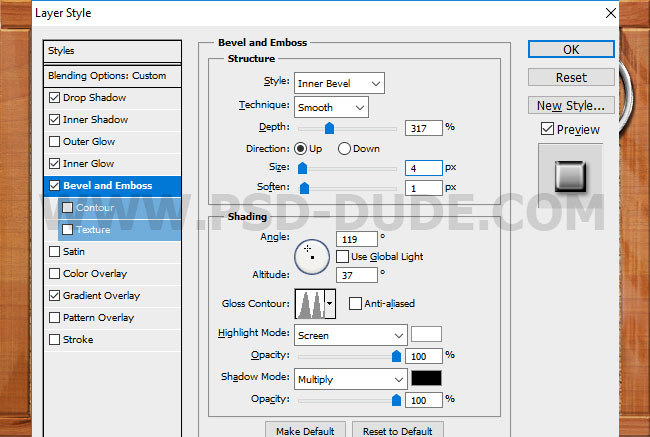
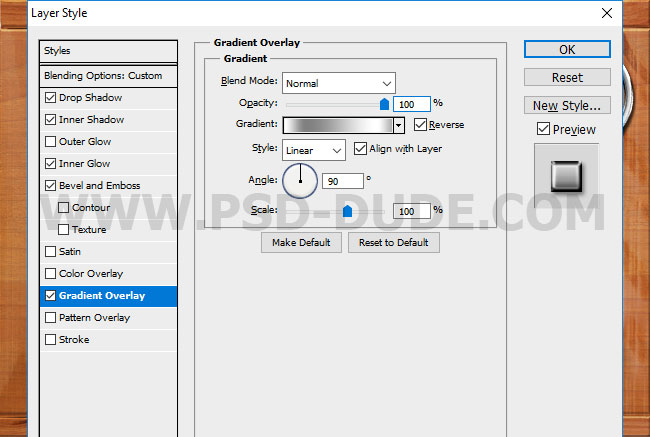
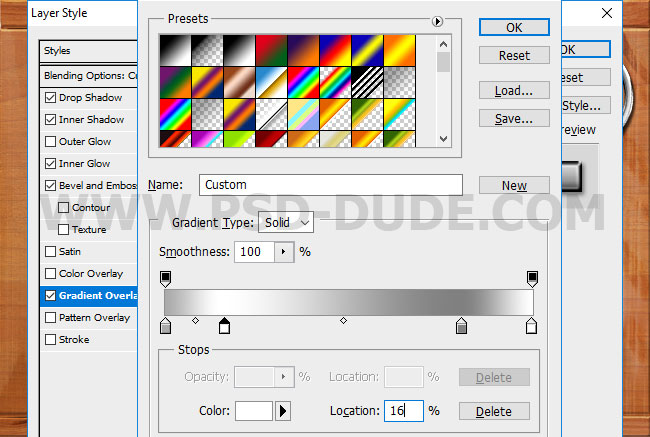
If you want you can add a metal key chain. Place the key chain PNG image in your PSD file. To create a shiny metallic effect, add this layer style: Drop Shadow, Inner Shadow, Inner Glow, Bevel and Emboss and Gradient Overlay(color #aaaaaa and location 0%, color #ffffff and location 16%, color #808080 and location 80% and color #ffffff and location 100%).

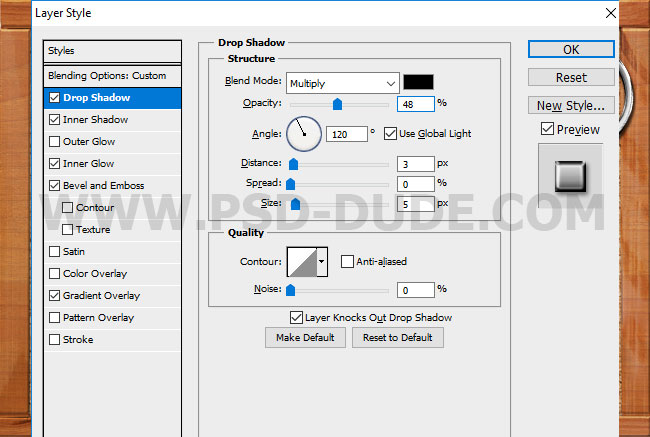
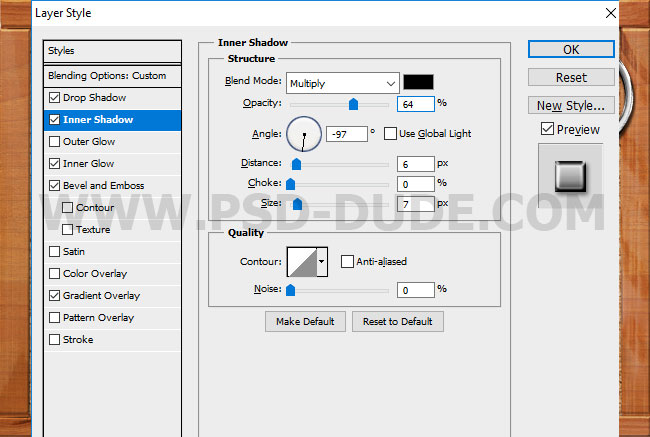
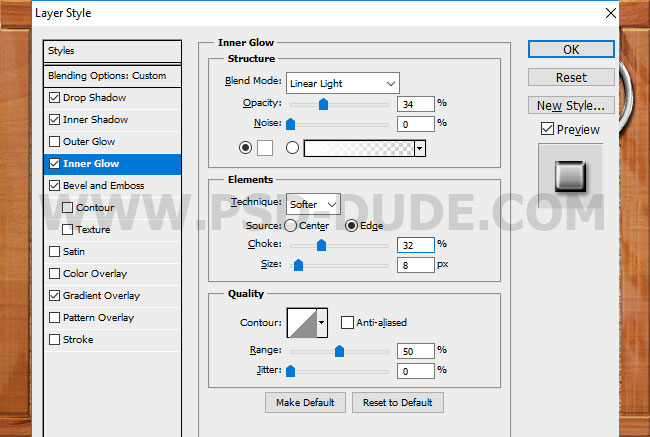
If you want you can add a sticky note to make the cork board more interesting and cool. So here is the final result for the perler beads key trinket text effect made from scratch in Photoshop.

Perler Beads Art Photoshop Action
If you want to create perler beads art in just a few seconds, you can download this unique Photoshop action.


No comment(s) for "How to Create a Hama Perler Beads Text in Photoshop"