Time for another text effect tutorial that I hope you will enjoy reading. So many text effects where already created in Photoshop so coming up with new ideas can be very challenging.
Board Game Text in Photoshop
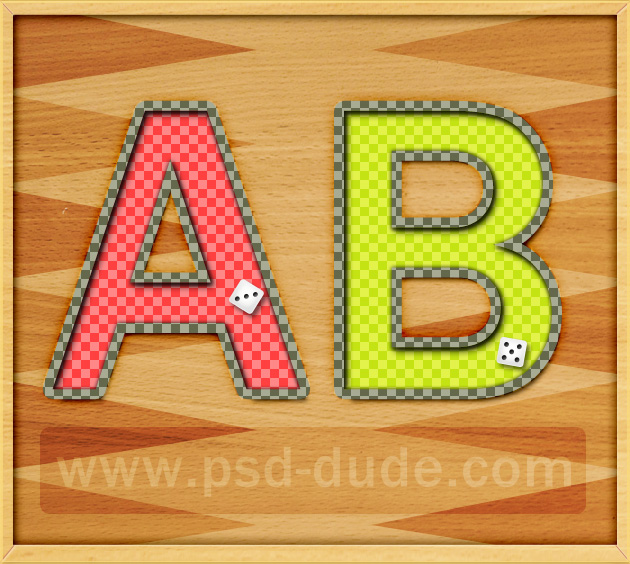
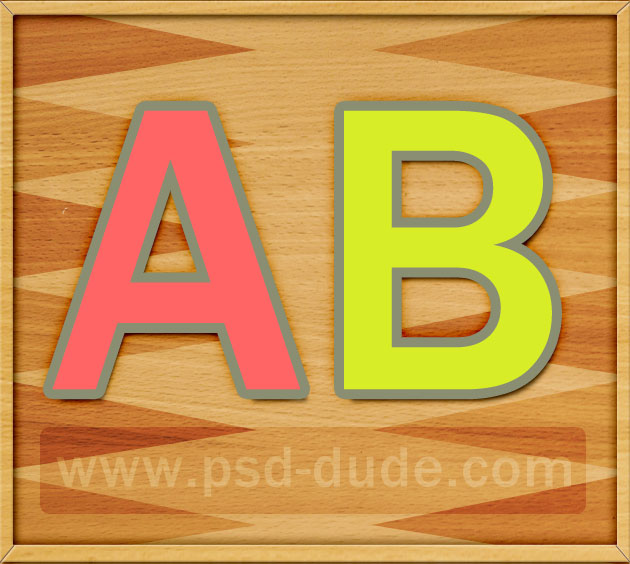
We are going to create a board game inspired text effect, so let's take a quick look at the final result. We are going to need an wood texture and some layer style settings to make this text.
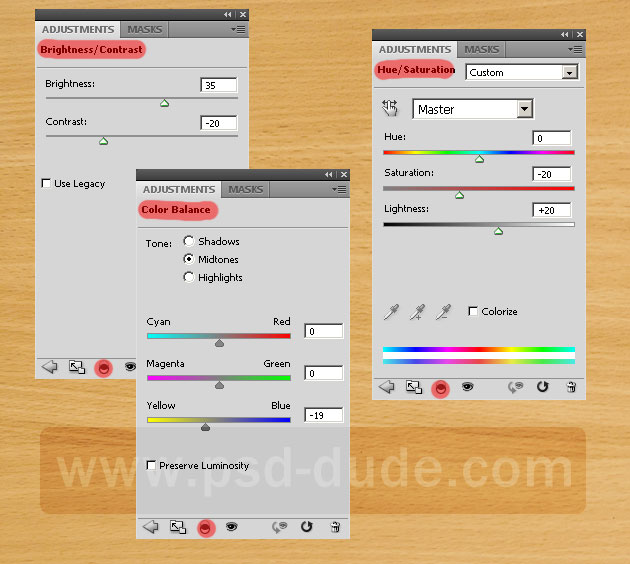
First we have to create the board table for this text effect. Many game tables are made out of wood so we need a wood texture. I have found a beautiful texture on Flickr; copy the wood texture and add Color Balance, Hue/Saturation and Brightness and Contrast adjustment layers following these settings.
Wood Board Game
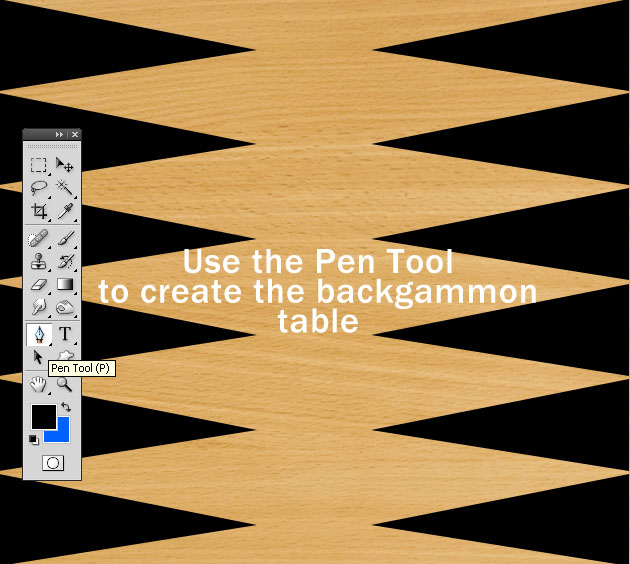
We are going to create a backgammon board game so with the Pen Tool draw these triangle vector shapes. After you create a first triangle shape, select it using the Path Selection Tool and with CTRL+C and CTRL+V copy paste the shape and move it.
When you have completed the left side triangles, select them all and copy paste again, Flip Horizontal and move them to the right side.
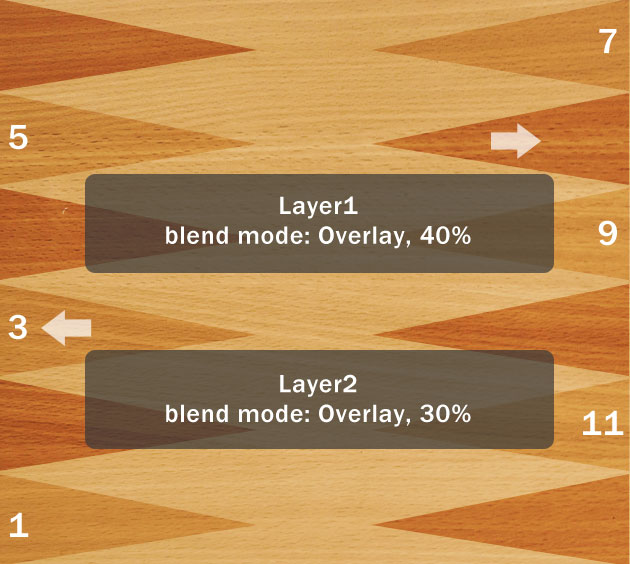
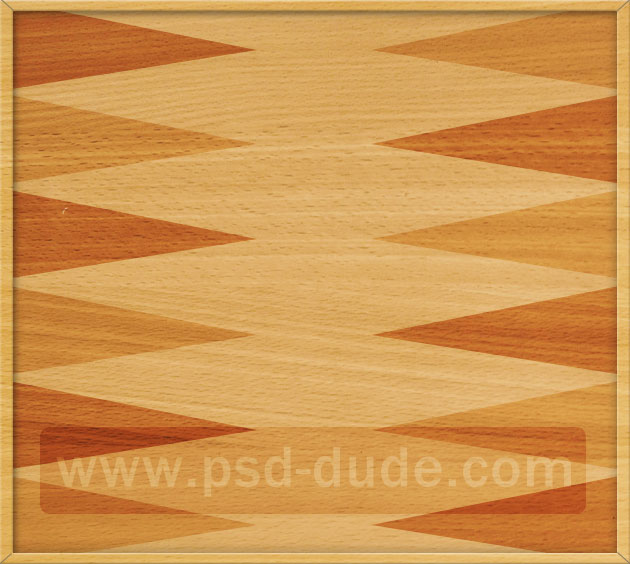
Set the Blending Mode to Overlay, opacity 40%. Duplicate this layer and simply select the 1, 3, 5, 7, 9, 11 triangle and remove them. Set the opacity of this new layer to 30%. That way we obtain a realistic backgammon table.
Duplicate the Wood Texture Layer along with the 3 adjustment layers. Press CTRL+E to merge them, and place the resulted layer above all the other layers. Call it Frame Layer.
Make a rectangle selection inside the Frame Layer around 97% of the shape and erase it. Open the layer style window and add Drop Shadow, Outer Glow and Bevel and Emboss with the following settings.
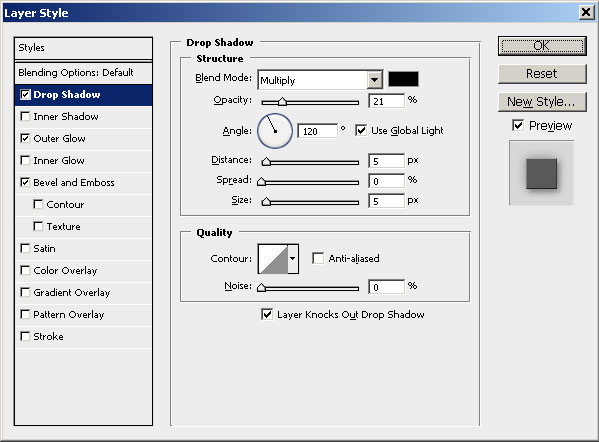
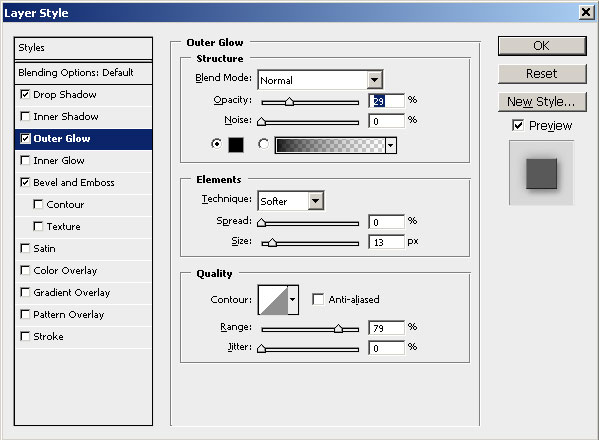
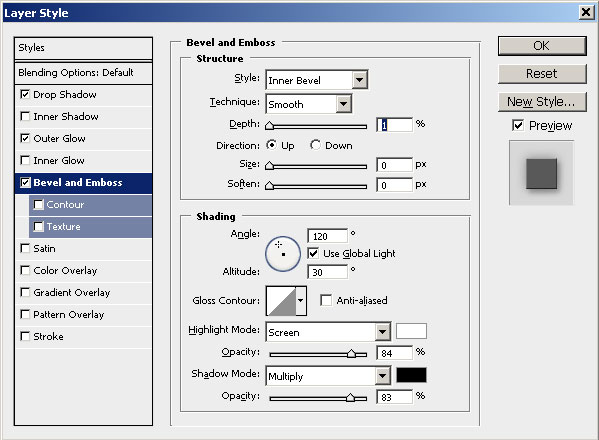
Simply add four line shapes, one for every corner using the Line Tool and the color #897b60. So here is how our backgammon table should look like.
Now write a simple text "AB" using Franklin Gothic default font. Use #ff6565 color for "A" letter and #d8ed27 for "B" letter. Call this first layer Text AB layer.
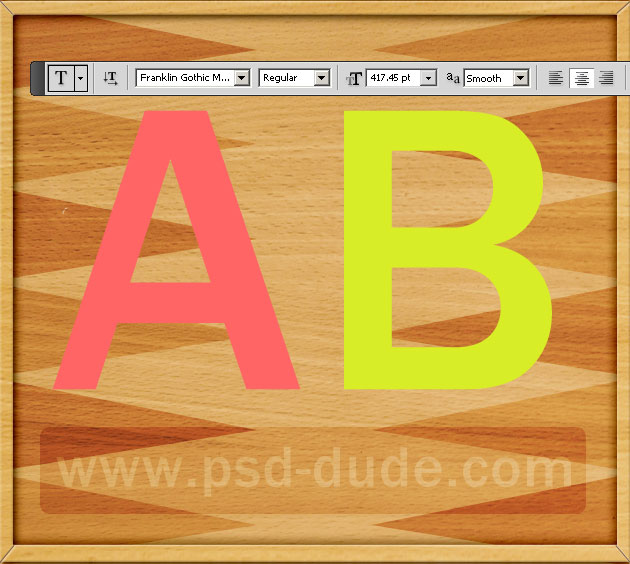
Open the layer style window for this Text AB layer and add the following layer styles Drop Shadow, Outer Glow and Stroke. The color for the Stroke is #8a8e72.
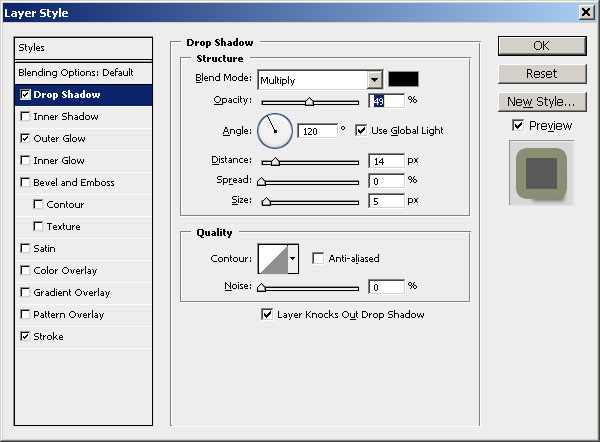
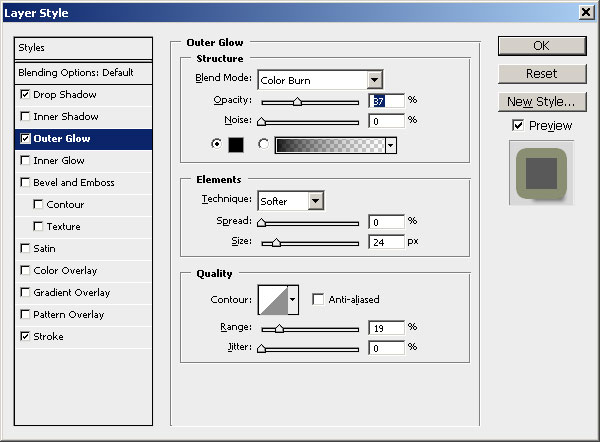
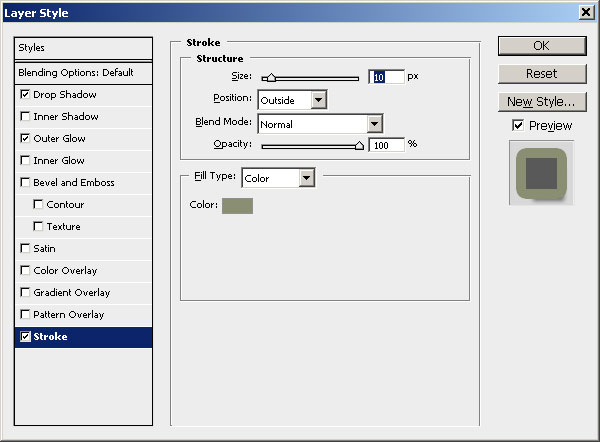
After making all the settings, our text efect should now look like this:
Halftone Pattern Filter
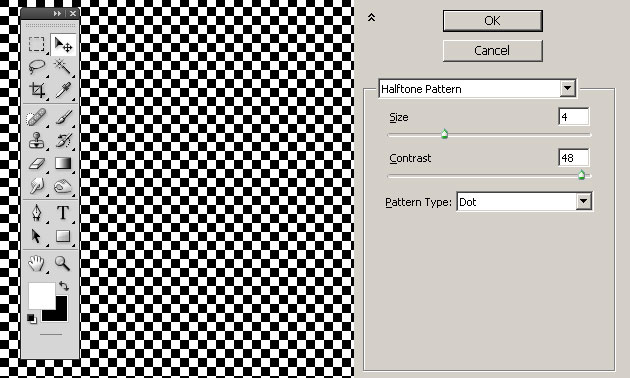
In the next step we'll create a chess pattern using Photoshop filters. Create a new layer called Chess Pattern and fill it with white color. Set the Foreground Color white and the Background Color black.
Go to Filters, Sketch, Halftone Pattern and make these settings:
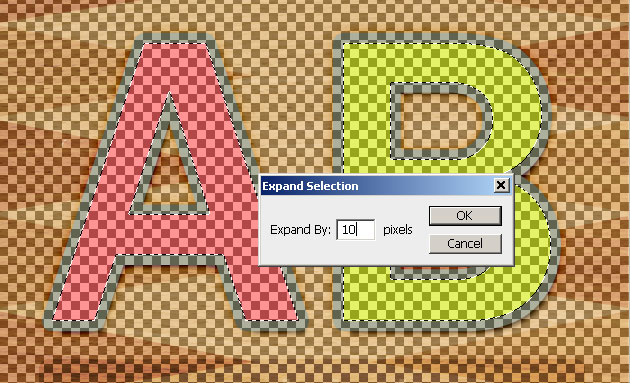
Select the Text AB layer(press CTRL and click the layer thumbnail). Go to Select menu, Modify, Expand and expand by 10 pixels.
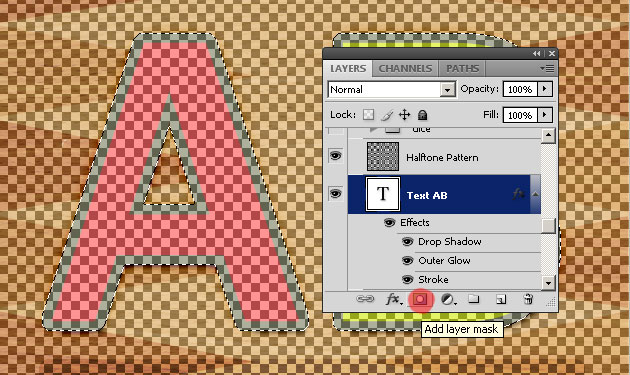
Using this selection press the Add layer mask button to add the mask to the Halftone Pattern layer. If you are not sure how to add a layer mask you can find out from this tutorial on how to create and use layer mask in Photoshop.
Set the blending mode of the Halftone Pattern layer to Soft Light 60% opacity. The text looks like this so far.
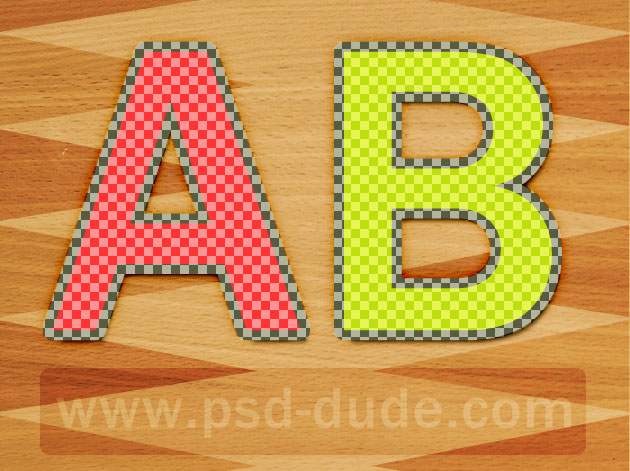
Duplicate the Text AB layer, clear its layer style, set the fill to 0% and add new layer styles as follows:
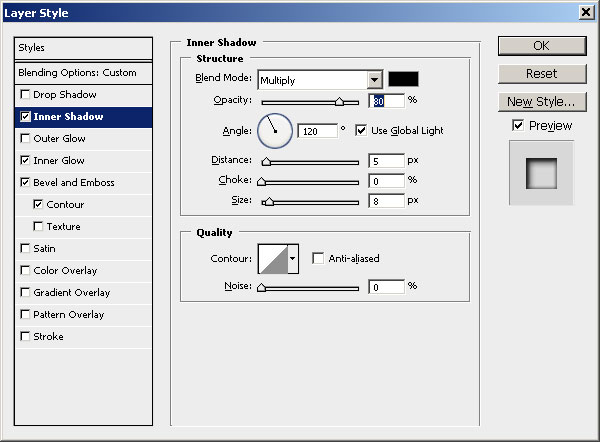
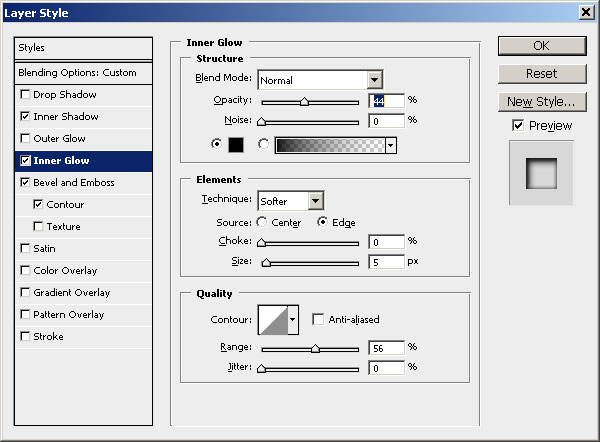
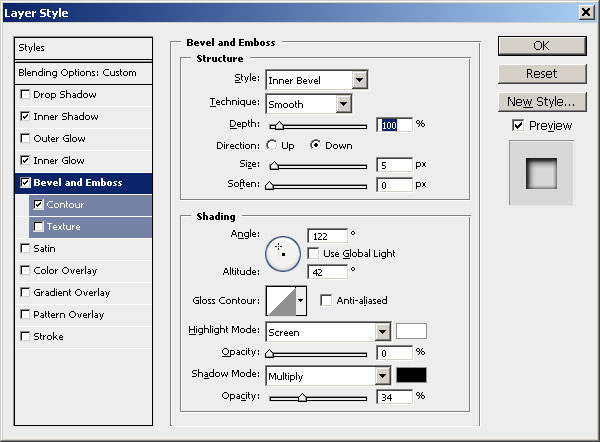
For the final touches you can add some dice inside each letter. If you download the PSD File you will find the vector based dice inside, along with all the layers used in this tutorial. The layer style are all intact. Please don not redistribute the file.


2 comment(s) for "Board Game Text Tutorial"
Thank you. reply