This is a guest tutorial made by Dwight Daley a full time graphic designer, illustrator, multimedia designer and photographer. Her runs a blog with Easy to follow Photoshop Tutorials and also Free Flyers and Photoshop Brushes .
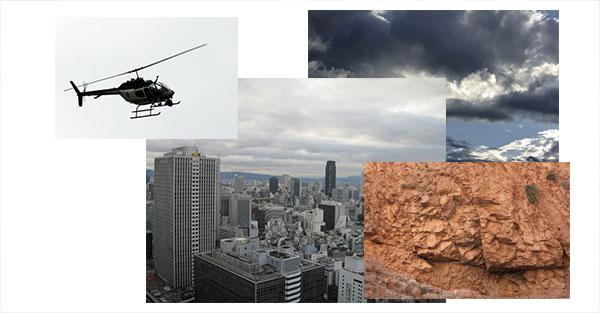
In this tutorial you'll learn how to create an explosion on a city skyscraper. You will learn how to use brushes and the cloud render filter to achieve these effect. These are the stocks we used.
You can download the stocks from the links below:
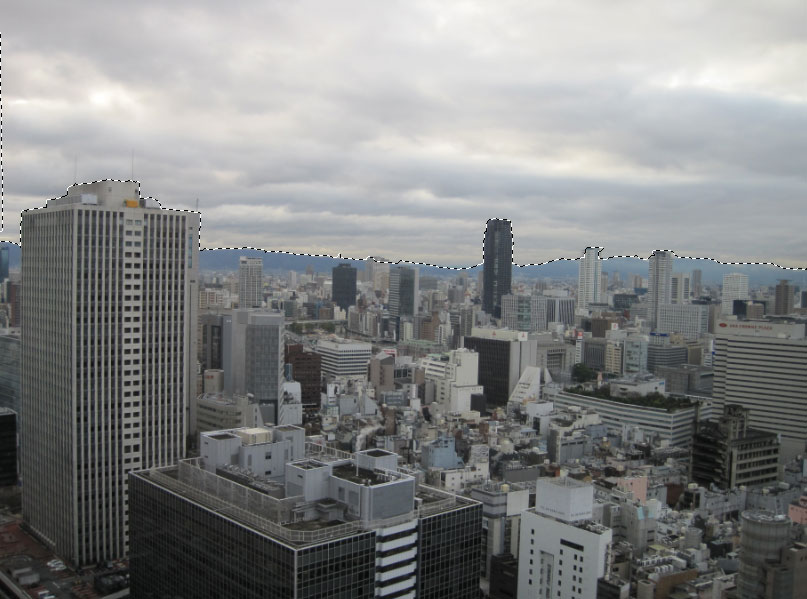
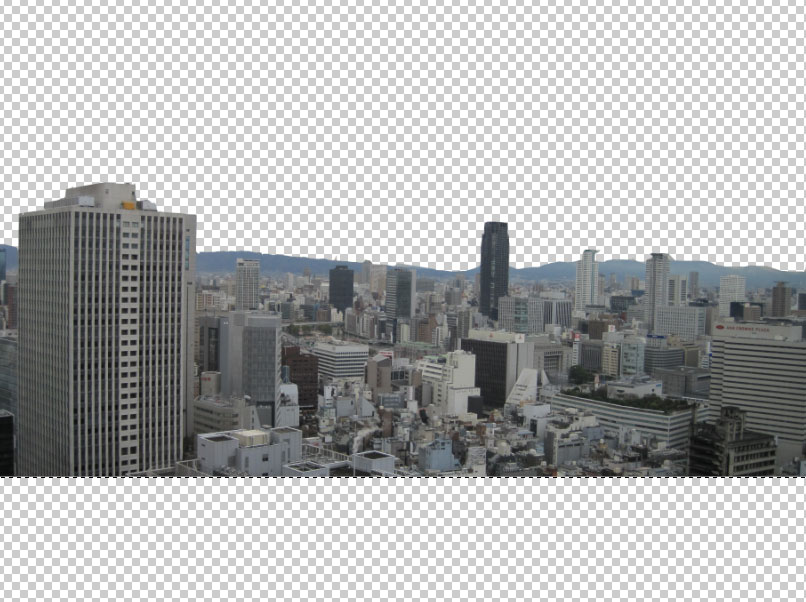
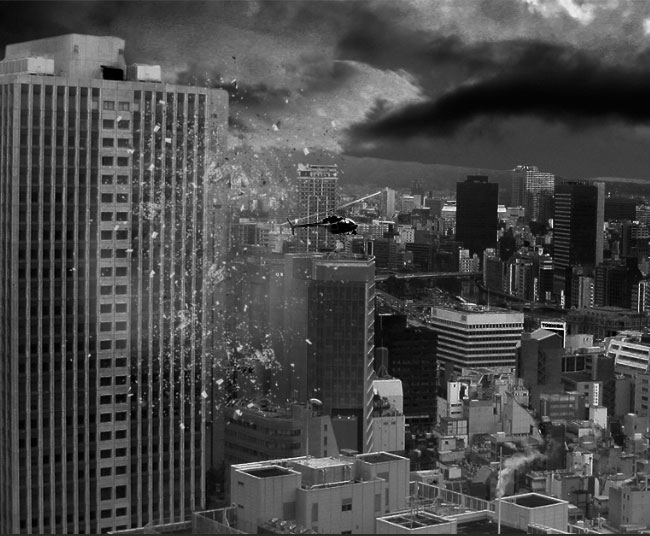
Create a new Photoshop document at 1200x625. Fill the background with black. Load your City stock and remove the the sky area away from it as shown below
.

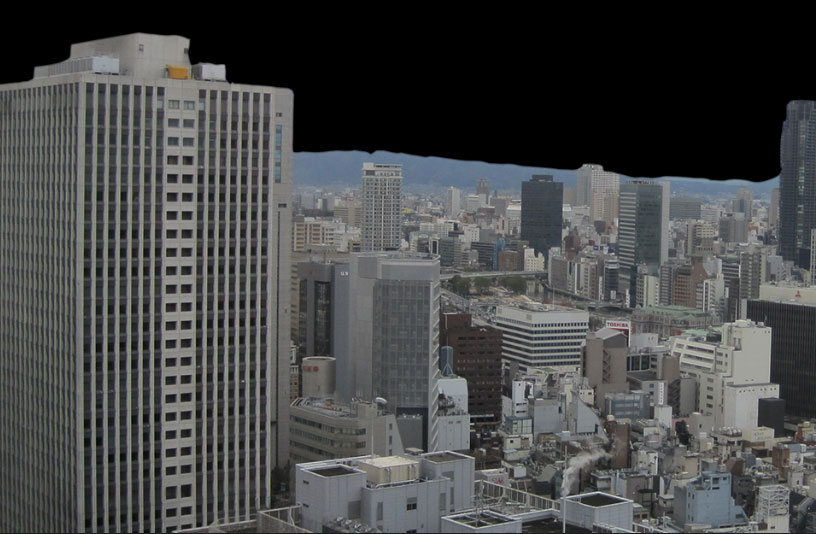
Take the Rectangular marquee tool, select a portion of the bottom half of the city and hit delete on your keyboard.

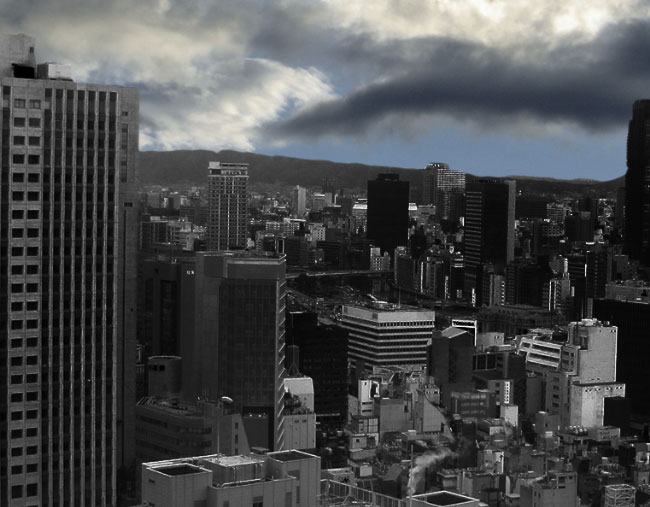
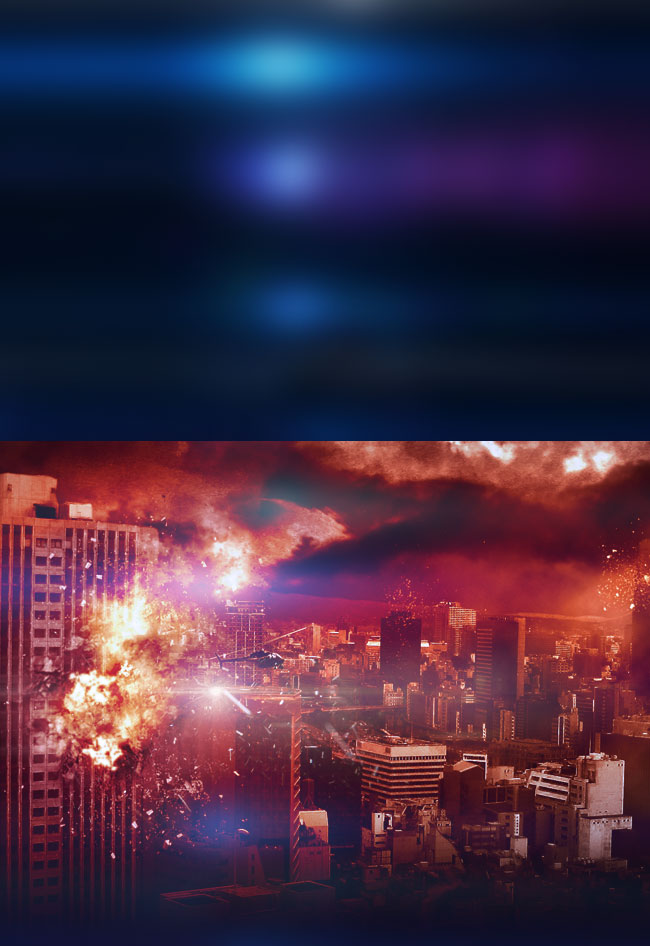
Click and drag the city stock over to your working document. Size and position it as shown below. Quick Hit: Don't close your city stock document; we are going to use it again later.
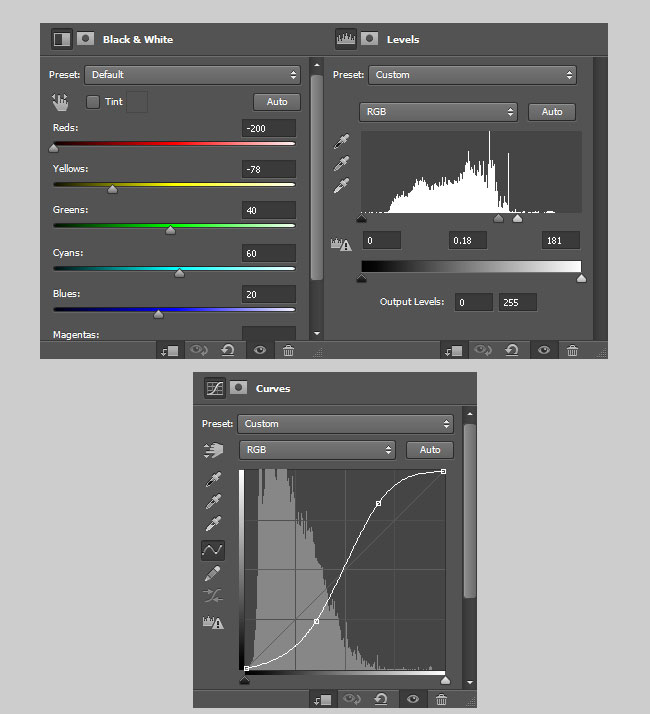
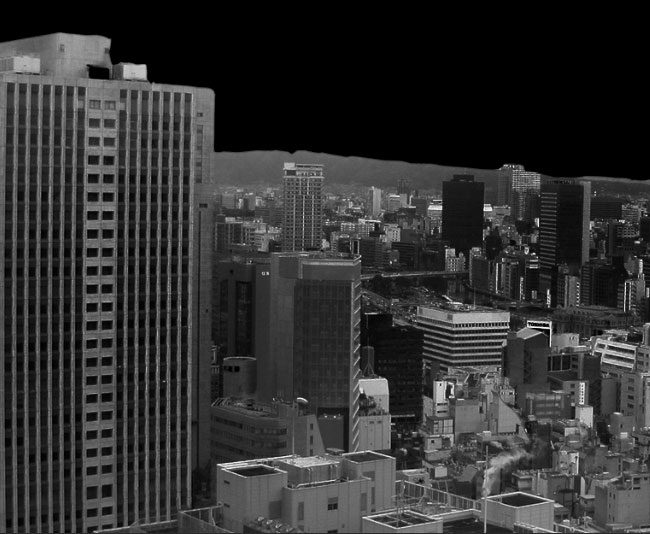
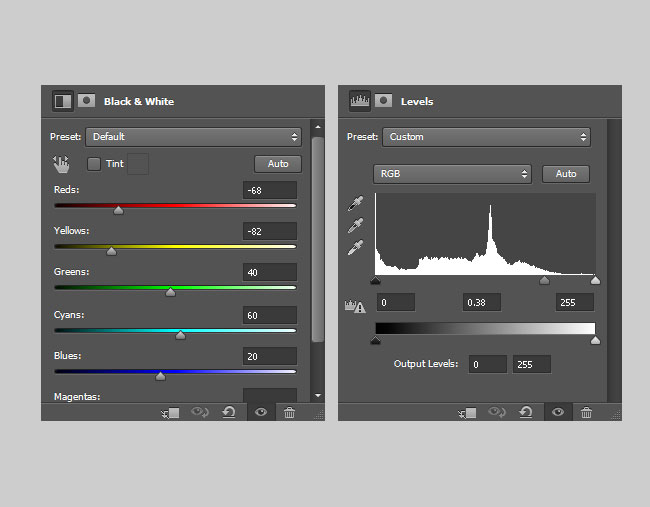
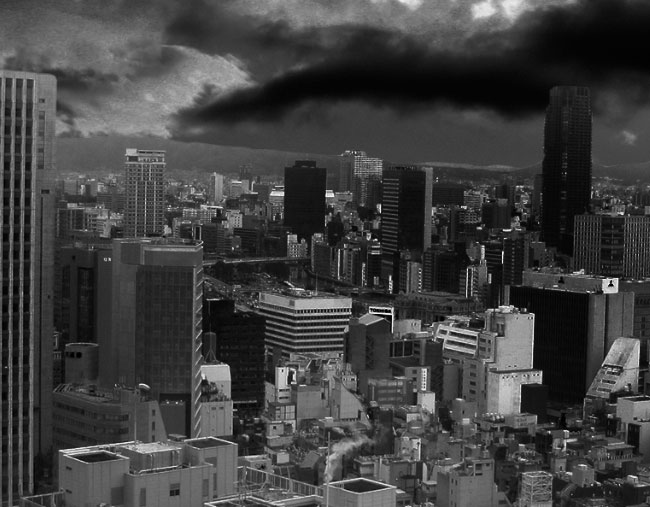
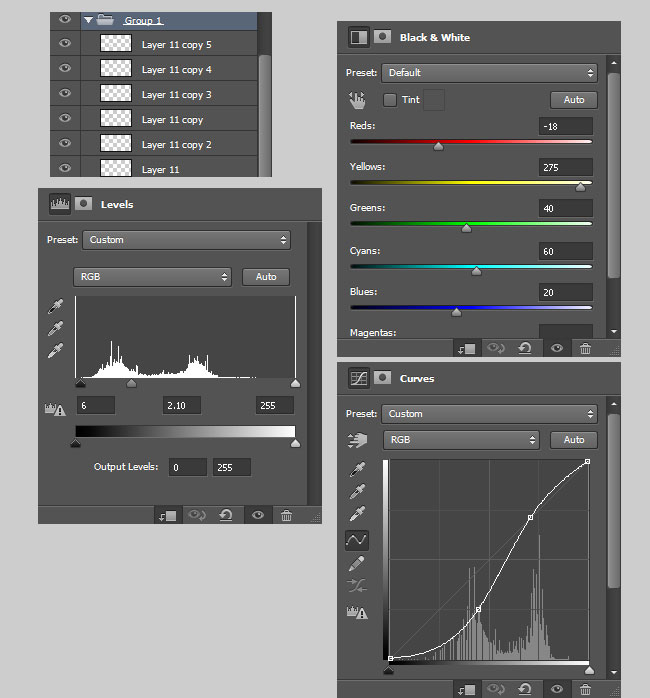
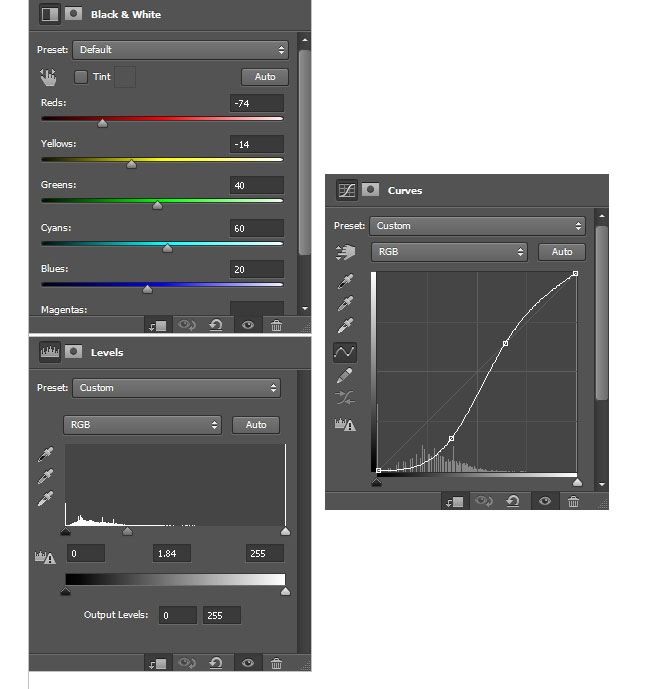
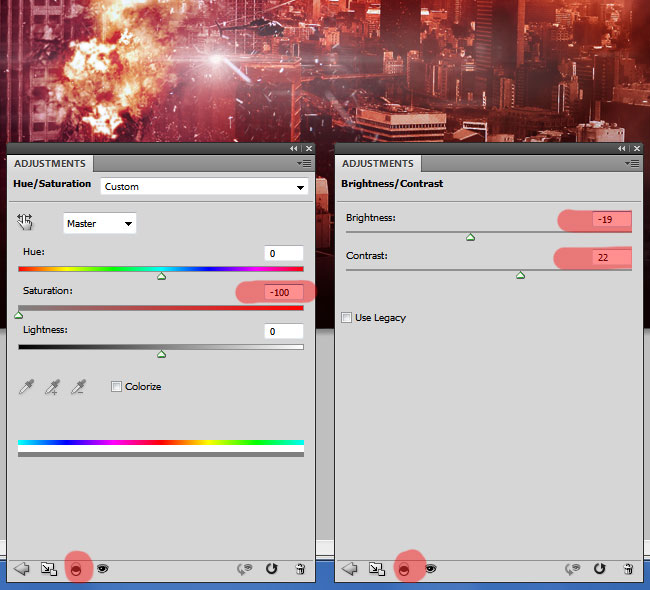
Add the following Adjustments via clipping mask respectively to the city stock.
Load your Sky stock into Photoshop. Take the Rectangle Marquee tool and select the top portion of sky.
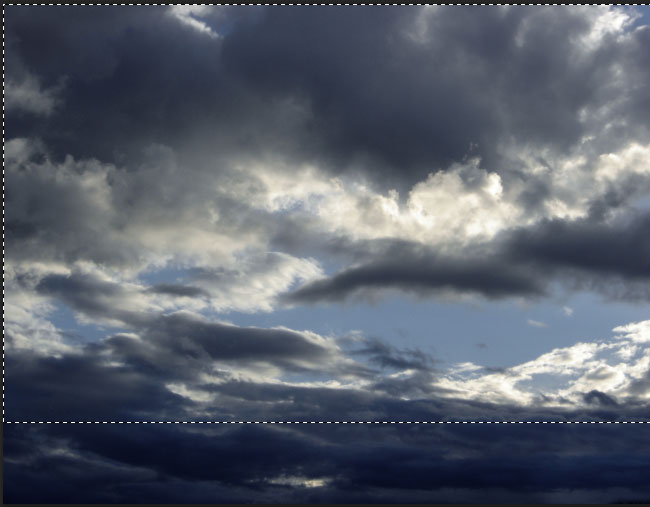
Copy and paste it onto your working document. Place it below your city stock layer then size and position it as shown below.
Apply the following adjustment layers via clipping mask respectively to the sky stock.
Load your Helicopter stock, take the Magic Wand tool, select the background of the helicopter you don't want and hit delete on your keyboard. Quick hint: To select more than one area at the same time with the Magic Wand tool, hold shift on your keyboard and click on areas you want to select simultaneously.
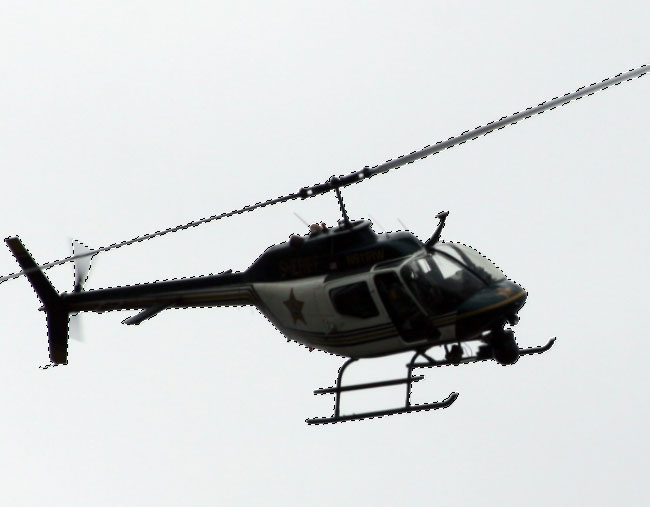
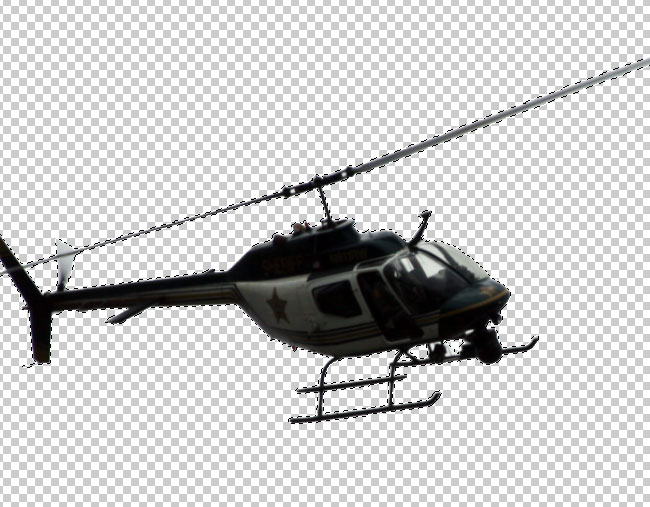
Click and drag your helicopter stock over to your working document. Size and position it as shown below.

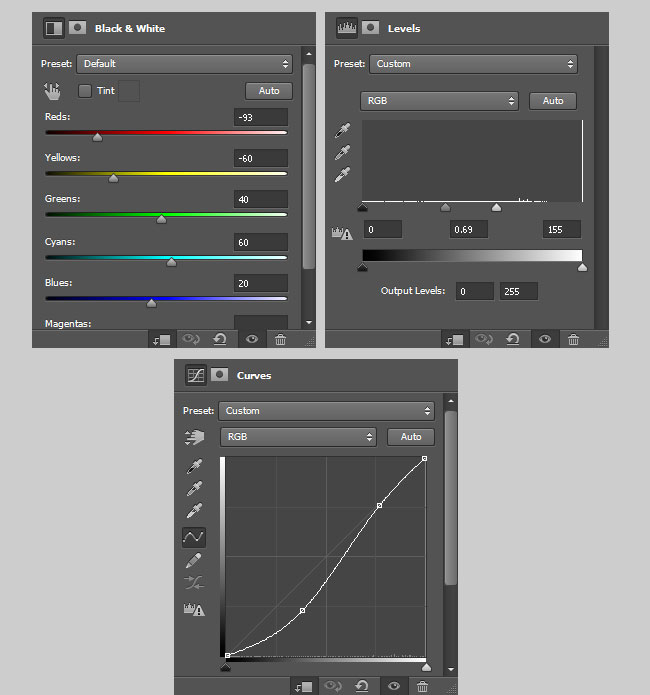
Apply the following Adjustments via clipping mask to the helicopter.

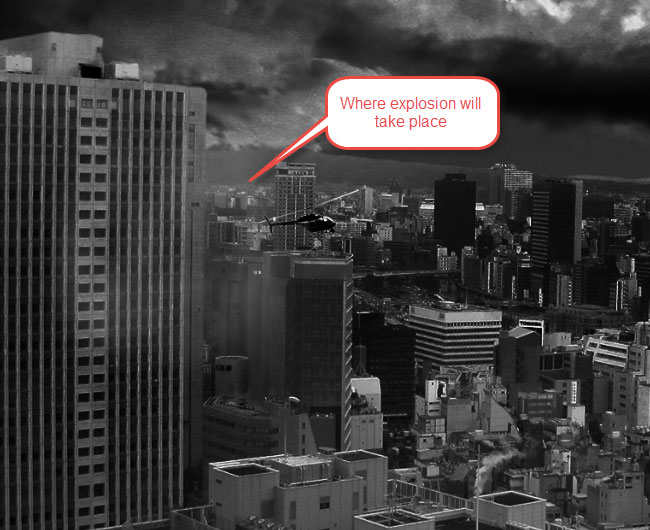
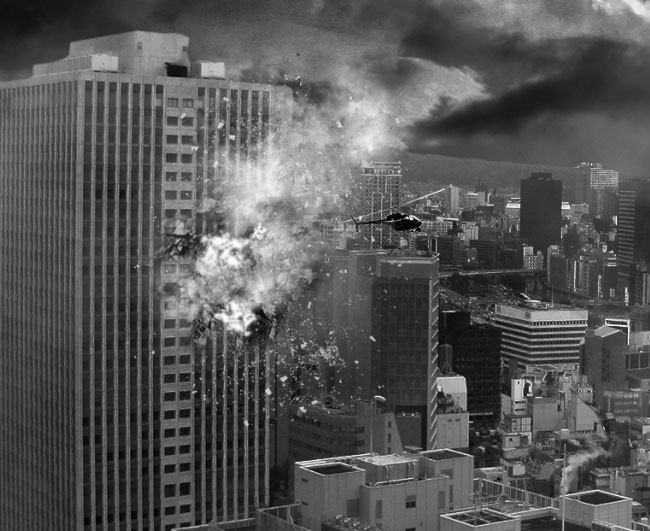
Create a Building Explosion in Photoshop
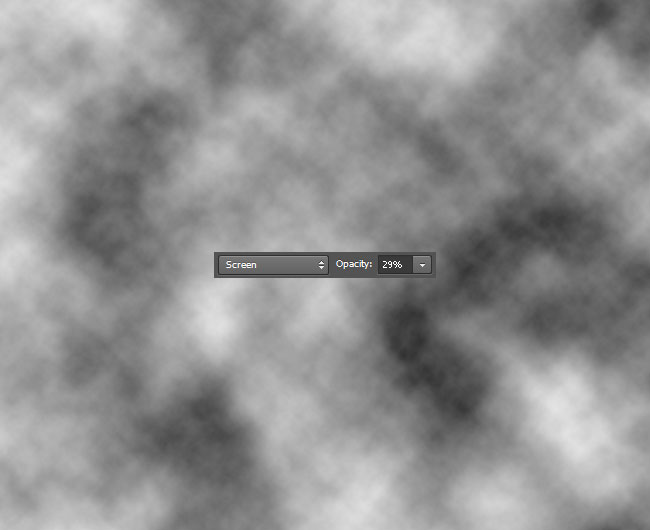
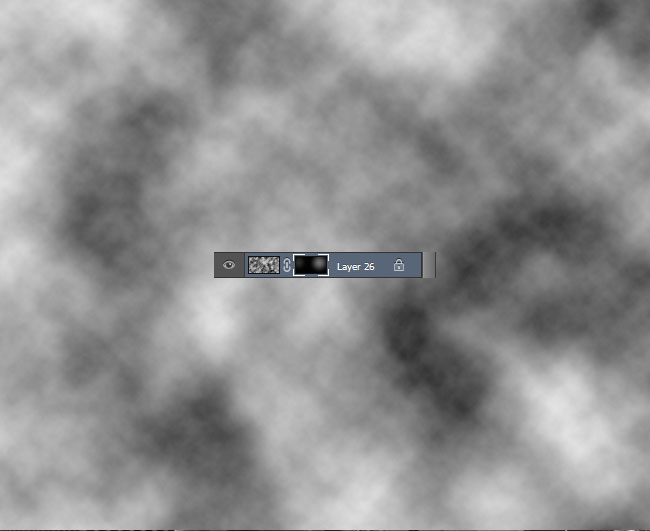
Now for the explosion on the building, first we are going to create some faint smoke. Create new layer above all previous layers. Go Filter > Render > Clouds. Set the blend mode of the cloud filter layer to screen and reduce the opacity to 29%.
Now with a soft eraser at 0% hardness erase most of the cloud effect leaving just a small portion on the area of the building where the explosion will take place near the helicopter.
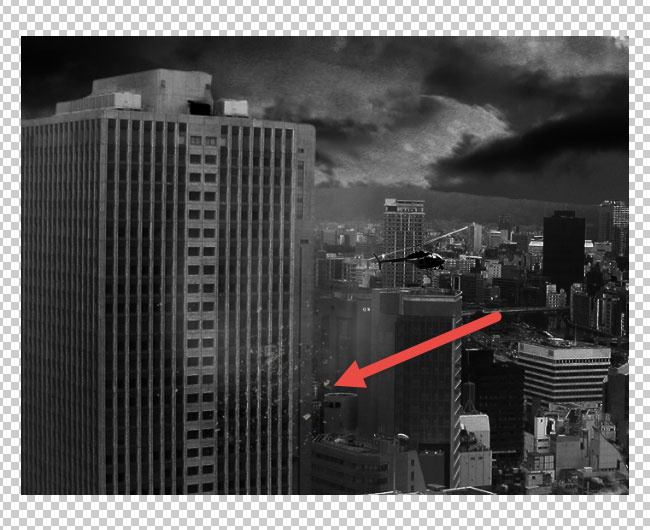
We are now going to add some explosion debris. Go back to your city stock document I told you to keep open in Step 2. Take your Ellipse Marquee tool and select a portion of the main skyscraper of the city.
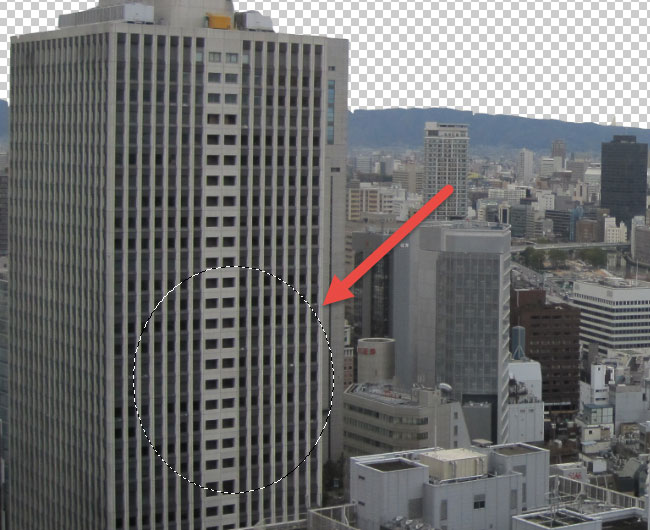
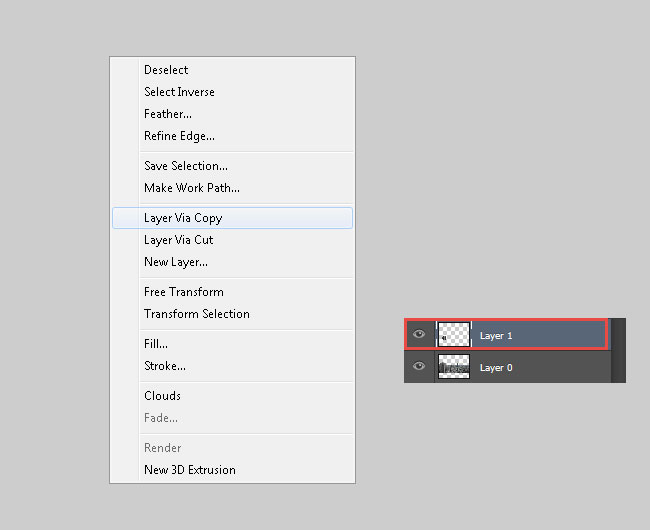
Right click and from the drop down menu select Layer Via Copy. This will create a duplicate of the selected portion of the skyscraper onto a new layer.
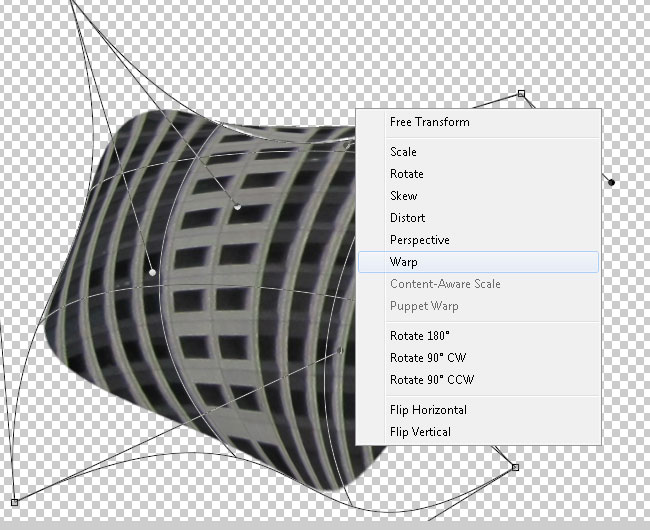
You can turn off the original city layer below to focus on the copied Ellipse layer. With the Ellipse layer selected, left click on the bounding box edge then right click and from the drop down menu select wrap. Move around randomly each point of the wrap to create to distort the shape as shown below.
Now take the debris brush you downloaded, select it and create a new layer then with any color paint onto that layer with your debris brush over where the woods are. Now ctrl hold and click on the layer you just paint onto. This will select the content within the layer. Now click a on the ellipse layer, select your Magic Wand tool then right click and select Via Copy, from the area the brush as painted. A new layer will be copied from the ellipse taking the shape of the debris brush. You can view a video demonstration in this tutorial at Step 11.
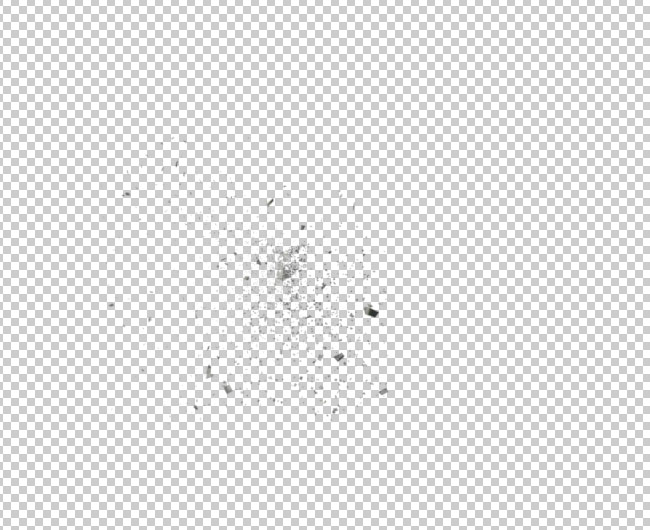
Click and drag the debris over to your working document. Size and position it as shown below.
To show the full effect of the explosion duplicates this layer a couple times and randomly change the position and rotation of each duplicate for variation.
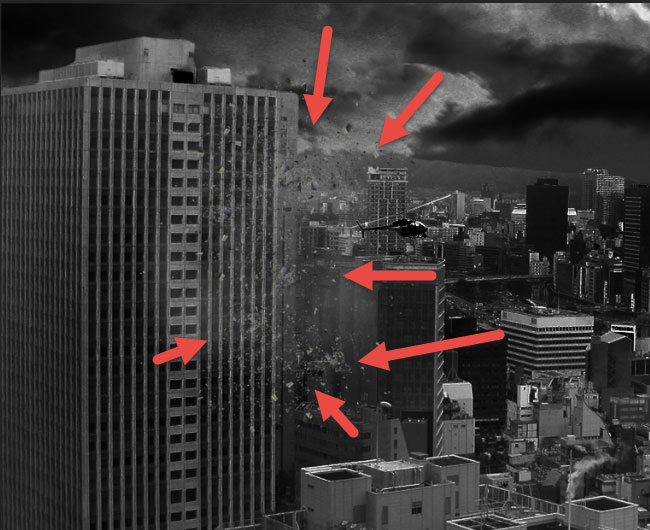
Place all duplicate layers of the debris explosion into a group.Apply the following Adjustments via clipping mask to the group.
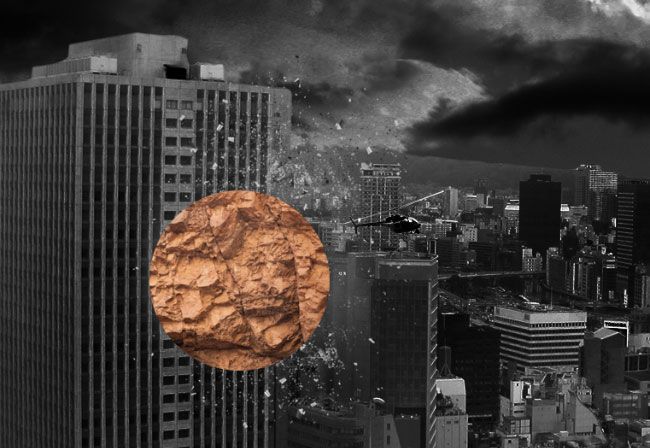
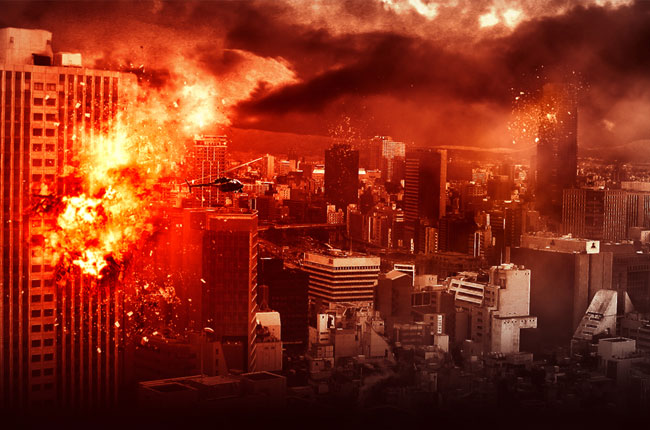
We'll now add the focus damage section of the building. Load your Rock texture stock, take the Ellipse Marquee tool and select a portion of the rock.
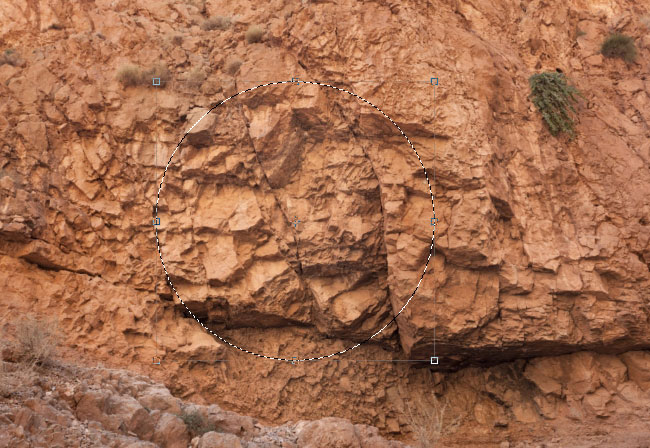
Copy and paste it onto your working document then size and position it on the skyscraper as shown below.
Take the eraser tool at 0% hardness and erase areas of the rock randomly. Erase the sharp edge areas.
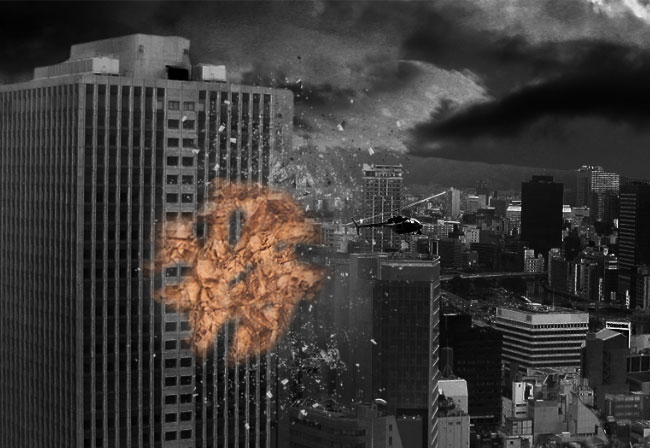
Apply the following Adjustments by clipping mask to the rock texture.
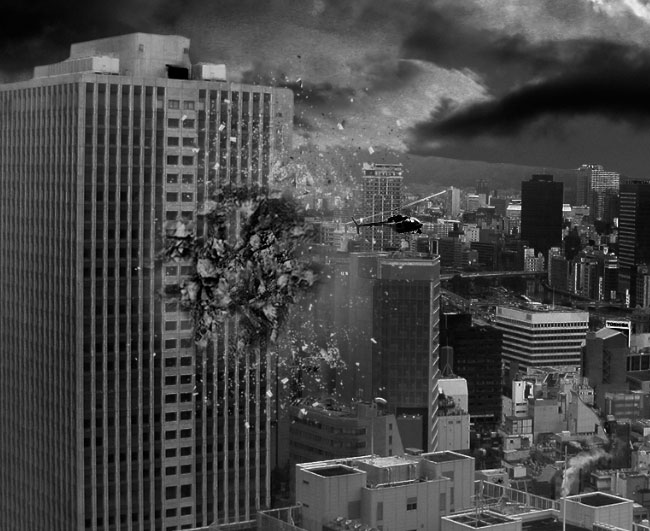
Take your Explosion brush, create a new layer and randomly select from the set and paint on and around the rock texture effect as shown below. Create new layers for each explosion brush you paint on for better manipulation.
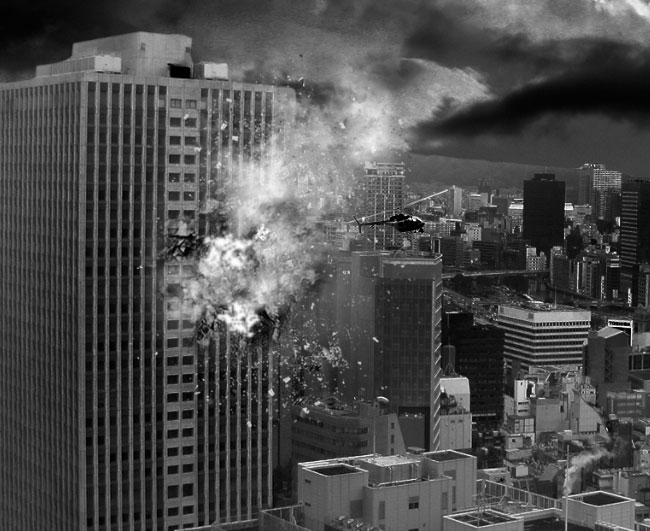
Create a new layer above all previous layers. Once again go Filter > Render > Clouds. Set the blend mode of the cloud layer to screen and apply a Hide All layer mask. Within the layer mask set the brush flow to 20% and gently paint back on some areas of the cloud for a sutler effect.
We further added some more explosion debris to sky scrapers in the distance by simply creating a new layer and painting on the explosion with the debris brush.
In our final step we add the colors via Adjustments above all layers (NO CLIPPING MASK): Selective Color, Color Balance, Vibrance, Curves.

We have come to the end of this tutorial. Hope you had fun learning. Any questions or discussions you can comment below. Happy Photoshoping
Create a Cinematic Effect in Photoshop
In this video tutorial you will learn "The Summer Blockbuster look" - using the powerful 2 node subtractive colour setup.
The cinematic movie effect is a edited part made by the psddude team and I hope you will like the look.
Create a new layer named Color. Set the blend mode to Color, pick the Brush Tool, and simply paint like shown in the image using a light purple #caa7ba tone. Use different opacity levels.

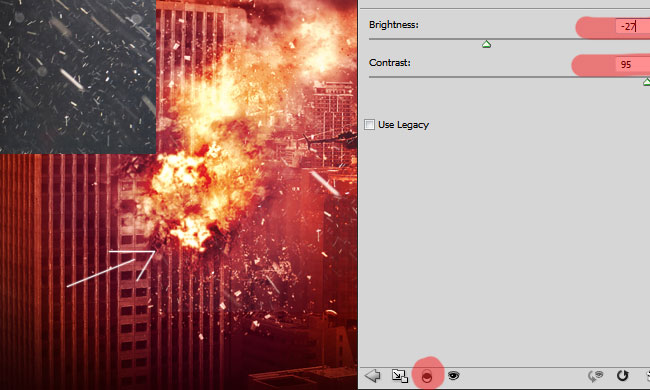
Use this stock image in a new layer and set the blend mode to Screen. Add a Brightness/Contrast clipping mask just for this image with the following settings.
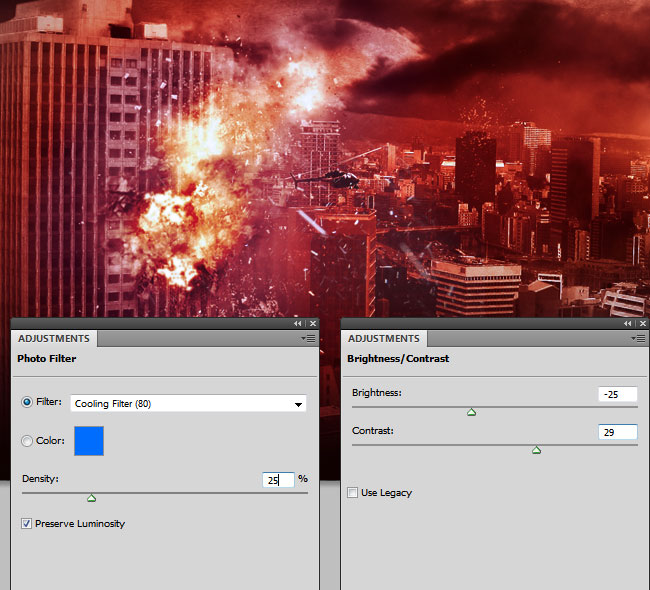
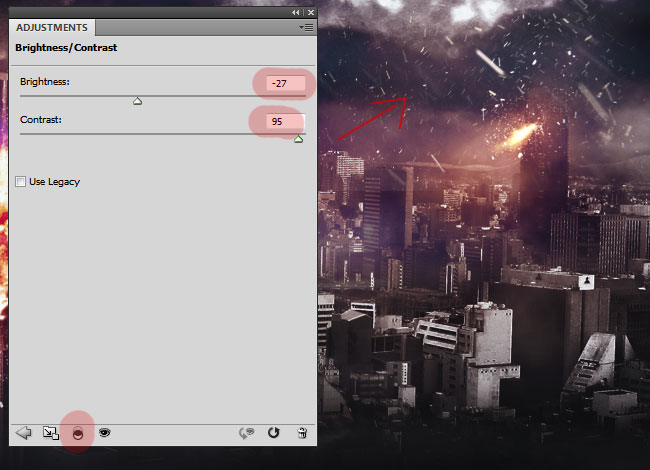
I will now add a Photo Filter and a Brightness/Contrast adjustments for all the layers.
Pick one of these Lens Flare Textures and add it in a new layer like shown in the preview. If you picked a colored lens flare you have to add a Hue/Saturation adjustment to desaturate it.
To add some color effects I have used this lens and optical flare preview image. So this time use the preview and not the images inside. Set the blend mode to Lighten. Add a Gaussian Blur and a Motion Blur filter effects to make the colored texture blurry.
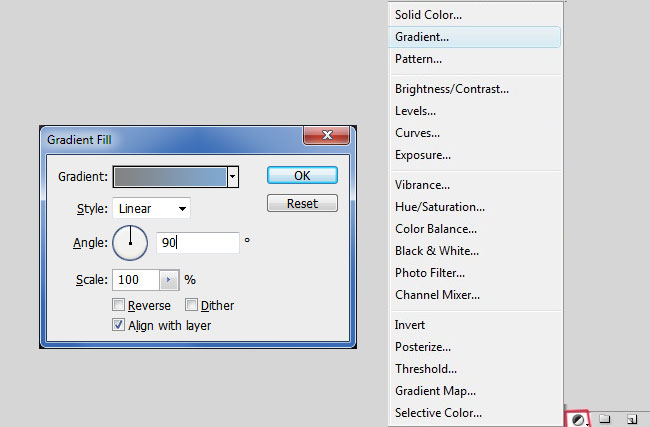
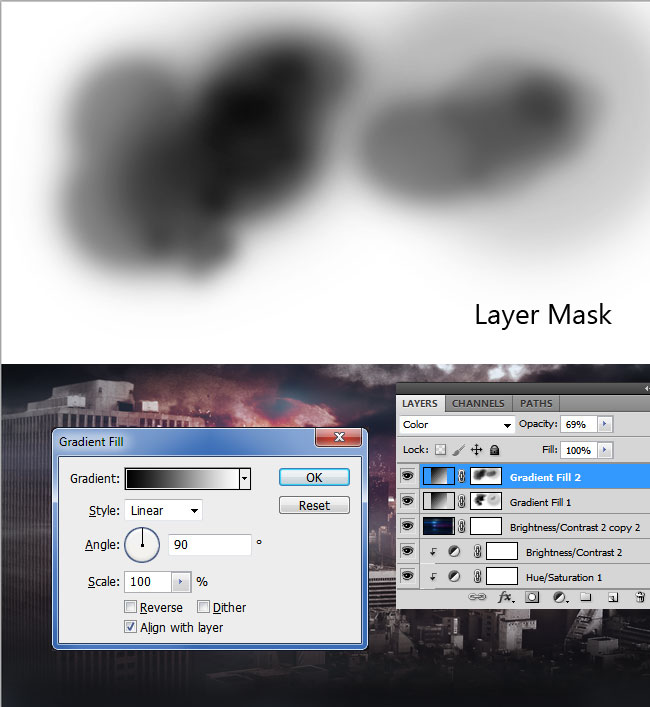
In this step we'll add a Gradient Fill adjustment using these colors: #838383 and #81a8d1
Set the blend mode of the Gradient Fill adjustment to Color, opacity 60%. Also add a layer mask and inside paint with different tones of gray like shown in the image.
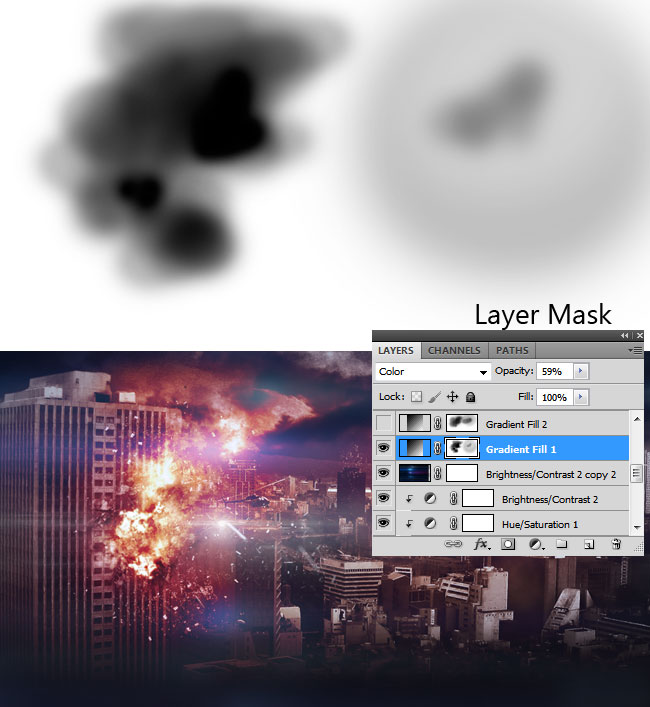
Add a new Gradient Fill adjustment using black and white colors. Set the blend mode of the Gradient Fill adjustment to Color, opacity 70%. Also add a layer mask and inside paint with different tones of gray like shown in the image.
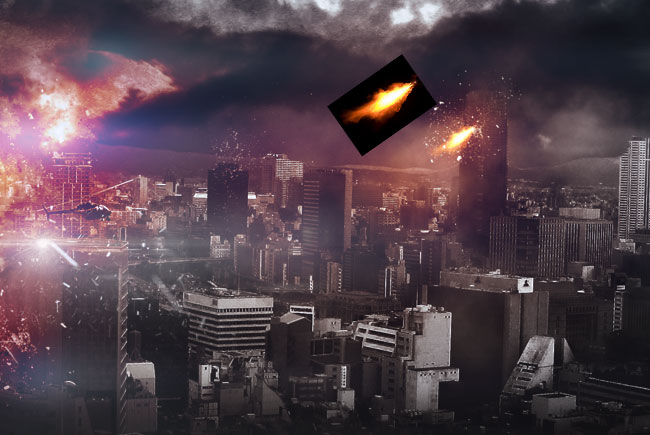
I have also added this flame on the city block explosion. You have to resize the image, roate and also change the blend mode to Screen.
Create a new layer and call it Darken. Use the Brush Tool and with the color black and different opacity levels simply add shading effects.

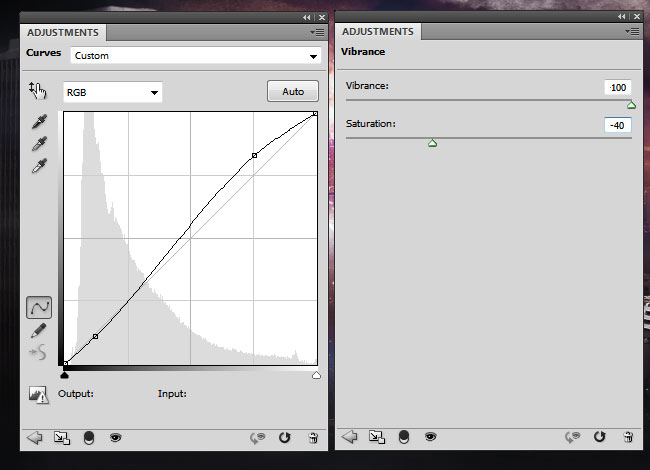
Add two adjustments for all the layers that you have so far. Add a Curves and a Vibrance Photoshop adjustments with these settings:
For extra blasting effects for the explosion I have used this cool texture ; all you have to do is to add the texture in a new layer, resize/etc and set the blend mode to Screen. Add a Brughtness/Contrast adjustment just for this layer only to make it pop.
The last but not the least step is the sharpen photo effect using the High Pass filter. Here are some quick and easy to follow tutorials on how to Sharpen Photos with High Pass Filter in Photoshop
Here is a quick video tutorial on how to create the sharpen image effect in Photoshop using 3 different methods.
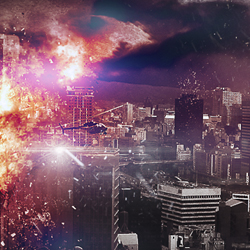
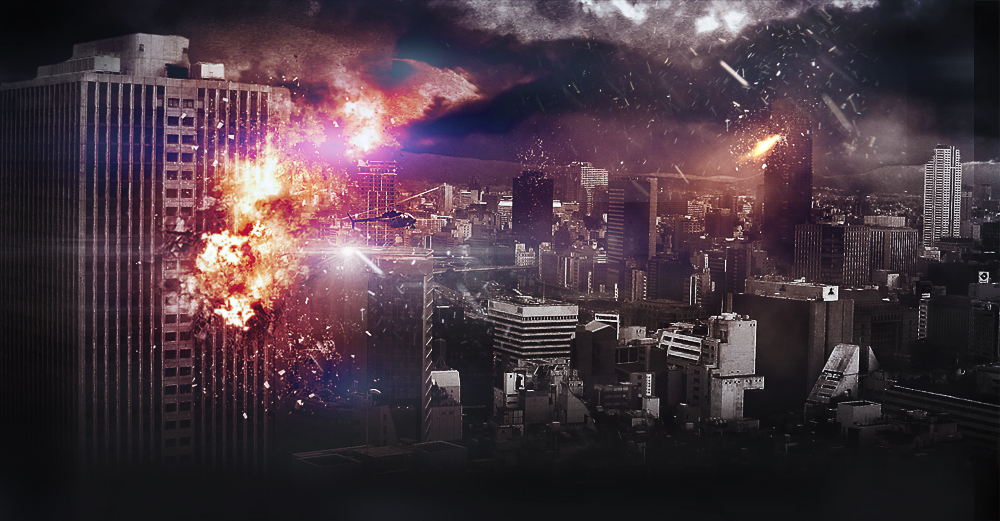
So here is the final result for the apocalyptic city explosion Photoshop tutorial; we hope you enjoyed reading/practising this tutorial and that you learned new interesting techniques.
To add a fire effect to your photos, you can try these awesome Photoshop actions.
Burnt Paper with Fire Effects in Photoshop
Apocalypse Effect Photoshop Action
Fire Effect Photoshop Action Download
Related Articles
- Fire Photoshop Brushes | Free Brushes
- Fire Text Effects | Tutorials
- Fire Texture Collection | Free Textures & Backgrounds
4 comment(s) for "Apocalyptic City Explosion Photoshop Tutorial"