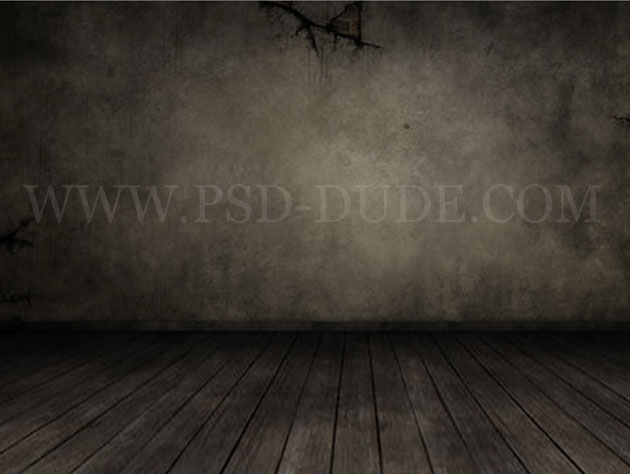
Open a new PSD file and copy this room stock image.
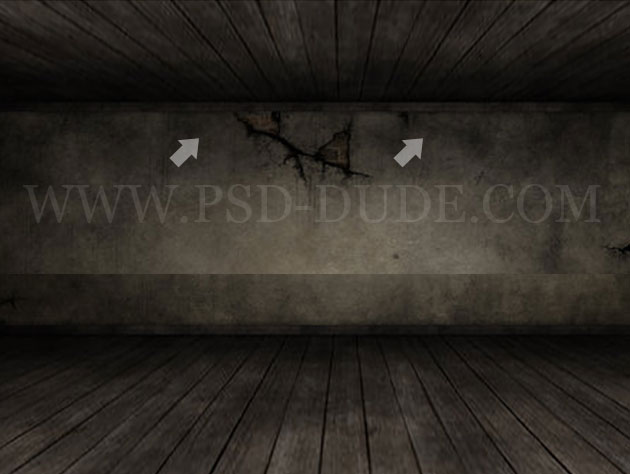
Duplicate the room layer, Flip Vertical and also cut part of the wall like shown in the image. That way we obtain a ceiling using the floor.
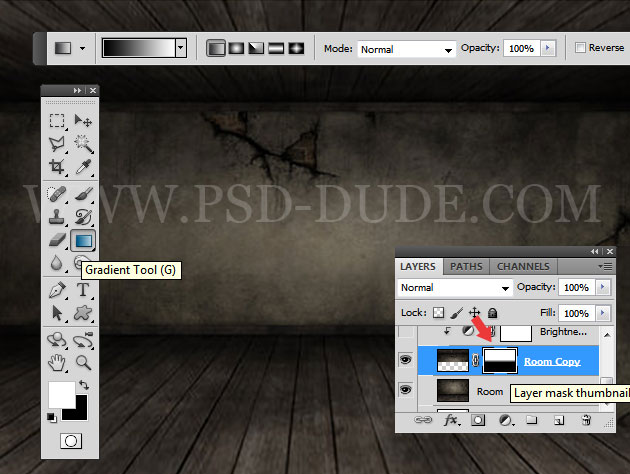
Use a layer mask for the Room Copy Layer and add a black/white gradient in this mask using the Gradient Tool; that way the transition bettween the two layers will be seamless.
Add a Brightness/Contrast adjustment layer to the Room Copy Layer; make sure you add the adjustment as clipping mask.
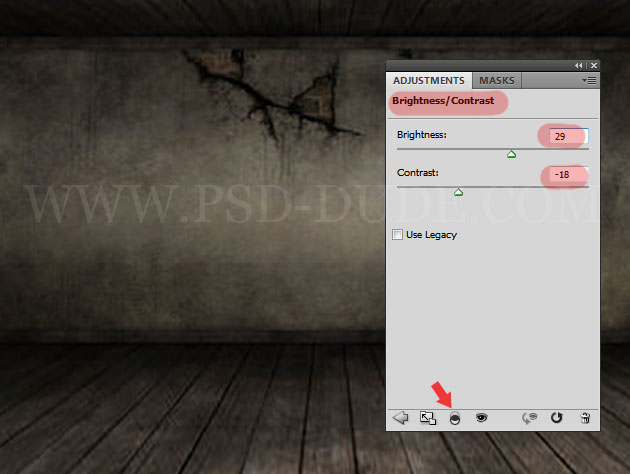
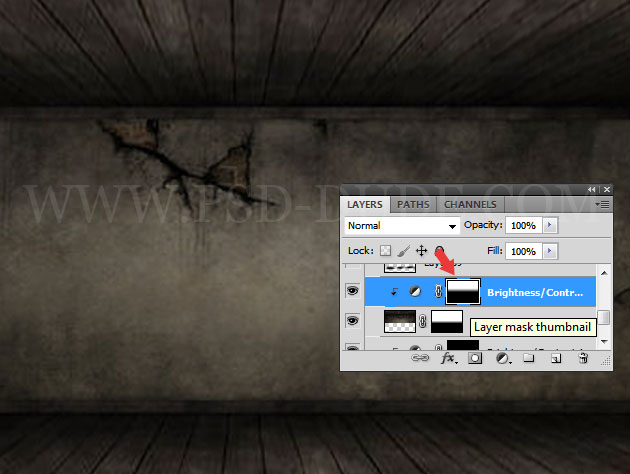
Again use the Gradient Tool for the layer mask as shown in the image. That way only the ceiling will be lightened.
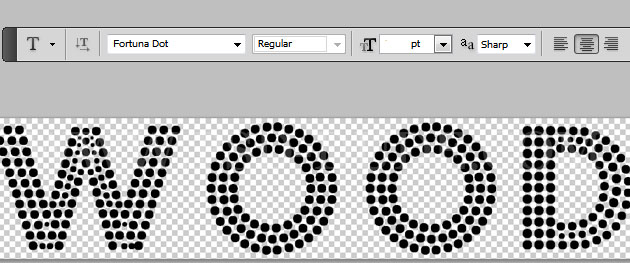
Open a new PSD file and in this file we'll add our text; I will write "Wood" using black color, but you can choose any text you want.
First we have to download the Fortuna Dot font and install it on your computer. It is essential to use this font so check out this tutorial on how to install font in Photoshop if you are a beginner.
You can add a new layer and use these heart shapes to decorate the text. Or you can use other custom shapes or any other graphics/text etc. But before you get to the next step you must select all the layers that you want to turn into 3D a convert them into a smart object.
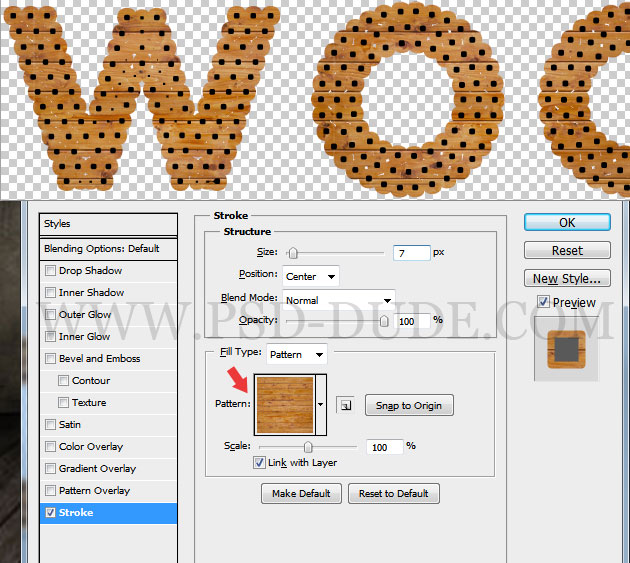
Open the layer style window for the Wood Text Layer and add a Stroke with these settings. I will use this wood seamless texture as pattern for the stroke.
So convert the text(and other text related layers) into a Smart Object and use this 3D Photoshop action to create a 3D text effect. Download the action, load the action in Photoshop and play the 3D effect simple(www.actions4photoshop.com) action. You will obtain a similar result.
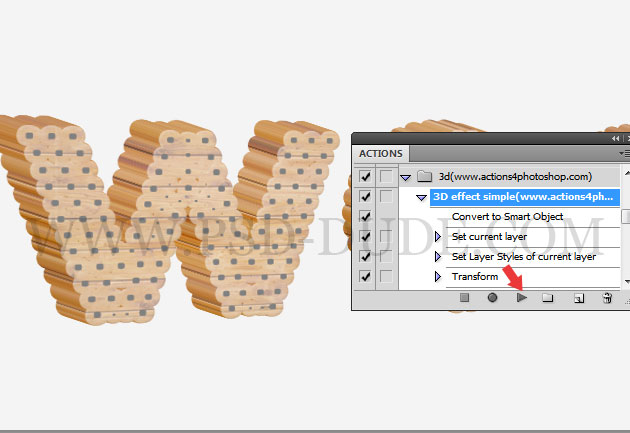
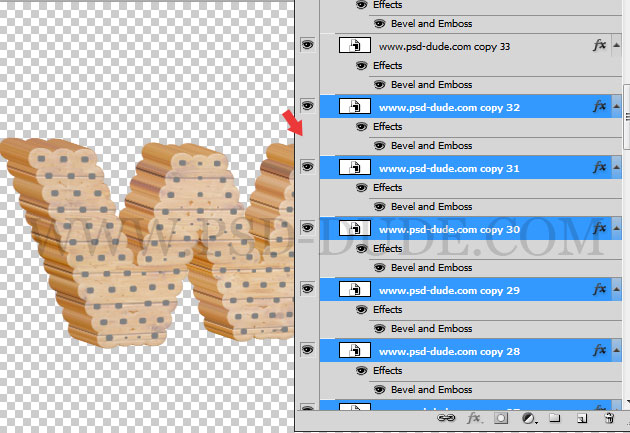
Remove the Background Layer. Inside the 3D Group you will find many layers. Select the first 33 layers and delete them. Press SHIFT to select multiple layers.
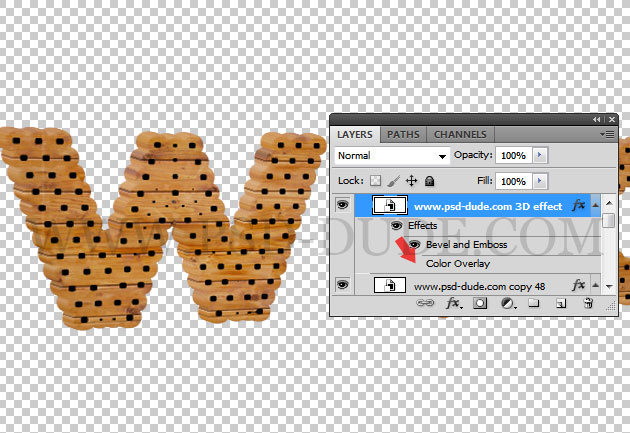
Remove the Color Overlay and the Bevel and Embossfrom the 3D effect Layer(the first layer from top)
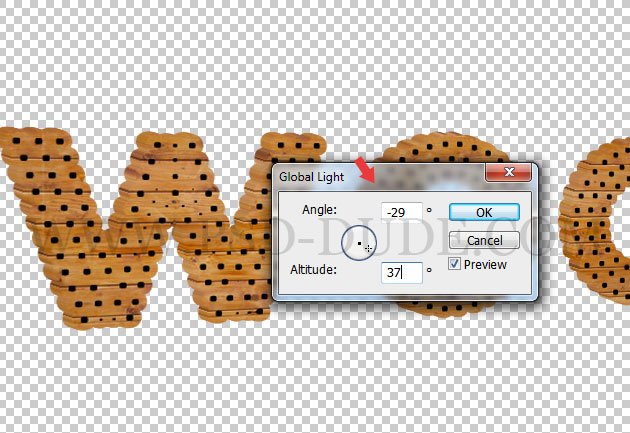
Go to Layer>Layer Style and choose Global Light with these settings:
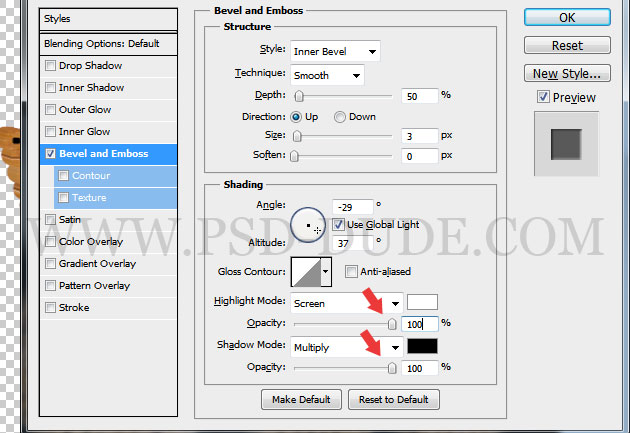
Open the layer style window of any layer and set the Bevel and Emboss like this. Copy Layer Style and select all the layers(except the 3D effect Layer(the first layer from top) and Paste Layer Style.
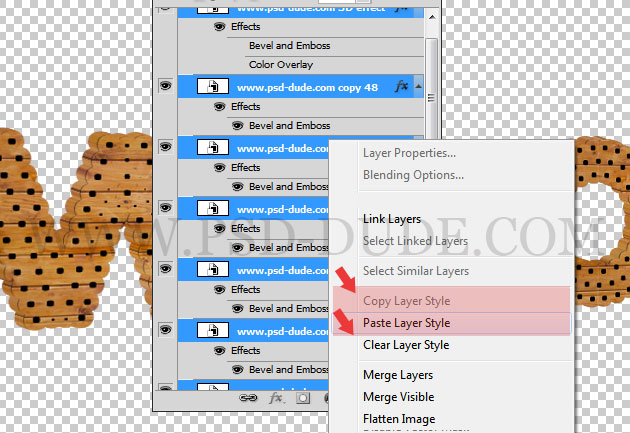
Select all the layers(except the 3D effect Layer(the first layer from top) and group them into Group 1. Copy all the text layers into our initial PSD file. Make two copies from the Group 1 (Group 2 and Group 3) and move the groups like shown in the image.
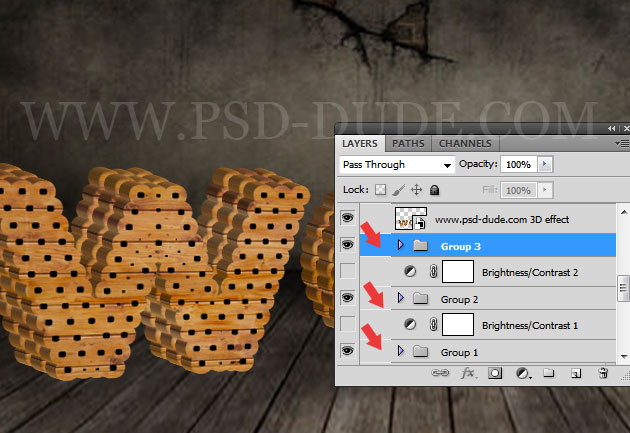
Add a Brightness/Contrast adjustment layer above the group 1 and 2.
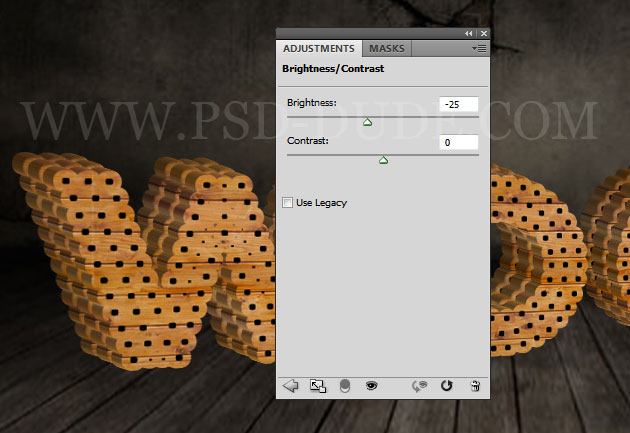
Our wood text effect should now look similar to this one.
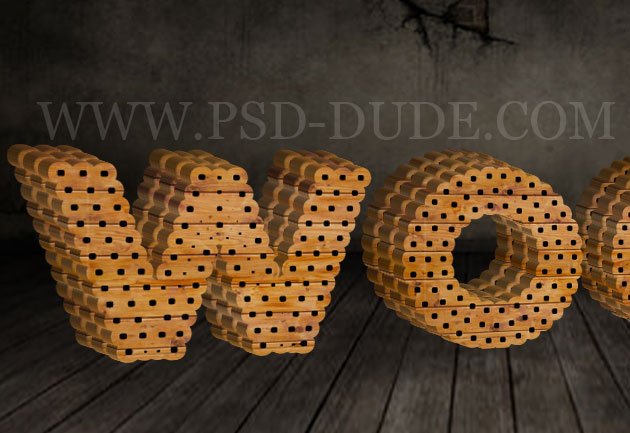
Use the first group and duplicate it; make it black and use a Gaussian Blur to create a soft shadow on the wall for our wood text effect.
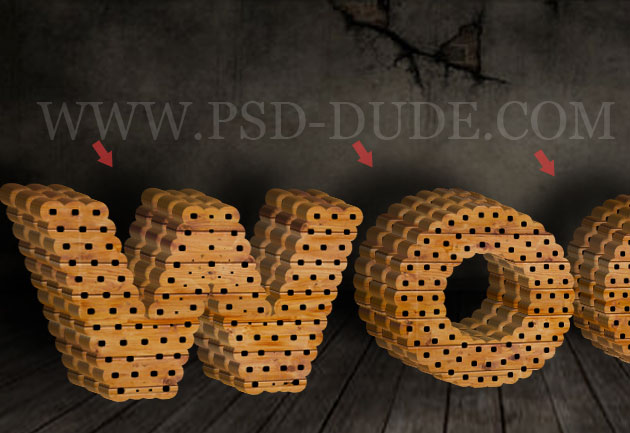
Create a new layer below the wood text layers and use a soft round brush(different opacity levels) and color black to paint a shadow under each letter. Use the Gaussian Blur to obtain a soft result.
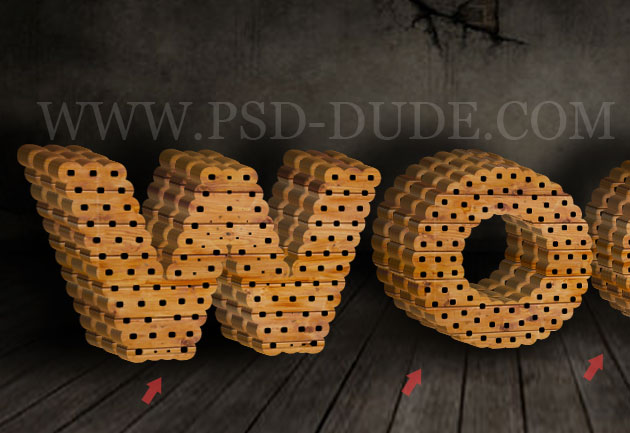
Now I will add another vintage retro effect to the wood text using these retro collage images : link 1 and link 2. Add a
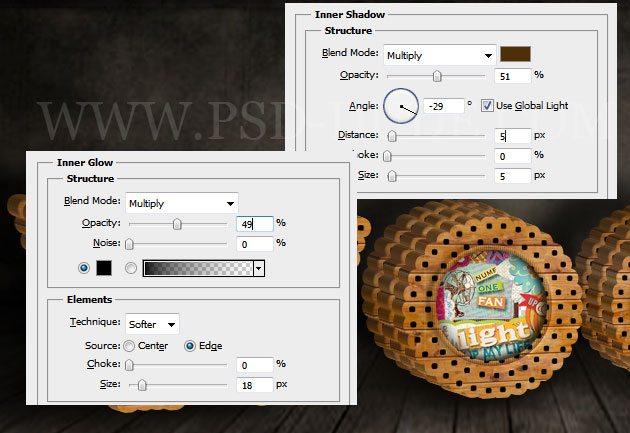
Copy this rope PNG stock image and make two long ropes. Place them like shown in the image and add a Inner Shadow effect.
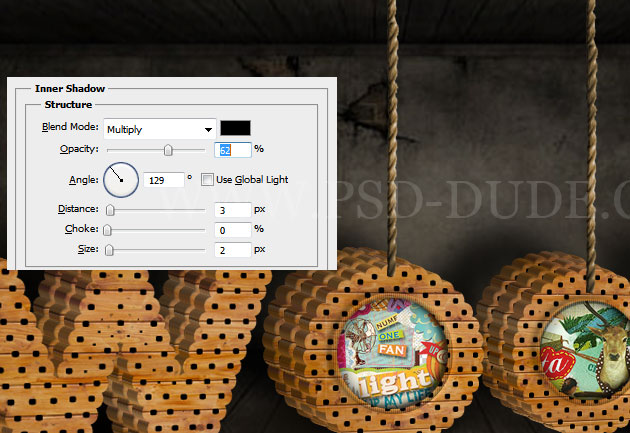
Use the Brush Tool color black to create the shadow for the ropes. Learn how to draw a line in Photoshop using the Brush Tool.
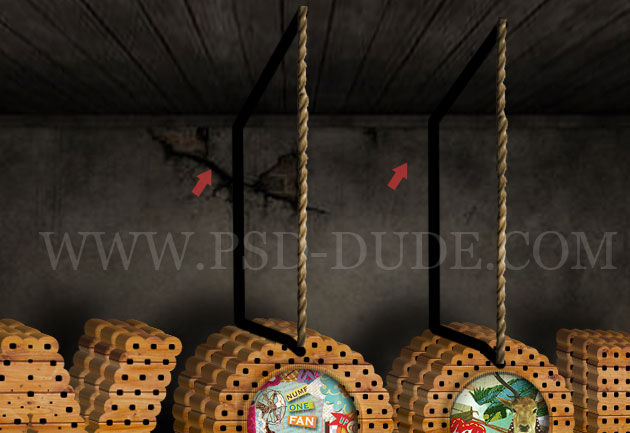
Use the Gaussian Blur to soften the shadows and also lower the opacity.
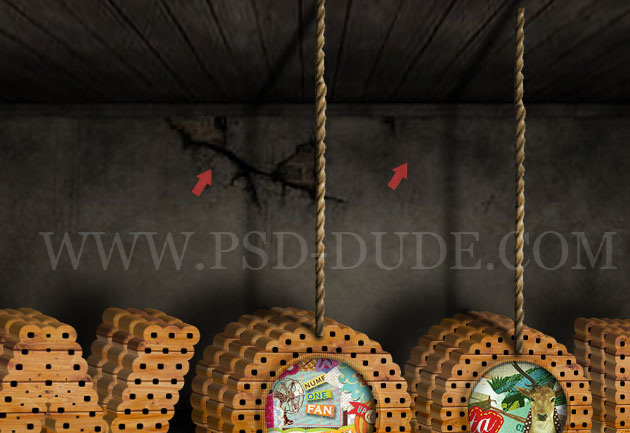
For the final touches you can add some lighting and shading effects by creating light rays(Brush Tool, white color, blend mode Overlay) in the room. Or you can use these sparkle brushes (sparkle 4 brush) to create some light dust effect; use #f5ce6f color and a soft Motion Blur effect. You can also add a Outer Glow layer style(white, Overlay blend mode, Range 5).
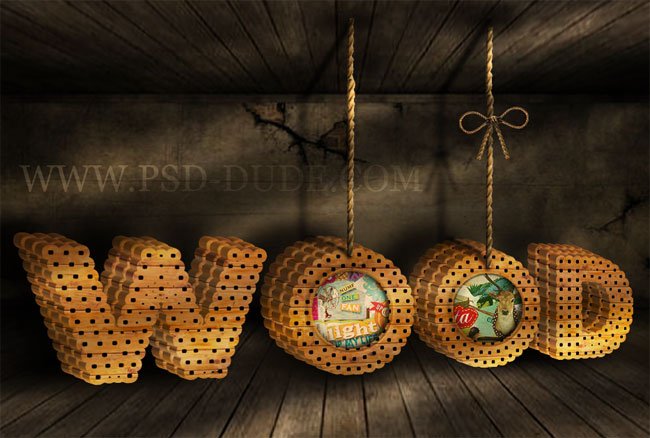
I have also added a old paper texture with Multiply blend mode and opacity 70%. So here is the final result for the vintage wood typography text effect; I hope you will enjoy and practice this new tutorial.

Premium Wood Photoshop Effects
If you want to try different wood Photoshop effects like painted wood or carved wood you can try these actions. You will obtain quick results, easy to edit and customize.
Painted Wood Photoshop Style Actions
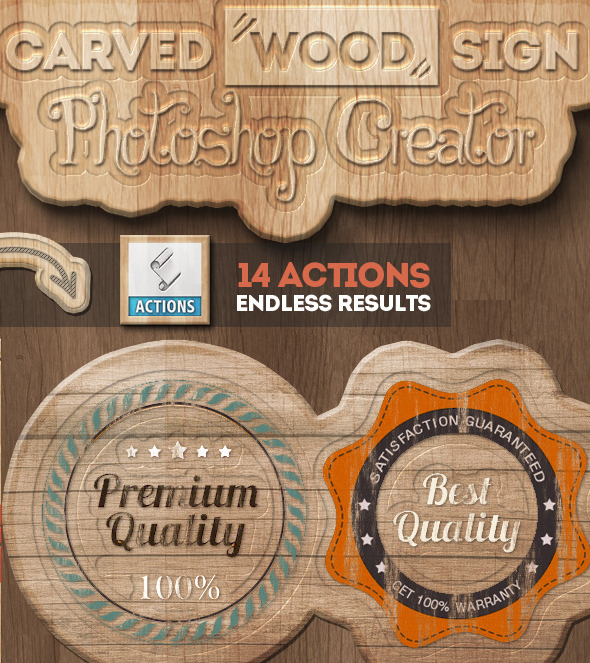
Carved Wood Sign Photoshop Creator
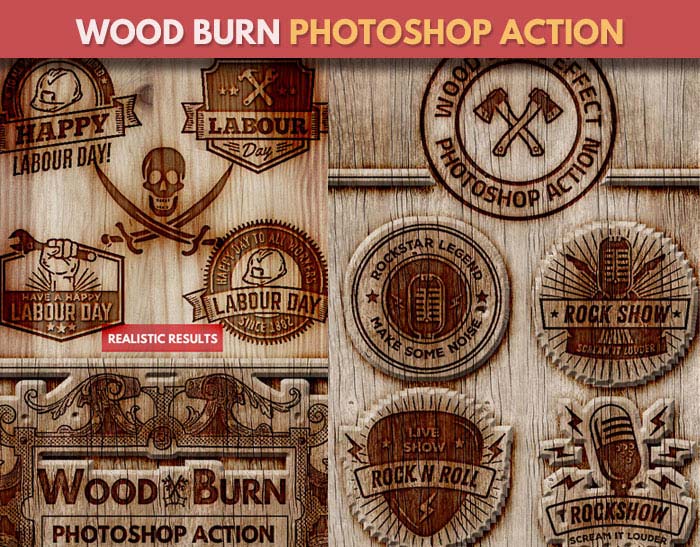
Wood Burn Effect Photoshop Action




2 comment(s) for "Vintage Wood Typography Photoshop Tutorial"