


What is an Adjustment Layer?
A Photoshop Adjustment Layer is an effect/adjustment added to a layer that is an independent layer. That means that when we apply a Color Adjustment for example, the effect doesn't get rasterize along with the respective layer/image. The adjustment remains separate and editable and the original layer/image also remains intact. An adjustment layer can affect one ar multiple layers and can be applied to almost any type of layer.
How to Add an Ajustment Layer in Photoshop
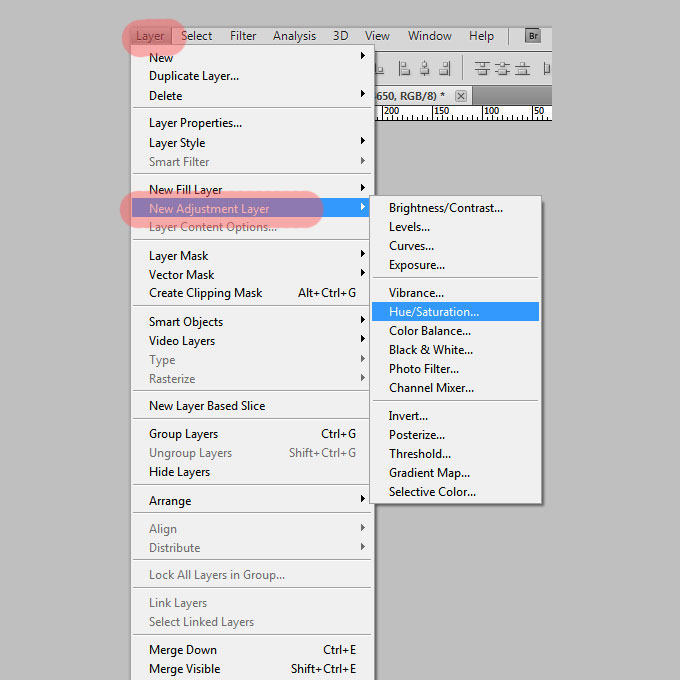
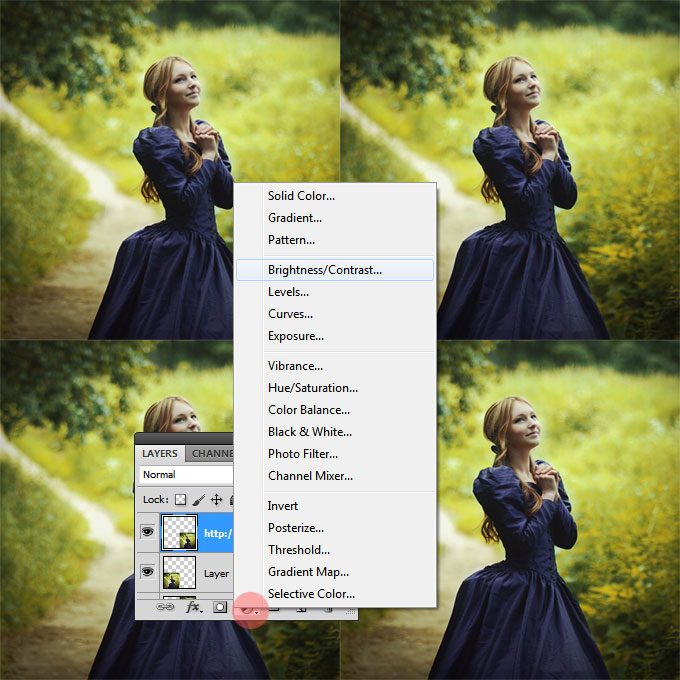
To add a Photoshop adjustment you can simply click the Create new fill or adjustment layer button found on the lower area of the Layers Tab. Or you can go to the Layer, New Adjustment Layer menu and choose from the list of adjustments. You can see previews with both cases in the images below.
Adjustment Layers for Post-Processing Photos
An adjustment layer is most commonly used for photos, to adjust elements like brightness, contrast, color, saturation, exposure and so on. They are used by photographers in post processing their photographs. In fact adjustment layers are an essential part of post-processing. They allow you to make lots of changes including color correction and the most important thing the original image remains intact.
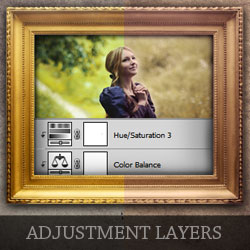
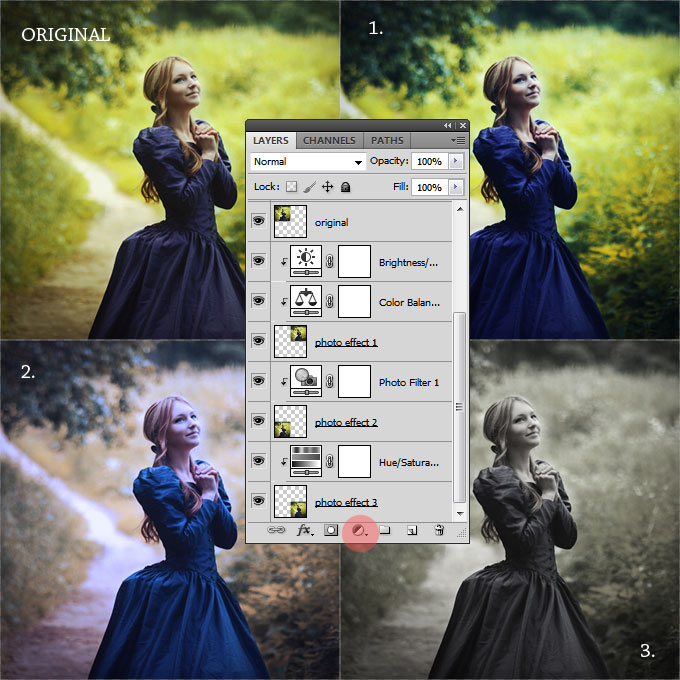
In the image below I have applied some adjustment layers to this beautiful photo. You can see the original image and some variations of it with simple Photoshop adjustments.
Even if they are mainly used for photographs, the adjustment layers can be added for all kinds of layers: rasterized layers/photos/etc, for custom shape layers, for text and for smart objects also.
Adjustment Layers for One or Multiple Layers
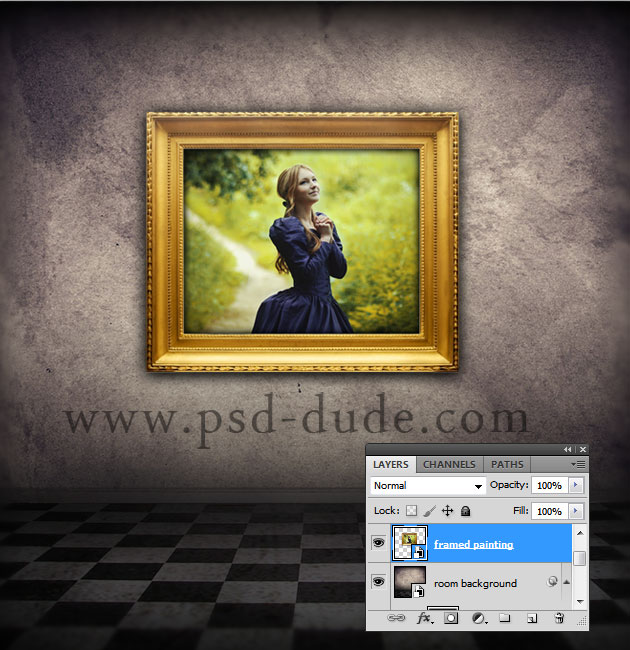
Now let's assume that we have two layers, one is this room background and the other layer is made out of this gold frame and the girl photo that we have used in the previous steps.
If we want to blend the two layers we have to add some adjustment layers to the framed painting layer. As you can see it has different color tones, brightness and color saturation.
So before we add any Photoshop adjustments, let's take a quick look at the two layers. You can see in the preview the color/contrast/etc difference.
Now select the framed painting layer and click on the Create New Fill or Adjustment Layer button. From the list choose Color Balance and make the following settings.
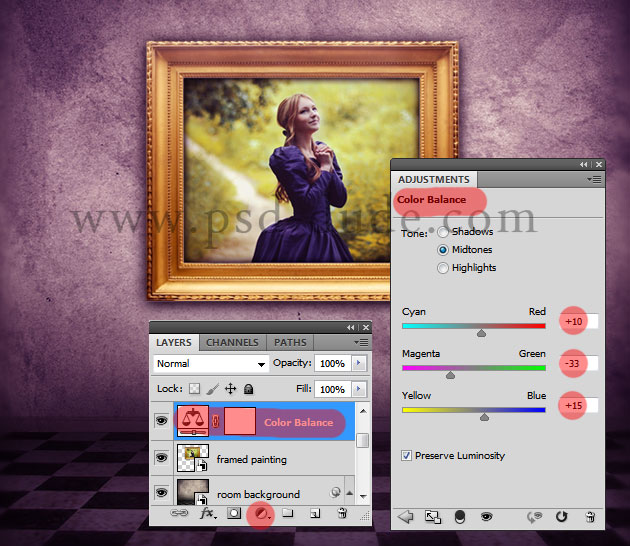
As you can see the color tones changed for the entire canvas that contains the two layers. Meaning that when you add an photoshop adjustment layer, it affects all the layers that are placed below. In our case we want to add the Photoshop color adjustment only for the framed painting layer. To do that we have to press the Click to Clip to Layer button that it is found on every Adjustment Layer tab.

As you can see the Color Balance adjustment has now a little arrow attached to it that means it affects only ONE Layer(the layer that is below it). To apply the effect to all the layers all you have to do is to press that button again. Note that the Clip to Layer button is not available for groups of layers.
Tip! If you have 5 layers and you want to apply a certain adjustment effect only to 3 of them you have to convert the 3 layers into a smart object.
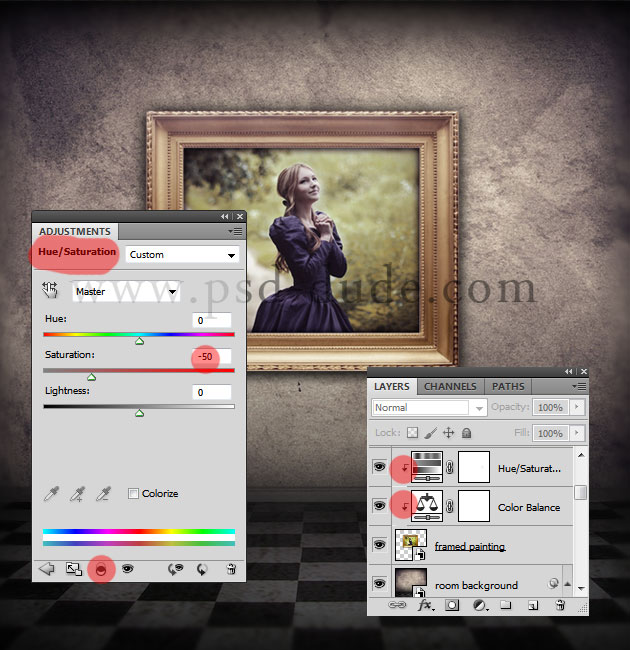
To continue with the blending process I will add one more adjustment layer to the framed painting layer. As you can see the colors are way too saturated so I will add a Hue/Saturation adjustment and reduce the saturation as shown in the image.
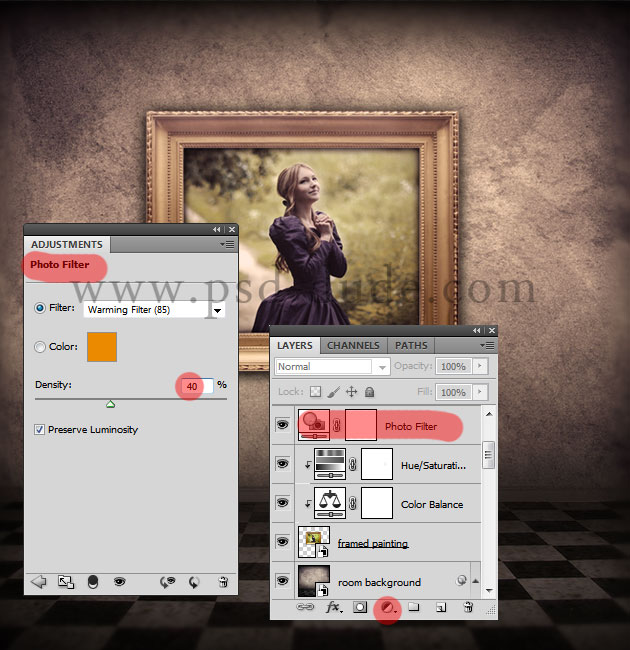
Next let's add a Photo Filter adjustment that affects all the layers. If the adjustment has no arrow attached than it affects all the layers below.
Adjustment Layers and Layer Masks
As you can see every Photoshop adjustment layer has a Layer Thumbnail like all the layers, but it also has an Layer Mask Thumbnail, meaning that you can use Photoshop mask layers for adjustment layers. And let's see exactly how.
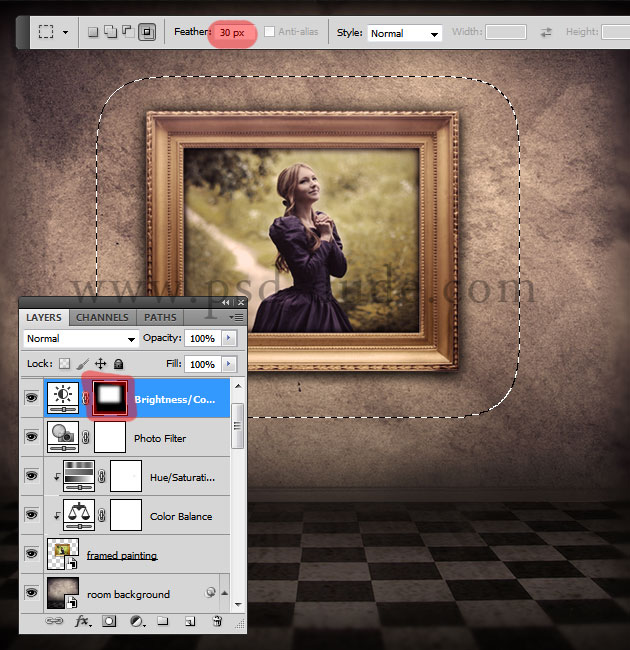
Add a new Brightness/Contrast adjustment that affects all the layers and place it on top of all the other layers and adjustment layers. The settings are not really important; I have increased the contrast a little and reduce the brightness. What is important is that I want that effect to be applied only on the framed painting area. So make a selection like in the image(feather 30px); make sure you are in the Layer Mask and fill that selection with black color. Press CTRL+I to invert the effect. You should obtain a similar result.
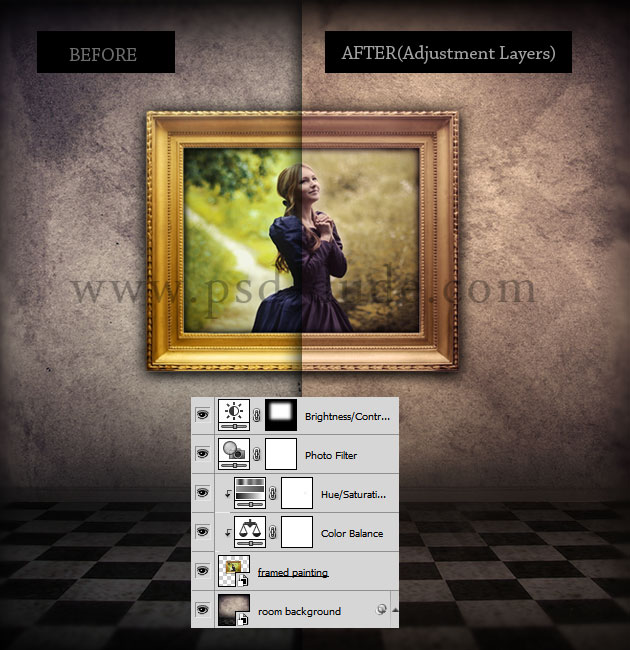
Now let's see the before/after adding adjustment layers preview image. As you can see there is a big difference and the advantage is that all the original layers are intact and that we can edit any added effect by double clicking on the Adjustment Layer Thumbnail.
Adjustment Layers and Layer Styles
You should also know that if a layer has layer styles, the adjustments DO NOT apply for the layer styles if you press the clip on layer button. You have to
rasterize the layer styles first or you can convert the layer into a smart object.
Also, it's nice to know that using Adjustment Layers might make Photoshop run faster. You can find out more about what to do if Photoshop lagging is a problem for you and what to do about it.
Well that is all you should know about adjustment layers and I hope that the Photoshop beginners learned something new and useful today. See you next time!

3 comment(s) for "Photoshop Adjustment Layers"
I like the color tones of your work; to make it look even better you should darken the floor and maybe add a grunge texture to it. And also add a Inner Glow to the girl photo using black color to make it look like it is behind the frame!
keep up the good work!
reply