


Create the Creepy Horror Haloween Background
In this pPhotoshop tutorial I will use premade backgrounds and other photoshopped images and blend them together to create a Halloween photo manipulation.
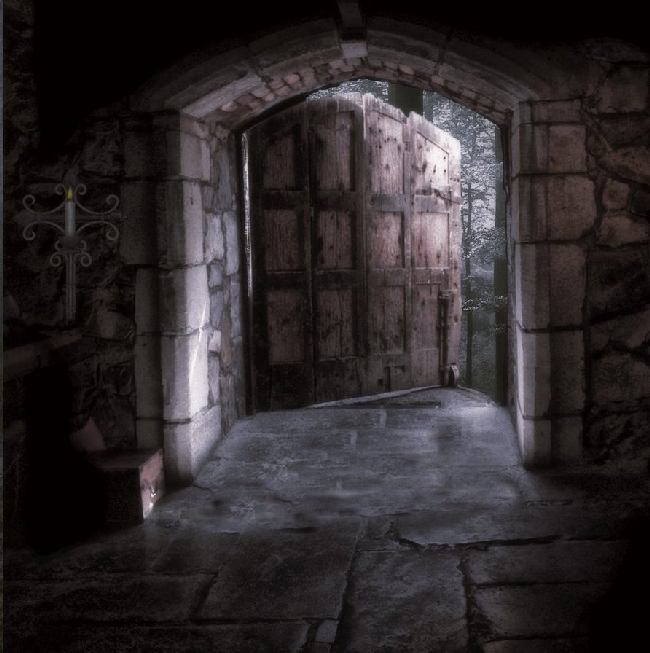
So let's start with this Creepy Room Premade Background stock image. Call this layer Creepy Room.
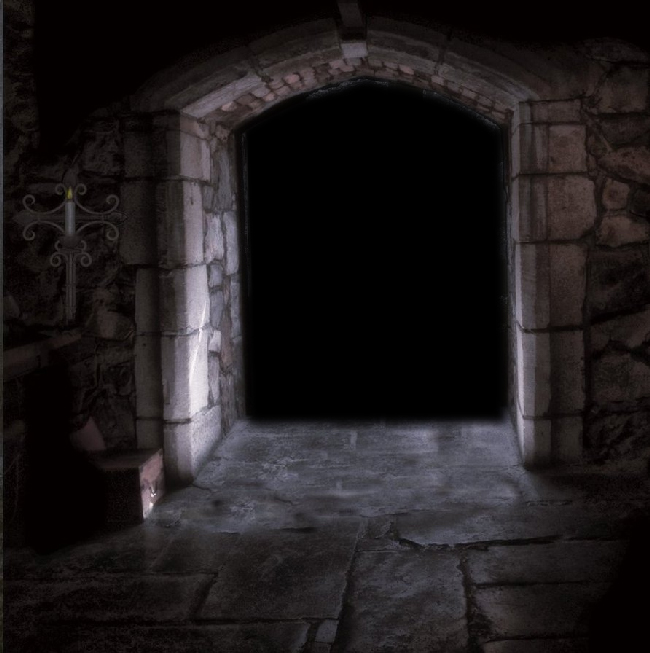
Create a new layer and call it Open Door. Use the Brush Tool, color black and paint over the door area.
Create a new layer and call it Wood Background. Paste this Forest Premade Background in this layer. Right click and choose Create Clipping Mask.
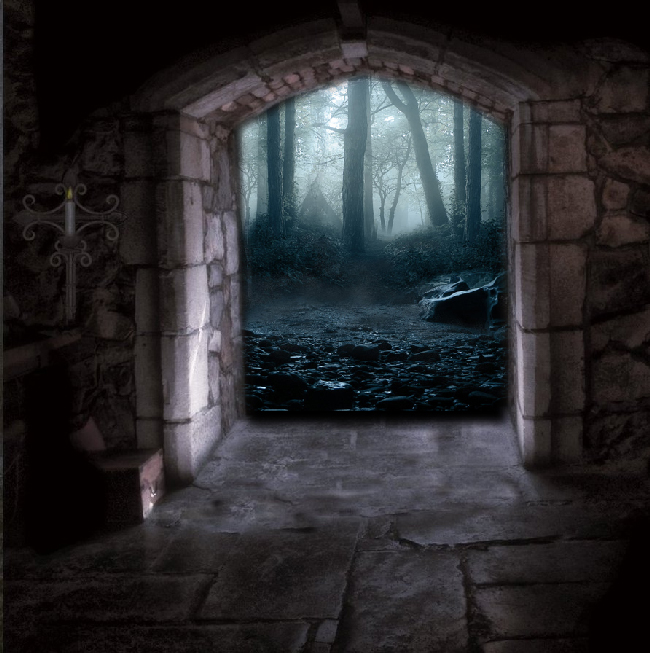
Create a new layer and call it Haunted Background. Paste this Haunted Background stock image in this layer. Right click and choose Create Clipping Mask.

Change the blend mode of the Haunted Background layer to Darken.
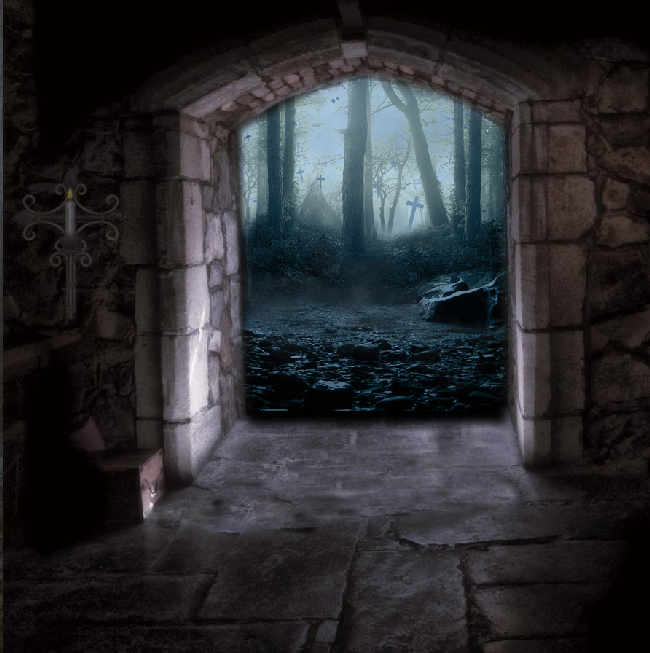
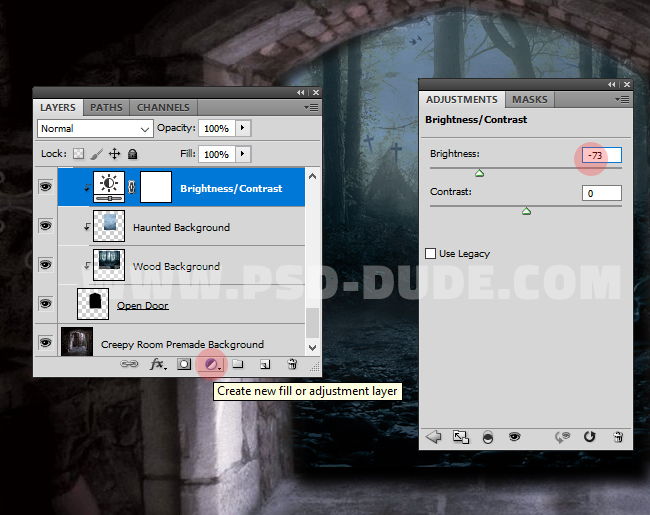
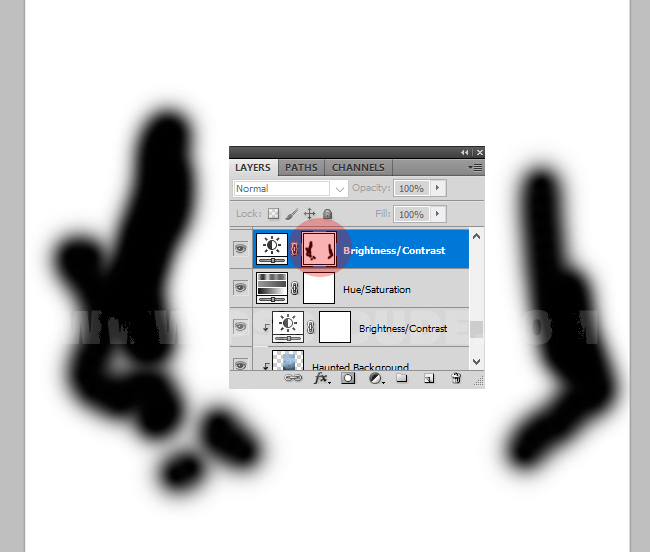
Create a new Brightness/Contrast adjustment layer with these settings. Right click and choose Create Clipping Mask.
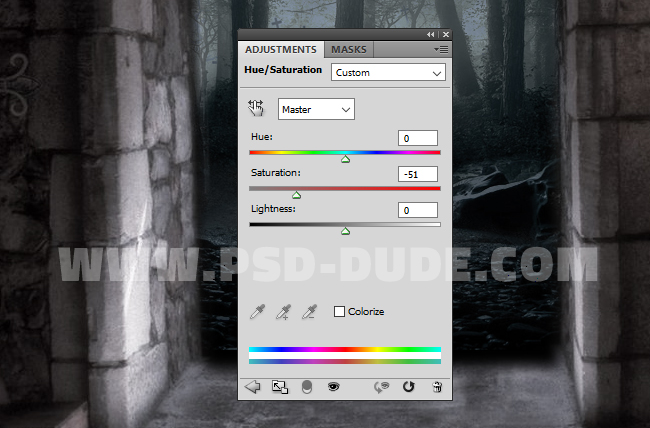
Add a Hue/Saturation adjustment layer and decrease the Saturation to around -50% or more.
Add a Brightness/Contrast adjustment layer and decrease the Brightness to around -55% or more.

Use the Brush Tool color black and a soft round brush to paint inside the Brightness/Contrast layer mask.
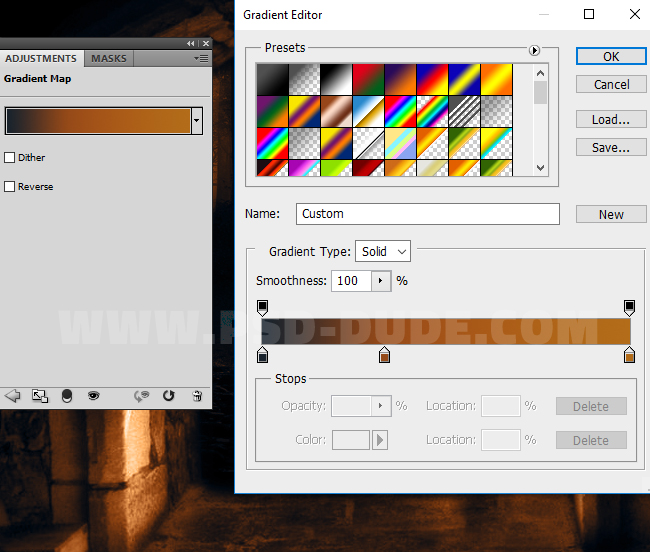
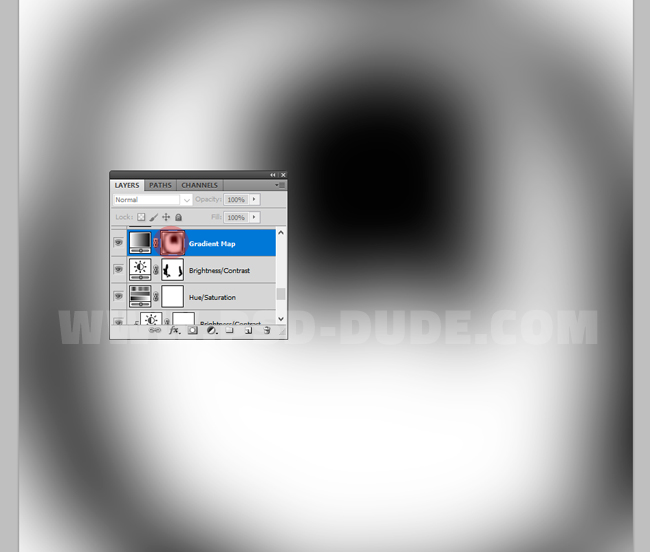
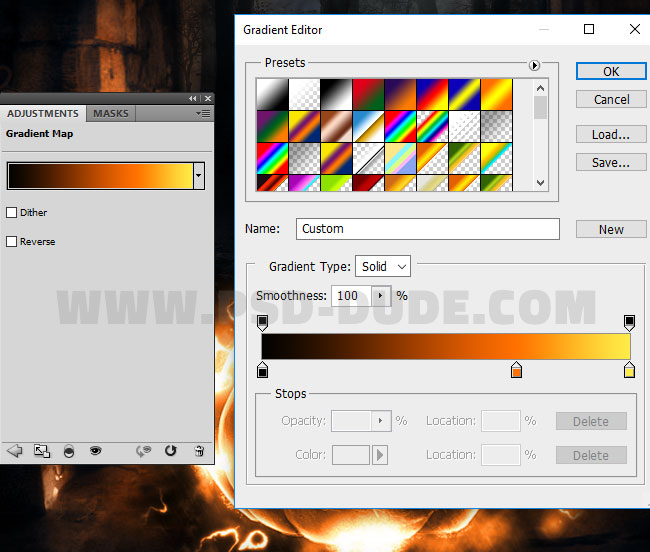
Add a Gradient Map adjustment layer. For the gradient I will use this colors: #18222d / location 0%, #954a18 / location 33% and #b36c19 / location 100%. Make sure that the blend mode of the Gradient Map adjustment layer is set to Color, opacity 100%.
Use the Brush Tool color black and a soft round brush with different opacity levels, to paint inside the Gradient Map layer mask.
Set the Background Color to white and the Foreground Color to black. Create a new layer and call it Smoke. Fill the layer with color black. Go to Filter > Render > Difference Clouds. Play this filter multiple times (up to 10-12 times). After you play the filter once you can simply press CTRL+F to apply the same filter more easily. CTRL+F is a shortcut to Apply Last Filter.
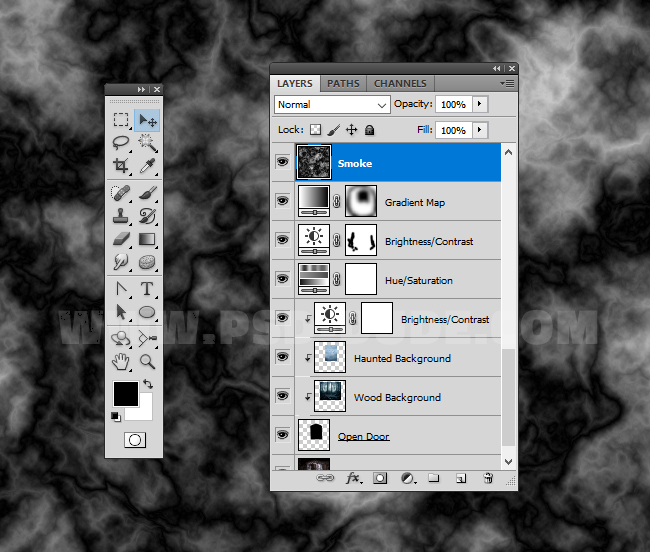
Set the blend mode of the Smoke Layer to Soft Light, opacity 53% .
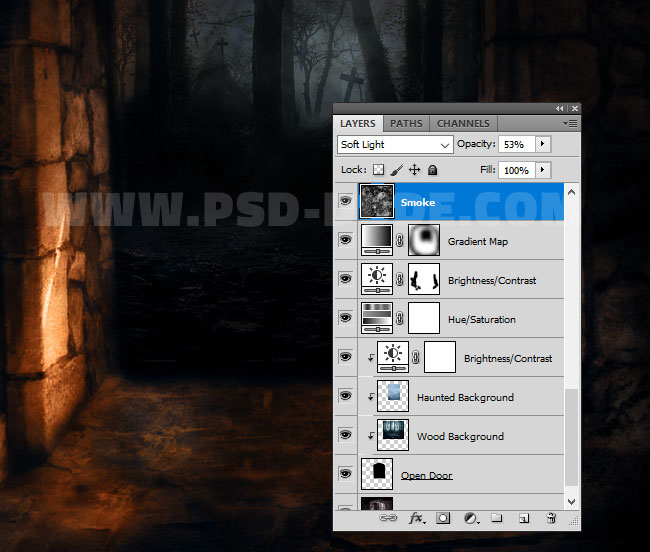
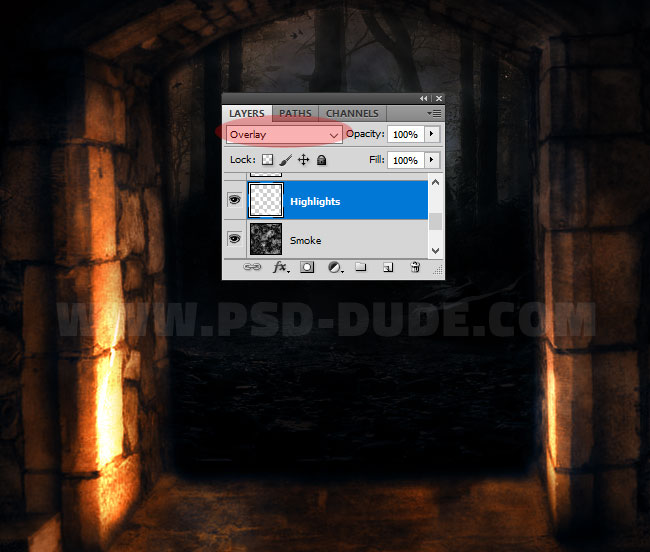
Create a new layer and call it Highlights. Use the Brush Tool and a soft round brush to paint like shown in the preview. Use the color white.

Set the blend mode of the Highlights layer to Overlay.
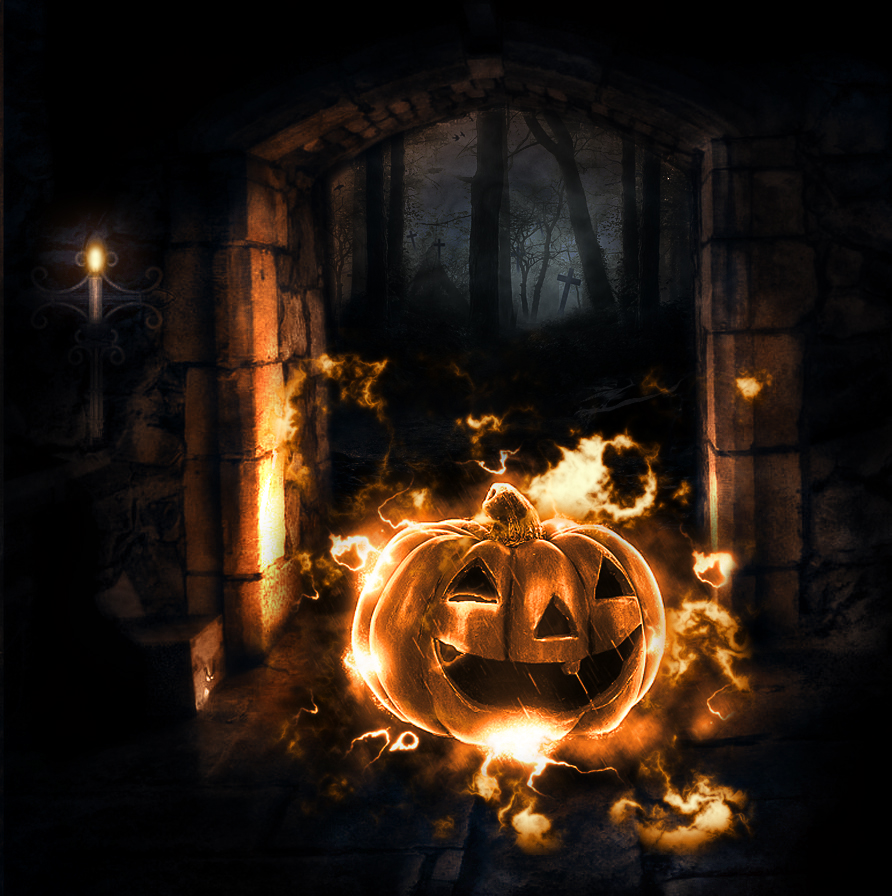
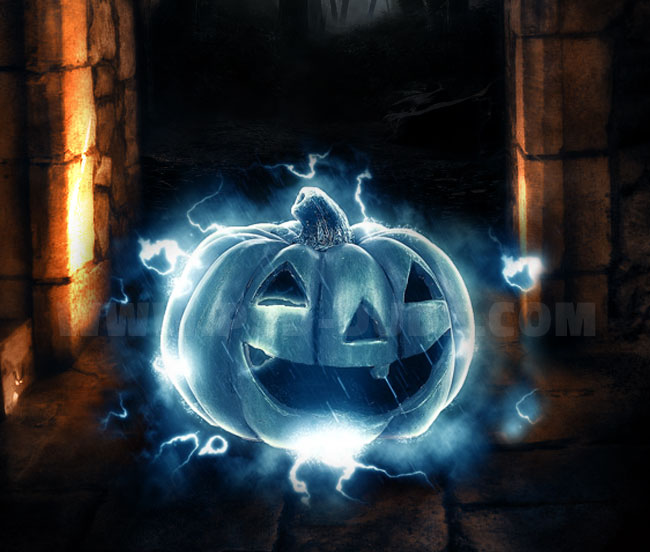
Add the Scary Halloween Pumpkin
In a new layer add this scary pumpkin photo manipulation image. Call this layer Halloween Pumpkin.
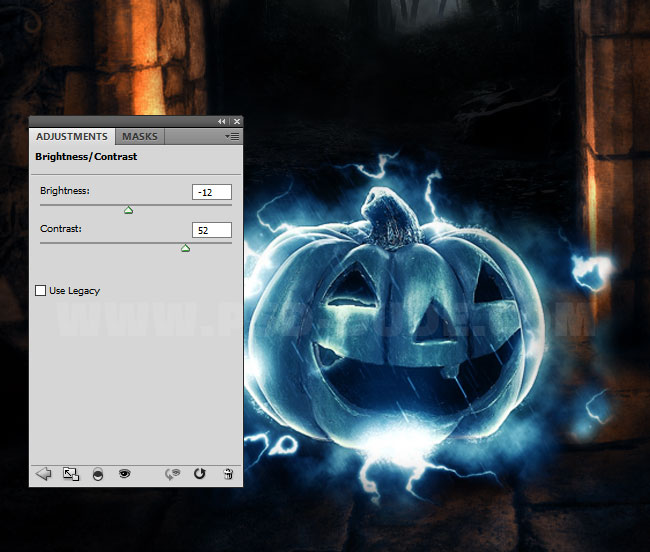
Add a Brightness/Contrast adjustment layer. Right click and choose Create Clipping Mask.
Add a Gradient Map adjustment layer. For the gradient I will use this colors: #040200 / location 0%, #ff7200 / location 69% and #ffec47 / location 100%. Make sure that the blend mode of the Gradient Map adjustment layer is set to Color, opacity 100%. Right click and choose Create Clipping Mask.
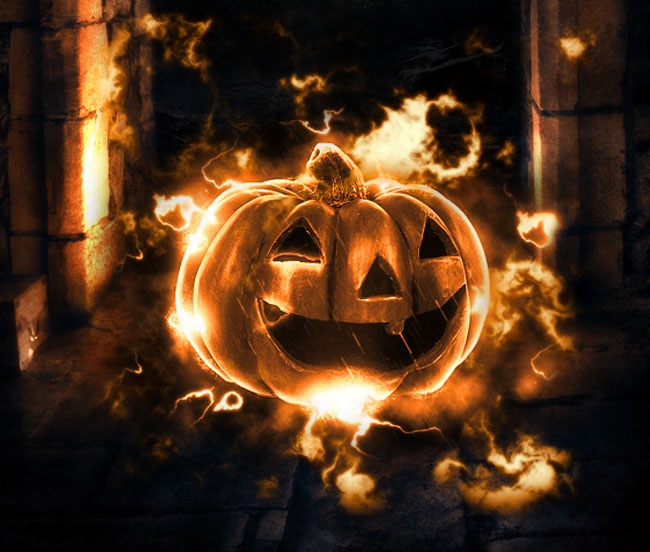
Your pumpkin Halloween photo manipulation should now look like this. If you like you can use some of these lightning textures and brushes for Photoshop to add more light effects.
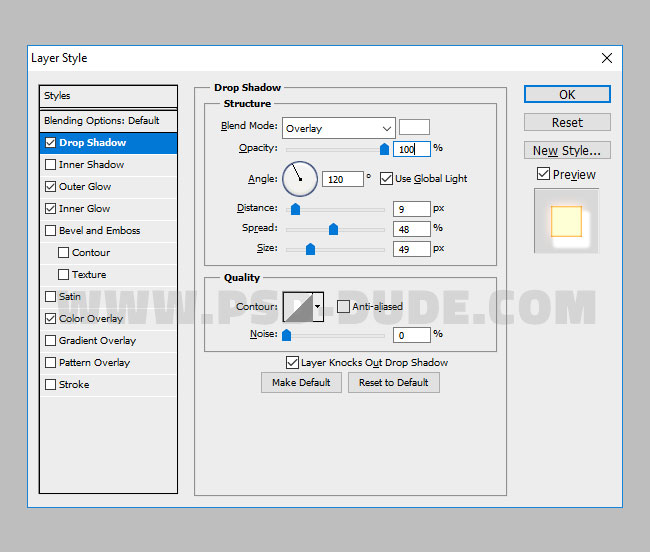
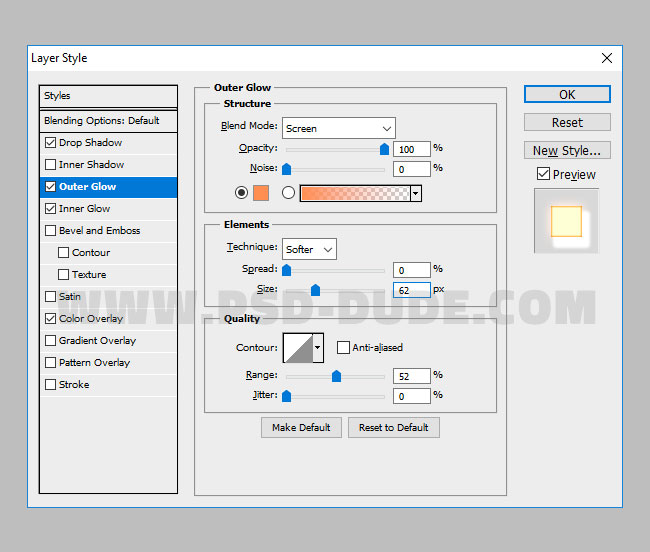
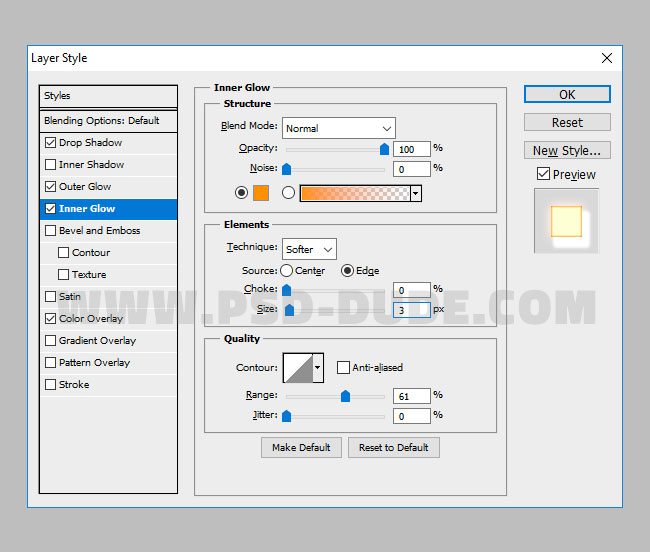
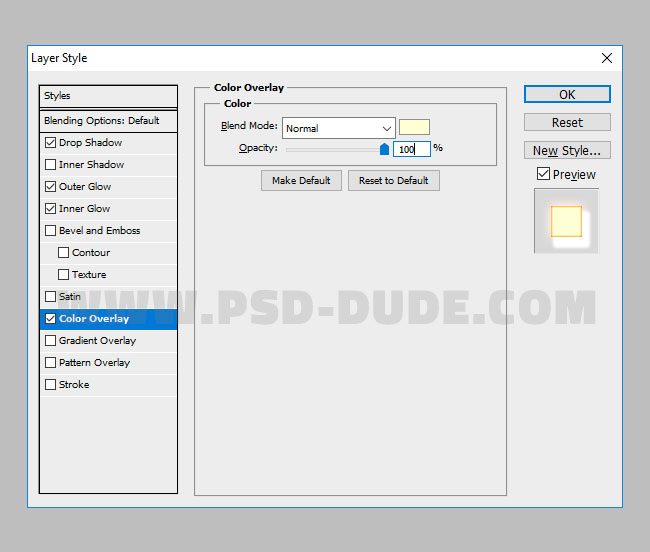
Crea a new layer and call it Candle Light. Use the Brush Tool and a soft round brush with color white to paint over the candle. Add this layer style to the Candle Light layer to light the candle: Drop Shadow, Outer Glow (color #ff8e51), Inner Glow (color #ff9000) and Color Overlay (color #ffffd4).
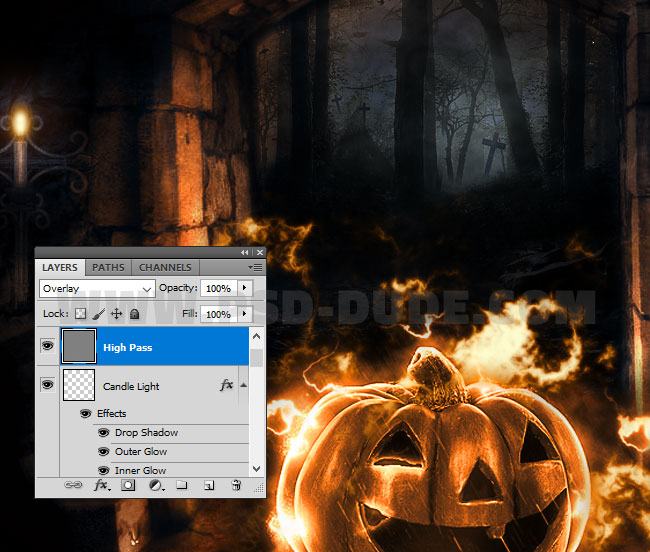
Sharpen the Image using Photoshop High Pass Filter
The last step of the action is to use the Photoshop High Pass Filter to sharpen the image.
So here is the final result for the enchanted Halloween pumpkin Photoshop tutorial. I hope you like it.
Other Halloween Photoshop Tutorials
If you enjoyed this Halloween Photoshop tutorial and you would like to check other amazing Halloween Photoshop tutorials:
Dark Horror Photoshop Tutorials or Creepy Photoshop Tutorials For Halloween
Halloween Photoshop Freebies

Make A Halloween Party Poster Online by MockoFUN.com

No comment(s) for "Enchanted Halloween Pumpkin Photoshop Tutorial"