Photoshop Gradient Tutorials for Beginners
Photoshop Gradients are among the most useful Photoshop presets and are used for making backgrounds, for creating layer styles and so on. Being a Photoshop preset means that you can create your own custom gradients, you can load gradients made by other people and you can save a set of gradients under the GRD file extension. It is true that gradients are not as popular as brushes or custom shapes for example but they are used often so it's important to know how to use Photoshop gradients properly.
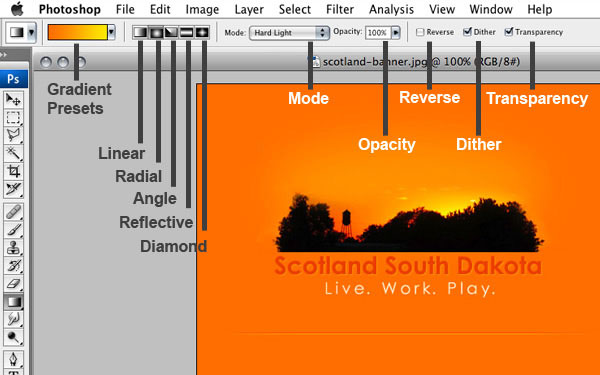
Like anything else in Photoshop, there are multiple ways to apply a gradient. This article simply covers the Gradient Tool (G). Gradients are applied by dragging the tool across the image. The starting point is defined by where the mouse is initially clicked and the ending point is where the mouse is released. Gradients can be applied to the whole active layer or just select portions of an active layer.
Use the Photoshop Gradient Tool
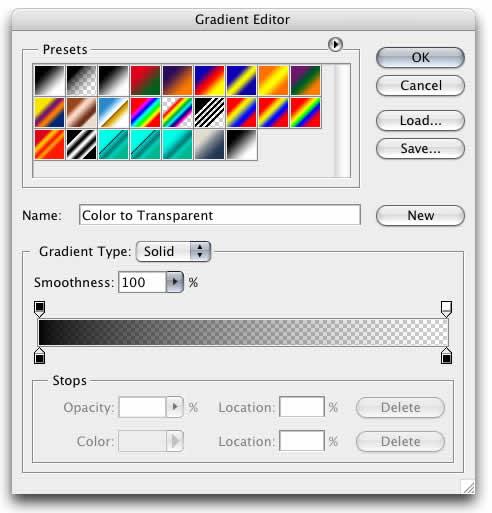
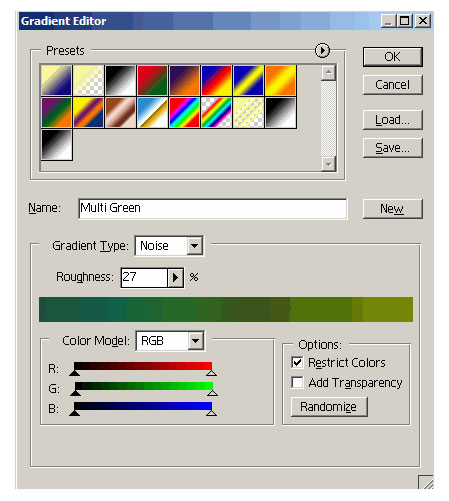
We can add gradients in Photoshop using the Gradient Tool. Simply open the gradient Editor and pick one of the predefined gradients or create one yourself. You can install new gradients using the load button; you can load only GRD files. Once you loaded a GRD file, the gradients will appear in the Gradient Editor; you can rename or delete a gradient that is in the list.
How to Create and Use Gradients in Photoshop
Create a Gradient in Photoshop
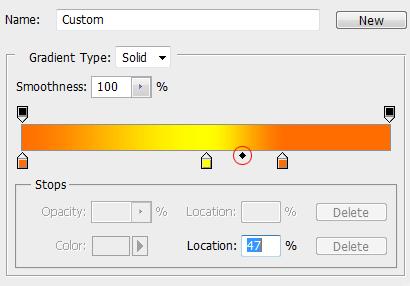
Choose a gradient to alter if there is one close to what you want. Otherwise the gradient editor will use the currently selected gradient. In the options bar, click the arrow beside the gradient preview to open the gradient picker. Note: Your gradients may not look like mine, because it depends on the gradient set you have loaded! If you are using Elements you will have an Edit button. If you are using Photoshop, you will not have an Edit button.
Photoshop Gradients Tutorial
Add Photoshop Gradients using the Gradient Tool
Photoshop Gradient Tutorial for Beginners
Photoshop Gradient Tutorial
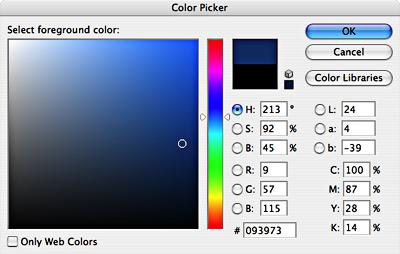
In this Photoshop Effects tutorial, we'll learn how to add complex colorizing effects to images using custom gradients! Specifically, we'll look at the Gradient Map image adjustment and how it allows us to apply different colors to different brightness levels in the image. We'll see how easy it is to create our own custom gradients in Photoshop so we can colorize our images with any colors we choose. As always, we'll be using the adjustment layer version of the Gradient Map so we avoid making any changes to the original photo, and so we can easily adjust the intensity of the effect when we're done!
How to use the Gradient Map in Photoshop
The gradients are used when creating layer styles. Simply check the Gradient Overlay and choose a gradient from the list to use it. A gradient is defined by colors map, opacity and style. We can create for example a black to black, transparent gradient with radial style for adding a vignette. Or we can use the same transparent gradient but with linear style to add a layer mask.
Creating Custom Gradients in Photoshop
Sunset Gradients | FREE
You can also check out these cool Sky Gradients that you can use in Photoshop to create sky backgrounds.
Amazing Examples of Scary Halloween Witches and Pumpkins in Digital Painting
3D Typography Text Effects Photoshop Tutorials






1 comment(s) for "Photoshop Gradient Tutorials for Beginners"
The Gradient tool creates a gradual blend between multiple colors. You can choose from preset gradient fills or create your own.
https://helpx.adobe.com/photoshop/using/gradients.html