Learn how to create a Gothic collage which combines multiple images together and use adjustment layers, brushes, filters and layer masks. This collage tells the story of the queen, who sword in hand protects the souls of dead. You can check out other horror dark Photoshop tutorials and resources available on our blog.
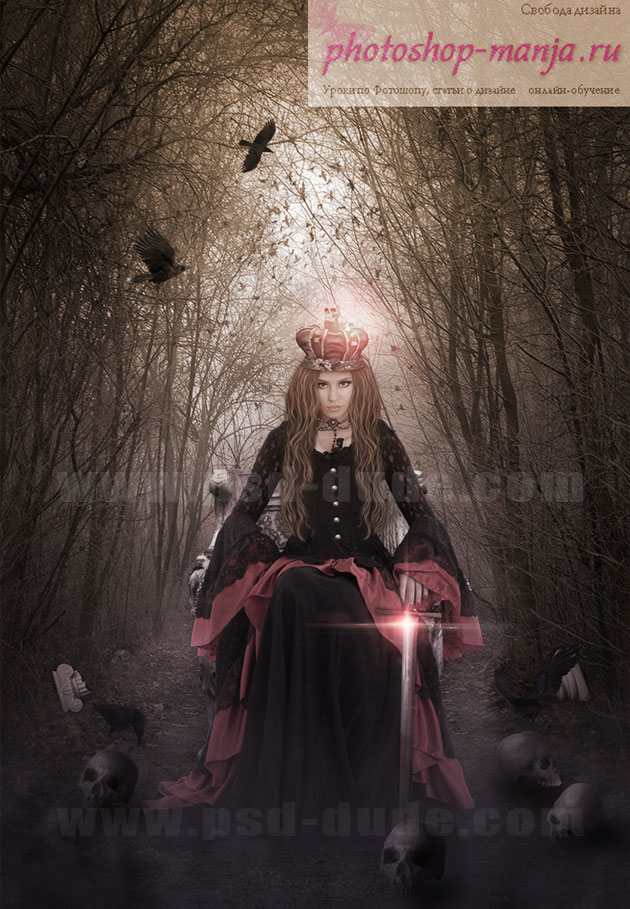
Here is a list with all the stock images and Photoshop resources that I have used in this tutorial; you will have to download all of them before we begin. Nature, Throne Girl Crown Sword Brush birds Brush leaves Brush eyelashes Skull 1 Skull 2 Skull 3 Ravens 1 Ravens 2 Ravens 3 Pearl Greek columns Hair PSD
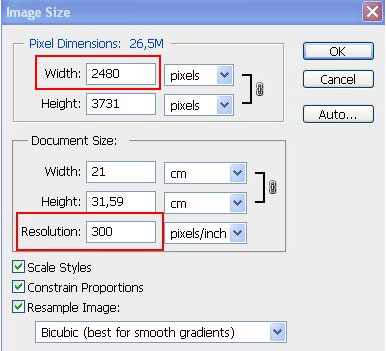
Open the image of nature, increase its size to 2480 pixels and change the resolution to 300 pixels (Image - Image size):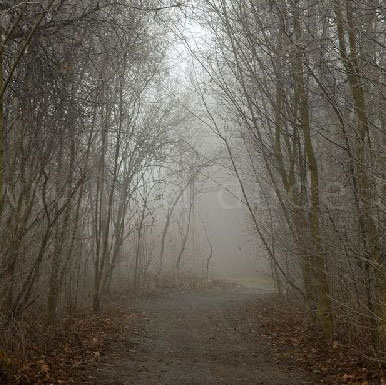
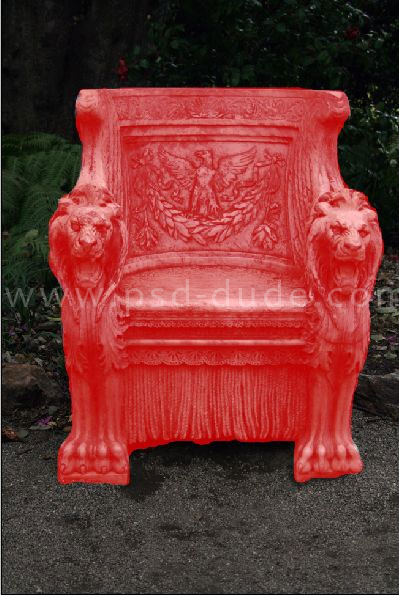
 Now add the old throne on which will sit a queen. Open the image of the throne and separate this background it is a tool Quick Mask: press Q, then black brush paint over the throne.
Painted area will be red - this is a selection. Try to paint as accurate edge of the throne. If you painted it too much - change the brush color from black to white and paint them in these areas.
 Again press Q to exit Quick Mask - you will see that the painted area is transformed into a selection:
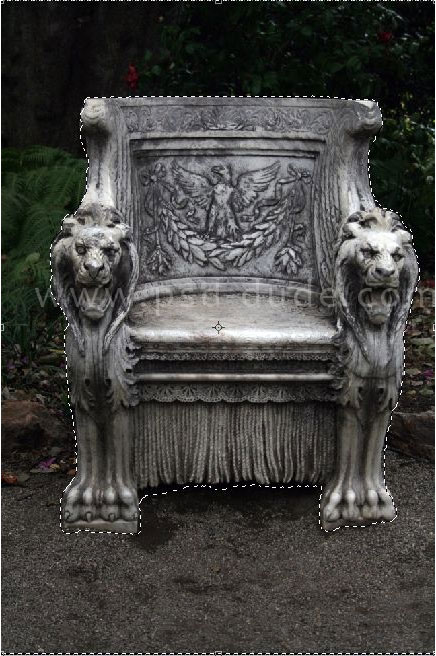 In fact, now isolated and the throne, and the background, therefore, it is necessary to invert the selection so that was allocated only throne. Enter the menu selection - Invert (Shift + Ctrl + I):
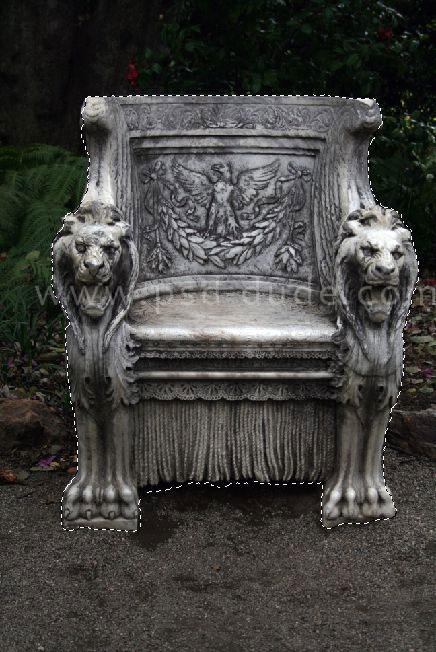 Once the throne is selected, copy it (Ctrl + C) and paste into the working document (Ctrl + V). Name this layer "Throne" and reduce it using the Free Transform (Ctrl + T):
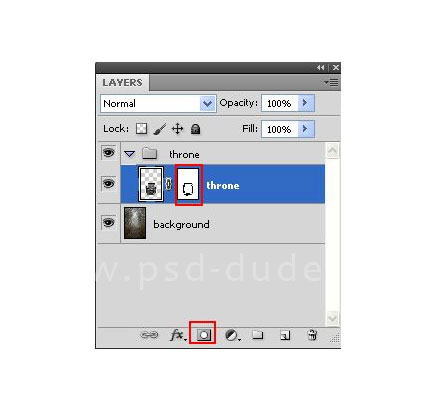
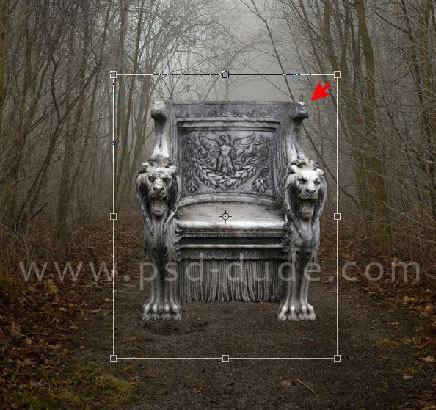 If you are not accurately identified the throne and its edges have flaws, they can disguise. To add a layer to the throne of the layer mask, click on it and brush in black
paint over any areas you want to hide. If you want them back, change the brush color to black to white.
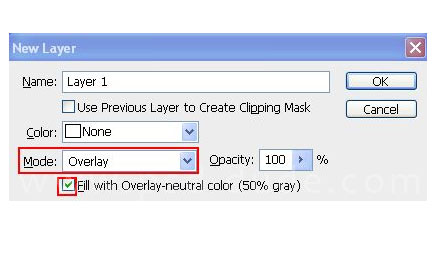
 Some parts of the throne to darken and lighten. Create a new layer (Shift + Ctrl + N) in the Blend Mode Overlay with gray shading 50% and apply a Clipping Mask. This layer name Darken/Lighten.
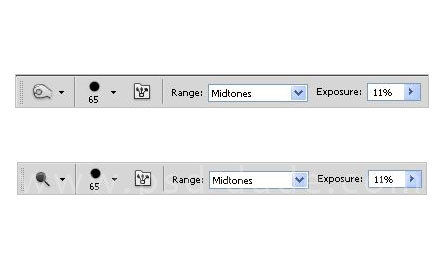
 Now use the Burn Tool to darken the dark areas of the throne. Use Range Midtones and Opacity 11%. With Dodge Tool to lighten the highlights on the throne.
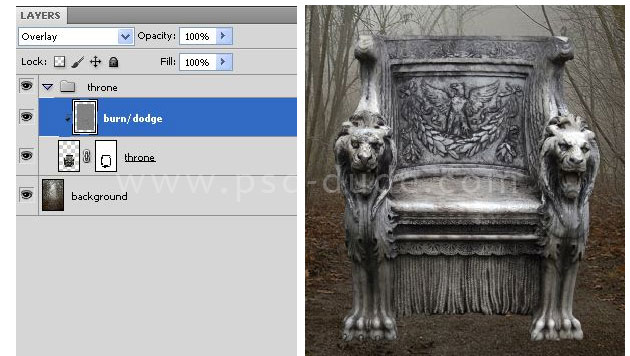 Select the layers "Throne" and "Darken / Lighten", hold Shift and place them in a group (Ctrl + G). Group is called "Throne".
Now it's time to add the queen. Open the image of the girl and crop from the background using the Quick Mask.
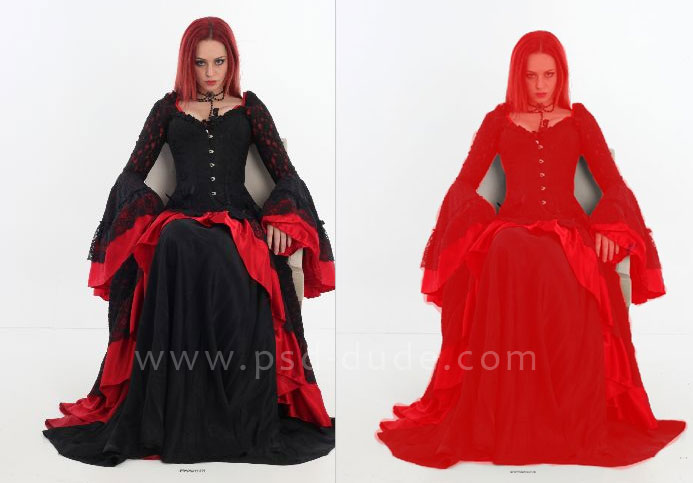 Exit Quick Mask (Q), invert the selection (Shift + Ctrl + I), copy girl and insert it into the main document. Layer with the girl name "Queen" and a little to reduce it.
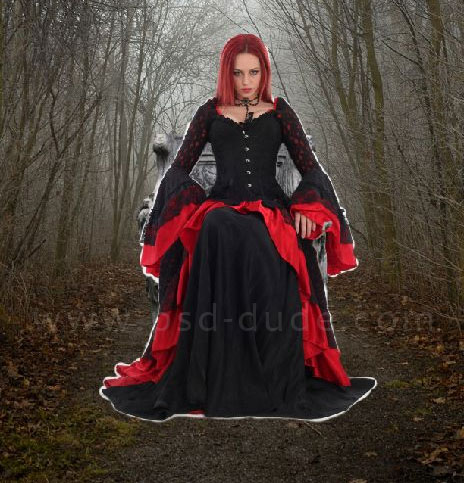 By Layer "The Queen" add a layer mask and brush clean the remaining black background on the circuit. Masking change opacity and a stiff brush to get smooth contour, seamlessly.
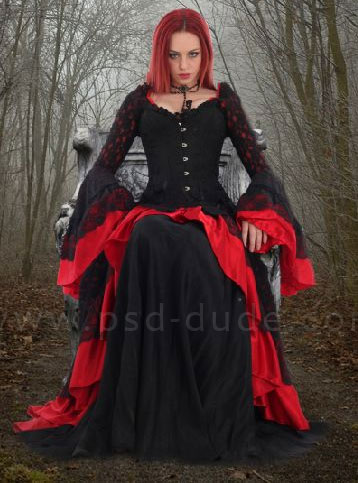 Under the bottom of the dress add a shadow. Create a new layer below the "Queen" and name it "Shadow" and a soft brush outline skirt. Blur the shadow layer a Gaussian blur:
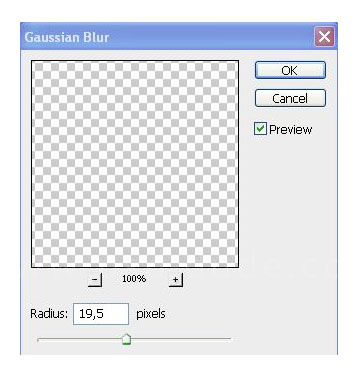 Reduce the opacity of the shadow layer to 43%, add the layer mask and soft brush with black to erase the part. Here's what you should have:
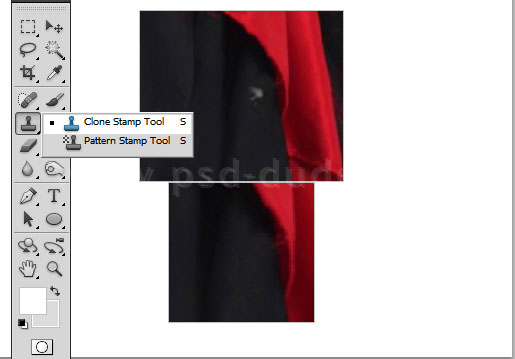
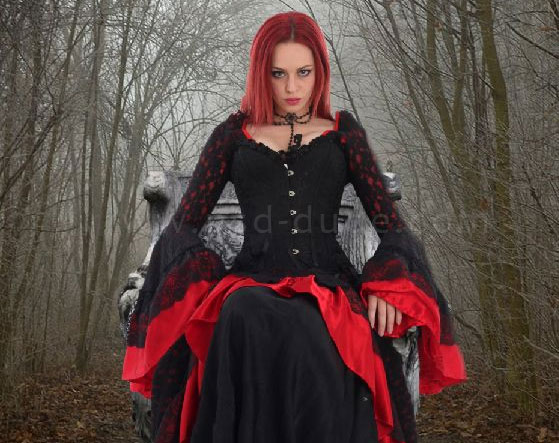 At the bottom of the dress has a small bright spot. Fill it with Clone Stamp Tool: hold down Alt, click next to this spot to take a sample and run on a light spot.
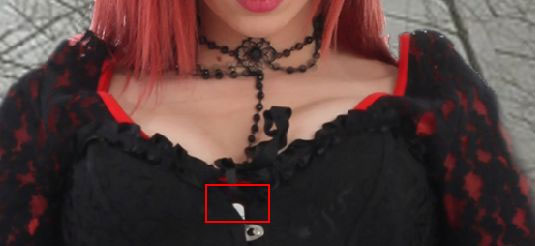
 Also, you need to cover up a small white area on her corset:
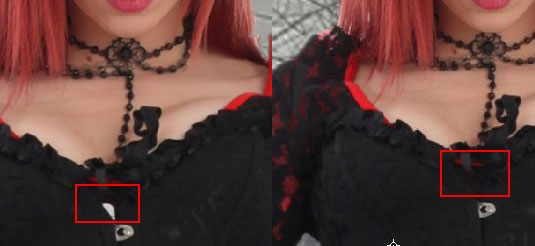
 Create a new layer above the "Queen" and take the Eyedropper Tool to sample colors next to the light areas.
Now small brush and selected color carefully paint the light plot:
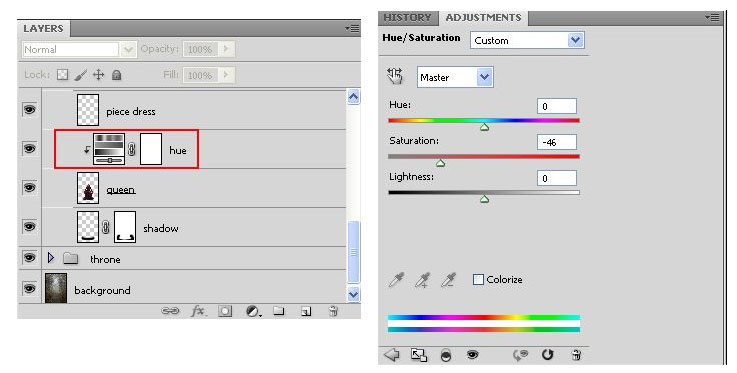
 Reduce the saturation layer "Queen" that the details of the dress were not as red: above the layer “Queen” add adjustment layer Hue / Saturation with a clipping mask and decrease Saturation to -46:
 Now add the makeup to the face of the queen. Let's start by creating a shadow on the lids. Create a group and name it "Shadows on the eyelids." In this group create a
new layer, select the color purple #37348d and paint a soft brush it over the right eyelid.
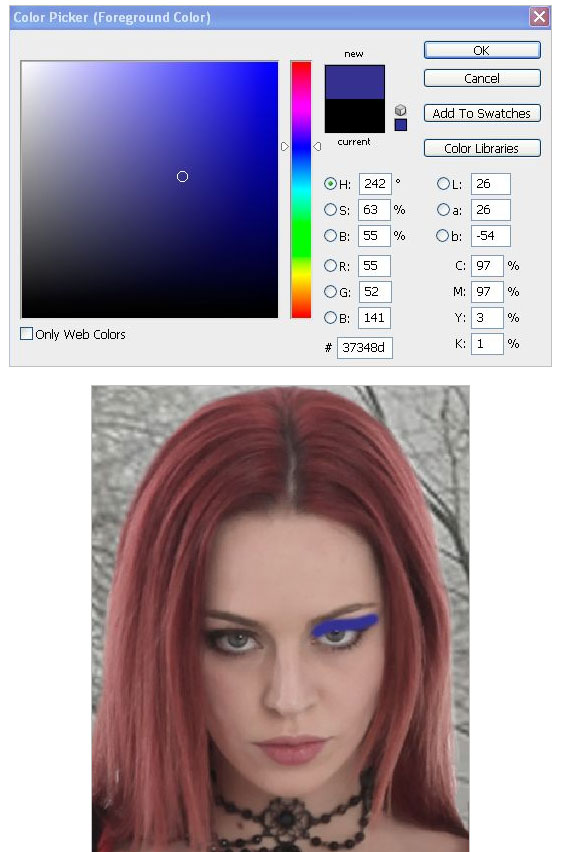 Name this layer "Shadows in the right eyelids " and blur it a Gaussian blur:
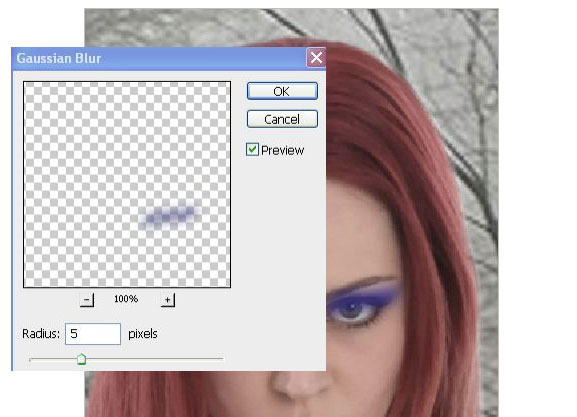 Erase part shadows that caught my eye and change the Blending Mode of this layer to Soft Light.
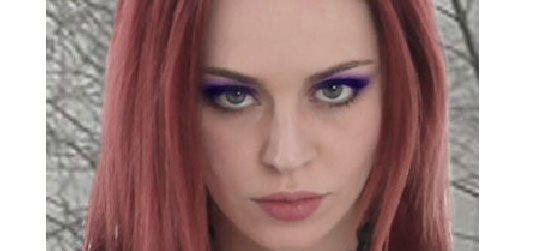
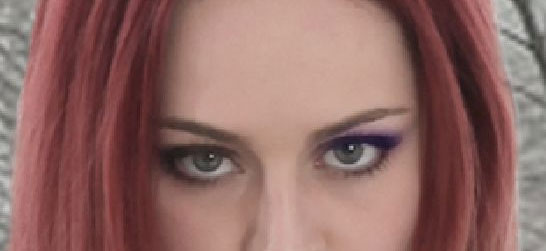 Duplicate the "Shadows in the right eyelids” (Ctrl + J), to make the color saturation. In the same way add the shadow on the eyelid of the left eye:
 Make the eyes more expressive and add purple stroke on the lower eyelid. Create a new group and name it "Liner for ages." Create a new layer and name it
"Liner at the right age." Brush with the same purple color drag across the lower eyelid:
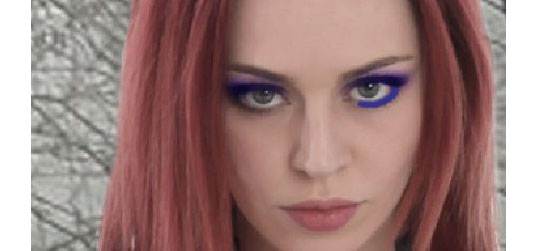 For this layer apply a Gaussian blur to make it softer:
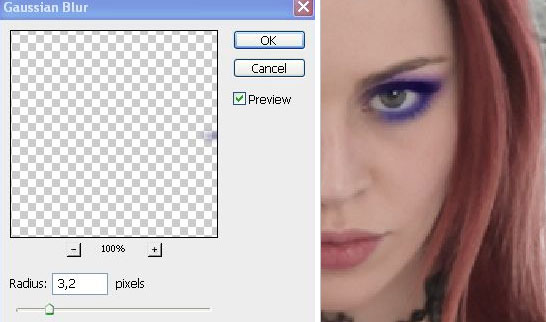 Change the Blending Mode to Soft Light and duplicate the layer to make eyeliner saturated.
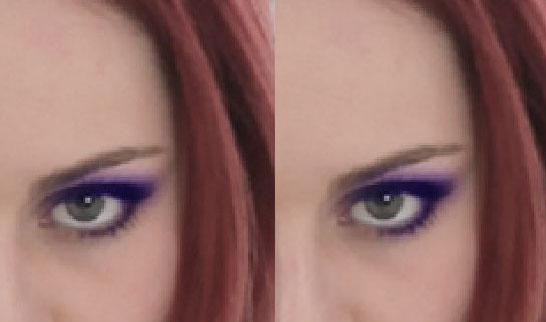 Repeat with the second eye:
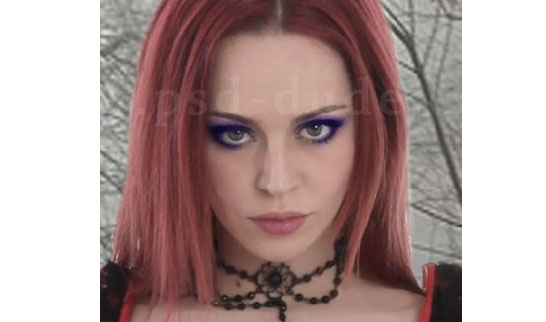 Download and install the eyelash brush, choose black color and brush with number 494 and with a size 69 pixels (the size of the brush is selected according to the size of this girl's eyelashes).
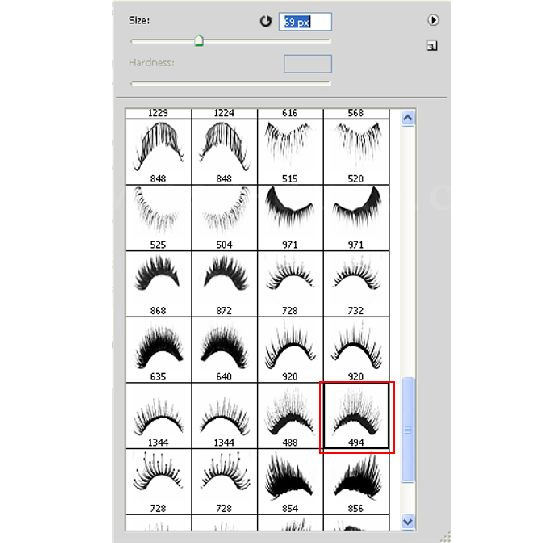 Create a new layer called "Right eyelash" and click once to paint eyelashes. Place a layer of the natural eyelash girl, call the command Free Transform (Ctrl + T) and rotate and to decrease the layer of eyelashes. In the same way, add the lashes on the other eye:
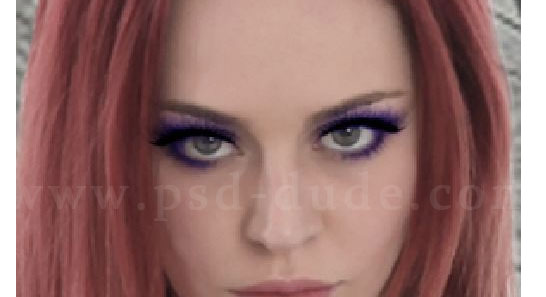 Now change the color of the eyes girl. I think the dark green color is perfect for the effect that we are creating. Green eyes make the face more expressive and the image - mystical.
Create a new group and name it "Eyes." Create it a new layer called "Left Eye" and then press Q. Black brush carefully paint the eyes, exit Quick Mask (Q),
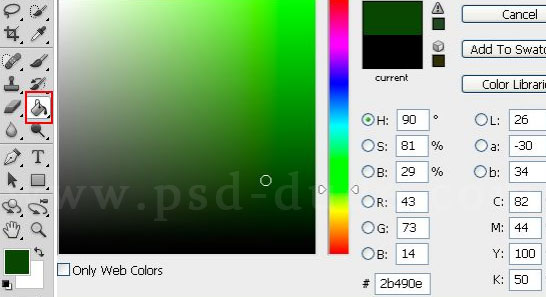
and invert the selection. Choose dark green #2b490e and Paint Bucket Tool fill it:
 Change the Blending Mode for this layer to Soft Light:
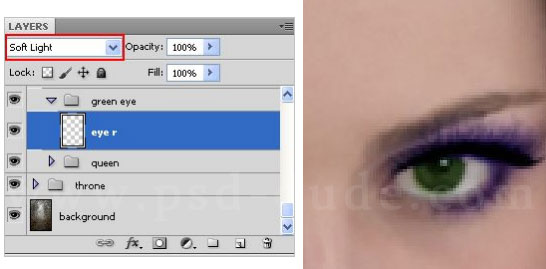 Duplicate the "Right Eye" and change the Blending Mode to Color Dodge, lower the opacity to 40%. This technique will make green eyes brighter.
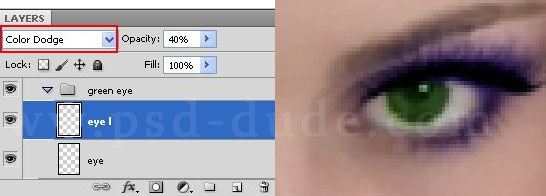 If the green color is outside the eye, erase it off with an eraser. Do the same with the second eye, changing its color to green, duplicate the layer and change the Blending Mode:
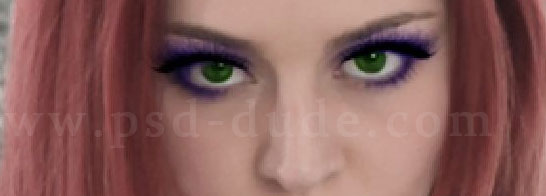 Now eyes look a little lifeless. To revive them, create a new layer (Shift + Ctrl + N) in the Blending Mode Overlay with gray 50% and apply a Clipping Mask. Name this layer "Darken/Lighten."
Select the Dodge Tool in the Range Midtones with little Exposure and run sometime in the eye, creating a shine. Also go with the second eye:
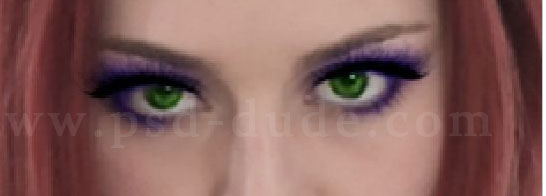 If you zoom the image, you can see that the white of the eye is not quite white, with red capillaries. Need to make sure that he was pale white with no red inclusions.
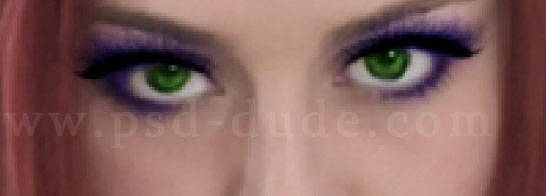
Create a new group and call it "White of the eye." In it, create a new layer called "White”. Brush Tool with soft edges and a small Opacity, carefully paint the white right eye without touching the green iris. Reduce the opacity to 52%. Similarly, paint white on the left eye:
 Now create the peach skin tone girl. The Rectangular Marquee Tool on the skin of the girls, draw a small square selection, as shown. Create a selection on the part of the skin that looks like the best:
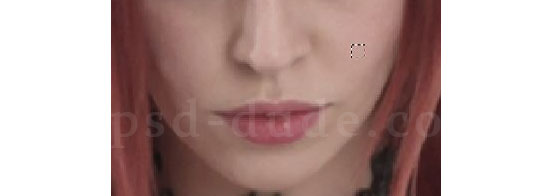 Once created a square selection in the skin, press Ctrl + C to copy the selected area of the skin, and then press Ctrl + V to paste the copied area of skin on a new layer. Now, with the active layer with the copied skin, enter the menu: Filter - Pattern Maker (Filter-Pattern Maker).
In the window, the pattern will be the one in front of you a little piece of skin that you have selected, and will be active Rectangular Marquee Tool. With it, select the piece of skin and set the parameters as shown below:
Width: 499
Height: 300
Other parameters are also set, as shown. Now click OK or Generate, to create the texture of a given size, and then click OK. That's the texture of the skin you should have:
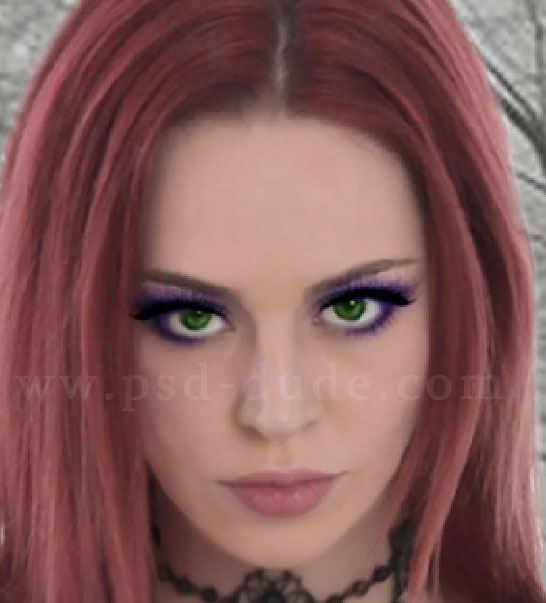
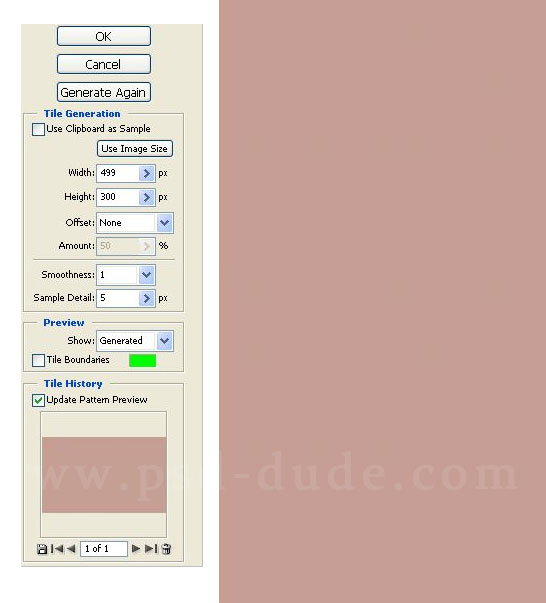 Reduce the opacity of the texture of the skin up to 40% or a little less, add a layer mask and erase the texture of the hair, with the nose, eyes, eyelids, eyebrows, lips, necklace and background:
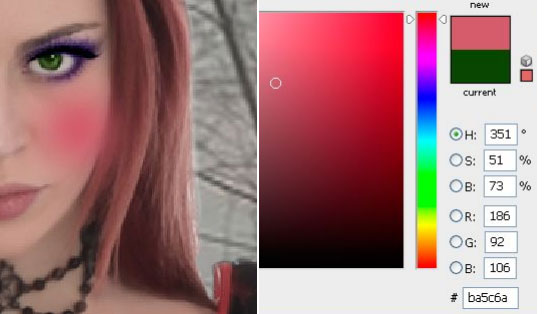
 In this step, add blush to the face of the queen. Create a new group named "Blush" and in it add a new layer. Name this layer "Blush on his right cheek." Select color
#ba5c6a and brush with soft edges click once on the right cheek, the girl:
 This layer is converted into a Smart Filter: Filter - Convert to Smart Filter (now using a filter to this layer, we are able to edit, not affecting layer
and, if necessary, can even remove). Here is the layer that has been converted into a Smart Filter in the Layers palette:
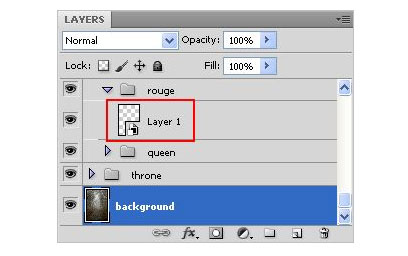 Now this layer apply a Smart Filter Gaussian Blur:
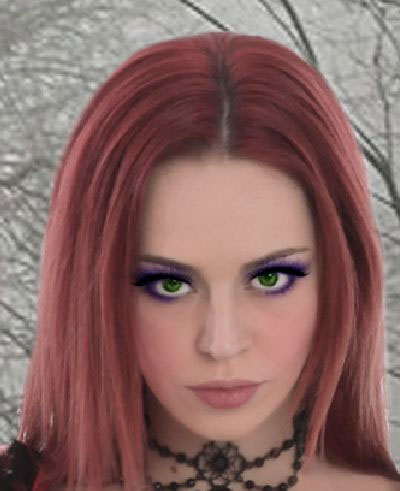
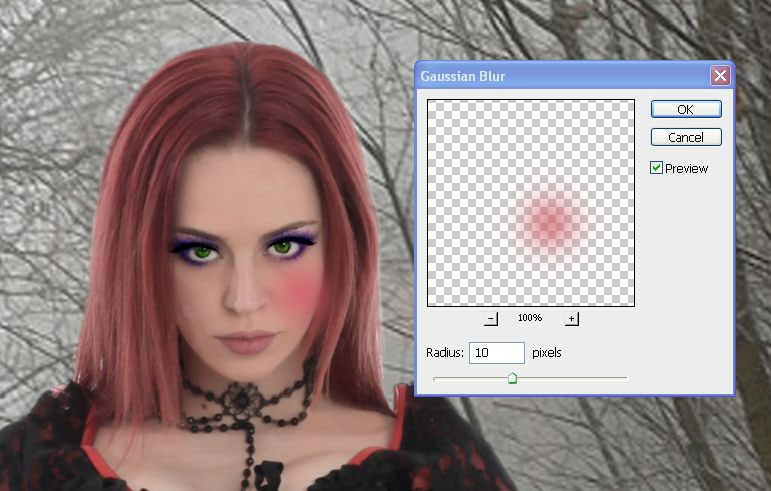 Reduce the opacity to 11-20% to make the blush more tender. Add blush on the other cheek and erase the parts that are beyond the cheeks:
 Now add gloss to the lips. Create a new group and name it "Shine." Within a group create a new layer. Brush tool with a small opacity accurately paint the
color of the lips #b37c77. Convert this layer to a smart object and apply a smart filter Gaussian Blur:
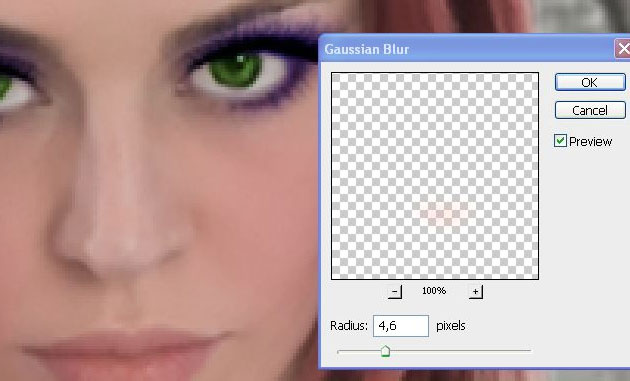 Now, on the lips to add shine. Over a layer of "Shine" create a new layer (Shift + Ctrl + N) in the Overlay with gray shading 50%. Name
this layer "Darken/Lighten" and on it, the Dodge Tool in the Range Midtones with small and opacity, draw lips, creating shine. Reduce the opacity of the layer "Darken/Lighten" up to 73%:
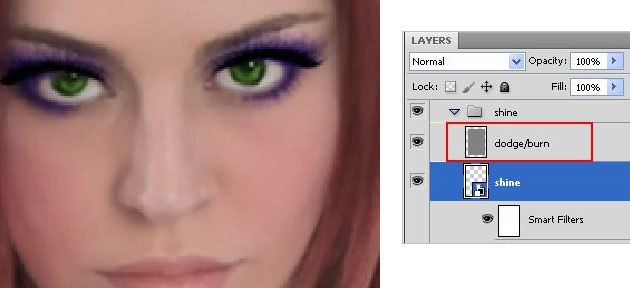 Makeup girl we finished, now turn to the design of the buttons, necklaces and create a manicure. Let's start with the buttons. Open
the image of pearls and Elliptical Marquee Tool select one pearl. If the selection is not got precise, enter the menu Select - Transform selection and transform the selection, then press Enter.
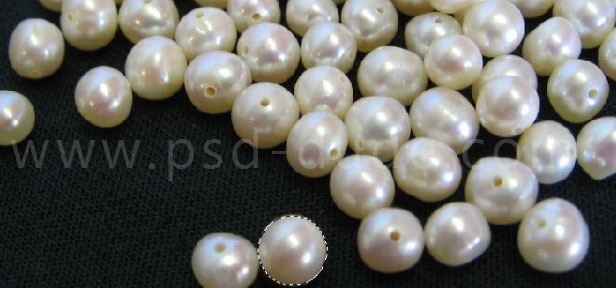 Copy and paste the selection into our illustration and put on one of the rivets on the corset. Reduce the layer to the size of the pearl rivet:
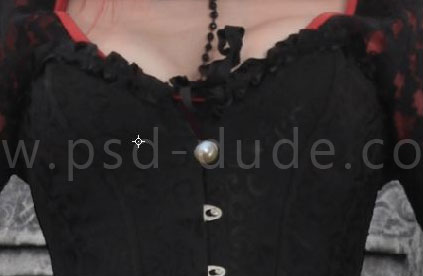 Duplicate the layer with the pearl four times and place a copy on the remaining rivets:
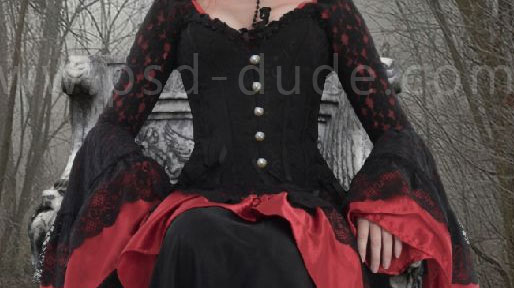 Add depth pearls, using one of these layer styles Drop Shadow, Inner Shadow and Outer Glow.
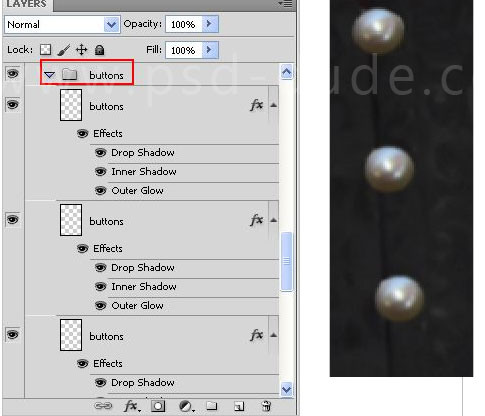
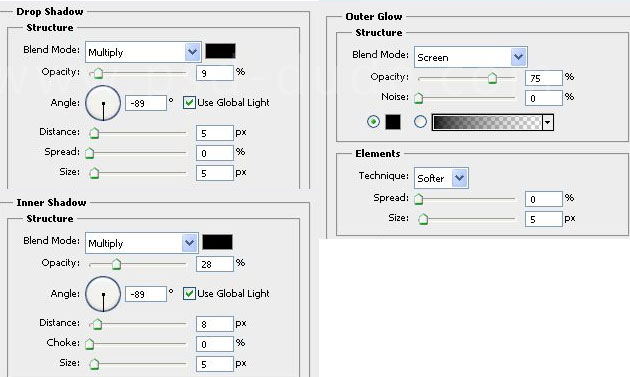 Copy the added layer styles by clicking on them, right-clicking and selecting Copy Layer Styles. Select all layers with pearls, click on one of them with
Shift, right-click and select Paste Layer Style. Now the layer styles applied to all layers with the pearls. All layers with pearls put in a group with the name "Buttons."
 We turn to the design of the necklace. Copy one of the layers with a pearl button and place it on the beads on a necklace. Layer styles is not removed. Copying the layer, place the
pearls on a necklace, alternating it in one:
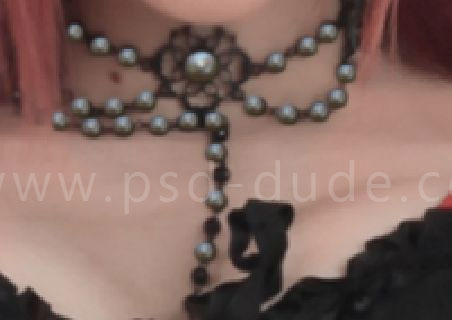 All layers of pearls on a necklace place in the group, which is called the "Necklace."
Now for the manicure. I think the most to the overall picture fits red nail polish. Create a new group and name it "Nails." In the color palette choose a rich red color #a31523. Within a group
create a new layer and use the Pen Tool, select the little finger nail. Now you need to fill the selection with a nail on a new layer with the selected color. Right-click on a path and
select Fill Path.
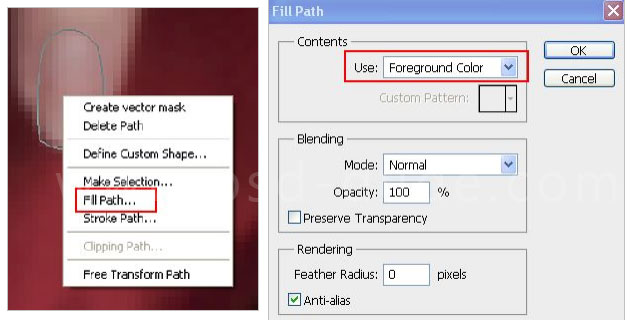 Without changing the tool, right-click on a path and select Delete Path. Select the other nails and fill them with dark red. To make your nails more realistic you can use Dodge Tool and
Burn Tool to add shading and lighting.
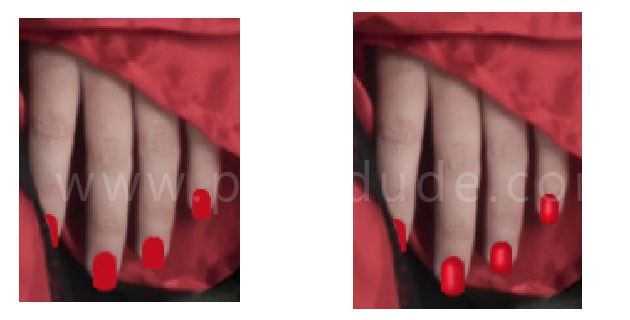 Reduce the saturation layer with nails, adding above each adjustment layer Hue/Saturation with a Clipping Mask:
I do not like this red hair girl, and also want the hair was long and beautiful. To create the hair I use PSD file with painted hair. I'll use the hair at number three. Select the Move Tool
and drag it with the hair on the picture:
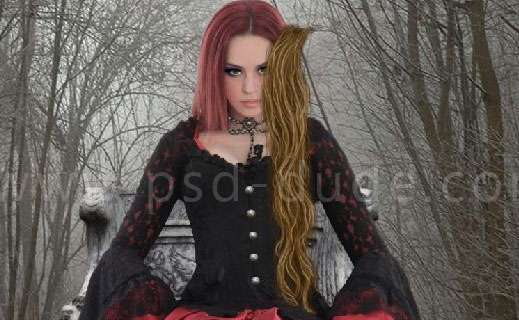 First, add the hair on the right side of the head. Flip horizontal layer of hair: Edit - Transform - Flip Horizontal, and then place them as shown in the screenshot. Now you need to
make the hair more volume and slightly change their shape. Press Ctrl + T and use the Warp Tool, distort the layer with the hair. After, you can turn a little layer of the hair. Here's what
you should have:
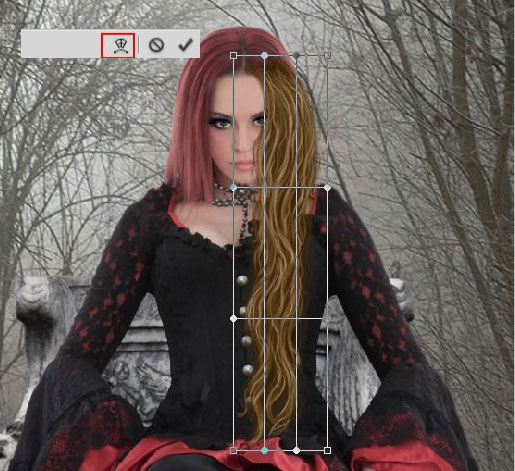 Please note that between the hair and the neck is a blank space. To close it, duplicate the layer with the hair (Ctrl + J) and place a duplicate
of the original layer above the hair. To duplicate add a layer mask and a soft brush erase almost all the hair, leaving only a small part. This
part and if you want to rotate, zoom in or out, as well as a tool to distort the deformation. This is how she looks now with the added hair on the right side of the head:
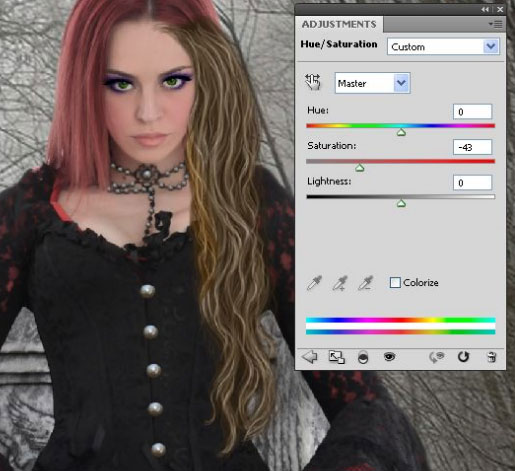
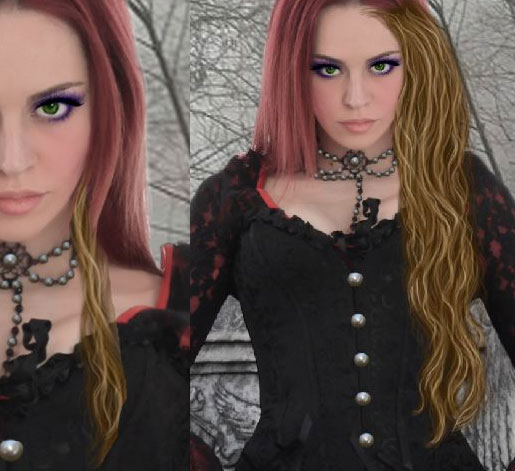 Over the first layer of the hair add an adjustment layer Hue/Saturation with Clipping Mask and set the values as shown in the screenshot below:
 To duplicate the layer with the hair, add the same adjustment layer with Clipping Mask:
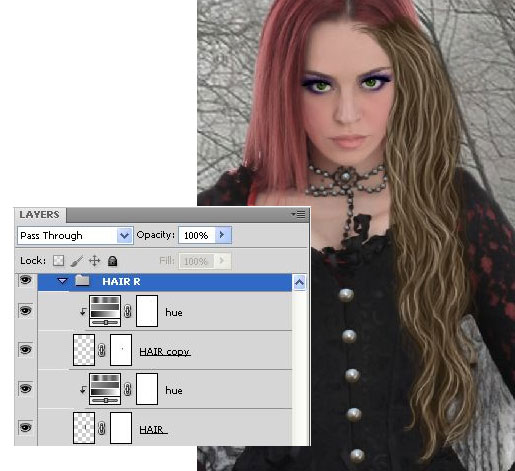 Select all the layers with the hair on the right side of the head, put them in a group (Ctrl + G), which we call the "Hair to the right."
In the same way, add the hair on the left side of the head:
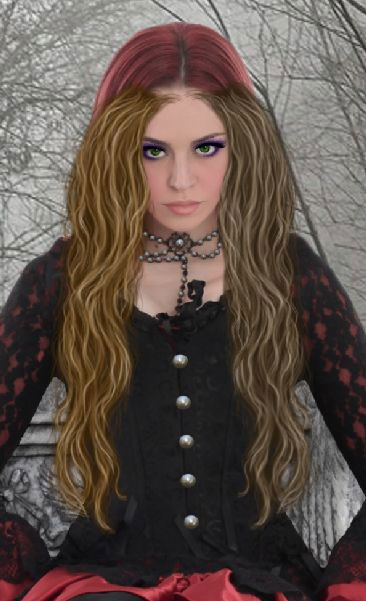 Add an adjustment layer Hue/Saturation with a Clipping Mask:
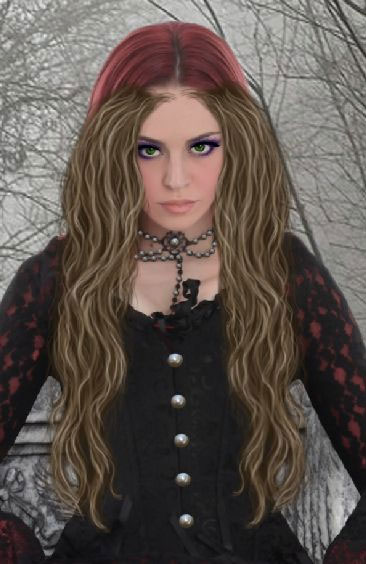 All layers of the hair on the left side of the head is also put into a group and name it "Hair left."
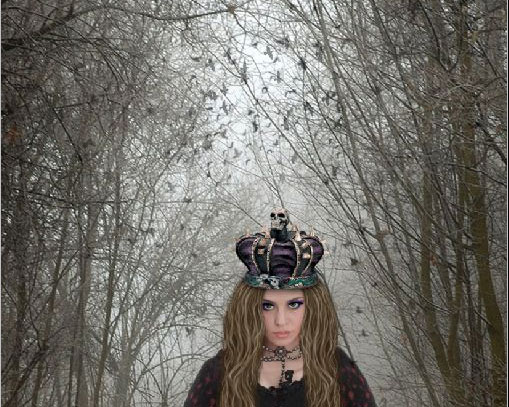
As you can see, on top of the head we did not add hair. On it we put a massive crown.
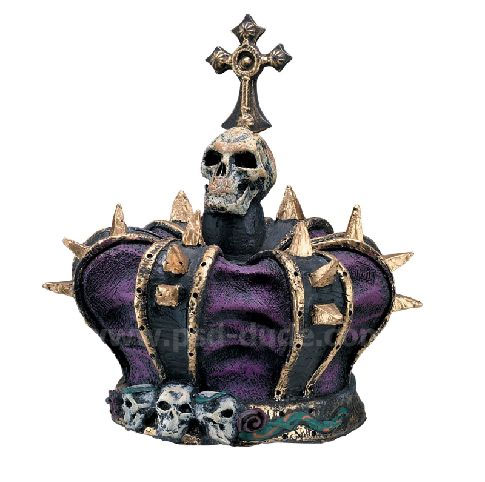 Separate the crown from the background (I separated the crown Magic Wand Tool - the background is white and it was easy to distinguish.) Invert the
selection to select a crown, and not the background, and then drag the crown on the illustration. Erase the cross from the top of the crown, turn it and put it on the girl's head:
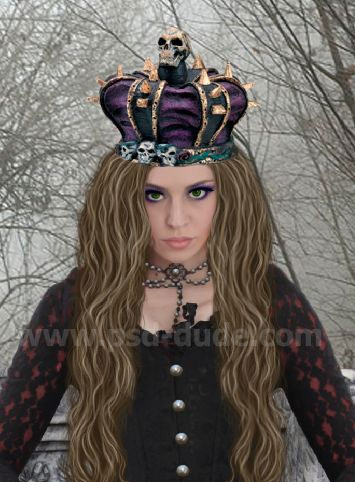 Under the layer of the crown create a new layer and brush in black paint shade. Blur the shadow layer a Gaussian Blur, reduce the opacity to 83% and erase unnecessary:
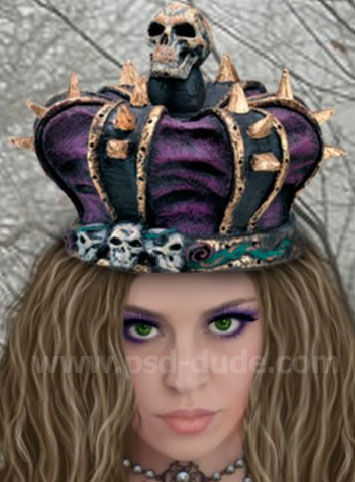 Is necessary to achieve this effect if the crown, is actually wearing a head girl. To do this, duplicate the layer with the crown, add a duplicate of
the layer mask and erase the upper part, leaving only the bottom (for convenience, I mute the visibility of the layer with the crown, to show how to do this):
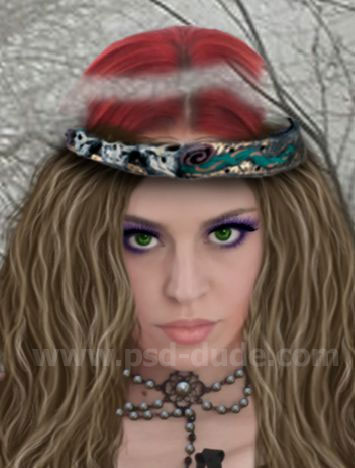 The rim of the crown distort Warp tool and turn it to realistically lay on his head. Lasso Tool to select the right side of the rim of the crown and copy it onto a new layer:
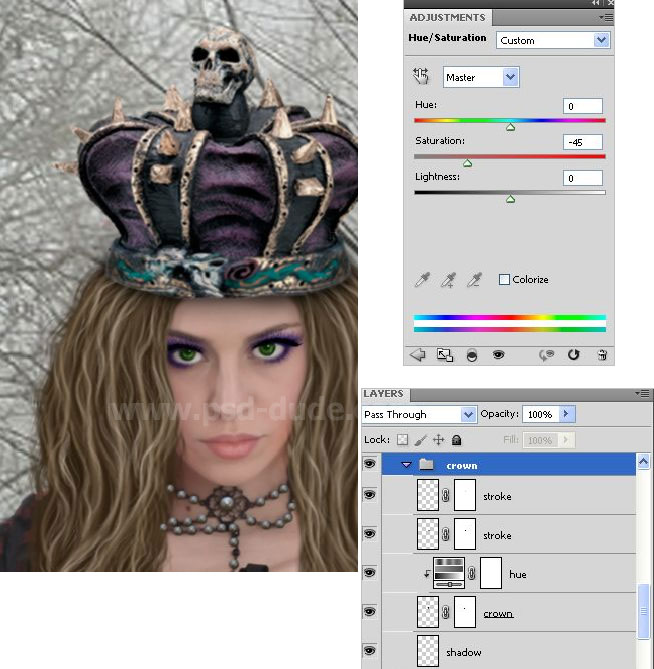
Distort slightly lower right part of the copies to it as realistically lay on his head. Include the layer with the first rim of the crown and the crown, we see here a picture. Reduce the opacity
of the crown, adding an adjustment layer above it Hue/Saturation with layer mask.
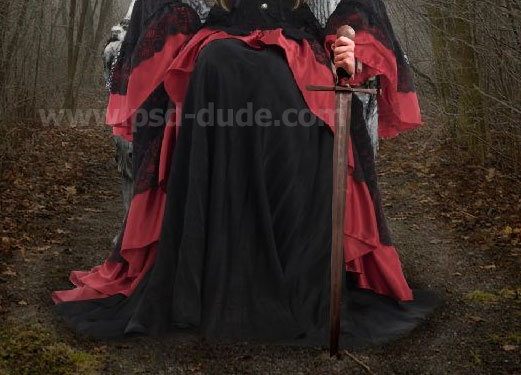
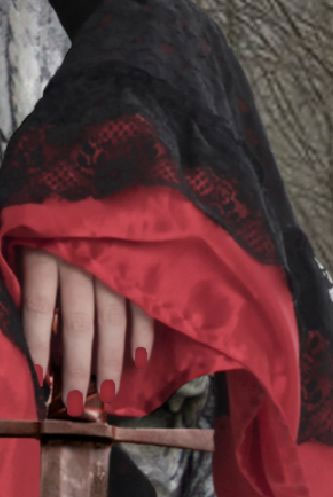
 Since by design, the queen protects the souls of dead, in her hand to be a sword. Open the image of the sword, separate it from the
background and drag on the image (do not be confused by the hand on the handle - we close the hand of the Queen). Layer with a sword placed under group with nails.
We need to lay on the handle of the sword hand the Queen, so go to the layer with her hand Lasso Tool select and copy to a new layer (Ctrl + J). Name this layer "Hand":
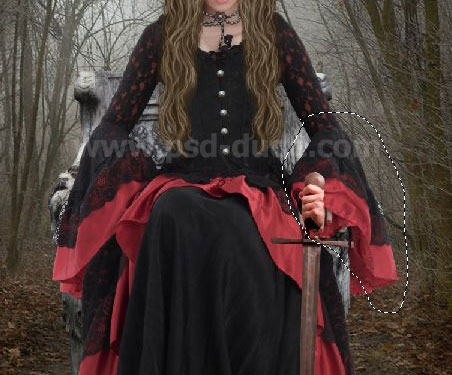 When copying, the adjustment layer Hue/Saturation, which is added above the layer with the Queen, will be lost. Therefore, it will have to add on the layer with the hand:
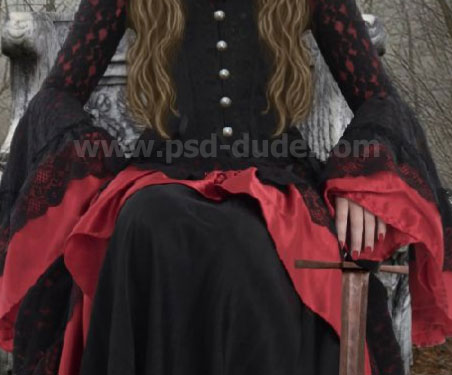 You see, when we took up arms excess region. Add a layer with a layer mask by hand and a brush in black wipe any excess from the background, and walk along the contour of a
brush with soft edges to smooth it:
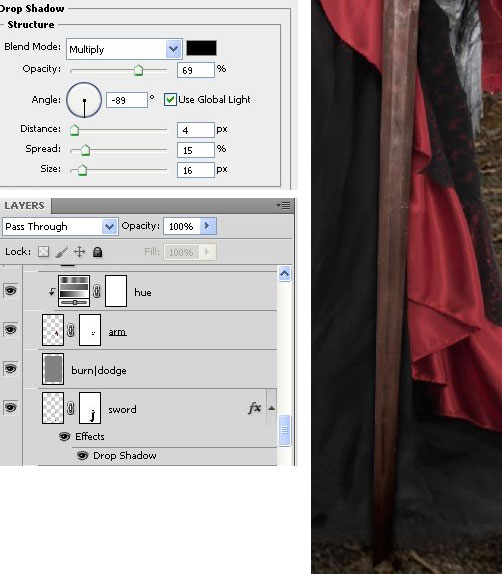
 Above the layer with the sword create a new layer (Shift + Ctrl + N) in the Overlay with gray shading 50% and apply a Clipping Mask. Name this layer
"Darken/Lighten." With Burn Tool slightly darken the dark areas on the sword, and Dodge Tool lighten some highlights.
Add a layer with a sword layer style Drop Shadow to add depth to it:
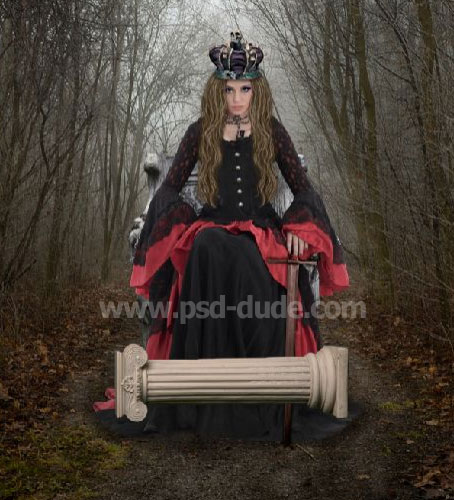
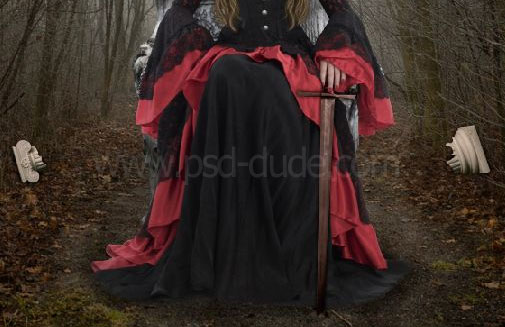
 On either side of the queen add the ruined ancient Greek colony. Open the image column, separate the left column of the background, using Quick Mask Tool,
exit Quick Mask (Q), invert the selection and drag it to the image. Lower the column and rotate it 90 degrees counterclockwise: Edit - Transform - Rotate 90 degrees:
 As planned, the column must be broken down into two parts, which will be placed near the trees. Polygonal Lasso Tool to select the left of the column so as to get a view of the broken parts:
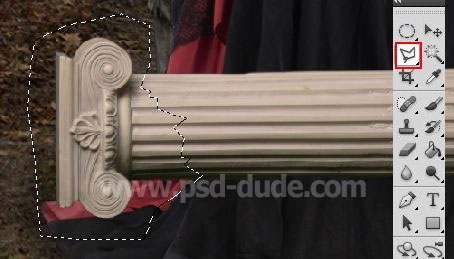 Copy the selected portion of the column to a new layer (Ctrl + J). Soft brush go over the edges of the broken pieces to flatten it, then reduce the layer of the column,
rotate it and place it to the left of the Queen. Draw shadow under layer of the column: create a new layer, select a black soft brush and paint the layer. Blur the shadow layer to make it look fluffy.
Little shadow erase soft Eraser Tool and reduce the layer opacity to 92%. Separated other part the column, copy it onto a new layer and add a shadow:
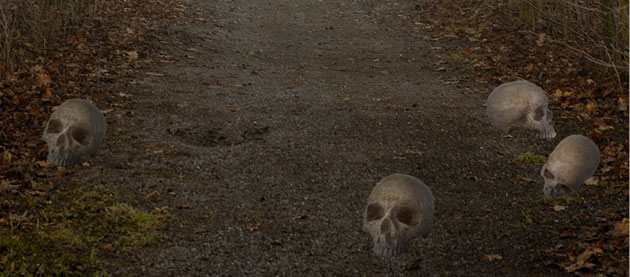
Now we will add the skull stock images; simply place them on the ground and adjust the Hue/Saturation and Brightness/Contrast levels so that it blends with the rest of the image. You will also have to add a shadow for each skull.
 Now let's add to the image of crows flying away. For this we need a birds brushes. Set these brushes in Photoshop, and
select black color. Open the Brushes panel and select the brush with
birds that you like. Create a group called "Brush Birds" and in several layers of paint birds. Change the opacity of each layer with the birds from 56% to 43%:
The same brush with birds or other draw more birds layers were placed in another group "Brush birds 2" and also change the opacity to 34% to 59%:
 The skull on the right side of the queen put the crow flies up. Select it with the Lasso Tool, drag it to the document, reduce and put on the skull:
Give a small volume of crow, using layer styles Drop Shadow:
Crows feet need to darken - add on the layer with the new layer with black Clipping Mask, and select black color. Brush with a little bit of paint opacity feet:
Another crow add to the skull, which is located to the left of the Queen. Under the black on a new layer draw a shadow. You will have to make adjustments for each crow and also you
will have to add shadow effect to make the manipulation look realistic.
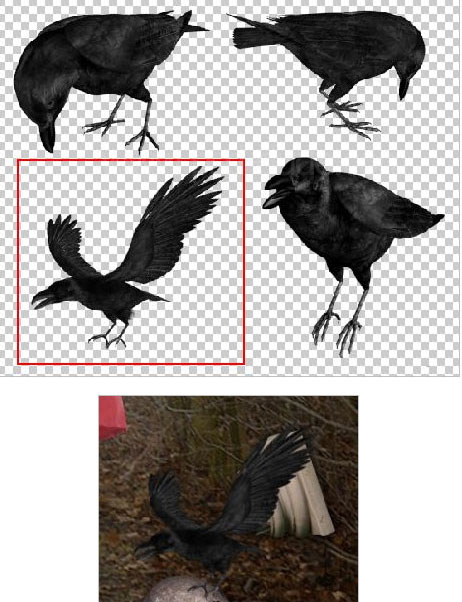 Two crows flying place to heaven, above the head of the queen. Previously, it is necessary to separate of background:
Each of the flying ravens put into groups with names of "Flying Crow 1" and "Flying Crow 2." Open the group with the first crow and create an adjustment layer above
it Hue/Saturation with a Clipping Mask. Need to change the color of a raven and reduce its richness:
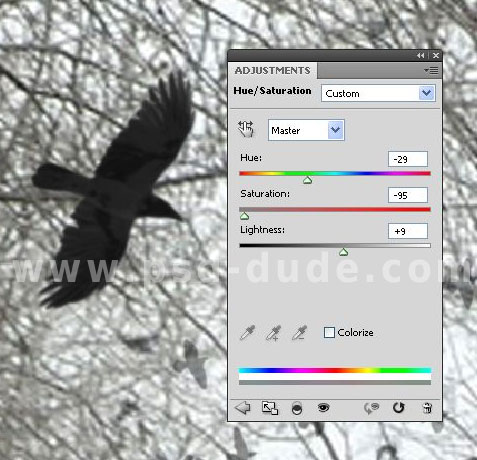 Open the group with the second crow and add over it add an adjustment layer Hue/Saturation with a Clipping Mask.
Since the background of the forest has its autumn leaves, they need to add to the lower part of the skull to give depth and create the feeling like they are on the foliage.
Download and install into Photoshop brushes leaves, open the group to the first skull and create a layer over the new layer with the skull. Select the Brush Tool and select the leaves,
which are more like them. Open the Brushes palette (F5) and set the brush as shown in the screenshot below:
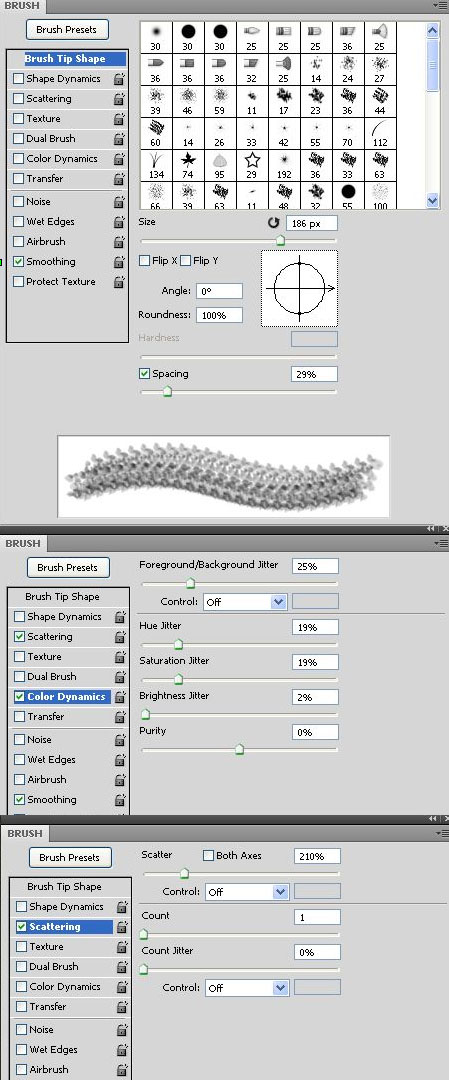 To set the foreground color to #5f4936, and for the color of the background - #6a5a44. Now, being in a new layer, click the brush near the bottom of the skull:
So we set up the dynamics of the color point, then clicking in different areas of the background, you will get the leaves from brown to green:
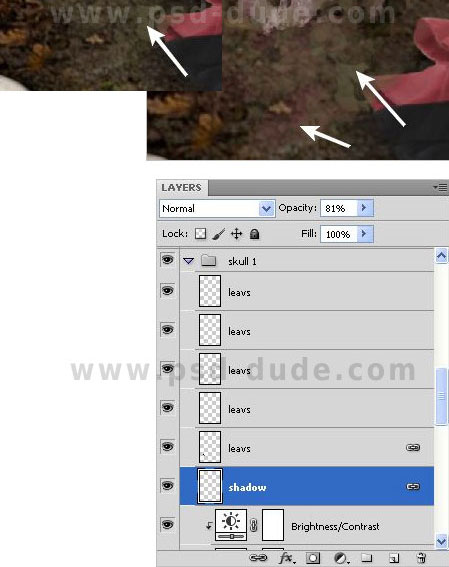 Continue to add the leaves to the rest of the skull: open group, create new layers in them and paint the leaves. You can reduce the opacity of the layer with the leaves and wipe excess, in your opinion pieces.
This is how the image will look with added skulls all leaves.
Also add the leaves on the broken part of the column. Of the column, which is located on the right, darken to the black brush: open group to that column, create a layer over the layer with column.
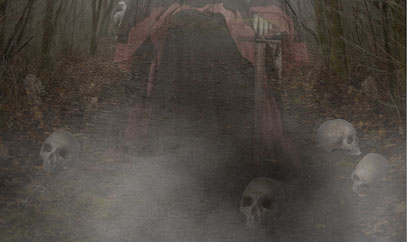
We almost finished, it remains to add a few details. Let's start with the fog. By a group of "Throne", create a new layer and fill it with black. Convert this layer to a smart object (click on the layer, right-click and select Convert to Smart Object) and apply a smart filter Clouds (Filter - Render - Clouds). On the layer mask of the Smart Filter black brush erase the effect of clouds with background skull, leaving him just around the throne and the queen (screenshot below shows the opacity layer with fog 100%). Reduce the opacity to 33%: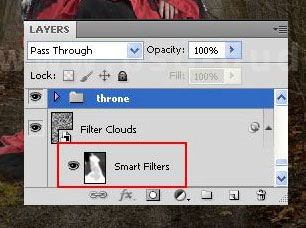 Over all layers create a new layer, fill it with black and convert to a smart object. Change the Blending mode to Lighten and lower the opacity to 47%:
The fog should begin at the bottom of the image, at the feet of the Queen, covered skull, skirting them and extended behind the throne, distant forest. Therefore, a round soft
black brush on the layer mask on filter erase the parts that should not be. If necessary, reduce the opacity of the brush:
The fog produces tender, blur it a Gaussian Blur (the blurring pick your own). Duplicate the layer with the fog and reduce its opacity to 56%. The fog appeared from the bottom of the image, smudge it a Smudge Tool with a small of intensity:
 Blur Tool with an intensity of 6 to 11% click all the parts an image (crow, skull, face, hair, makeup, dress, sword and other) in order to dilute them slightly. Then they will look
better on a background autumn forest.
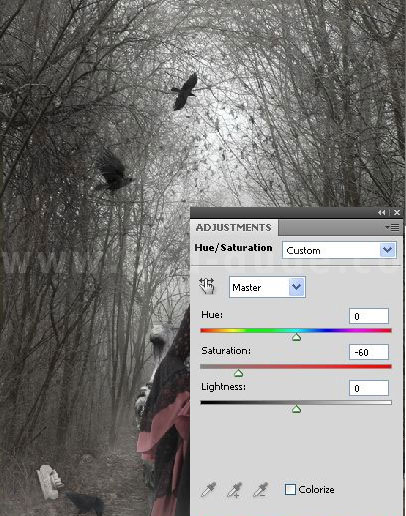
Now change the color tone of the image, reducing its intensity and made it dark and mysterious. Above the fog layer add an adjustment layer Hue/Saturation without Clipping Mask:
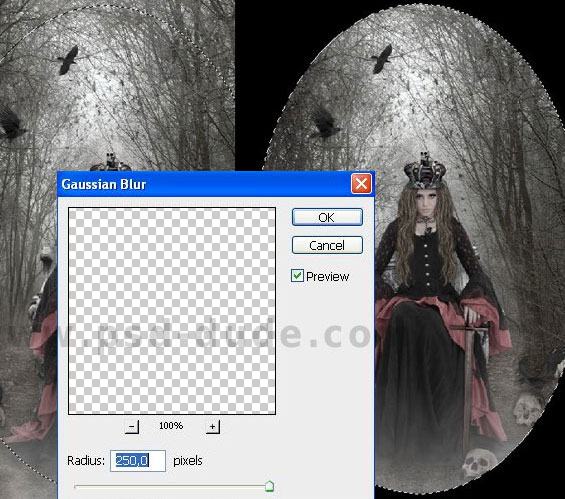
 Now add the final touch - a vignette. Create a new layer and draw on it the Elliptical Marquee Tool selection in the form of an ellipse. On the layer with round selection right-click and
select Invert Selection: now is selected not the central part of the image, and the extreme. Fill the selection with black, to get the vignette. Convert vignette layer to a smart object and
apply a smart filter Gaussian Blur with a Radius of 150. Reduce the opacity of the vignette and 55%.
 If you want to add other color tones you can use a Gradient Map adjustment layer. You can
also increase the sharpness and contrast using the High Pass Filter. You can also add light effects by using a
optical lens flare image made by psdbox using a Screen blend mode.

About the author
 My name is Tatyana Girsh and I live in Russia. At the moment I am working as graphic designer but I also write tutorials and I have a Photoshop related website
photoshop-manja.ru that you might want to visit.



6 comment(s) for "The Dark Queen Adobe Photoshop Manipulation Tutorial"