Learn how to create a surreal underwater scene in Photoshop in only a few simple steps. This is an intermediate level Photoshop tutorial and the completion time is about 1 to 2 hours. It was made with Photoshop CS5 but can be done in any other Photoshop version. Very important to know that this tutorial uses some non free stock images but we gave you also an alternate free images that you can use instead.
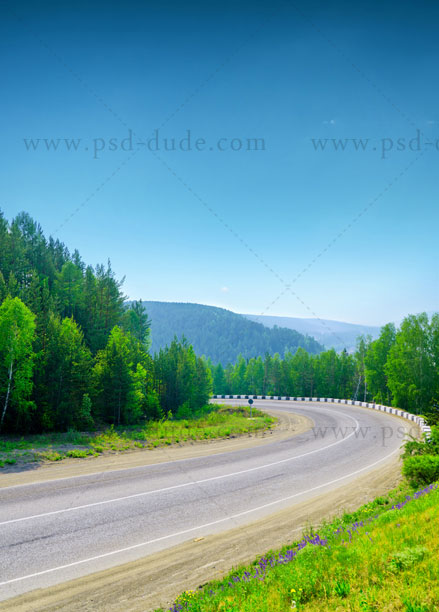
Start off opening the main road image (As an alternate image you can use this road stock). (Ctrl + O and select the image to be used) We will use the exact measures of the original background image so we don't need to worry about dimensions and measures.
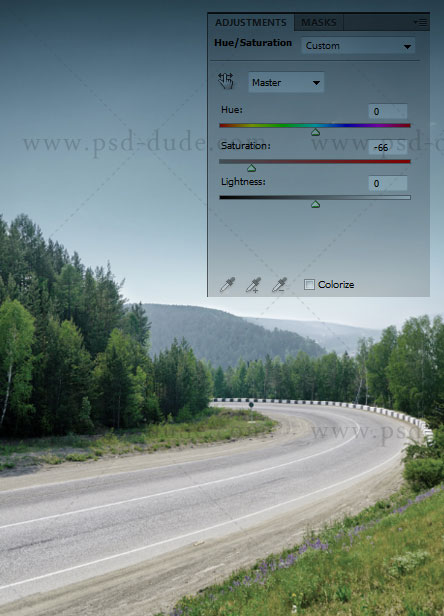
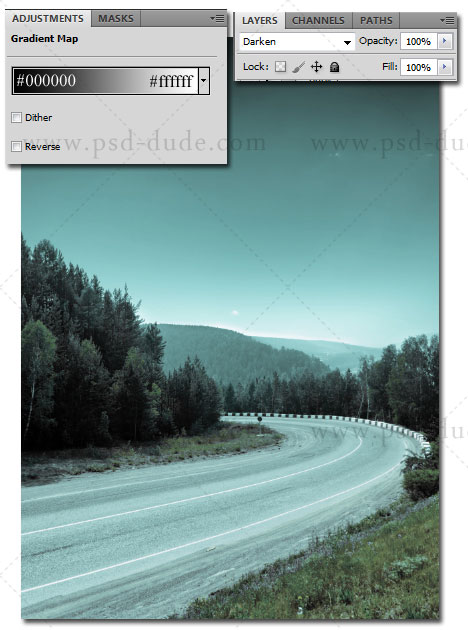
Go to adjustment layers options and select the Hue/Saturation option and lower the saturation to -66. (Note: do not alter the rest of the options and do not mark the colorize option. now our image will look as the image above. with less color.
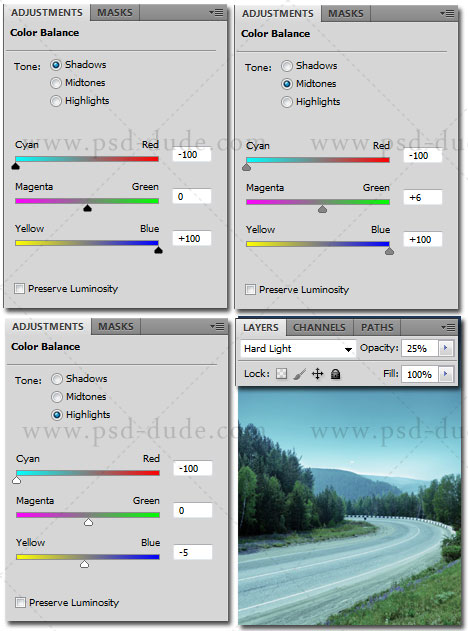
Now go back to the Adjustments panel and select the Color balance. Follow the tones as showed above in the images. (This includes the Shadows / Midtones / Highlights) After doing so, go to the blending options and set the layer to 'Hard Light' + lower the Opacity to 25%. The image will have a bluish tone.
Now go back to the Adjustments panel and select the Gradient Map. Set the colors from Black to white and change the blending mode to Darken. This will make the overall tones darker and closer to the underwater tones.
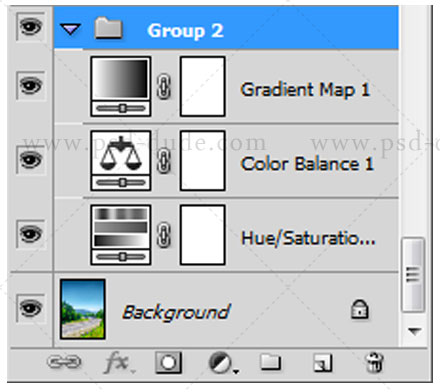
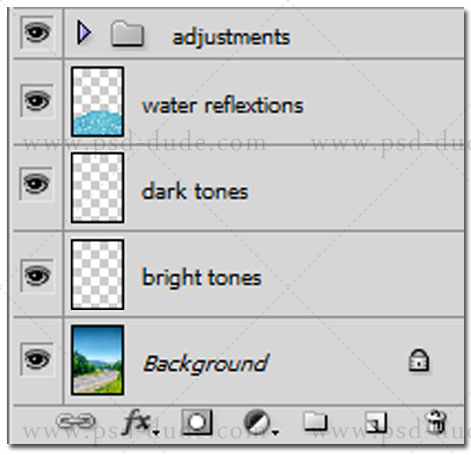
Just so we don't get lost on the layers and positions they should be in, follow the guide to see how they all should be displayed. I recommend you select all three Adjustment layers and group them. Simply hold the CTRL + click on the three layers to be grouped. After all are selected press Ctrl + G
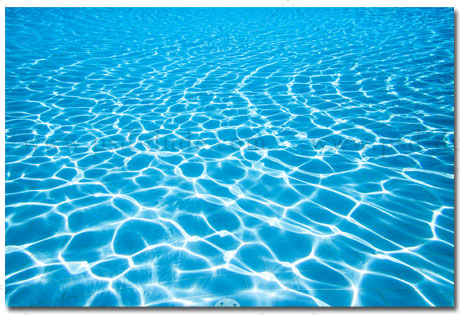
Now open the water reflections image(Important! For those of you that don't have a depositphotos account you can use this water texture instead but you have to make different adjustments and blendings in order to fit with the tutorial) and place it in between the background image and the last adjustment group we created. We will be using this image for the reflection on the ground. For alternatives, check out this huge water texture collection. (This will be most visible on the road)
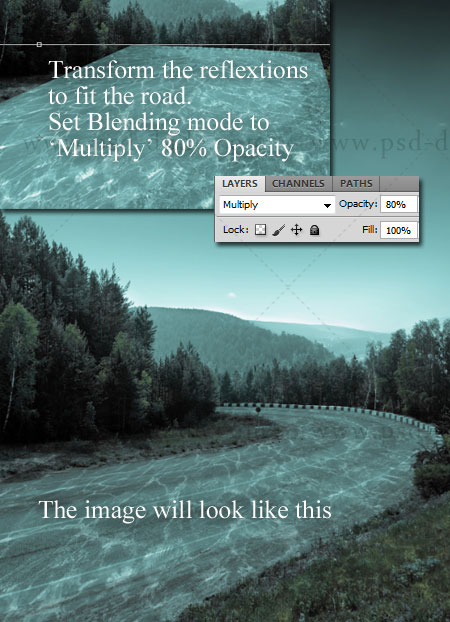
Change the water reflection mode to Multiply and lower the opacity to 80%. With the water reflection layer selected, press CTRL+T. Once you have done so right click with the mouse and select the Distort option. Now shape the reflection image to fit the road and parts of the grass. The overall image will look as above.
Now create a new transparent layer over the background image and bellow the water reflections we just worked on. If you don't know how to create a new layer, you can simply click on the 'create new layer symbol' or press CTRL+SHIFT+ALT+N. Now name this layer Bright Tones. Create another layer over this one and name it Dark Tones
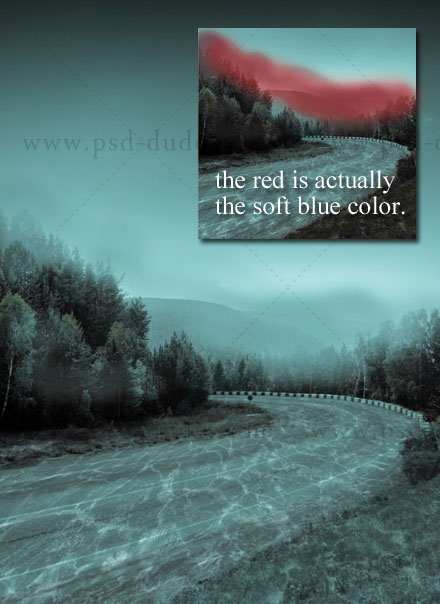
Go to the color panel and select the color #7ab9b9. (Note: this color is basically the same color as in the middle of our sky) Select a soft brush and lower the opacity to about 30%. Now pass this color brush over the tree borders and parts of the background as in the image above. (All of this in the Bright Tones layer.) By doing so, we already start to work the underwater lighting and shades.
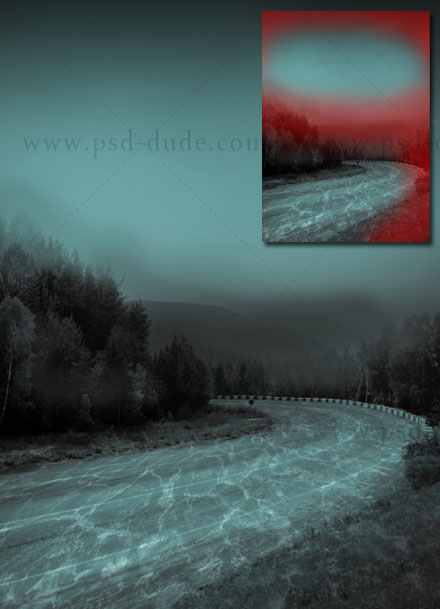
Now do the same as in step 09, but instead of using the blue color, use the black. (In this step we will be using the Dark Tones layer over the Bright Tones Layer) The small example with red tones is actually a guide for you to know where the black tones should be placed/painted.
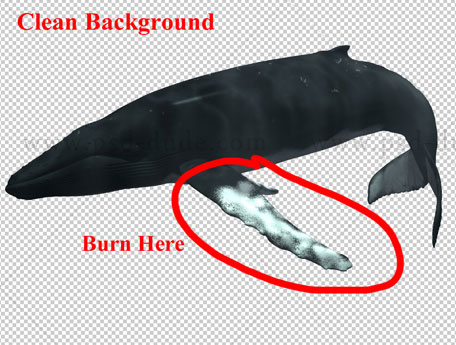
Open the whale image(alternate image dolphin image) and clean the background. You can either use the Pen Tool or the Magic Wand. (Whatever you think is better) Select the Burn Tool and burn out the whales white fin/flap. (I don't really know the name of that, but just follow the example image to know where to burn)
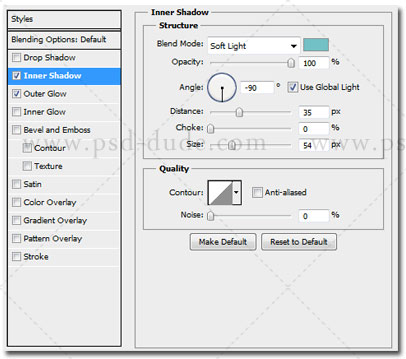
Place the whale in the image we are working on. You must place the whale over the 'Adjustments' Group and name it Main Whale. Now click twice on the whale layer to play around with the styles. Click on Inner Shadow and set the configurations as in the example image. The color should be #72c1c5.
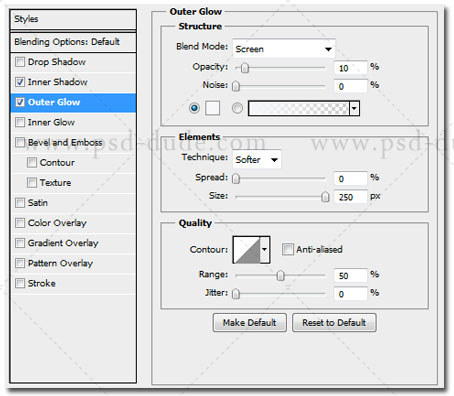
Click on Outer Glow and set the configurations as in the example image. The color should be #f5f7f8. Steps 12 and 13 will add a soft blue tone to the whale's borders and add a slight glow to make it stand out better against the dark background.
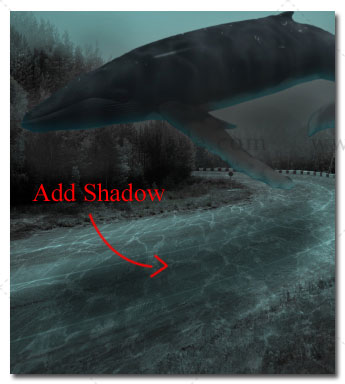
Create a new layer named Shadow below the Main Whale Layer. Use a soft large brush with the black color set at 20% Opacity and pass it on the ground under the whale to simulate the shadow cast. The overall shadow should look similar as in the example image.
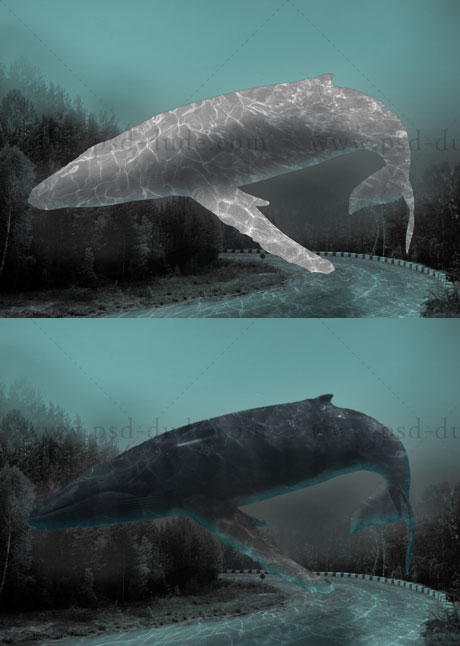
Open the water reflection image we used on step 06. Create a new layer named Reflection Whale and set it over the Main Whale layer. Transform the reflections to black and white. (Ctrl + shift + u). Erase all except for what covers the whale. Set the blending mode to Overlay Now we have the same effect we added to the ground.
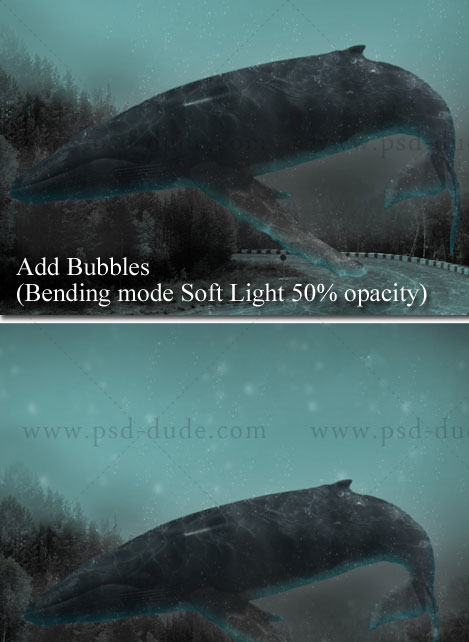
Create a new layer over all the layers we have already worked on named Bubbles 1. Select a small white brush with white color and go adding the bubbles around the whale. (Lower the opacity of this layer to 50% and set the blending mode to Soft Light. Now create a new layer named Bubbles 2 and add larger bubbles scattered over the whole creation. (blur out the bubbles with Gaussian Blur) - Set the layer blending mode to soft light and maintain the opacity of 100%)
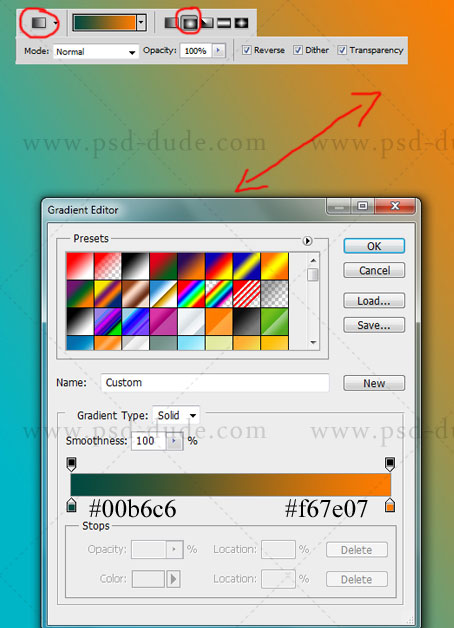
Create a new layer above all layers and name it Color. Select the Gradient tool and click on the radial option. Set the colors of the gradient from #00b6c6 to #f67e07. Add this gradient color to the 'color' layer. The gradient should look similar to the example image.
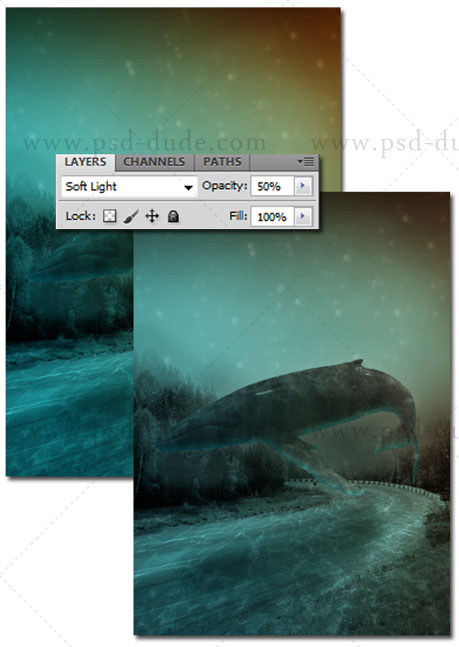
Now set the blending mode of Color layer to Soft Light and lower the opacity of this layer to 50%. We now have a soft tone of orange at the top right of the image as if there were some sky lighting hitting from above and to add a dramatic tone as well.
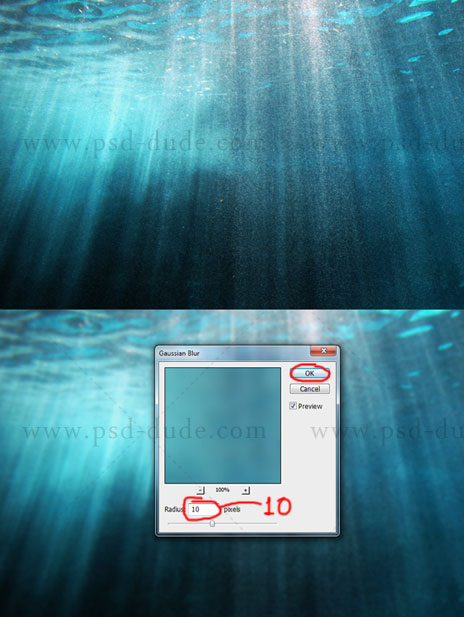
Open the water image. Go to Filter > Blur > Gaussian Blur (10 px)
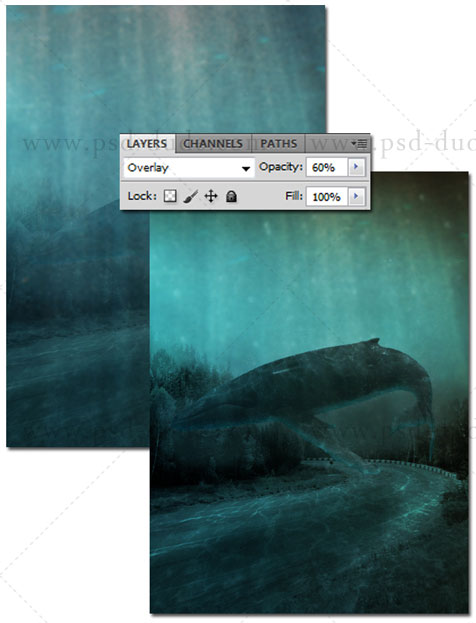
Now Create a New layer above all the layers and name it Light Rays. Paste the water image we worked on previous. Lower the Opacity to bbout 60% and set the blending mode to Overlay. (Note: use the transform tool (Ctrl + t) to fill the whole image with these light rays.
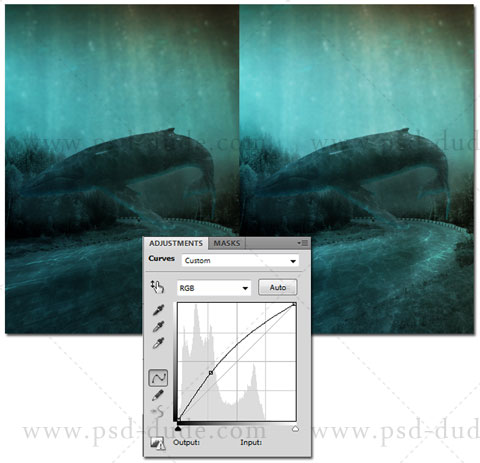
Now Create a New Adjustment Layer and select the Curves tool. Set the Curve as in the example image provided. This will make the overall image slightly brighter.
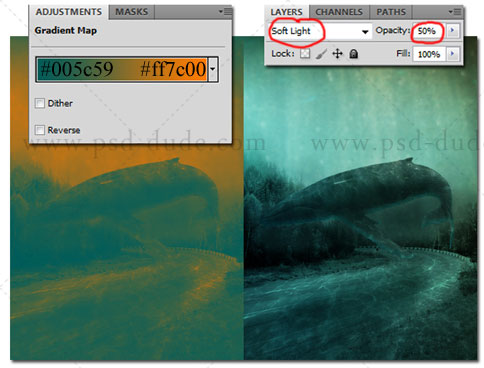
Now Create a New Adjustment Layer and select the Gradient Map. Set the colors from #005c59 to #ff7c00 The overall image will have a mixture of Orange and Blue/Green. Set the blending mode to Soft Light and lower the opacity to 50%. You will notice now we have a different overall tone to the image.
Now select all the layers we have worked on until now. Right click with the mouse and select the Duplicate All. Once we have duplicated al the layers we will merge them all together. (Right click with the mouse, Merge Layers. Name this Layer Sharpen. Go to Filter > Sharpen > Smart Sharpen. Set the sharpen options as in the example image and press ok.
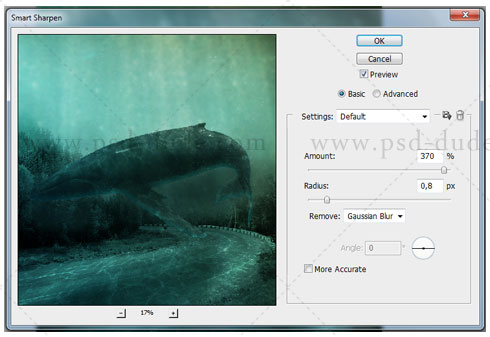
You will notice now we have a sharper crystal clear image.
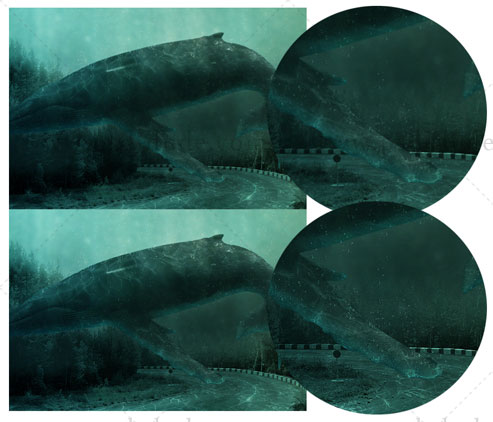
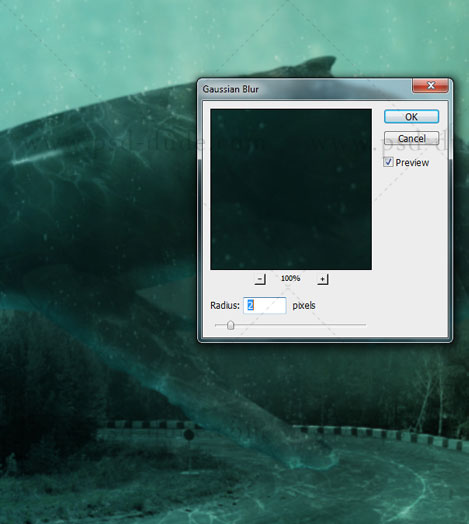
Now duplicate the Sharpen layer (ctrl + j). Name this layer Soft Blur. Go to Filter > Blur > Gaussian Blur, set the blur to 2 pixels. Press ok.
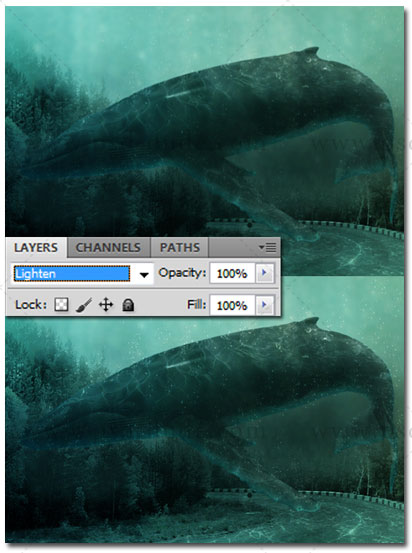
Change the blending mode of the Soft Blur layer to Lighten. This will give a soft blur shine over the bubbles and overall image.
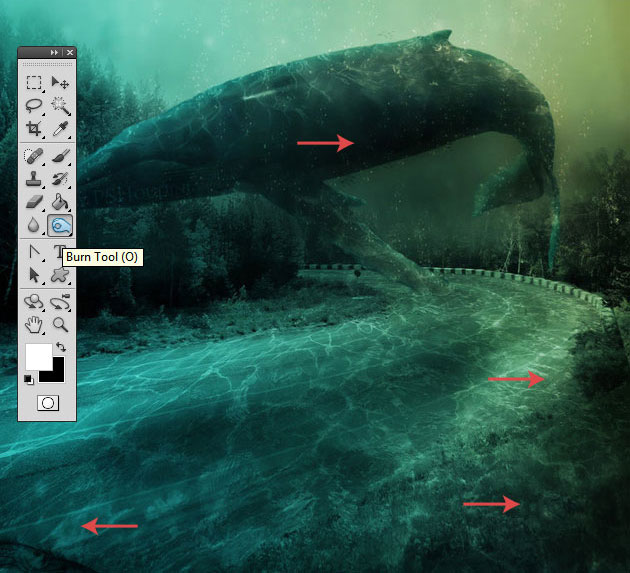
As a final touch I have use the Burn Tool to darken some areas. In the same way you can use the Dodge Tool to lighten some areas. Use a soft round brush.
You can also add some extra light effect using these rays of light images.
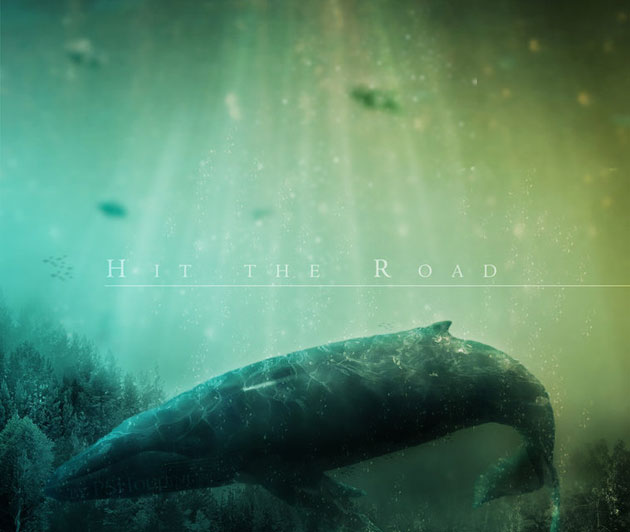
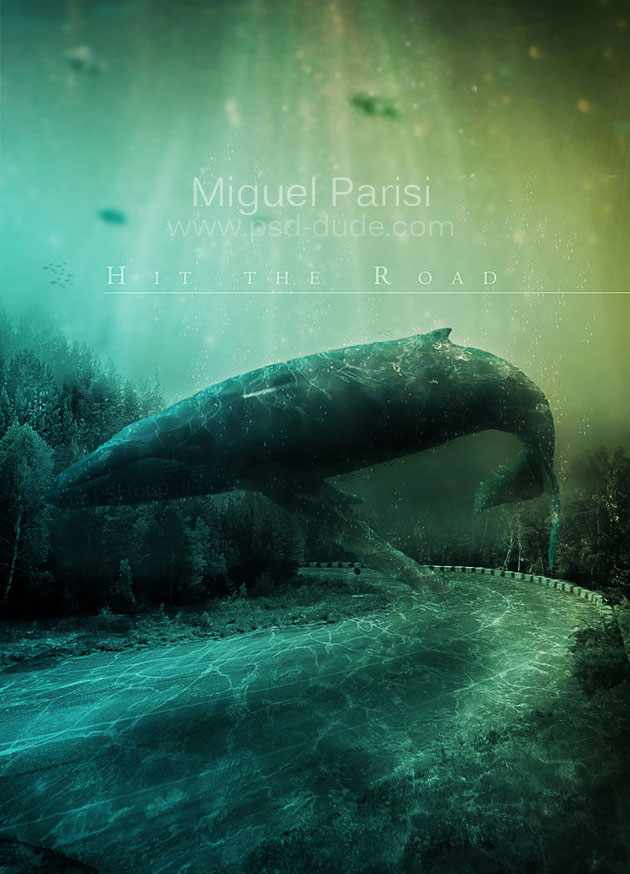
Here is the final image of this beautiful underwater Photoshop background; I really hope you like it.

About the Author
Miguel Parisi (PSHoudini) is a 27 years old talented self-taught digital artist from Brazil. Miguel is working with photoshop since the end of 2009 and he creates amazing photo manipulations; he makes really beautiful underwater/water manipulations. You can find Miguel on his deviantArt page and on his Facebook account.
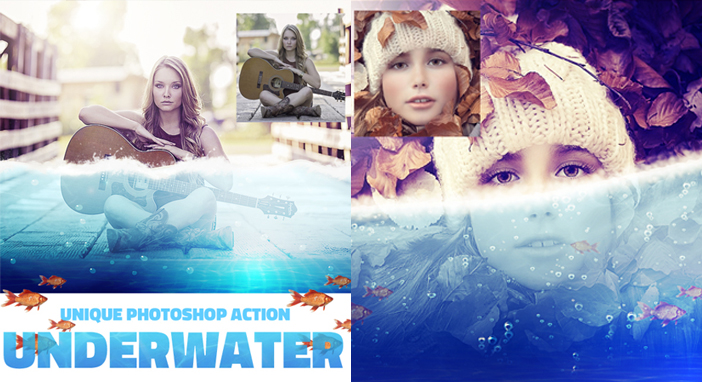
Underwater Photoshop Action


14 comment(s) for "Create a Surreal Underwater Background in Photoshop"
This is my creation
Cheers.