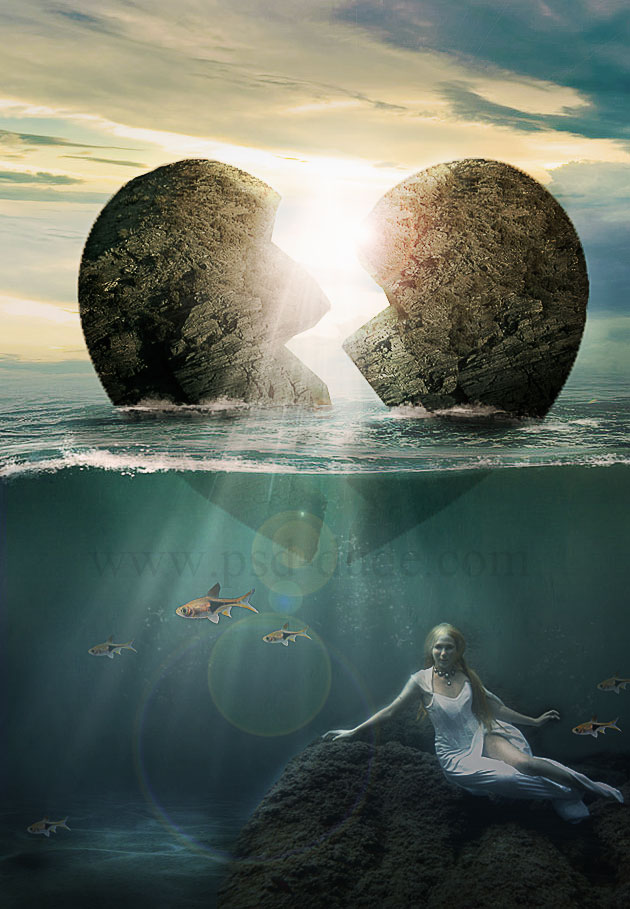
The Valentine's day is coming in just a few weeks so I decided to make a serie of photo manipulations simply because love is one of my favorite Photoshop themes. This new tutorial can be easily practiced even by Photoshop newbies; we'll use some basic Photoshop techniques of cropping image, blending photos, adjusting color tones and so on.
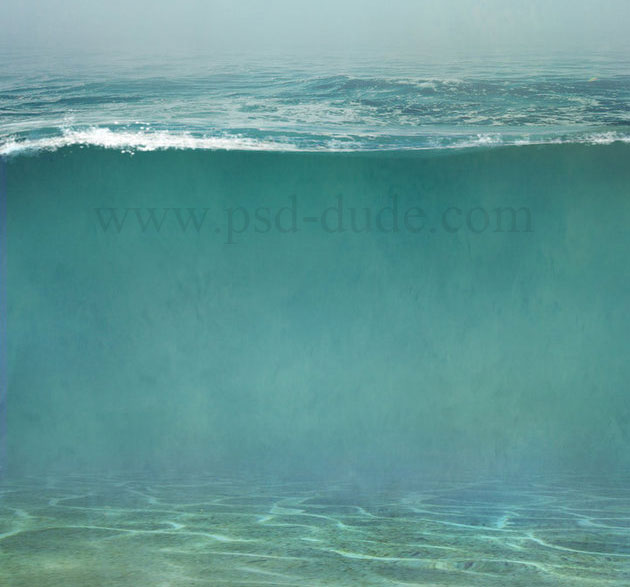
Simply open this beautiful underwater stock image; name it Underwater layer.
In a new layer add this clouds stock image; remove the grass area, set the opacity to around 70% and place the stock photo like shown in the image. Call this layer Clouds 1

Add a layer mask to the Clouds 1 and mask the lower area using the Gradient Tool.

Now add a Color Balance adjustment layer only for the Clouds 1 layer to change the color tones a little bit.

Duplicate the Clouds 1 layer along with its Color Balance adjustment layer; call it Clouds 2 layer. Set the opacity of the Clouds 2 layer to 100% and also move the image to the right like shown in the preview.

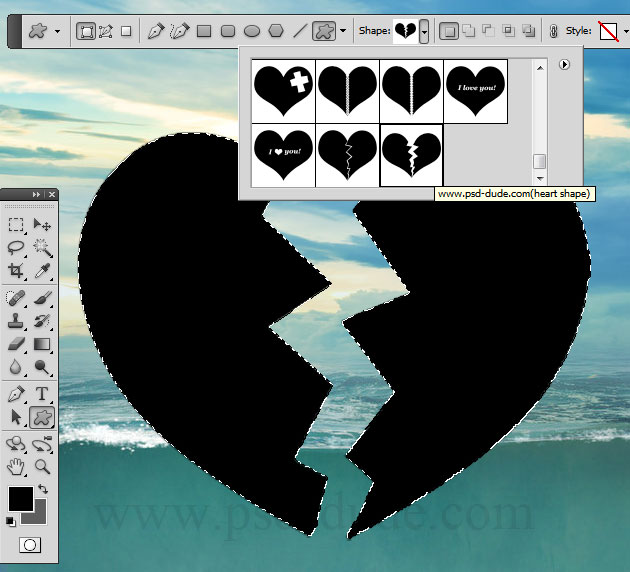
In a new layer called Broken Heart Shape, I will draw a heart shape using the Pen Tool. You can easily learn how to become a Pen Tool master by reading these great tutorials for vector drawing beginners. Or you can use one of my heart Photoshop shapes instead. You will have to make small adjustments to the heart shape and also to move the two parts away one from another to look like in the image.
Use this rock image to texturize the broken heart shape. Place the rock over the heart shape, make a selection out of the Broken Heart Shape layer and press CTRL+J to make a Layer via Copy. Call this layer Rock Heart.

Don't worry if the rock doesn't cover all the heart shape; you can use the Clone Stamp Tool to cover the entire area.

As you can see the rock image is too saturated and has a different color tone than the rest of the image. To fix these problems I will add two adjustment layers, a Hue/Saturation and a Color Balance. Make sure you press the Clip to layer button so that the adjustments to affect only the Rock Heart layer.

Open the layer style window for the Rock Heart layer and add an Inner Shadow effect.

Use the Pen Tool to create two surface areas in a new layer behind the Rock Heart layer. Use the color #425249 for the shapes. Call this layer 3D effect
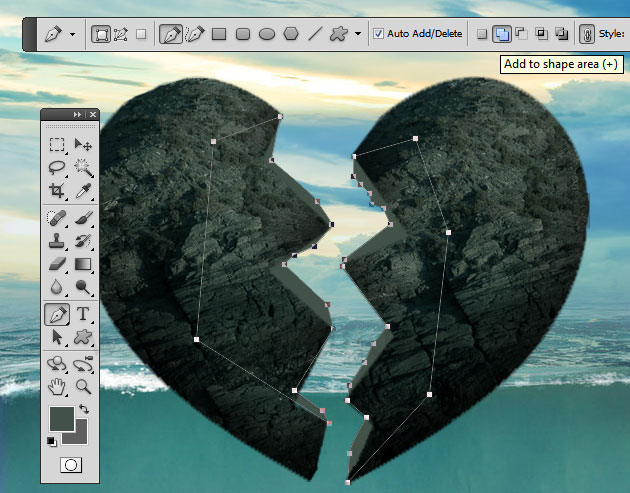
Rasterize the 3D effect layer and use the Burn Tool and the Dodge Tool to add shadow and lights. You can even texturize these areas using the rock image
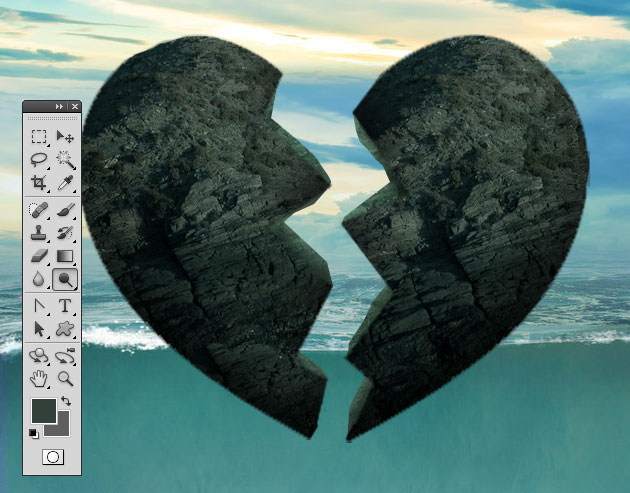
Group all the heart layers, including the adjustment layers in a new group called Rock Heart Group.
We want to create the effect that the island is half sunk underwater. So use the Lasso Tool to make a selection like shown in the image.

Make a Layer via Copy using the Underwater Layer. Call this new layer Water Surface and place it above all the existent layers.

Lower the opacity of the Water Surface layer to around 80%.

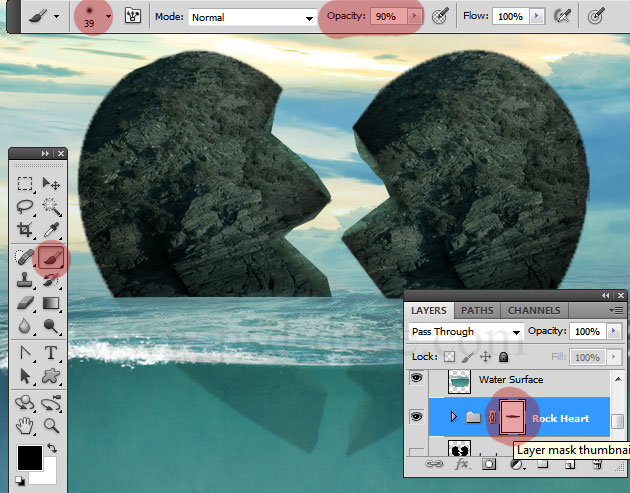
Add a layer mask to the Rock Heart Group. Use the Brush Tool with a soft round brush, color black, opacity 90% to paint in the layer mask and hide an area from the heart shape.
Make a new layer and call it Heart Shadow. Use a soft round brush, color black and different opacity levels to paint a shadow. Change the blend mode to Overlay, 70% opacity. Learn more about cast shadow in Photoshop.

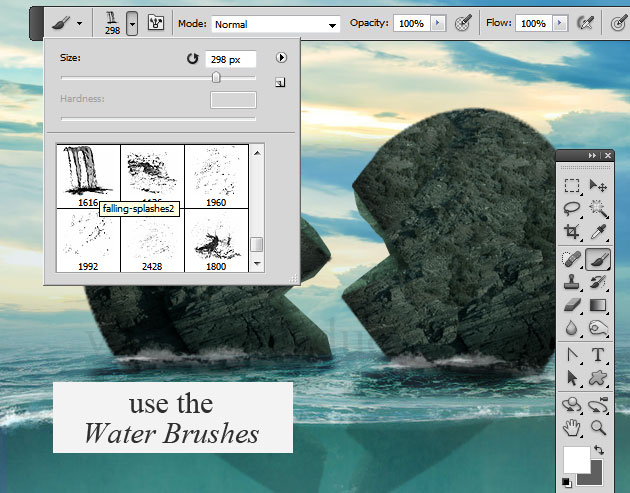
You can usee these water brushes to add water foam effect, water bubbles, etc. Use a proper size brush, colr white and different opacity levels. Use the Eraser Tool to adjust the brushes.
Create a new layer and call it Gradient Layer. Set the Fill to 0% and add a Gradient Overlay using a black to black transparency map. This layer will darken the underwater area.

Open the mermaid stock image, resize it and place it like shown in the image. Call this layer Mermaid

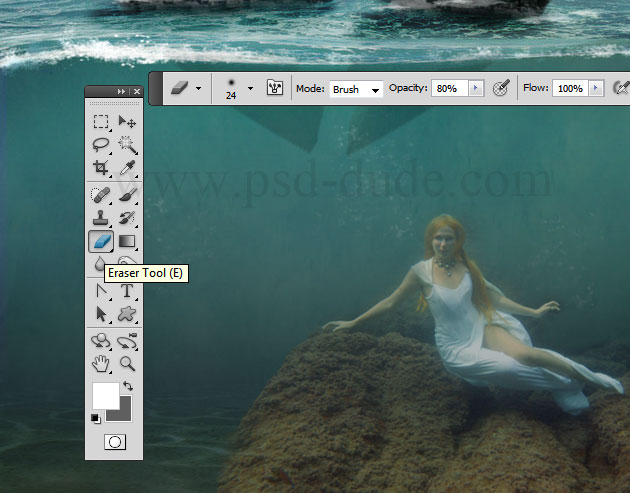
Set the opacity of the Mermaid layer to 60%. Use the Eraser Tool to remove parts from the mermaide image so that it blends with the other images. Use a soft round brush around the mermaid area and a hard round brush for the rock area.
Add two adjustment layers only for the Mermaid layer; first add a Hue/Saturation and than a Brightness/Contrast with the following settings:

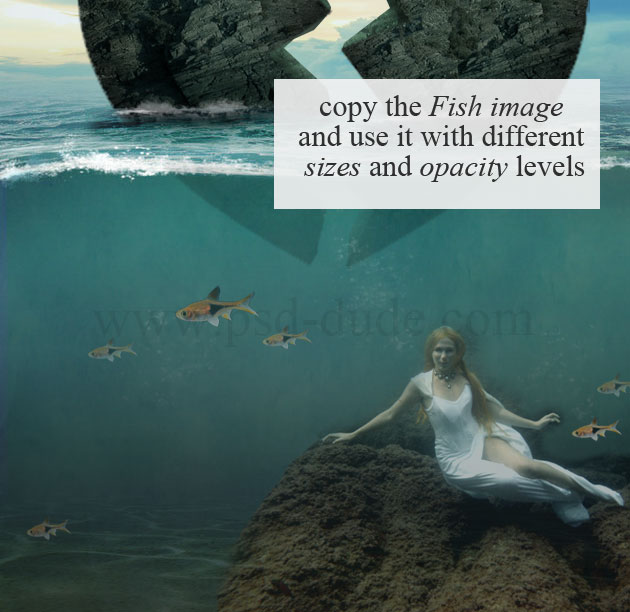
You can also add some fish under the water; simply resize the fish PNG image and copy it several times. Use different sizes and opacity levels.
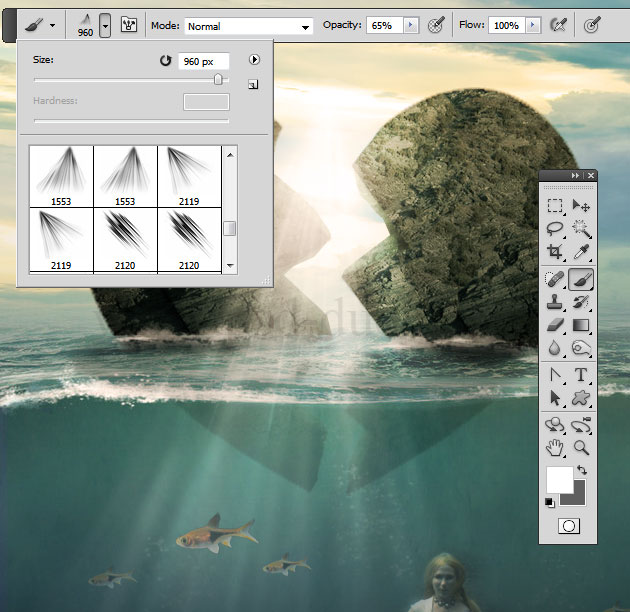
In a new layer/layers I will use these light beams brushes to create light rays effect that are coming between the broken heart. Use the Brush Tool, color white and different sizes and opacity levels. You can create more than one layer and use either Normal blend mode, Overlay blend mode or combine the two of them.
Now we will add the final details; create a new layer above all trhe other layers. Go to Image>Apply Image. A new layer was created that contains all the visible layers merged.

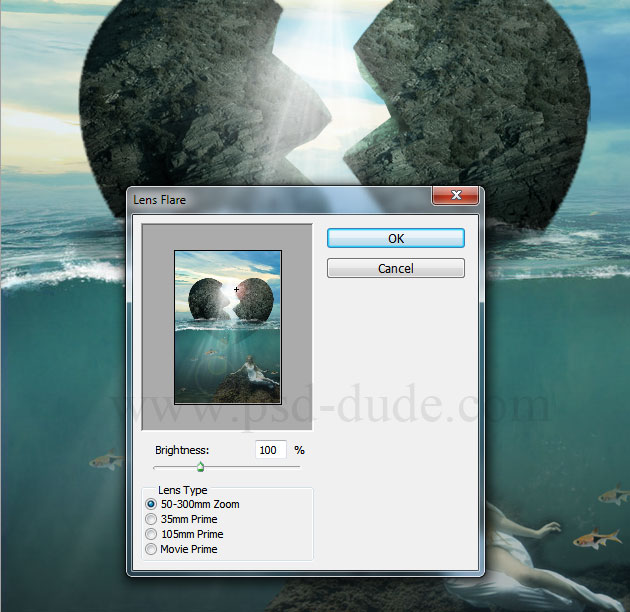
Go to Filter>Render and choose Lens Flare; or you can use my lens flare brushes. Drag the lens flare position inside preview to place it where you want.
Add a new Photo Filter adjustment layer with these settings:

Add a new Gradient Fill adjustment layer with these settings. Set the nlend mode of this layer to Overlay 55% opacity. The colors for the gradient map are #0a3159 and #f3bd76

Create a new Apply image layer above all the others and go to Filter>Other and choose High Pass.

Change the blend mode of the High Pass layer to Overlay; to create other light and shadow effects you can use the Dodge Tool and the Burn Tool on the High Pass. So here is the final result for the Broken Heart Island Photo Manipulation. This tutorial was create especially for the upcoming Valentine's Day so it is really a love inspired Photoshop artwork.


9 comment(s) for "Create a Broken Heart Island Manipulation in Photoshop"
thanks for sharing. reply
author Drsela - http://drsela.deviantart.com/