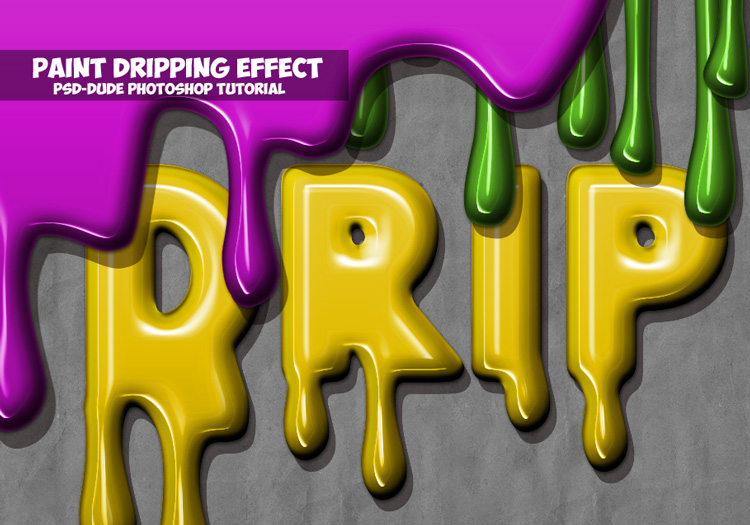
Learn how to create a paint drip effect in Photoshop using layer styles.
How to Create the Paper Background in Photoshop
Create a new PSD file, size 900x600px. Add this seamless paper texture or any other paper texture and call this layer Paper Background.

Add a Gradient Map adjustment layer using these colors: #000000 (location 9%) and #ececec (location 90%).

Work with Text Layer in Photoshop
Create a new text layer and write something using any font type you want. I will use League Spartant Font ; see how you can install font in Photoshop from this quick tutorial for beginners.

Toggle the Character and Paragraph panels and set the tracking for the text to 100.

Right click on the text layer and choose Rasterize Type.
Keep the CTRL key pressed and click on the Text Layer Thumbnail to make a selection.

Press the Add Layer Mask button.

Go to Select > Refine mask and make these settings.

Keep the CTRL key pressed and click on the Text Layer Mask to make a selection.

Click the Layer Thumbnail and go to Edit > Fill to fill the selection.

Right click on the Layer Mask and choose Apply Layer Mask.

Add Drip Effect in Photoshop
Download these drip vector shapes and load the CSH file in Photoshop. Go to Edit > Preset Manager, choose the Prest Type: Custom Shapes and click Load to load the CSH file.

Pick the Custom Shape Tool to add dripping effect in a new layer. Keep the Shift key pressed to add multiple shapes in the same layer.

Right click on the Drip Shape Layer and choose Rasterize Layer.
Use the Brush Tool and a hard round brush to remove some areas and to reveal the text behind.

Keep the Shift key pressed and click on the Drip Shape and Text Layer to select them. Right Click and choose Merge Layers. Call this new layer Paint Drip Effect.
Right click on the Paint Drip Effect layer and choose Convert to Smart Object.
Multiply the Paint Drip Effect smart object 2 times and call them Paint Drip Effect 1 and Paint Drip Effect 2.

Create Glossy Paint Style in Photoshop
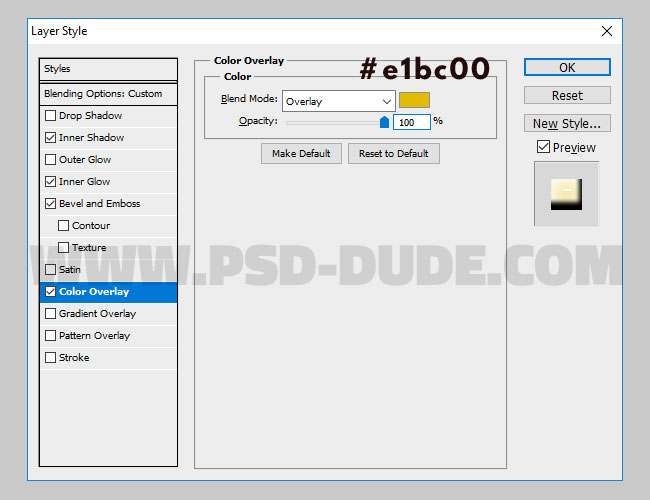
Add this layer style to the Paint Drip Effect smart object. Set the Fill to 0% first.


Add this layer style to the Paint Drip Effect 1 smart object. Set the Fill to 0% first.


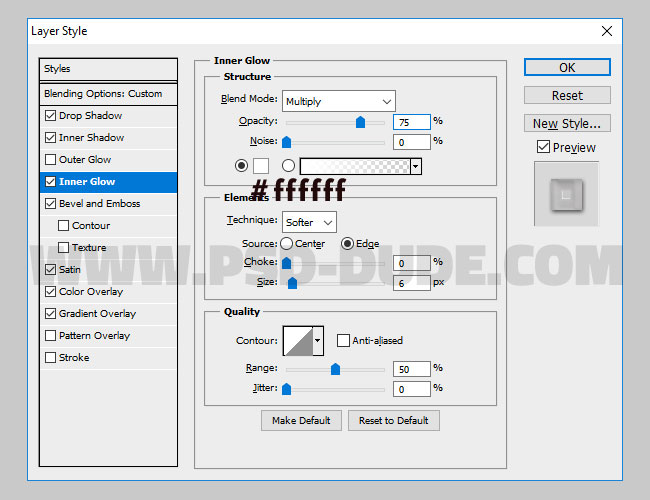
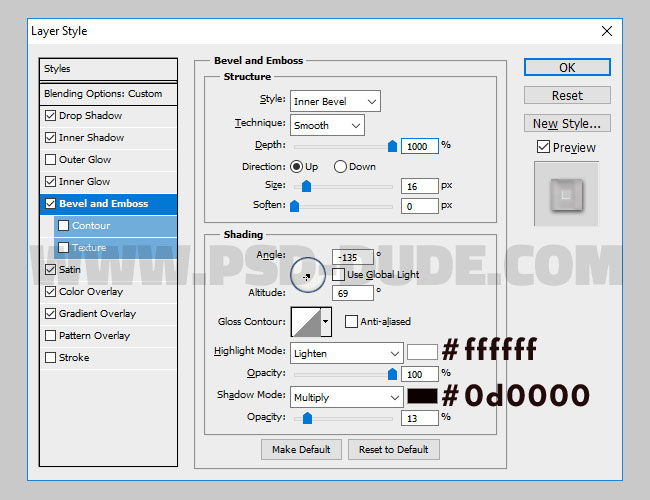
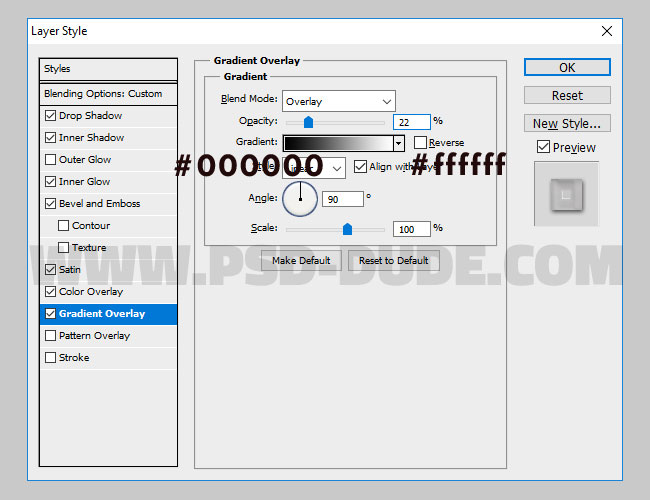
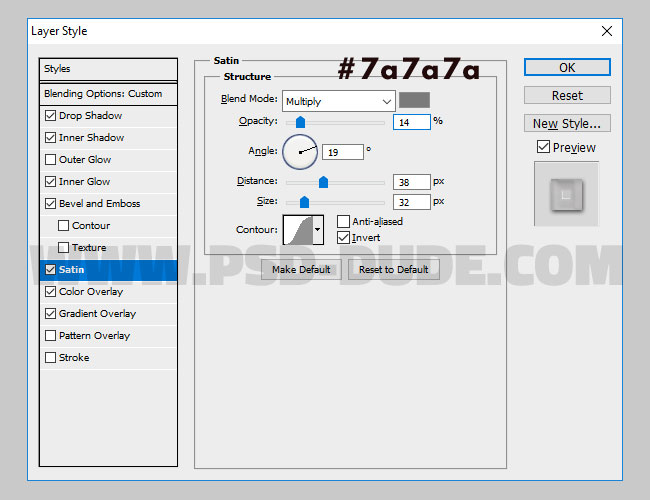
Add this layer style to the Paint Drip Effect 3 smart object. Set the Fill to 0% first.
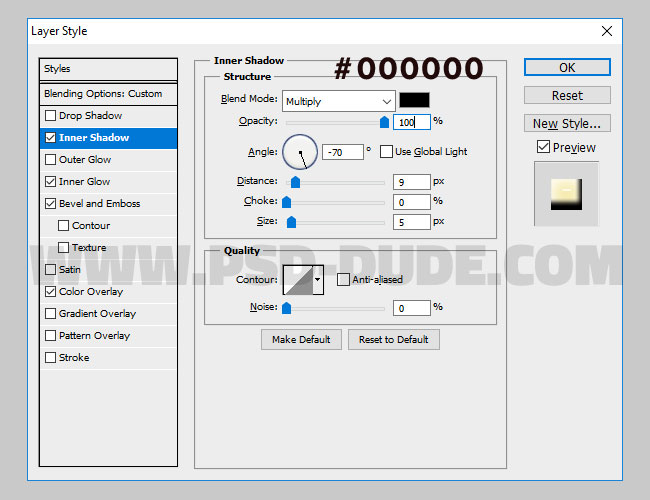
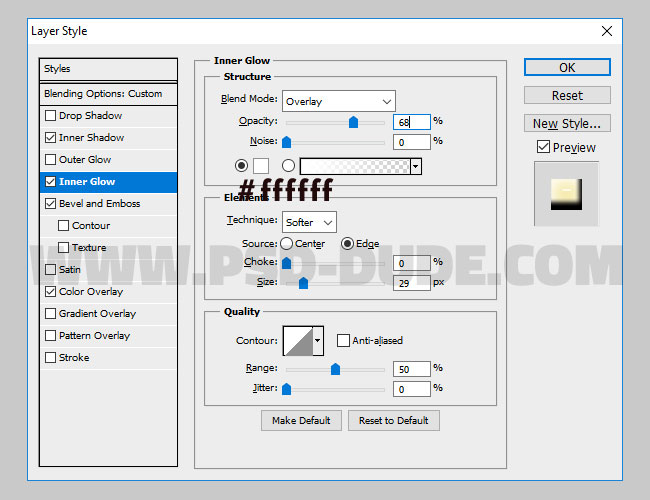
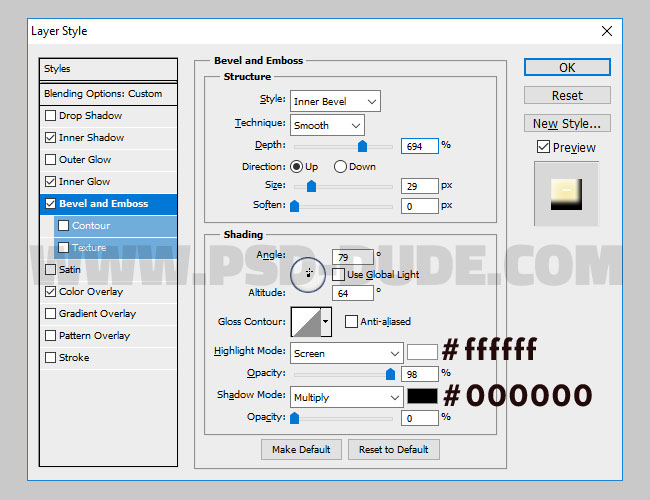
With the Color Overlay layer style you set the color of the paint drip effect.
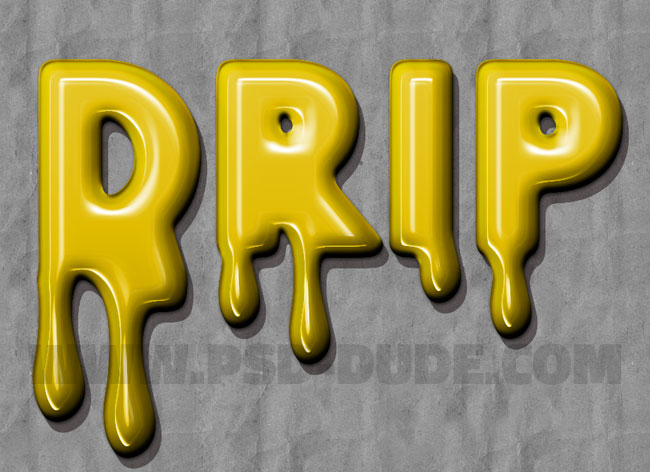
Your result should now look like this.
You can download the PSD source file if you want obtain the result more easily.
FREE DOWNLOAD
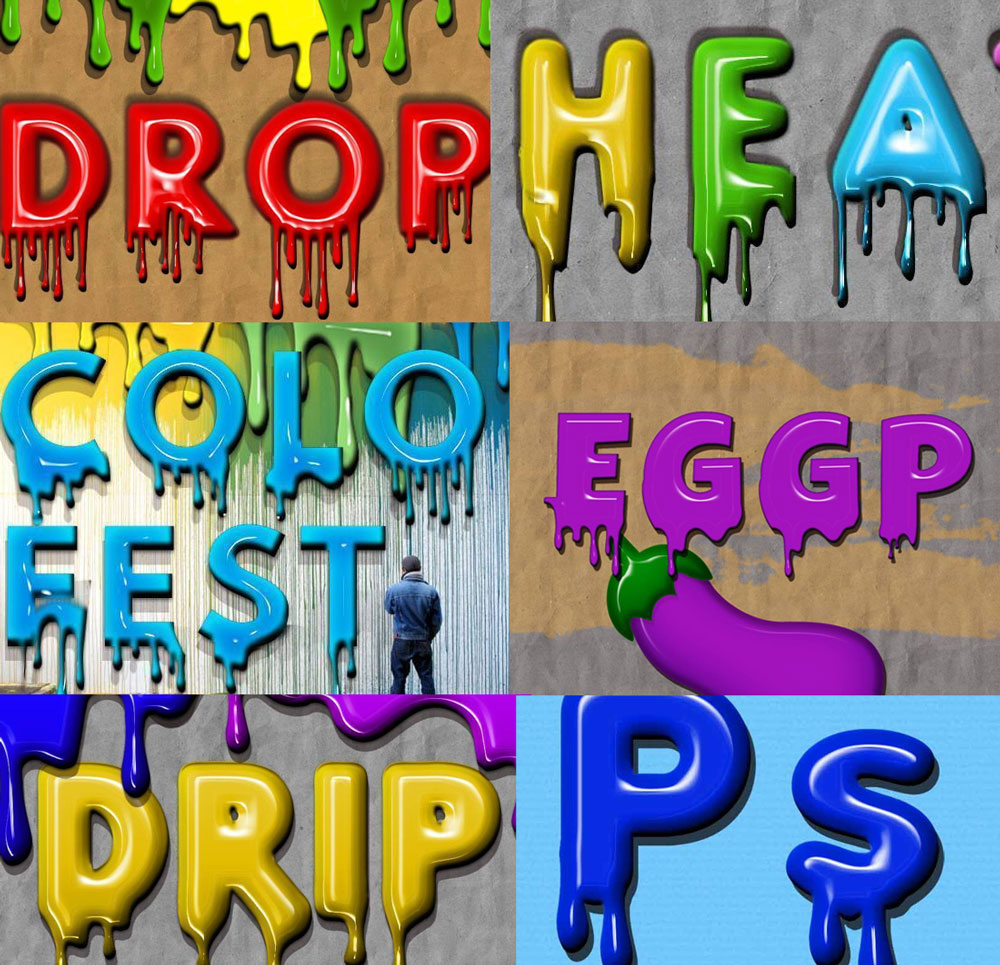
You can add other paint drips using different colors. So here is the final result for the dripping paint text effect in Photoshop.

Beautiful Fan-Art Images Collage

No comment(s) for "Paint Drip Text Effect in Photoshop"