Create Realistic Lava Texture in Photoshop
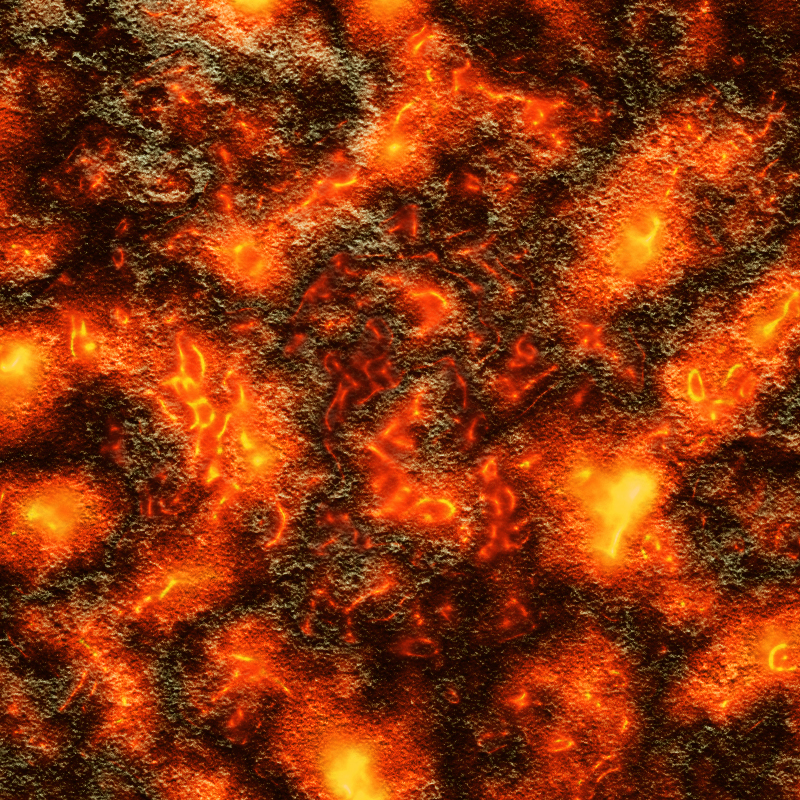
Learn how to create lava texture in Photoshop from this quick tutorial for beginners. First you have to create a new PSD file with the size that you want. Next, name the first layer Lava Texture. Fill thsi layer with white color.

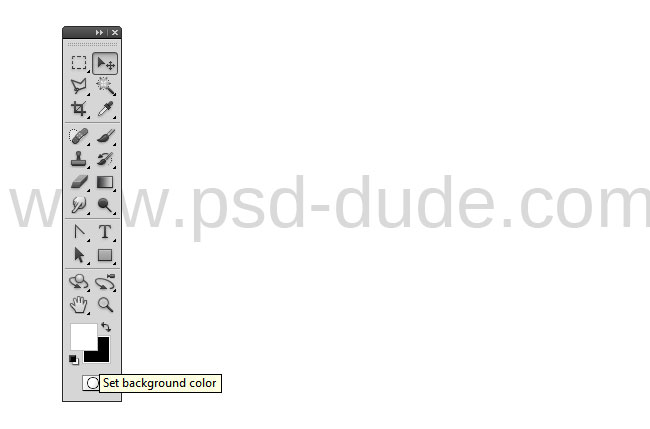
Set the Foreground color to white and the Backgroundd color to black.
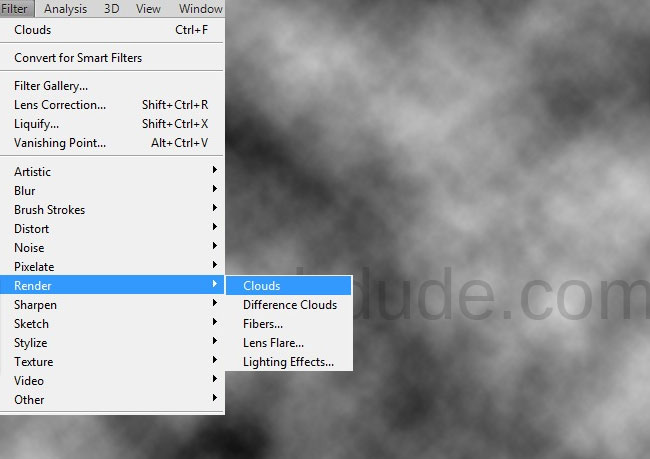
Go to Filter>Render menu and choose the Clouds Filter. This filter is used to create different textures in Photoshop: for example you can create of course cloudstexture but also stone rock texture, so it is a versatile and useful filter.
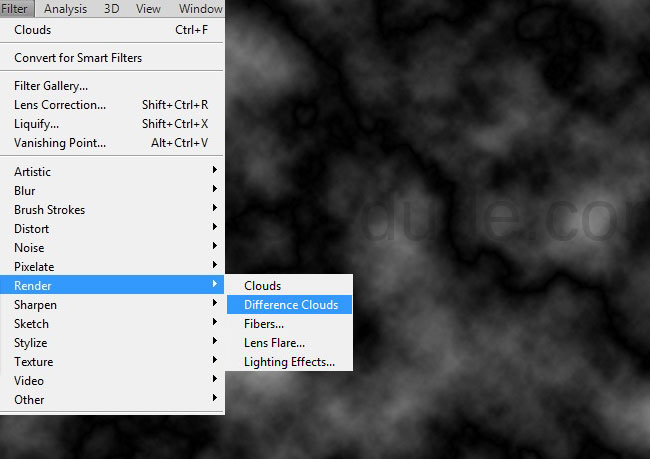
Go to Filter>Render menu and choose the Difference Clouds Filter.
Duplicate the Lava Texture and call this new layer Molten Lava Texture. For the mmoment hide the Molten Lava Texture layer. Return to the first layer, the Lava Texture and add it a Hue/Saturation adjustment layer with a Clipping Mask(learn more about how to use the Clipping Mask in Photoshop from these tutorials for newbies).
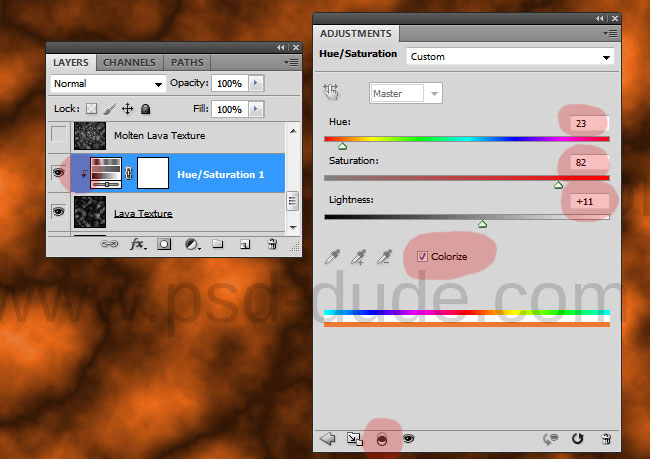
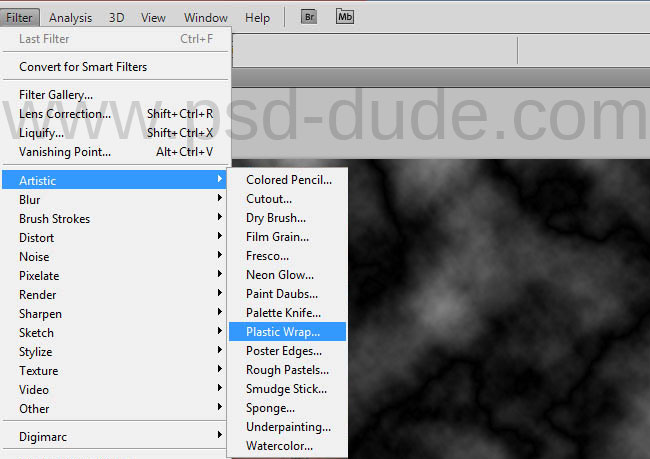
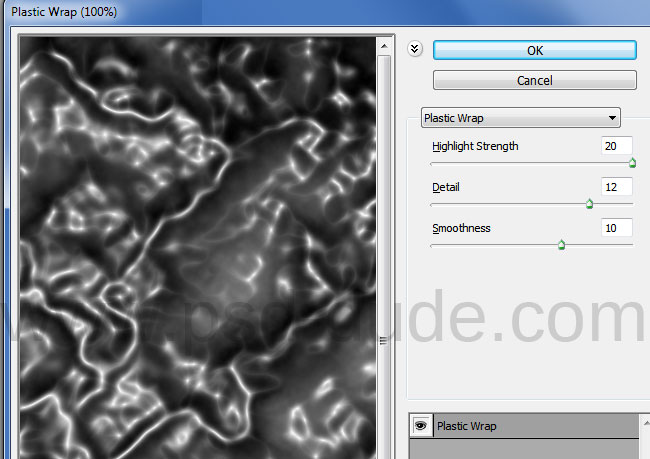
Go to Molten Lava Texture and unhide this layer. We'll now use the Filter>Artistic>Plastic Wrap filter to create the hot melted effect for the lava texture.
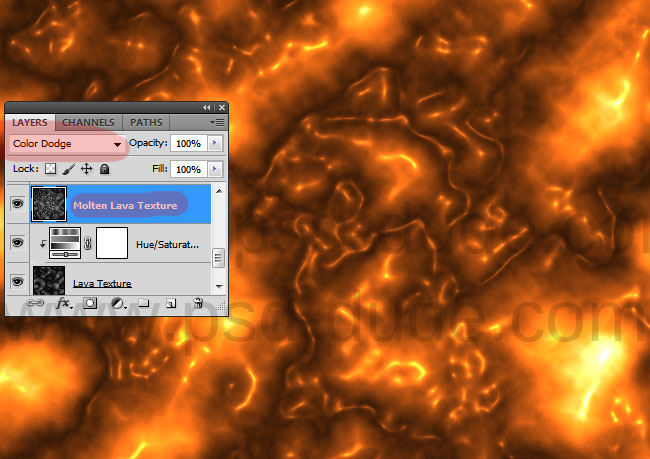
Set the blend mode for the Molten Lava Texture to Color Dodge and obtain this hot melted lava effect.
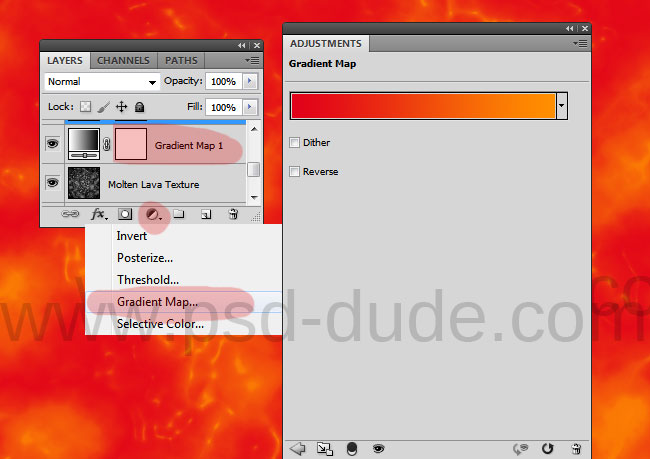
To add more vibrant color effects similar to fire texture you have to add a Gradient Map abouve all the other layers. The two colors used for the graident map are #e10119 and #fe8f00
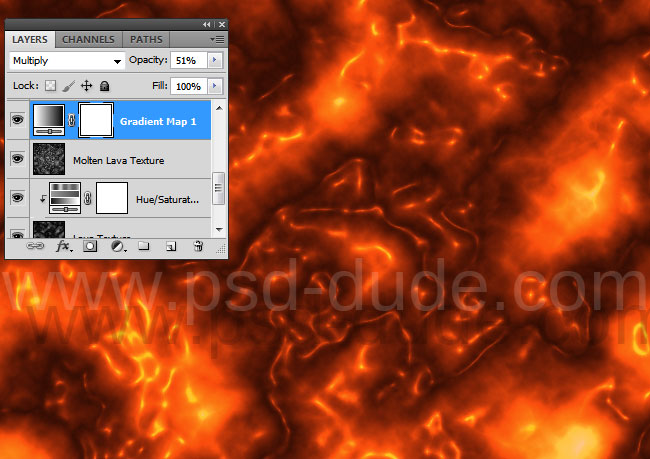
Set the blend mode for the Gradient Map to Multiply, opacity 51% as shown in the image.
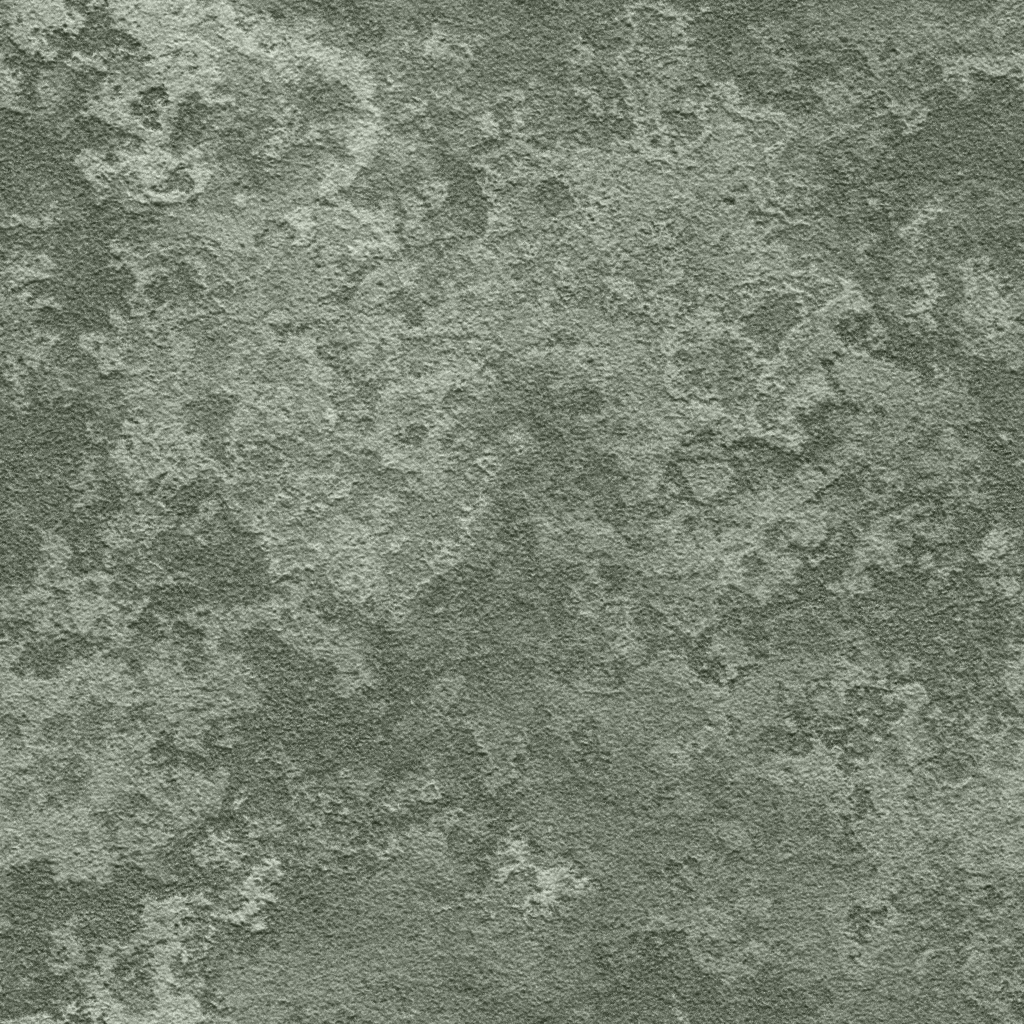
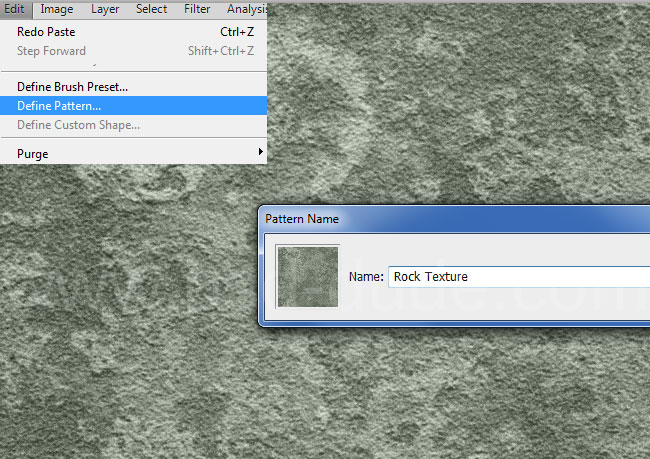
Copy this seamless rock texture in a new Photoshop file and go to Edit>Define Pattern menu. This is a seamless texture pattern made by webtreats but as I can't find the original download link you'll have to define the pattern yourself. Call it rock texture.
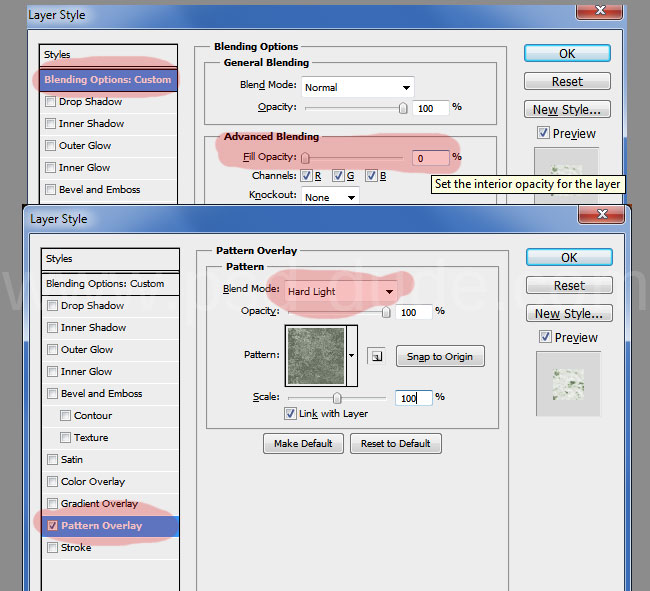
Create a new layer above all the other layers and call it Rock Texture. Fill the layer with any color and add a Pattern Overlay layer style using the rock pattern created in the previous step. Set the Fill Opacity of this layer to 0% and the Pattern Overlay to Hard Light.
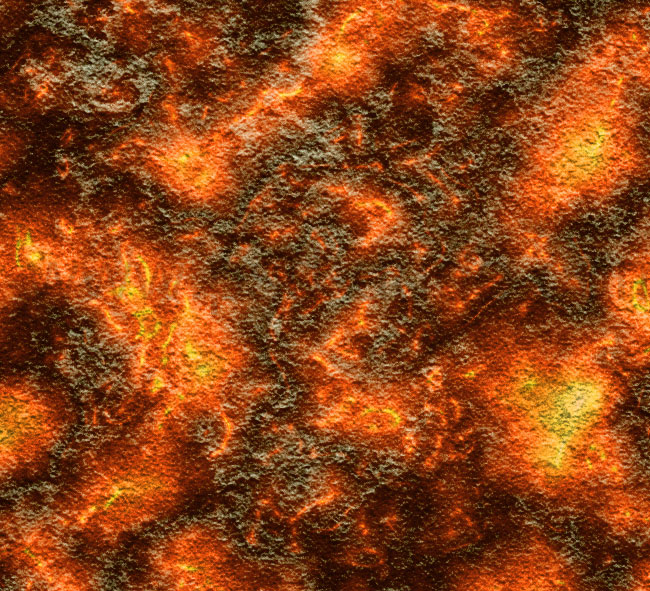
Your result for the lava rock texture should now look like this.
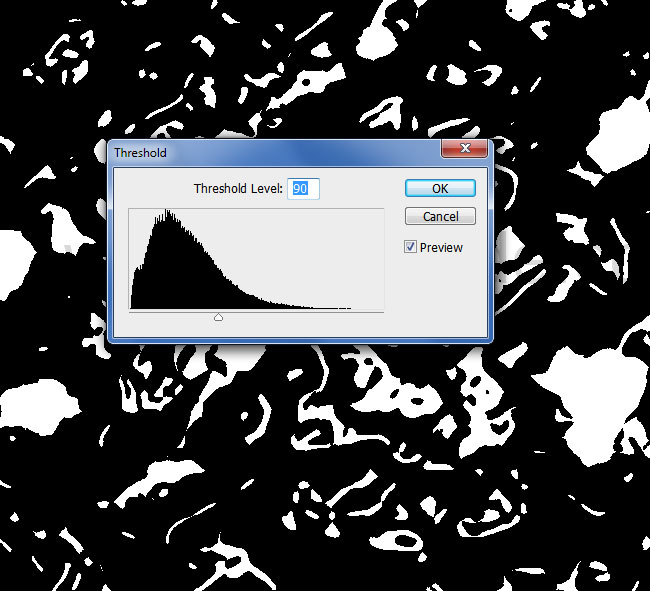
Duplicate the Molten Lava Texture and call it Mask Layer. Set the blend mode to Normal. Go to Image>Adjustment menu and choose Threshold with these settings.
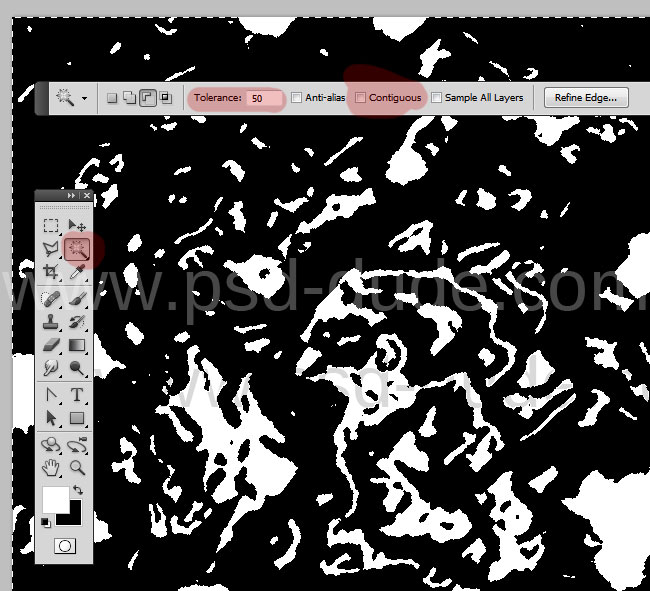
Pick the Magic Wand Tool and use it to select the black color from the Mask Layer. Make sure you have the Contiguous setting unchecked.
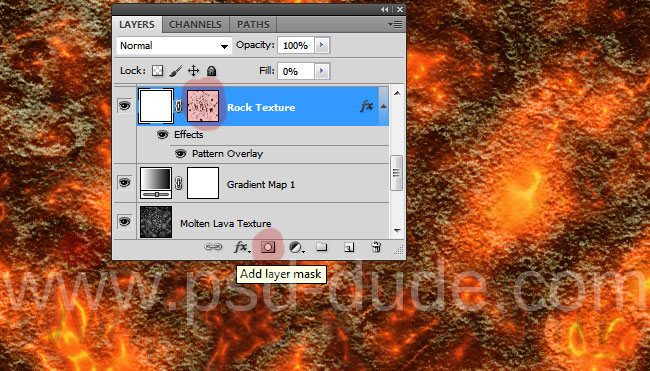
With the selection still active go to Rock Texture layer and click on the Add Layer Mask button to create a mask from the selection. Delete the Mask Layer.
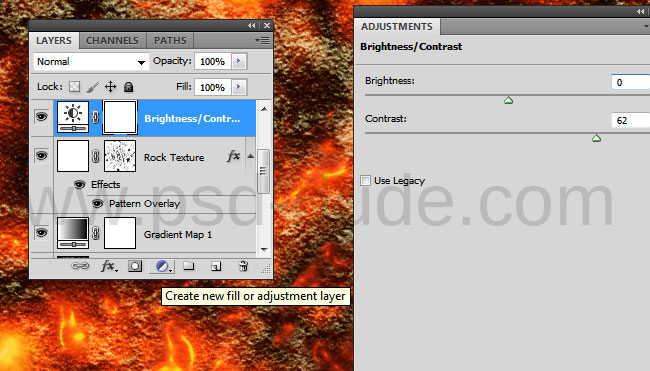
For the final touches you can add a Brightness/Contrast adjustment layer to make the volcanic magma texture more vibrant.
So here is the final result for the realistic lava texture made in Photoshop using some basic filters. You can download the seamless tileable version of the magma texture. The pack includes a JPG file and a PAT patterns file.
 DOWNLOAD!(2.53MB)


3 comment(s) for "Create Lava Rock Texture in Photoshop"
Made this: https://imgur.com/l2f10jq reply