Pizza Font Online
If you don't have Photoshop, you can try this creative pizza letters from MockoFun. Use the pizza text online.
Download Pizza Seamless Texture
First you have to download this file that contains the Pizza Seamless Texture and other textures that are useful for this tutorial.
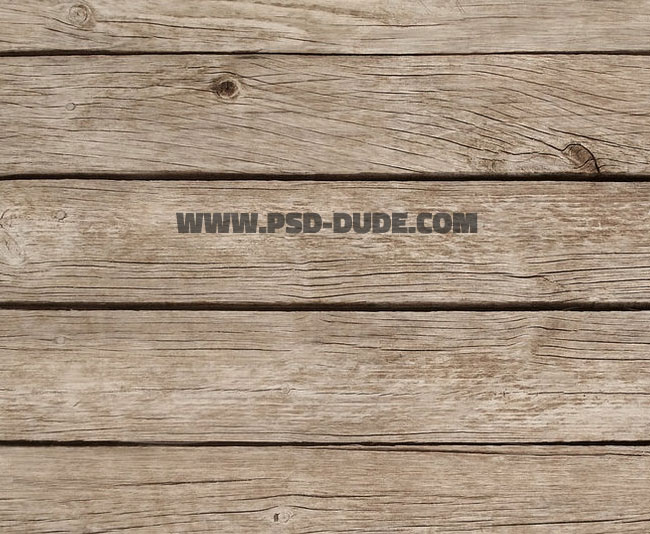
Use this tilable wood texture as background. You can of course use any other wood texture that you like or any other surface.
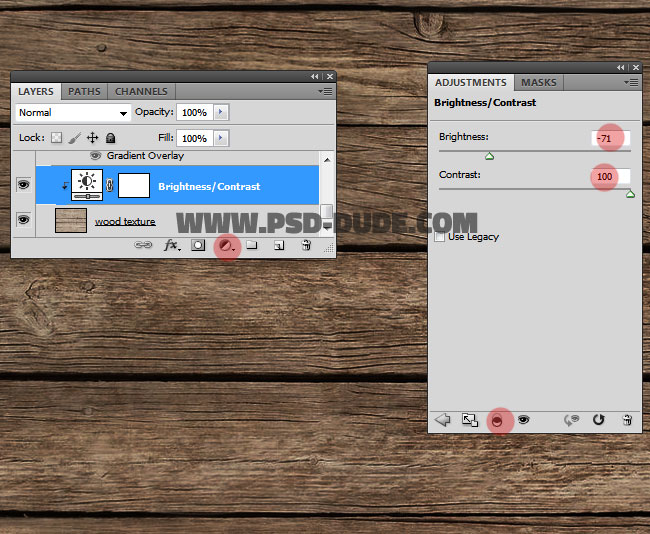
Use a Brightness and Contrast adjustment layer for the Wood Texture layer.
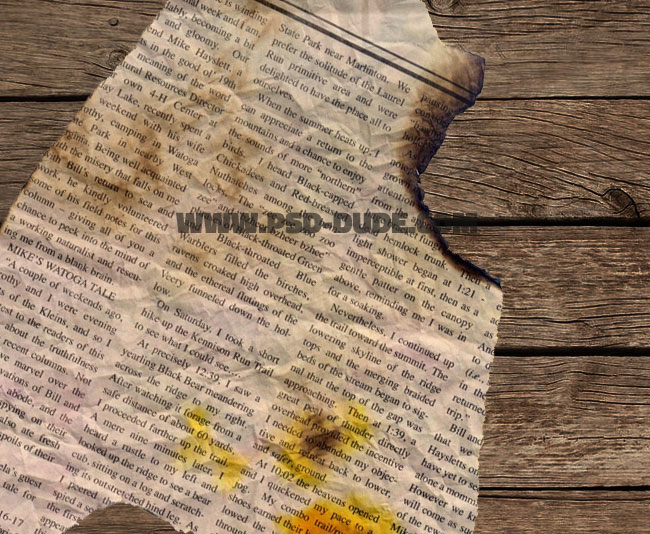
In a new layer add this newspaper texture and call it Newspaper1. Use the Magic Wand Tool to remove the white background.
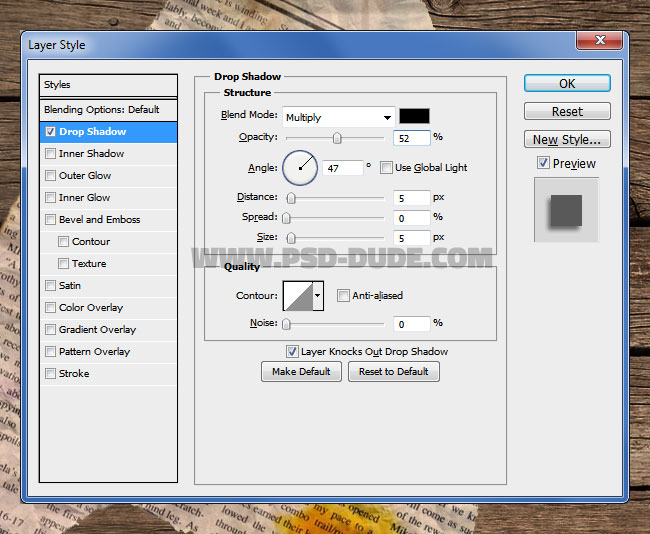
Add a Drop Shadow layer style for the Newspaper1 layer.
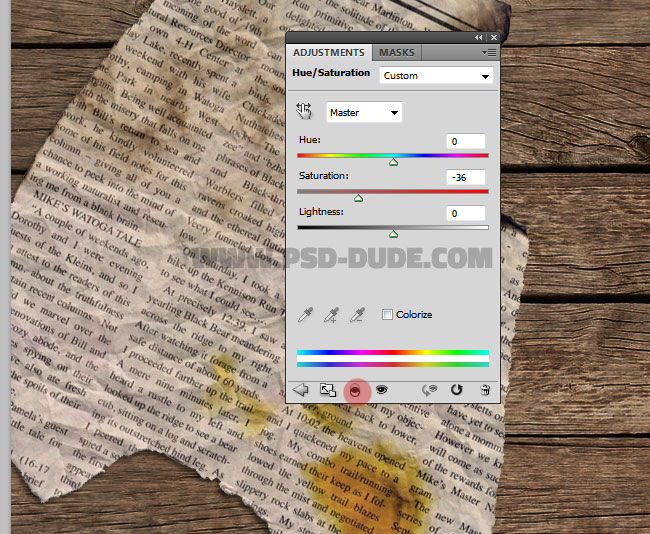
Add a Hue/Saturation adjustment layer just for the Newspaper1 layer using the clip to layer option.
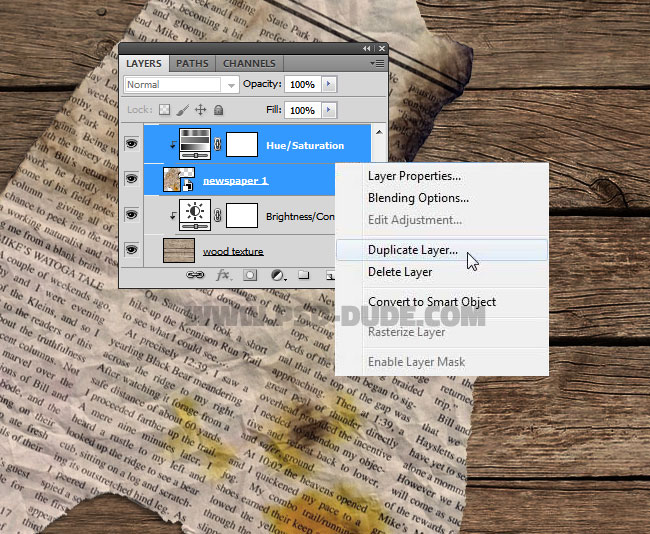
Select the Newspaper1 layer and the Hue/Saturation adjustment layer and duplicate them. Right click and choose Duplicate Layers. Rename the copy Newspaper2 layer.
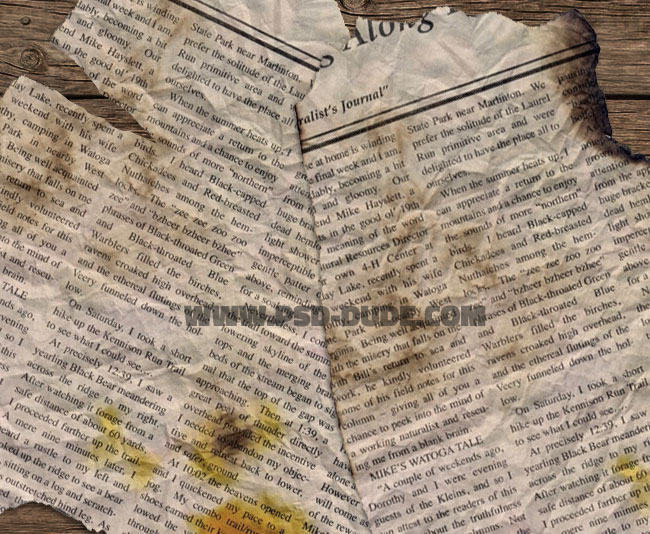
Rotate and move the Newspaper2 layer like shown in the preview.
Now you can add your text. Idecided to type "PSD" but you can write your name for example or the word "pizza". Use the Intro Font which is a free font type. Call this layer Text Layer.
- Add New Font in Photoshop
- To add a new font on your computer you have to follow a few simple steps. Once the font is installed it will automatically appear in your Photoshop Fonts list. Read more...
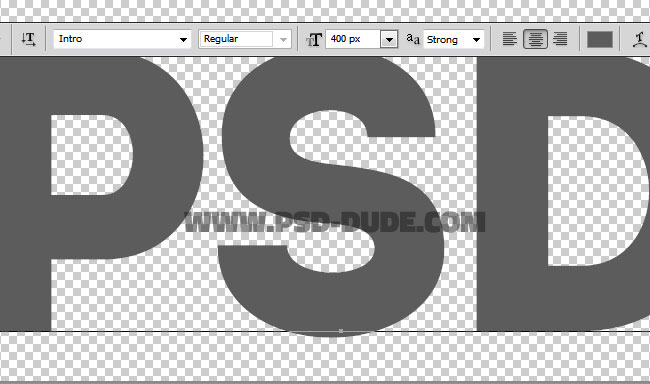
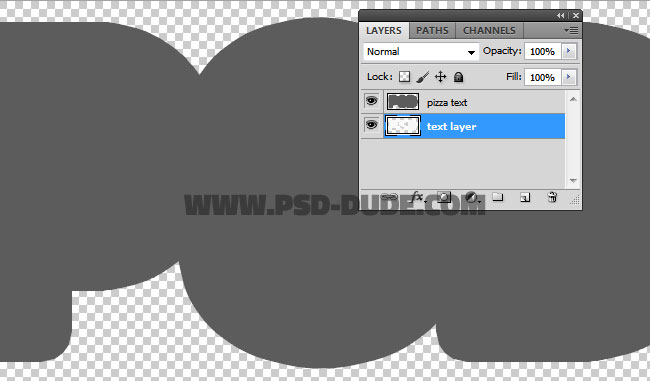
Right click and rasterize the text layer(Rasterize Type). Use the Paint Bucket Tool to fill the "P" and "D" letters like shown in the image. Duplicate the Text Layer and call it Pizza Text.
Use this tutorial to create rounded corners for the Pizza Text or you can simply add a Stroke layer style: 30px, outside, opacity 100% and chose any color. Right click on the layer and choose Convert to Smart Object. Right click on the layer again and choose Rasterize Layer.
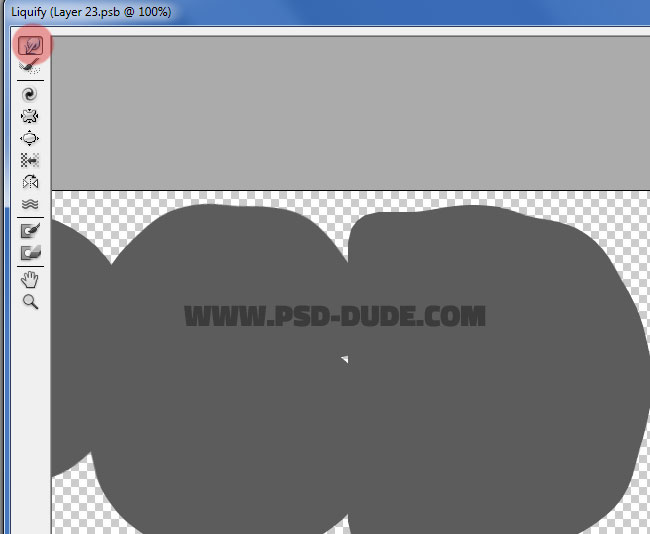
Use the Filter>Liquify tool to distort the edges of the Pizza Text like shown in the image. Use the Forward Warp Tool.
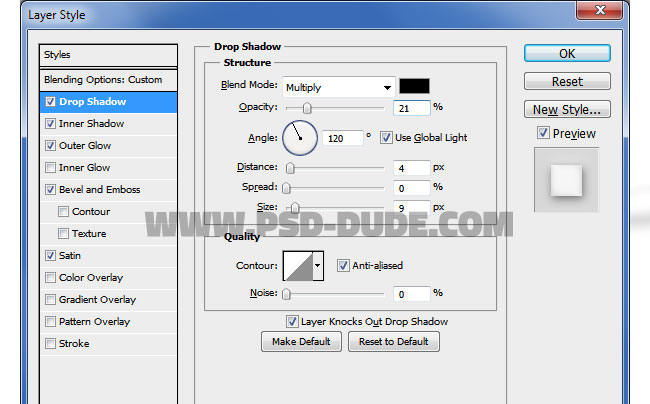
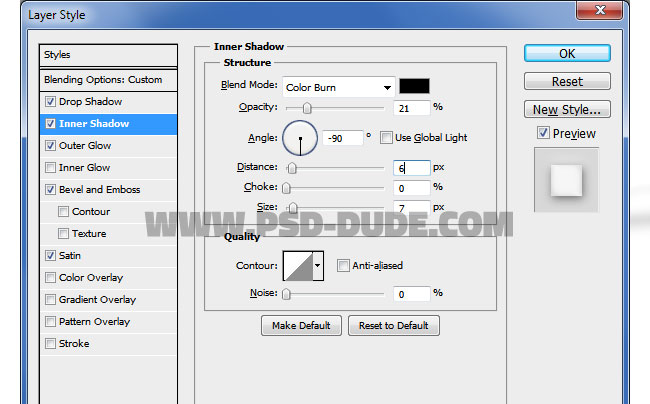
Add the following layer styles to tehe Pizza Text:
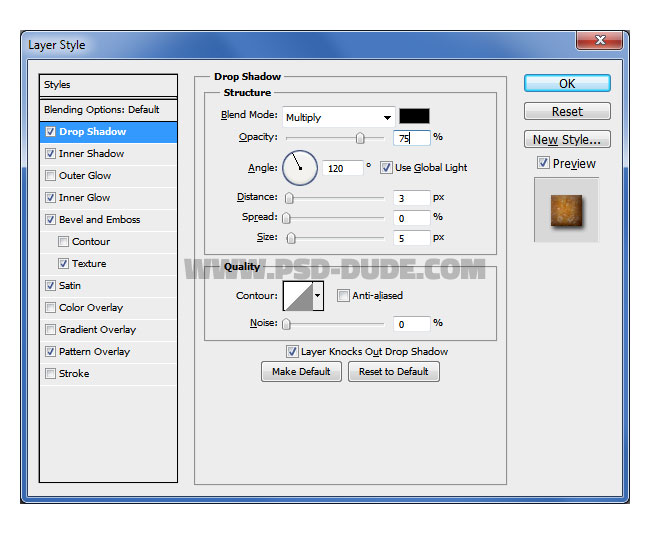
Inner Shadow Color:#230e0e
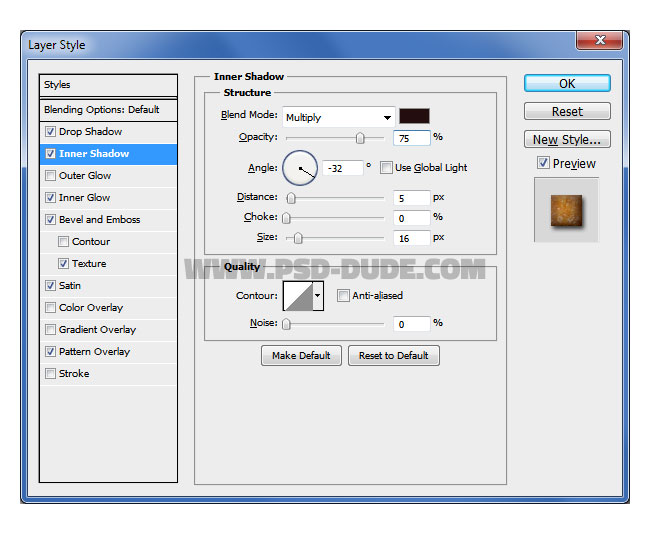
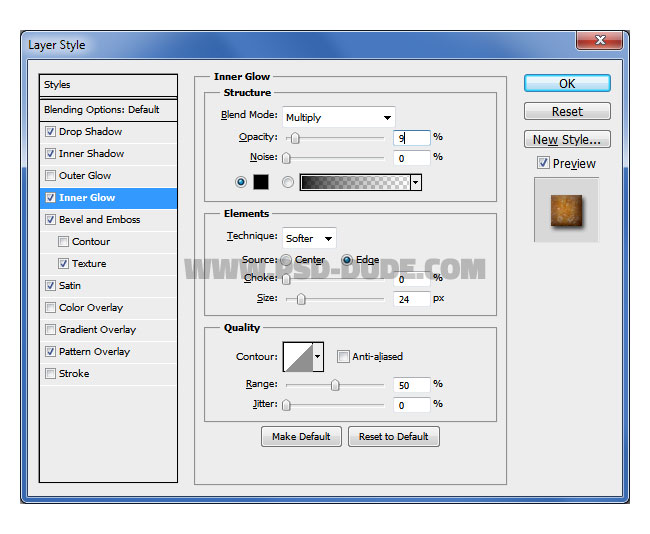
For the Bevel and Emboss texture you have to download and use this texture
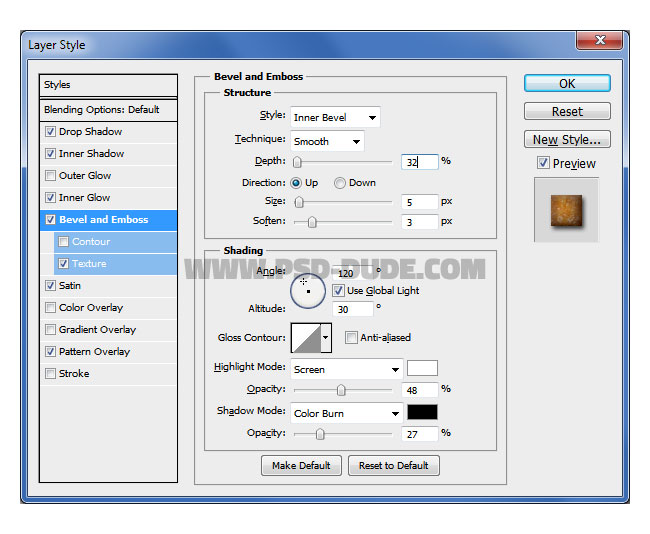
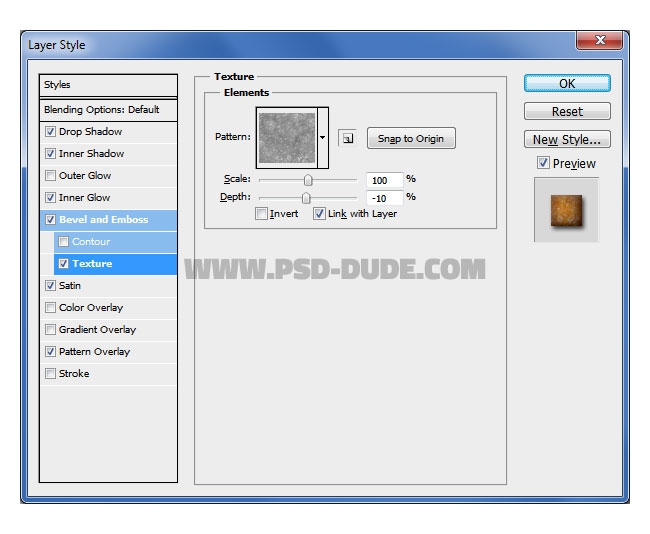
For the Pattern Overlay you choose also the "pizza pattern" that you downloaded.
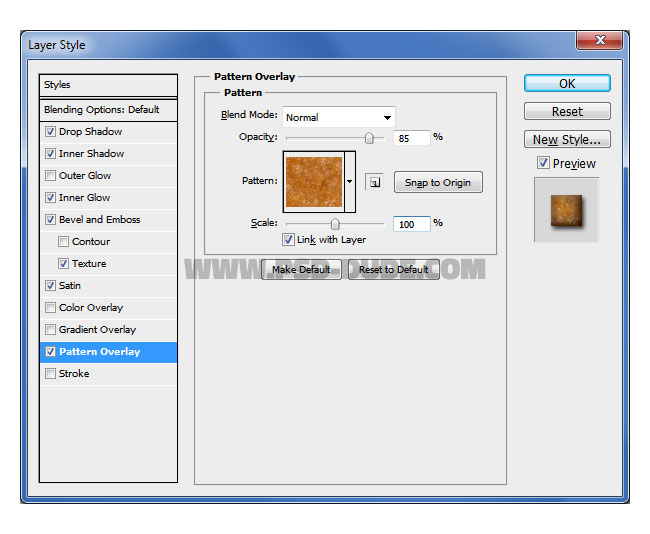
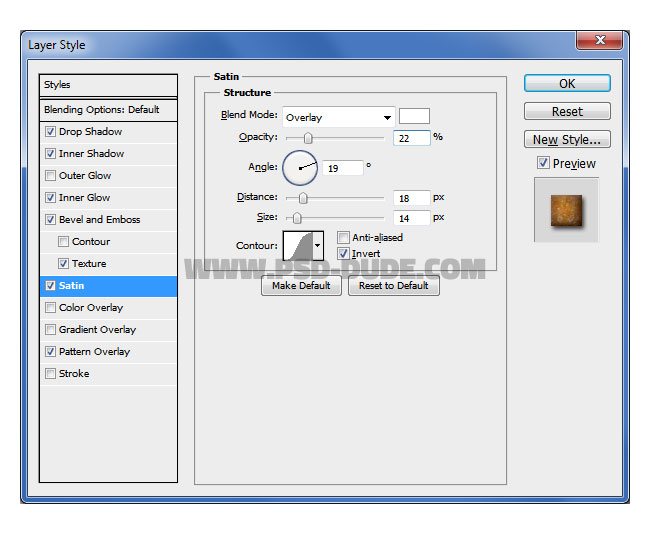
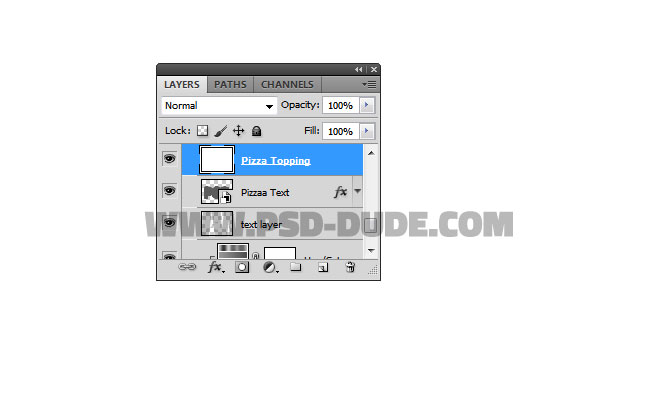
Create a new layer in front of the Pizza Text layer and call it Pizza Topping layer. Fill the layer with color white.
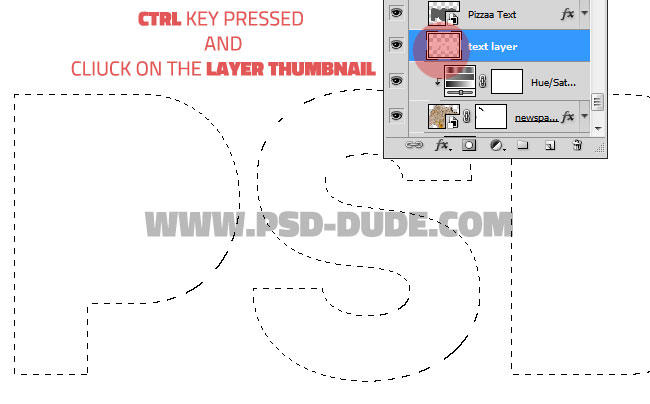
Go to the Text Layer and keep the CTRL key pressed and click on the layer thumbnail to make a selection.
Go to the Pizza Topping layer and add the selection as layer mask(click the Add Layer Mask button).
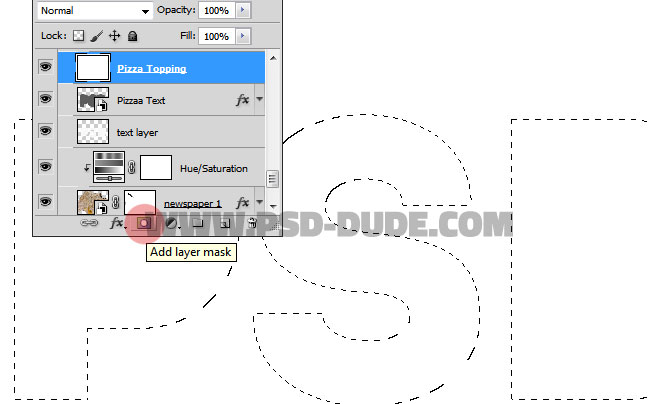
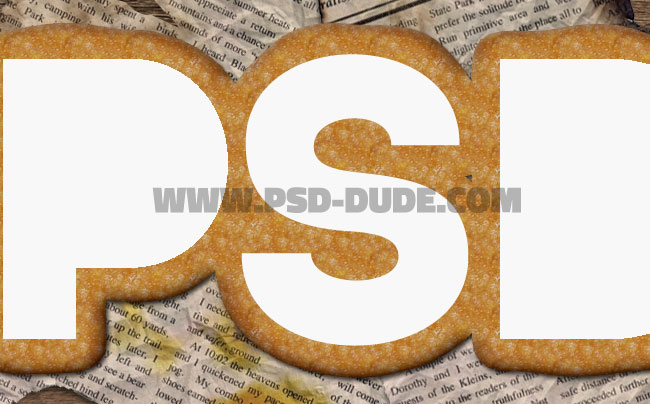
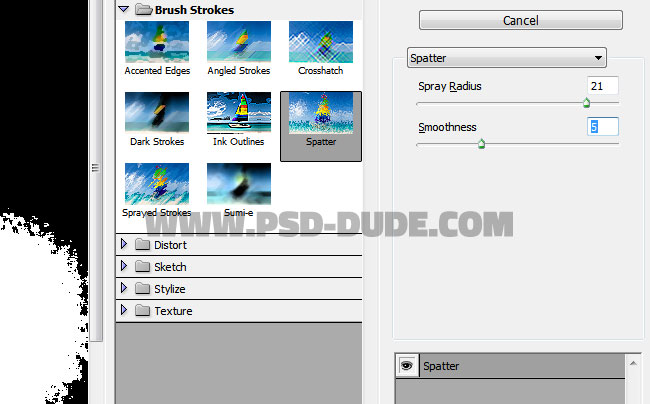
Click on the layer mask thumbnail of the Pizza Topping layer. Go to Filter>Brush Strokes and choose Spatter.
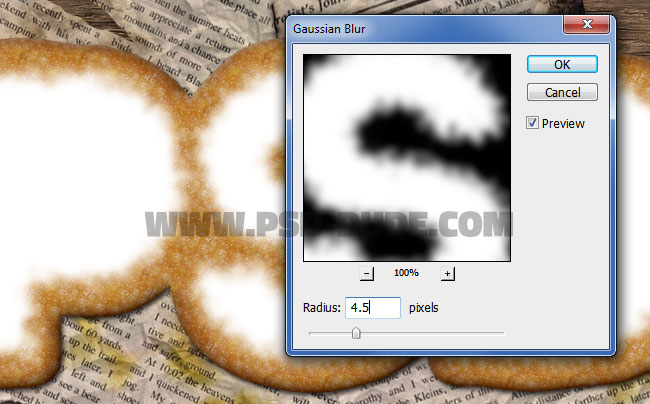
Go to Filter>Blur and choose Gaussian Blur.
Create a new layer called Pizza Texture in front of the Pizza Topping layer. Fill this layer with a color of your choice. Right click on the layer and choose Create clipping mask.
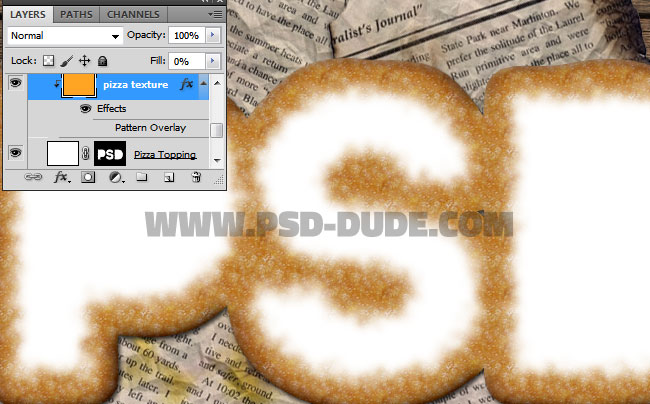
Set the fill of the Pizza Texture layer to 0% and add a Pattern Overlay using one of the "pizza-topping" patterns included in the ZIP file that you downloaded earlier. You can of course make combinations using the 3 pizza textures.
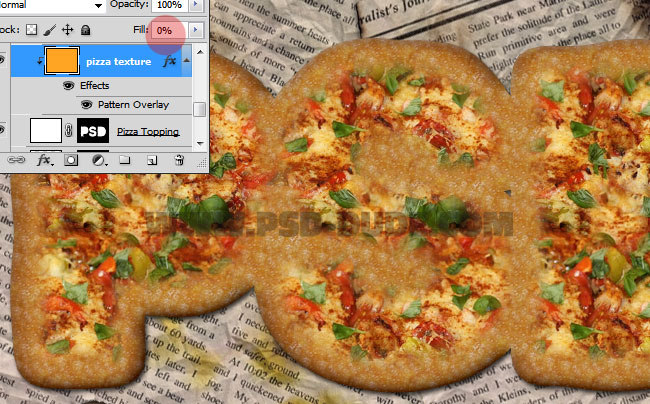
Create a new layer above all the other layers and call it Pizza Crust. Set the Fill to 0% and add these layer styles.
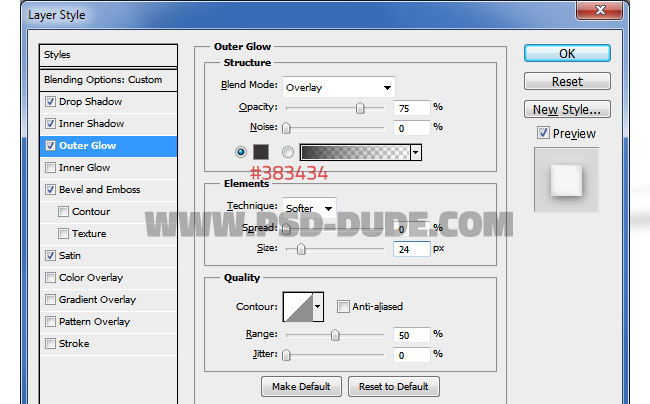
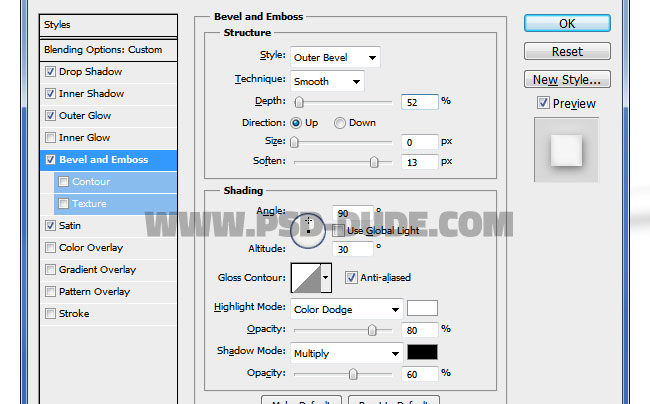
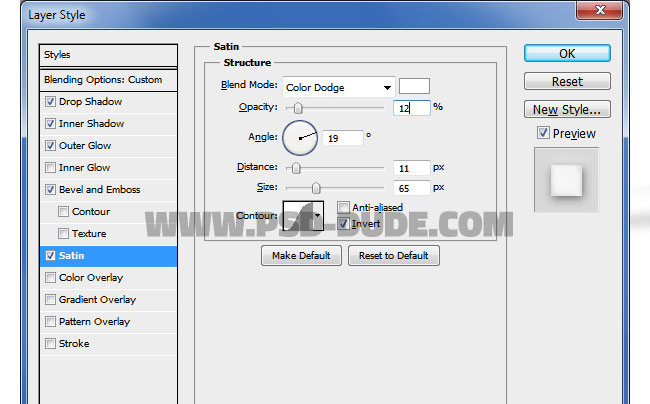
Inside the Pizza Crust layer, use the Brush Tool and a soft round brush to paint over the text edges to create some texture bumps. Make sure that you don't cross over the text edges.
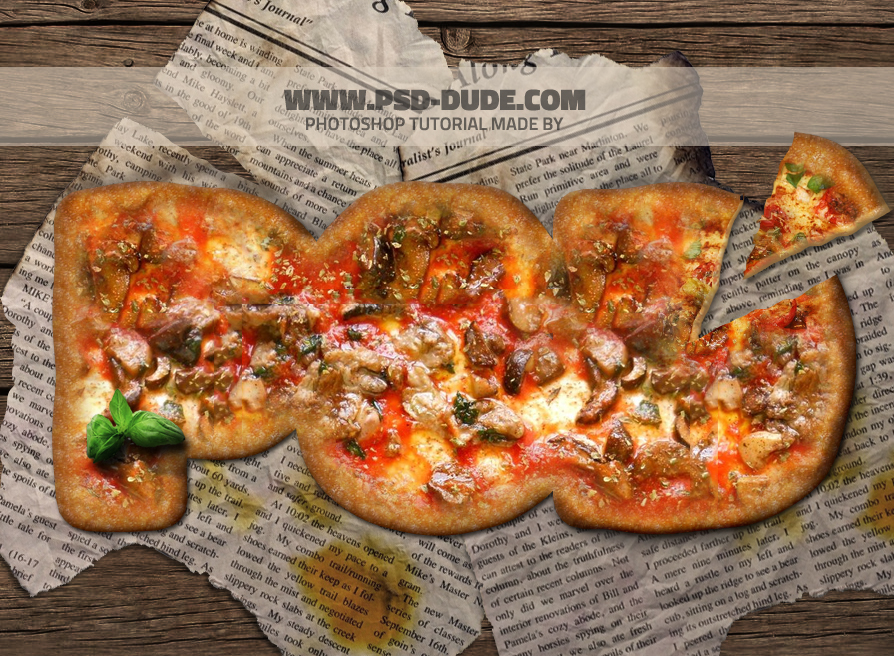
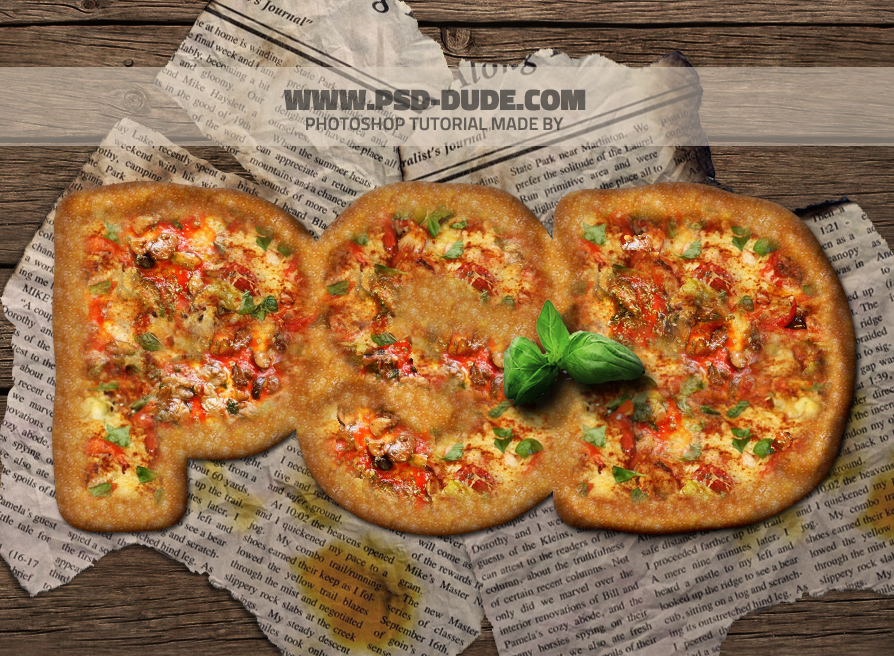
For the final touches you can add a basil leaf over the pizza text effect. Don't forget to add a cast shadow effect. So here is the final result for this delicious cheesy pizza typography made in Photoshop.


6 comment(s) for "Create a Pizza Food Text Effect in Photoshop"