


Let's take a quick look at the final image that we are about to create for the 2013 New Year. This is actually a 3D text effect that we'll create using a nice 3D action generator from www.actions4photoshop.com

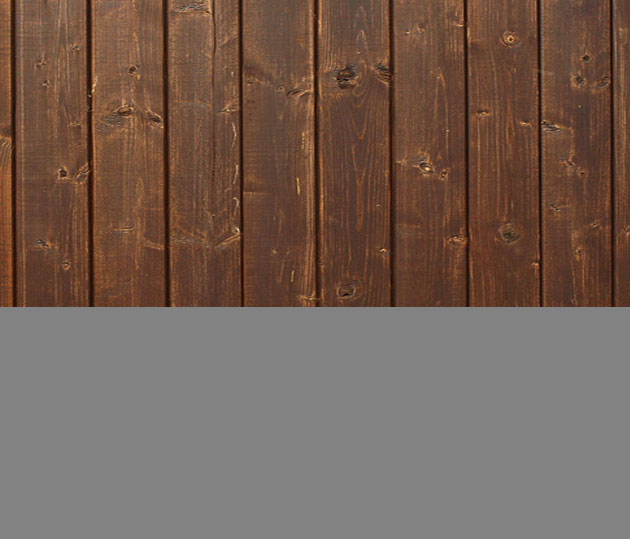
First we I will add a nice and warm wood background using this wood texture but you can of course use another one from this list of free wood textures but I suggest you to use dark wood. First use this texture to create a nice rustic wooden wall like in the image.
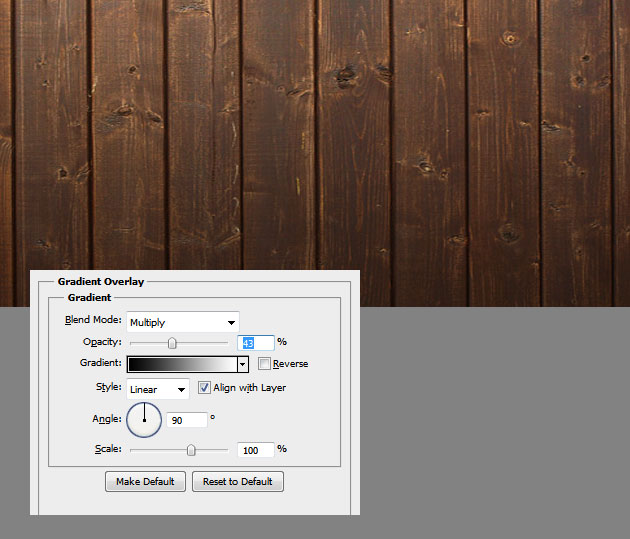
Add a Gradient Overlay to create light and shade using these settings:
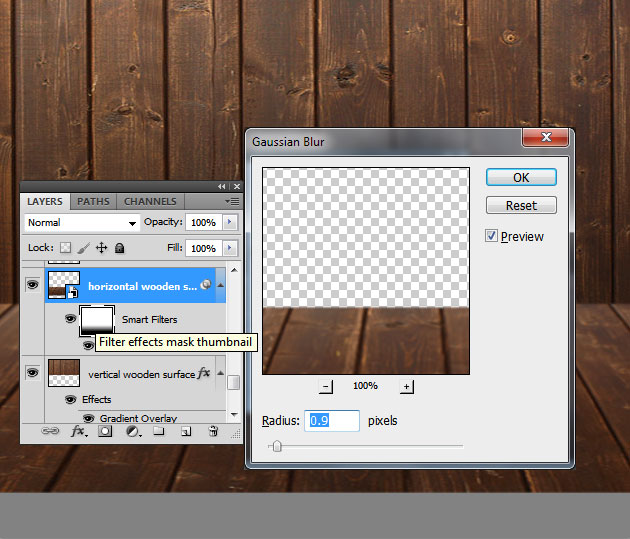
Use the same texture but scale it to around 30% only on the vertical scale and use the Perspective Tool to create a horizontal wooden surface.

Convert the surface into a Smart Object and add a Gaussian Blur smart filter with the following settings. Add a Layer Mask to the Smart Filter to blur only the back part of the horizontal surface like shown in the image.
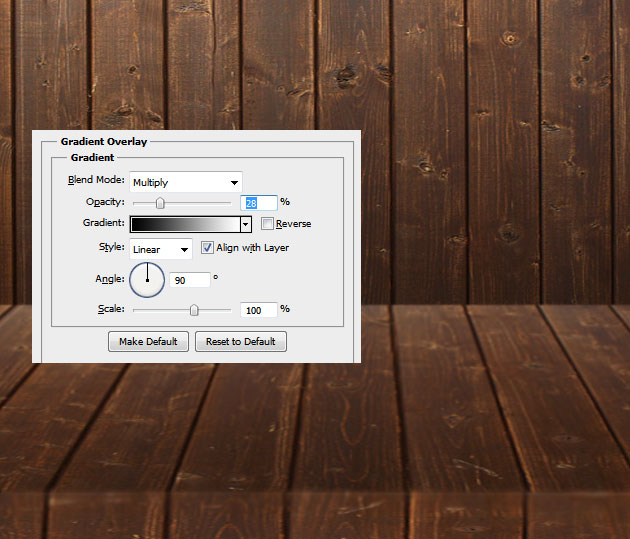
Use another piece of the texture to create the third wood surface. Add also a Gradient Overlay to create a realistic look. Use the Transform Tool to align the wood stripes for all the three surfaces.
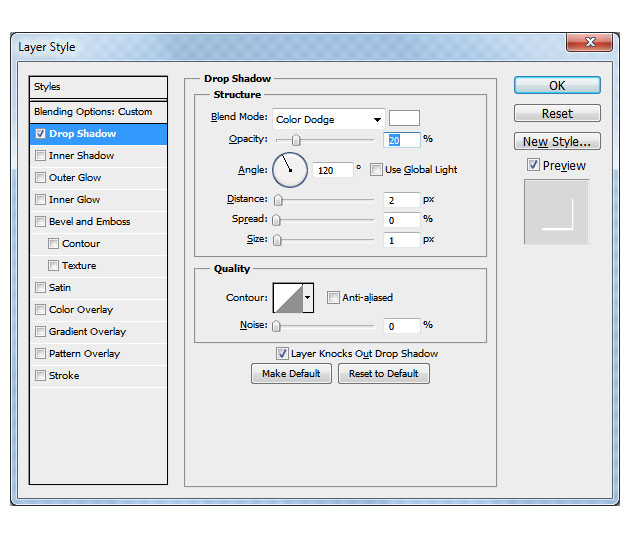
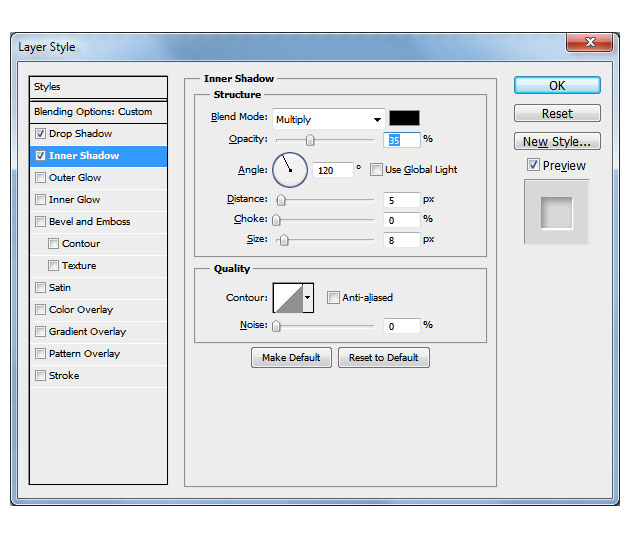
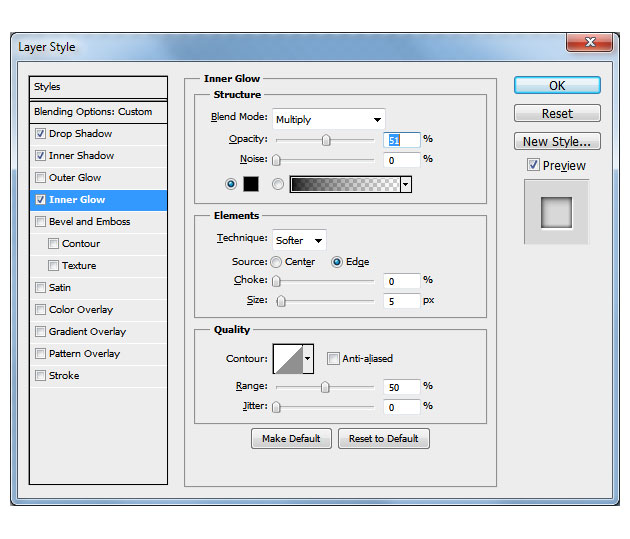
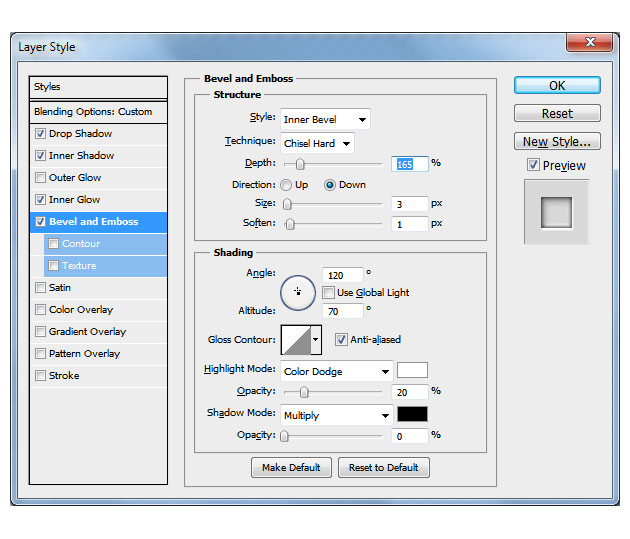
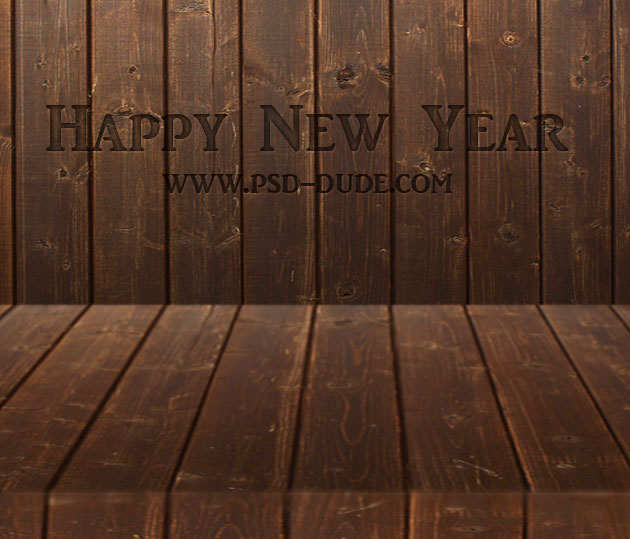
You can engrave a text on the wood wall with a nice message; I will simply write "Happy New Year" and also I will add watermark with www.psd-dude.com

To create the engraved pressed text effect simply add these layer styles to your text. By the way I used the font "AR JULIAN" but you can use any font you like.
So here is how the engraved wood text effect looks like. If you want to try more effects you can download these amazing Letterpress and Emboss Photoshop Styles
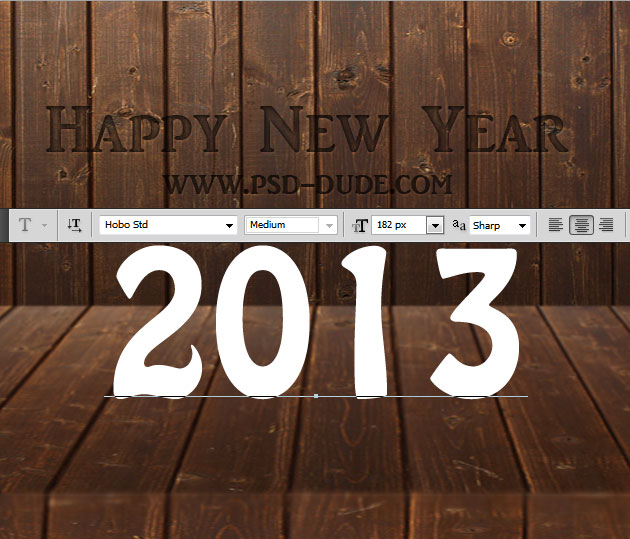
Now I will add a "2013" text in the middle of the image; this text will be the focus point after a few changes and Christmas decorations.
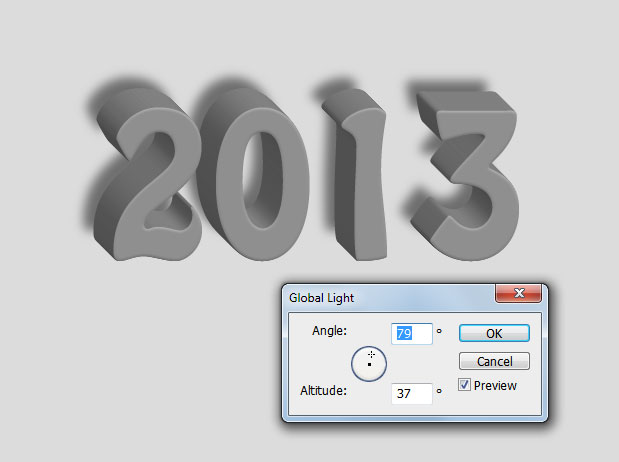
Important! Move this text layer in a new document. Download this 3D Photoshop action, load it in Photoshop and click play to add a 3D effect with just a single click. You can use this 3D generator for any text, shape or raster shape.
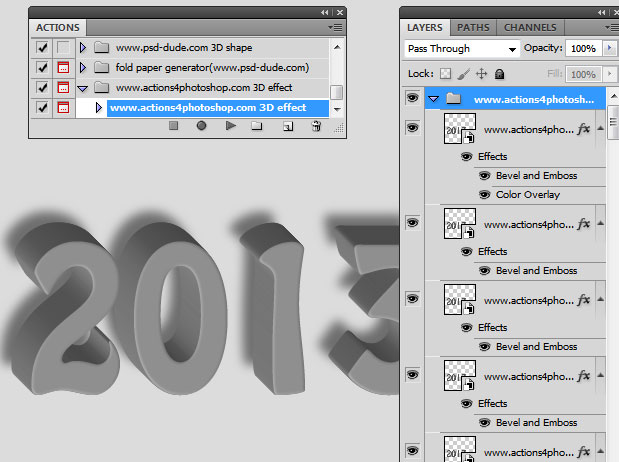
I have replaced the 3D action with a new improved one that can be customized more easily in terms of shadow and light, color, etc. The action generates an aproximate 60 copy layers. Select one of the layers and go to Layer>Layer Style>Global Light and from there you can change the light direction as you like.
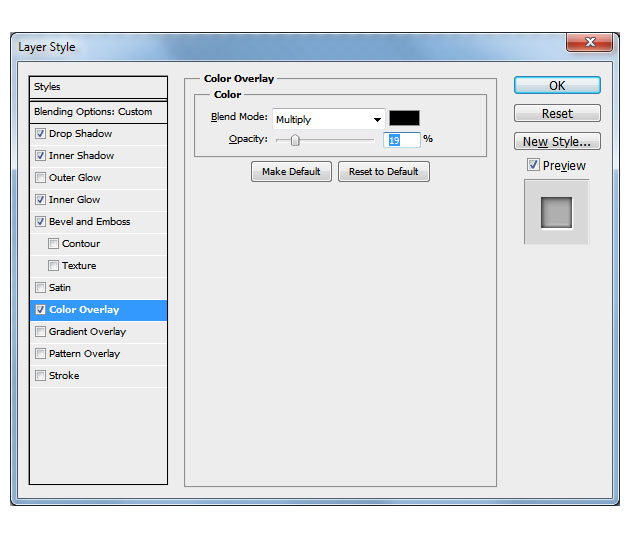
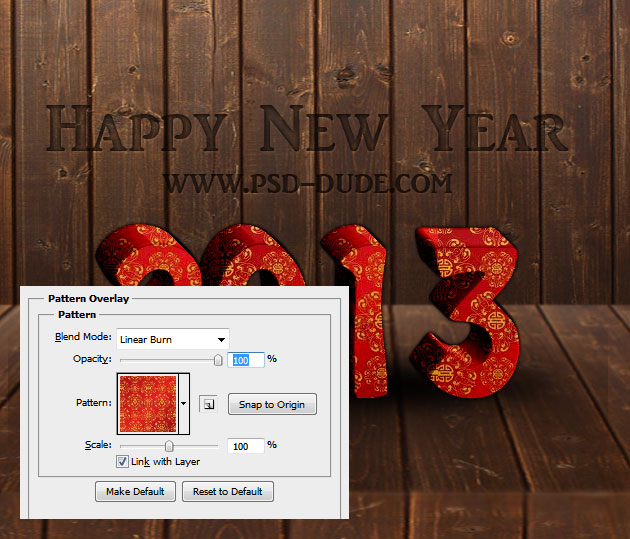
You can even change the Color Overlay of the www.actions4photoshop.com top layer if you want to obtain more contrast.

Now you have to hide the first layer www.actions4photoshop.com shadow and to convert the Group named www.actions4photoshop.com 3D effect into a Smart Object(right click on the Group name and choose Conver to Smart Object). Add a Pattern Overlay to this new layer/smart object using one of these beautiful Christmas patterns or any other gift wrap paper that you like. I will choose this beautiful red chinese pattern for this tutorial.
To make the New Year 2013 text effect look more festive I will add a nice Christmas wreath. Download this useful Christmas tree brush. Create a new layer called Christmas wreath and use the Ellipse Tool with Paths selected to create the Christmas wreath shape.
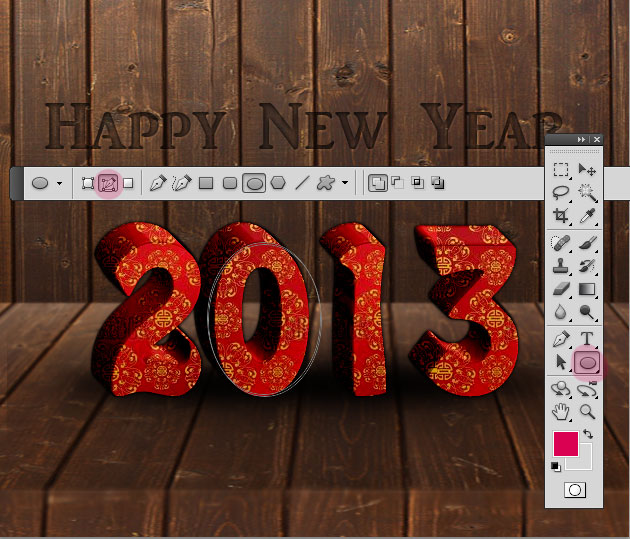
Pick the Brush Tool and with the new Christmas tree brush selected Stroke Path. Use these nice tones of green #1d6400 and #173f03 as Foreground and Background colors.
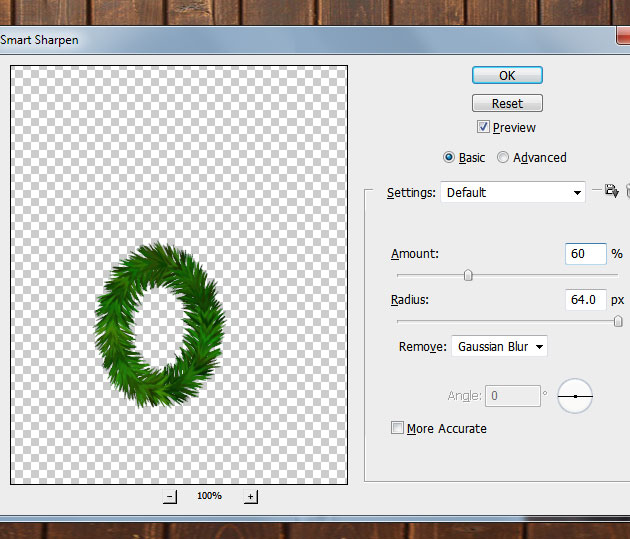
Add a Smart Sharpen filter effect with the following settings.
Add also a Drop Shadow effect and you can even add one or more layers using the Christmas tree brush and with different colors for example. Add some simple Christmas decorations like Christmas balls, stars, tinsel and so on. You can see in this Photoshop Christmas text tutorial some of the decorations that I have used.

Download these amazing Gold Silver Bow PSD file and choose the golden bow, resize and place it like in the image. Add also a simple Drop Shadow effect and also an Inner Shadow effect to add some depth to the bow.
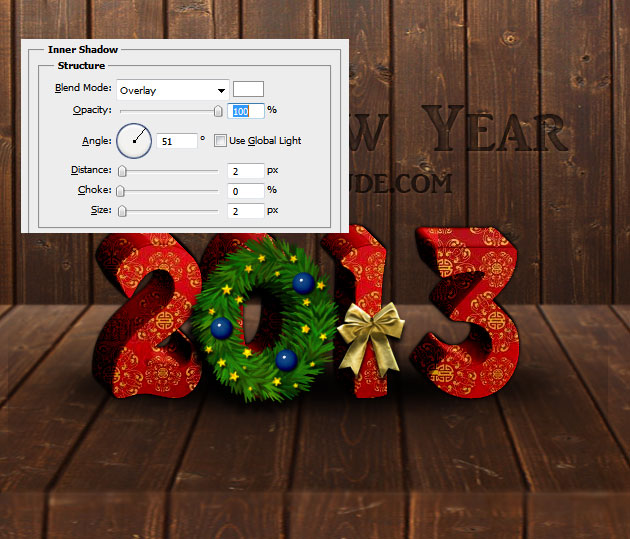
As final touch I have added some Christmas balls hanging using the same gift wrap paper that I have used for the 2013 text and also some gold stars.

Add a new layer; set the Fill to 0% and create a soft Vignette effect using an Inner Glow with black as color. And here is the final result for the 2013 Photoshop text effect. I am waiting to see your results so add your work inspired by this tutorial at our comments section.
If you are not really sure about the settings and layer styles used you can download the PSD FILE(2.98 MB) for free. Download now the updated PSD file with the 2014 Wooden Horse Year design. Please do not redistribute on other sites.


32 comment(s) for "Happy New Year Text Effect Photoshop Tutorial"
---
again a great tutorial, very clear and easy to produce, thank you and happy holidays for year the psd-dude.com team
Your result looks great even if you had so much problems with the Christmas tree brush and the 3D action. You could download the PSD file to see the settings but the file was made with CS5 and I don't know if you could open it with PS7
Happy New Year !!!! reply
this is actually one of our other websites where we try to gather the best actions for Photoshop and also to publish some of our free Photoshop actions such as this 3D generator. And we don't have a login at the moment so we use Facebook; but we are planning to remove it in the next days! reply
Your work looks great, I especially like the green color tones and all the little details. Lovely! reply
I like that more sparkle and glitter effect was added to the original 2013 text so now it looks more festive!
-----
Hi, I congratulate all my colleagues for their great work, I hope you like mine too. Thanks for the tutorial, I had to use your 2013 because the 3D action didn't work quite well ............... A big hug and happy new year.
I like your work very much and the fact that you added your girls is really nice!
I have one question: Why didn't you use the 3D action; I made this action and it works ok on my Photoshop CS4? Can you please send me the result to see exactly what is wrong with it.
Un abrazo a ti tambien amiga y un Feliz Ano Nuevo! reply
Thank you for the great tutorial! my attempt of this tuto is in my blog and I shared your link for this tuto^^
Greetings! reply
I am glad you like the tutorial. If this is your result, looks nice !!!
Saludos
-----
Thank you very much, I enjoyed making this PS tutorial. And I also like the results of the other people that you published here.
your 2013 Feliz Ano Nuevo Photoshop inspired work looks great, I love it! Saludos reply
I have replaced the 3D action with a better one, pliz try it and tell me if it works ok! reply
Thank you for your replies. I couldn't open your psd-file in my PS7 properly. Some layers or some stuff went lost. Nevertheless, I tried to make a better brush for the wreath. Here is the second wreath: Now Xmas has passed, I need a tutorial for the Easter ;)
Kind regards,
Sevan K.
reply
And I am preparing first for Valentine's day :) and then comes the Easter! reply