Step 1 - Change the Hair Shape
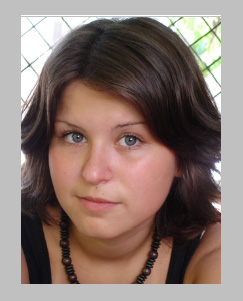
Go to stockvault.net and download this photo. It is a really big photo so you will have to resize it.
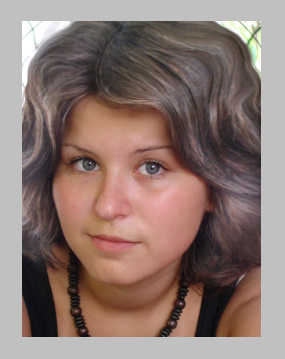
Now duplicate this layer so we can have both photos, before and after. I will start with the hair..Go to Filter - Liquify and with the Forward Warp Tool make the hair bigger . Play with size and pressure to get a similar result:
Step 2 -Make the Hair Whitter
An old person has white hair so take the Dodge Tool and with the following settings gently dodge the hair.
Do the same for the Highlights
Now we will make whitter hair wires with a small size Dodge Tool.
Because this is not a video tutorial you will have to relay on your intuition. The result should be similar to this:
Step 3 - Change Face Features with Liquify
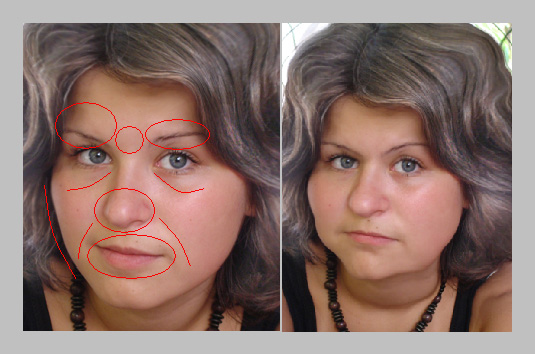
Now let's concentrate on the skin parts: face , neck, arms. I intend not only to add some age to the face but to add some kilograms also. So we will work with liquify again. Go to Filter - Liquify - Forward Warp Tool ; at the face level we will deal with cheeks , chin, eyes, mouth , nose, eyebrows. In the picture below I marked with red the areas that will be photoshoped.
- fat face
- bigger nose
- thin old mouth
- mouth wrinkles
- forehead wrinkles
At the same time I will make the neck fat and the arm.you will have to figure it out from the photo attached.
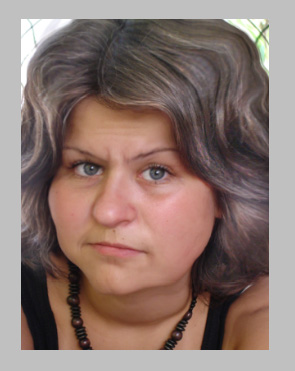
Step 4 - Add Wrinkles
Now with the Burn Tool make visible all the wrinkles that you see on the face.brush 8px and exposure 5%. You will have to change the brush to 3-4 px for more detailed wrinkles. A good way to emphasize wrinkles is to burn an already existing line of the face and than easily dodge the area near to that line.look for example at the wrinkles between the eyebrows .
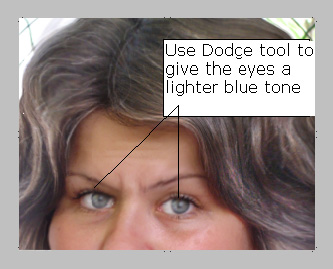
Step 5 - Age the Eyes
An old person has eye problems so with the Dodge Tool and Blur Tool make the eyes look not very healthy.
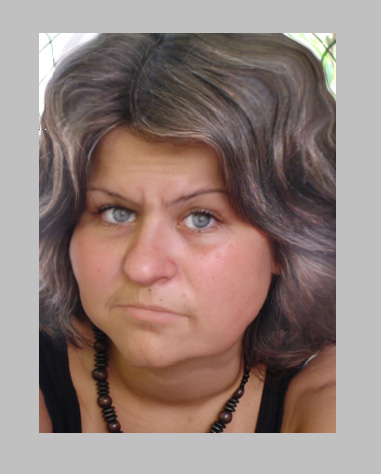
Step 6 - Age the Skin
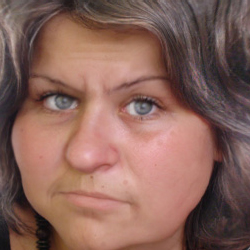
Add a new layer and call it OldSkin. With the Brush tool color cb8778 , brush : 7 , 4 and 5 make little spots on the skin. Use the Eyedropper Tool to get a color similar to the skin tone. Also in this layer add a pale tone to the mouth..color d0a58a opacity 100% and blur a little.this color should cover the mouth area. Now leave the Blending mode : Normal and Opacity of this layer 45 %. You can of course play with those effects and add more wrinkles and make the person much older but I will stop here; this is my final result:
I really hope you like it! Please JOIN our PSD-DUDE Group on FLICKR.
8 comment(s) for "Turning a girl from young to old"
nice tutorial sir reply