Create the Winter Background
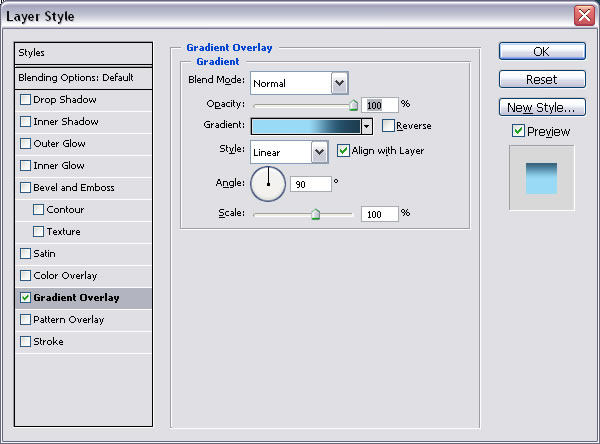
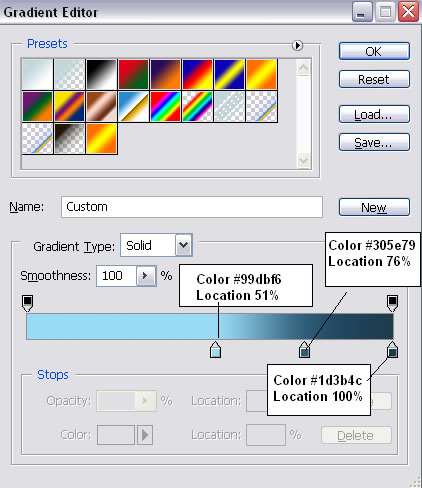
Open a new psd file 600/500 pixels. Draw a rectangle 600/500 pixels. Go to Blending Options of this layer and set Gradient Overlay. This layer represents a winter night sky.
Add Snow Dunes
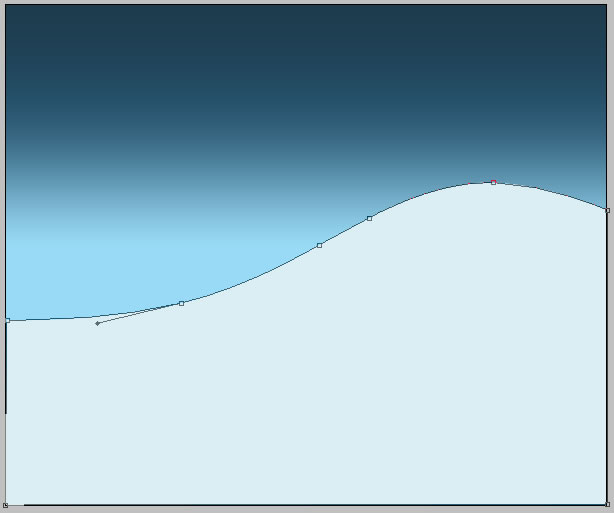
With the Pen Tool draw a shape like this. The color is # dbeef3. Call this layer Snow Dune 1.
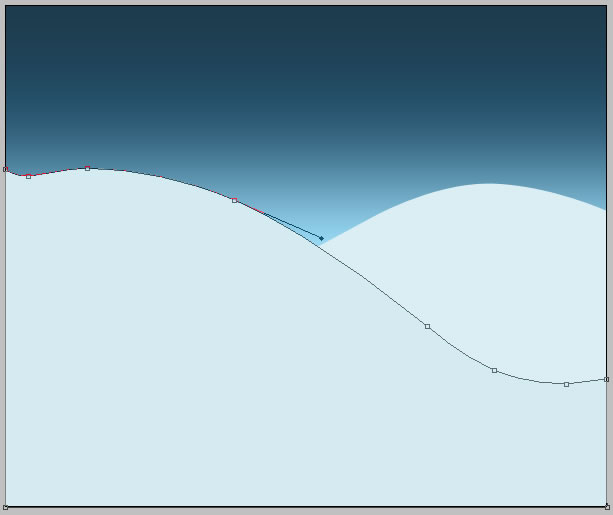
Draw another shape, color #d3ebf1. Call this layer Snow Dune 2.
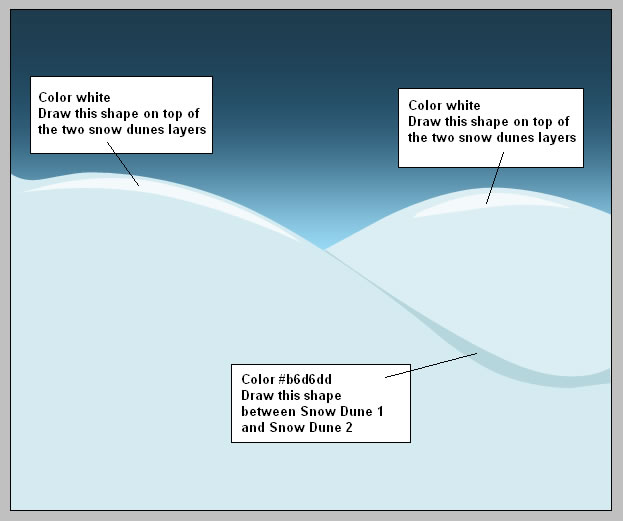
Lets add highlights and shadow to the snow dunes. With the same Pen Tool draw three shapes like in the picture below.
Draw a Snowman in Photoshop
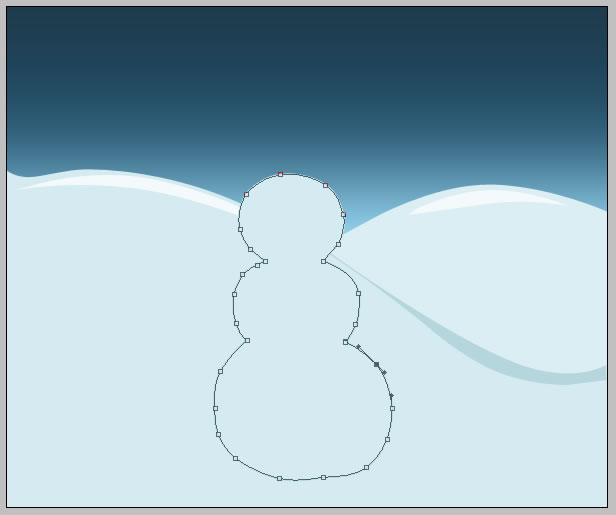
I will use the Pen Tool to draw the Snowman Body Layer. The color is # d3ebf1 and for the stroke color I've chosen the color #b6d6dd.
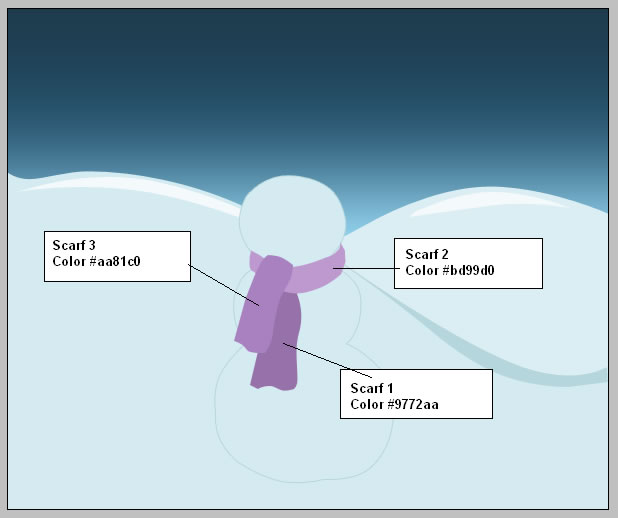
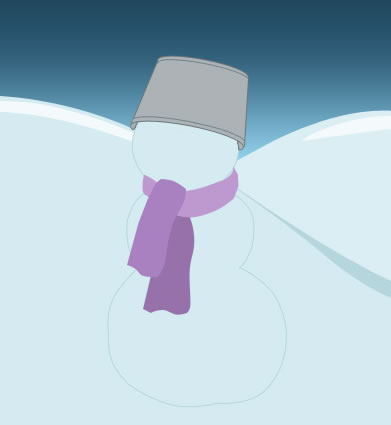
Draw the Snowman Scarf
Now I will draw a scarf for the snowman. I will use the Pen Tool. The scarf is composed by three layers as you can see in the image below. Start with scarf 1, than 2 and 3.
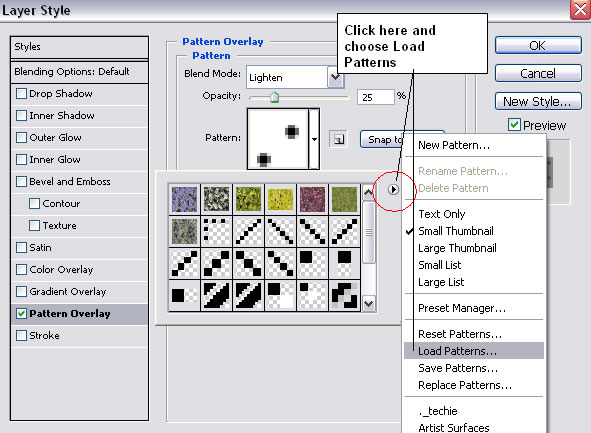
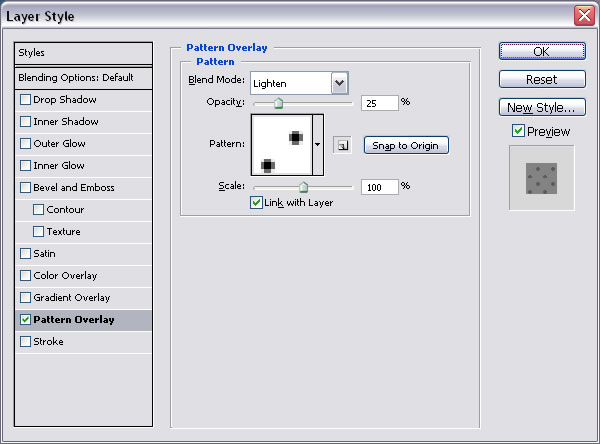
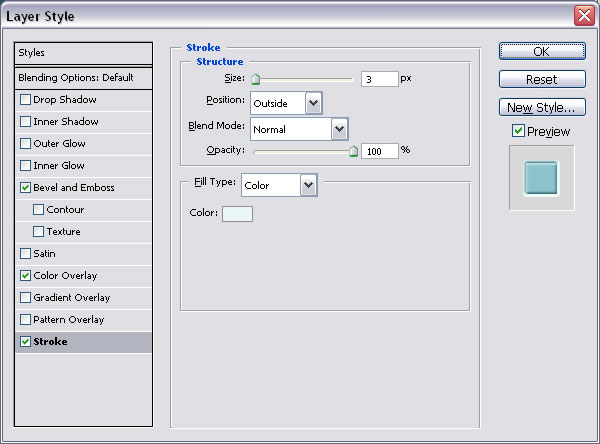
Go to Blending Options for all three parts of the scarf and do the following settings. But first you need to download those patterns from here. Save them and than Load Patterns.
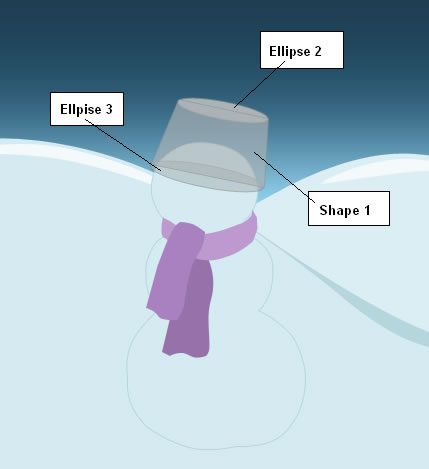
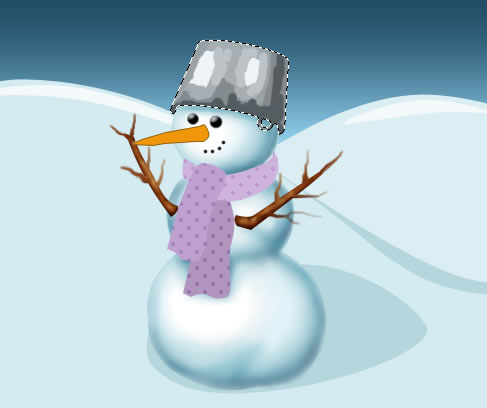
Draw the Snowman Hat
Instead of a hat I will draw a bucket on the snowman's head. Set the Foreground Color #abb3b6. With the Ellipse Tool draw a circle. Go to Edit - Transform - Rotate ( rotate angle 10,9). Duplicate this layer and scale it to 80% on width and height. Move it upper.
Now with the Pen Tool draw a shape between the two ellipses like in the picture below. The order of drawing is 1, 2, 3. I have seted the opacity to 60 % to see all the layers.
Select all three layers, right click and Rasterize Layers. Select Ellipse 3 and Ellipse 2 and duplicate layers. Add a stroke to this layers, size 1 and color #728288. Select those layers duplicated and merge layers. Call this layer Borders Layer.
With Eraser Tool delete the bottom part of the two ellipses so that you obtain only 2 dark lines.
Press CTRL and click the Thumbnail of the layer Ellipse 3 and go to Shape 1 and press delete. Select Ellipse 2 and Shape 1 and merge them. Call the new layer Bucket Layer.
Press CTRL and click the Thumbnail of the Snowman Body layer than return to Ellipse 3 and press delete. Add to Bucket and Ellipse 3 a stroke size 1 and color #728288.
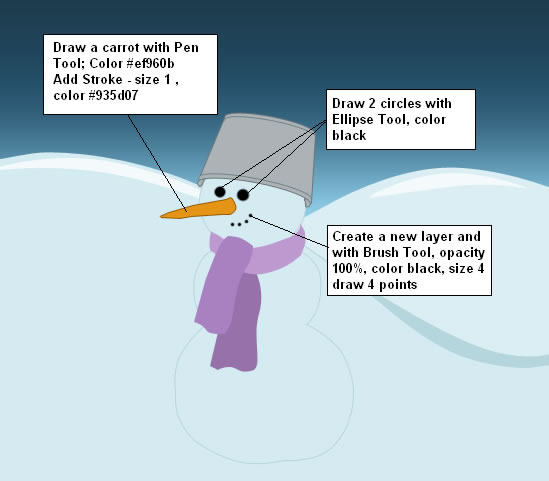
Draw the Snowman Nose and Eyes
Draw a carrot with the Pen Tool to create the nose. Draw two circles with Ellipse Tool, color black. Paint little black points in the mouth area with Brush Tool.
Draw Tree Branches as Snowman's Arms
Take the Pen Tool and draw 2 shapes like in the picture below. The color that I have used is #b6712c. You can of course choose other color and/or shape.
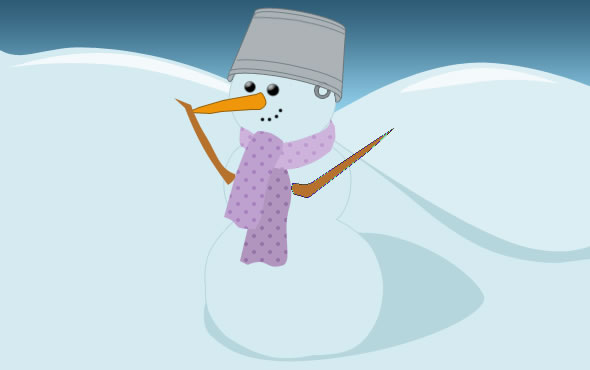
Select the two shapes and click merge layers. Than with Burn Tool start burning the edges of the snowman arms. You will have to act several times to obtain different color tones.

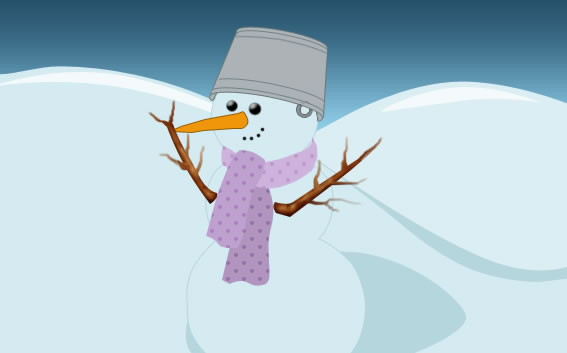
Than with the Dodge Tool add highlights on the arms like in the image.


Now take the Smudge Tool and drag lines from the arms to look more like tree roots.

It is easy to do if you practise a little.
Add Shadows and Highlights
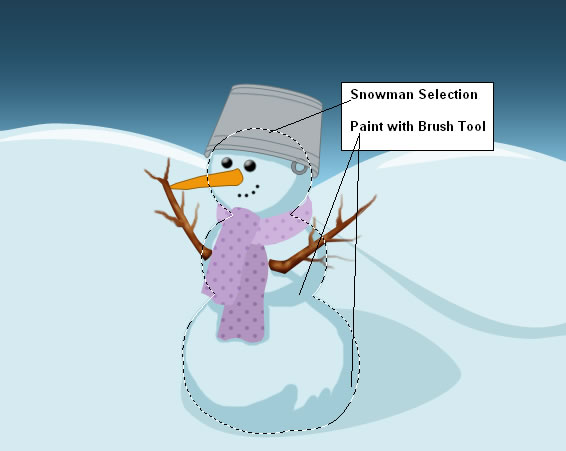
It is now time to make the Snowman a little more atractive. For that I will create another layer above Snowman Body Layer and call it Paint Snowman Layer. For this step we will use Brush Tool, Blur Tool, Burn Tool and Dodge Tool.
Press CTRL and click the thumbnail of the Snowman Body Layer and with this selection start painting in the Paint Snowman Layer.
Set the Foreground Color #a0cbd7 and with Brush Tool, size 12 and opacity 100% start painting the snowman.
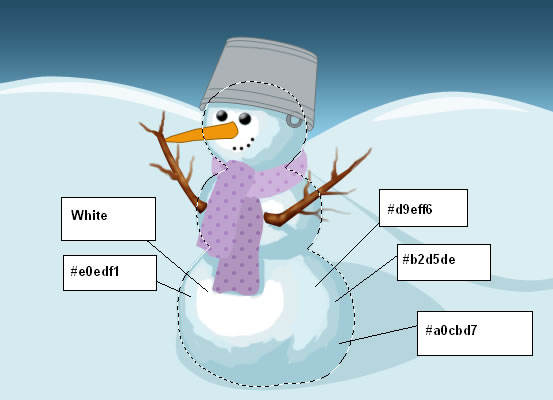
Now change the colors for the Foreground and paint inside the Snowman Body like in the image below. Colors #a0cbd7, #b2d5de, #d9eff6, #e0edf1, white.
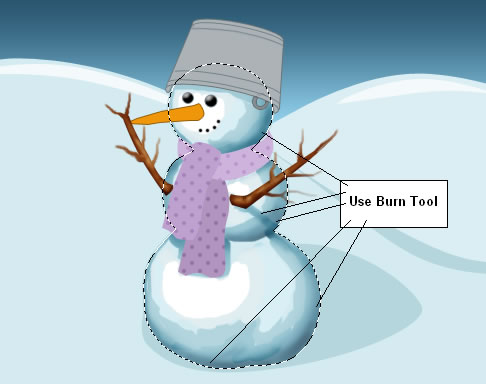
Now you can use Burn Tool to darken the edges of the snowman like in the picture below; we will use again burn tool in the next step.

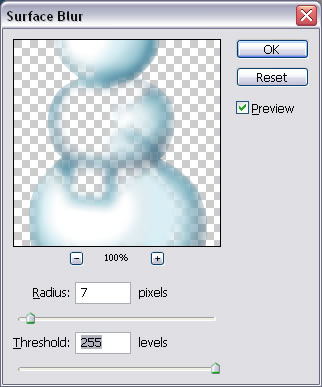
Now go to Filter - Blur - Surface Blur and do the following settings. You could of course use Blur Tool but with Surface Blur Filter the result is faster.
Add Shadow and Lights to the Hat
Now create another layer above Hat Layers and call it Paint Hat Layer. Select all the hat layers, duplicate them and merge the duplicated layers.the result is the shape of the hat. Call this layer Hat Shape Layer.
Press CTRL and click the thumbnail of the Hat Shape Layer. Return to Paint Hat Layer and with the Brush Tool, opacity 100% , size 10 start adding shadow and light to the hat. Choose tones from the gray palette like in the image below. Use Surface Blur again this time with the settings 10 and 255.
Change the Blending Mode from Normal to Overlay 100%. Use Burn Tool and Dodge Tool to adjust the contrast . Use this tool in the same way you use Brush Tool.

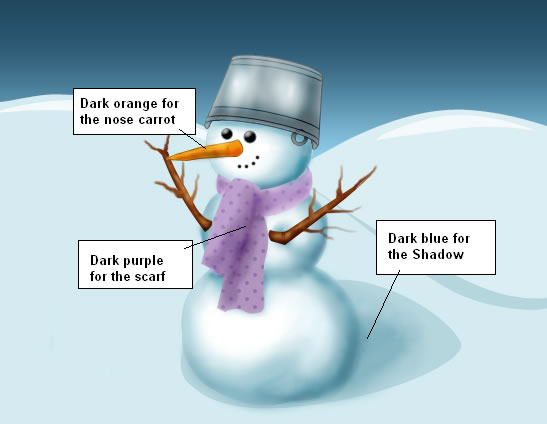
Add Other Details to the Snowman
Create a new layer above all the others and call it Detail Layer. In this layer with Brush Tool, Burn and Dodge Tool we will paint the nose, the scarf and the snowman's shadow.
Paint Christmas Trees in Photoshop
With the Pen Tool create 3 shapes like in the image below, that will become parts of the Christmas Tree.
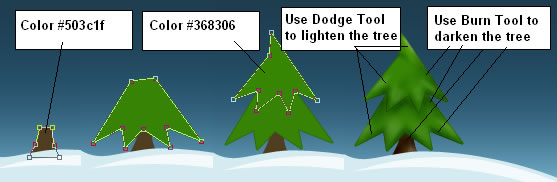
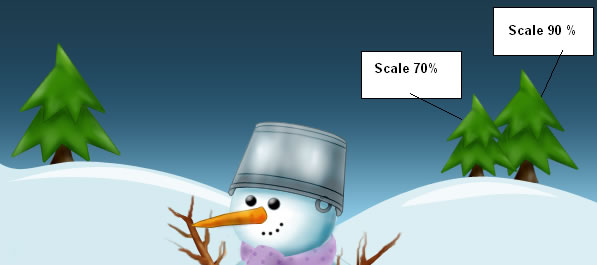
For the next step I've merged all three layers and than I used Burn Tool and Dodge Tool to darken/lighten areas of the tree like in the image. Now duplicate the tree three times.
Create the Winter Sky
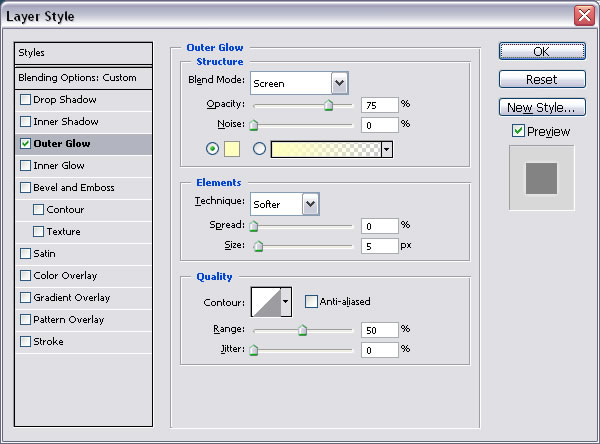
Create a new layer and for the Blending Options choose Outer Glow with the following settings. Take the Brush Tool, size 2 and color white and draw little points to look like stars..you can change the opacity to 60 - 70 % to have stars that bright with different intensity.
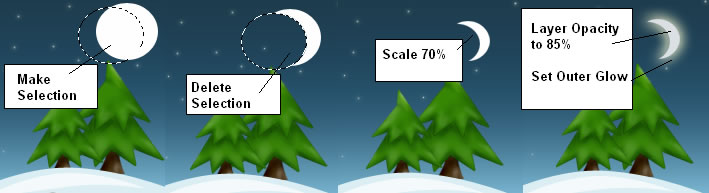
Draw a white circle with Ellipse Tool. Than with Elliptical Marquee Tool select like in the image and press delete . Go to Edit - Transform - Scale and set 70%. Set the layer opacity from 100% to 85%. Than go to Blending Options and set Outer Glow spread 14 and size 16.
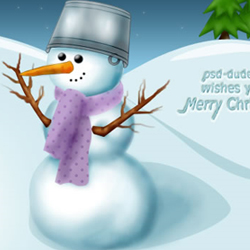
Add Write in Snow Text
Write "psd-dude.com wishes you a Merry Christmas!" with this settings:

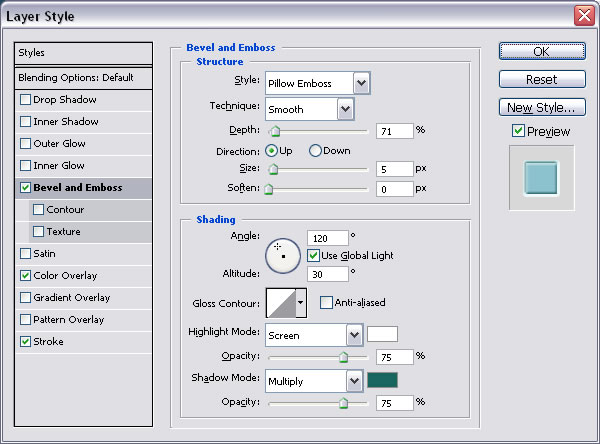
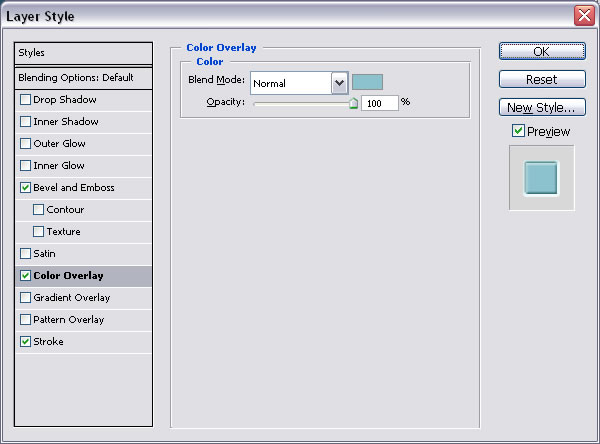
Than right click and choose Rasterize Type. Go to edit - Transform - Perspective. For the final touch go to Blending Options and do the following setting for this text layer.
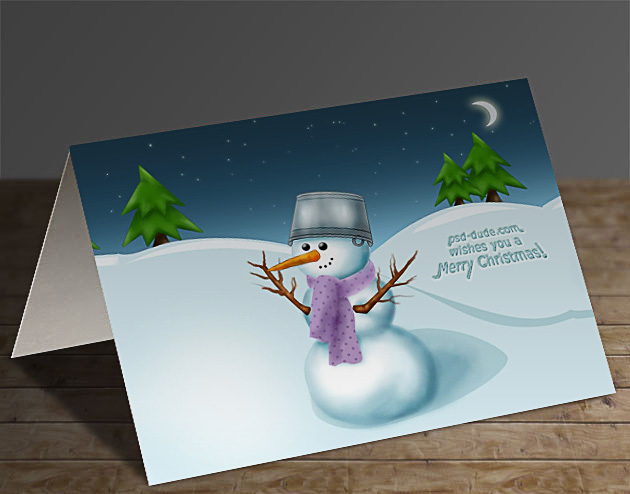
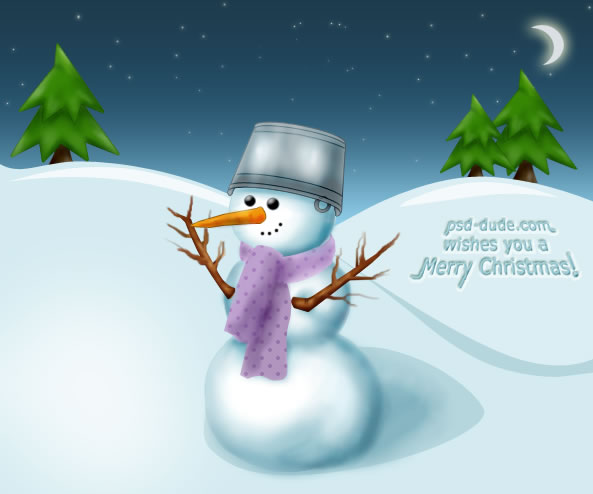
Congratulations, You Made It!
This is the final result for the Snowman Christmas Card made in Photoshop using painting and drawing techniques. Create a Christmas card using these Free Greeting Card PSD templates.
Online Christmas Card Maker
Did you know you can use online tools like MockoFun to make Christmas cards? Combine Christmas vector shapes with text and create some amazing Christmas cards. MockoFun provides pre-made templates for making Christmas cards online in just a few minutes.
Check out this awesome list of over 50 Christmas fonts that you can use online or download for free to use in Photoshop. Combine Christmas fonts with text symbols like a star symbol for example.
Check out this tutorial on how to use the online Christmas Card Maker and all the awesome features that MockoFun has to offer.

6 comment(s) for "Snowman Christmas Card"
The tutorial was again great, thanks!
I am really glad you like the Snowman Christmas tutorial, thank you! reply