
In today tutorial I will show you how to make tree faces in Photoshop and I will try to create a magic scenery, a forest that unexpectedly comes to live revealing charmed trees that can talk , white rabbits and magic light sparkles . .....
Tree Face Photoshop Tutorial
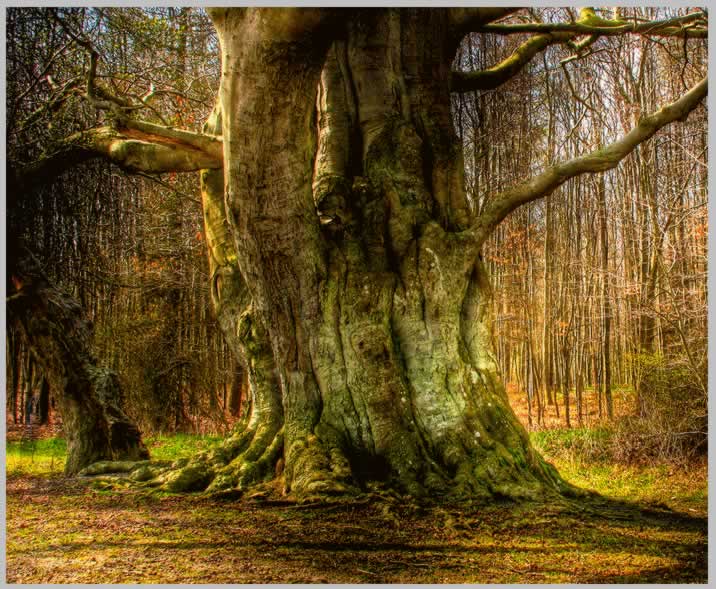
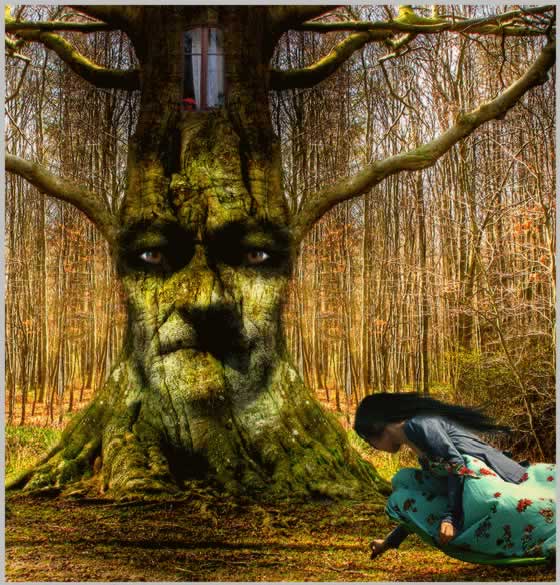
Preview of the Final Image

I've started by searching the internet to find an inspirational photo and I have
found the most incredible photo , that I consider a true beauty. Not only that the
photographer captured the image extremely well but the image itself , without any
effect looks magic.
So this Old Danish Tree is my source of inspiration.
Open a new document size 1024 / 575 px. Because of this unusual size I will not be able to show the entire image in the tutorial I will have to crop parts to see the actual pixel size.
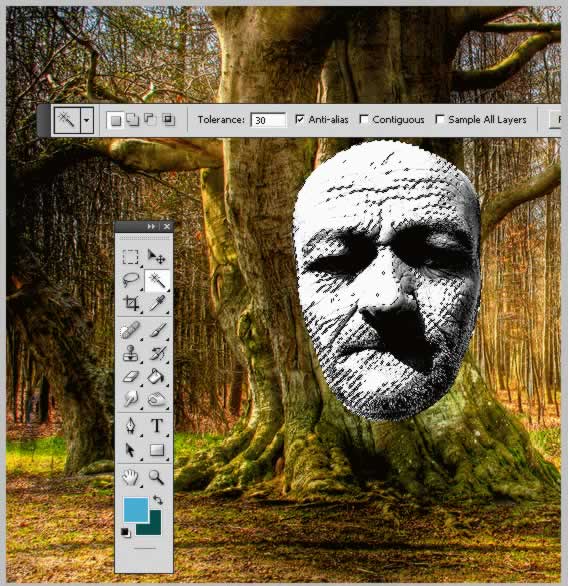
The first photoshop treatment will be for the tree. The color is not important now, the main objective is to apply a face to the tree. An old tree goes well with an old face. With a little bit of luck I have found this beautiful photo Face .
Scale the photo to 60% .
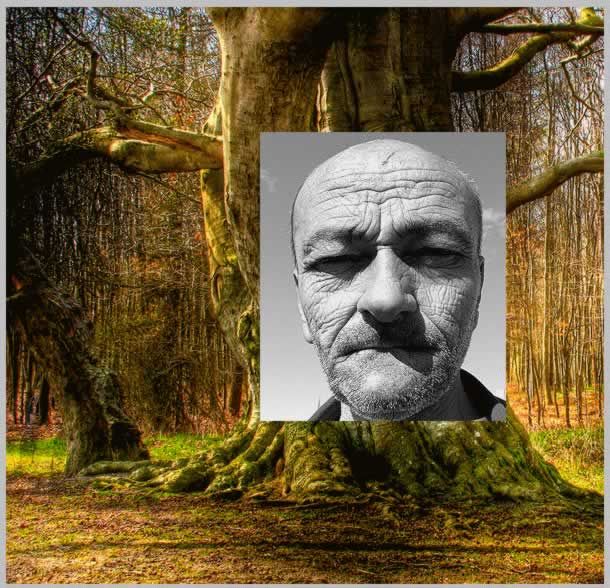
Crop only the face of the old man and remove the rest.
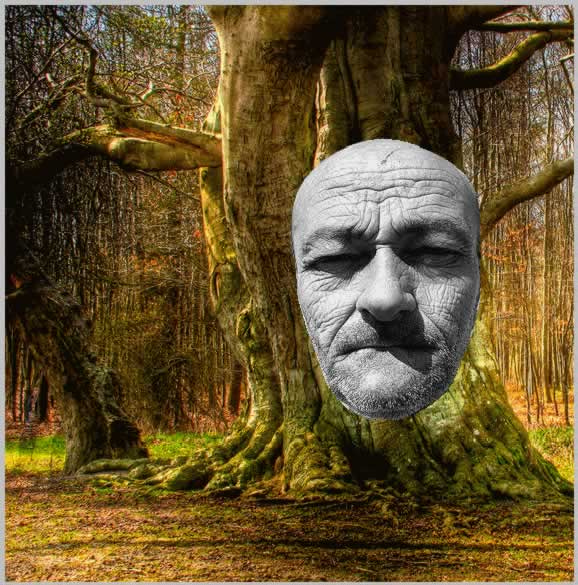
Now change the blending mode of the Old Man Layer to Overlay 100%.
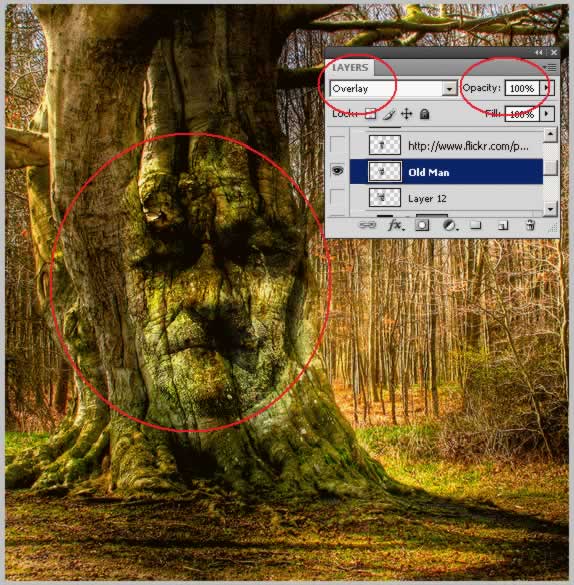
You can see that there is a big difference between the Overlay mode and the Normal mode.
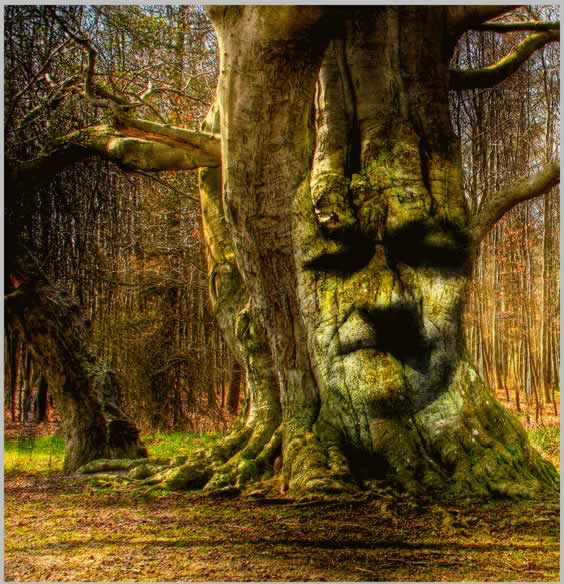
Unfortunately the tree as it is now is not perfect with the blending. The good news is that we can fix that .
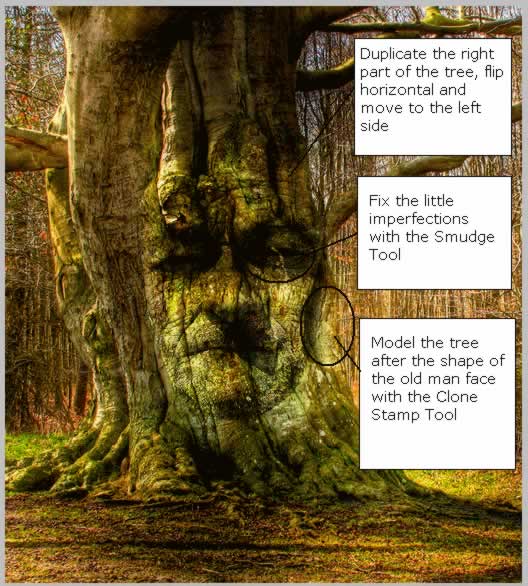
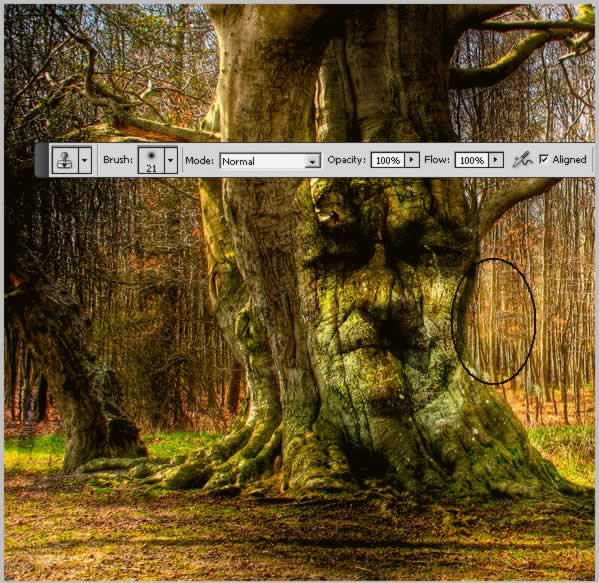
Take the Clone Stamp Tool and hide the area shown in the image below:
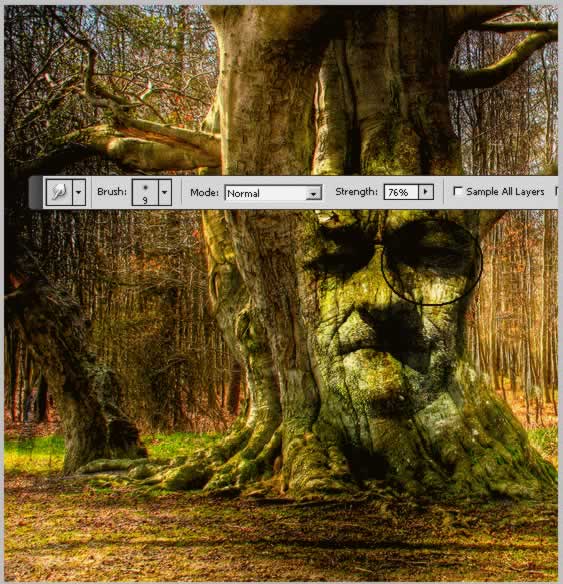
Now with The Smudge Tool hide the little imperfection in the eye area:
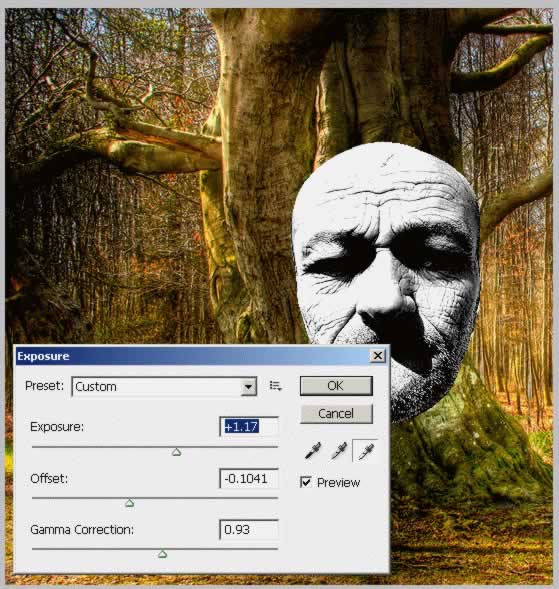
Face treatment. As you remember the face is obtained only from a layer with overlay blend mode.
Duplicate the Old Man Layer . Go to Image – Adjustments – Exposure and do the following settings:
From this layer create 2 new ones . With the Magic Wand Tool select the lighted areas and put it in another layer CTRL + C and CTRL + V. Name this layer Light Areas and change the blending mode to Soft Light 80%.
Do the same this time with the dark areas . With the Magic Wand Tool select the dark areas and put it in another layer CTRL + C and CTRL + V. Name this layer Dark Areas and change the blending mode to Darken 80%.
The result is this so far. To soften the look a little bit you can apply Gaussian Blur Filter to the Dark Areas Layer.
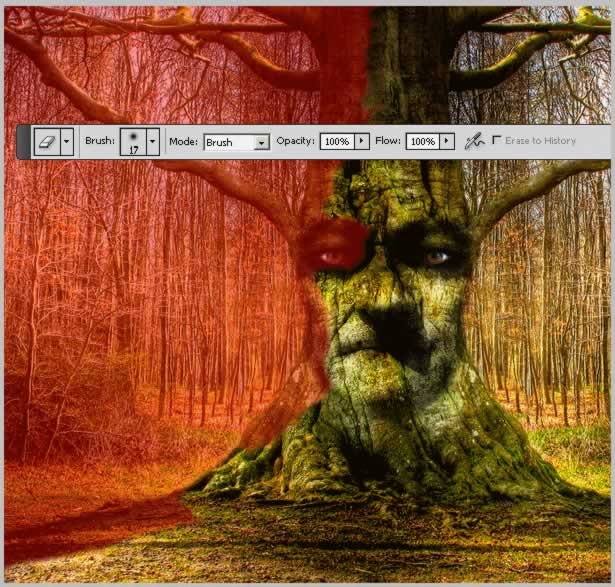
Now it looks pretty good but there is a small color difference where the face ends. So we have to adjust all 3 layers with the Eraser Tool. Play with sizes and opacity to obtain a good result.

The Face of the Tree needs eyes to add expression. So copy this image Look into my eyes by Look into my eyes.
The eye actually looks like my eyes ??!!? Strange
Scale the eye to 10 % and than easily erase the skin area.
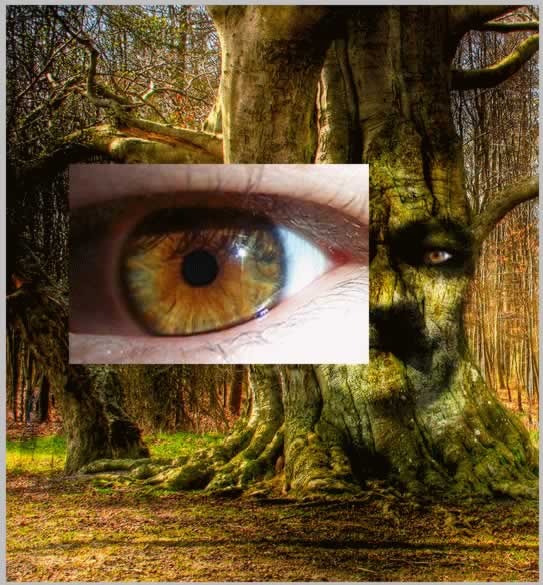
Now the eye is a little to bright in comparison with the rest of the face. So go to Image – Adjustment – Brightness / Contrast :

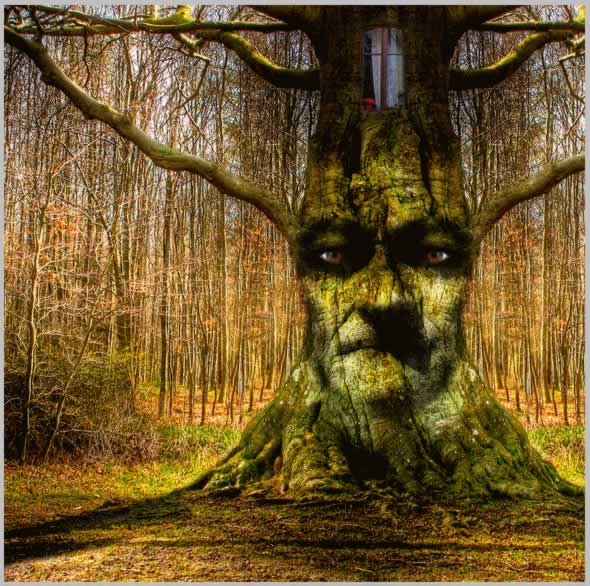
The next thing to do is give a little symmetry to the tree. Because the left side of the tree is a little odd I will duplicate the right side and move it to the left side.
So above all the other layers create a new one called TreeImage. Go to Image – Apply Image.
I have now a layer that contains an image of all the visible layers merged.
Make a selection like in the image, press CTRL+C and CTRL+V . A new layer was created; go to Edit – Transform – Flip Horizontal :
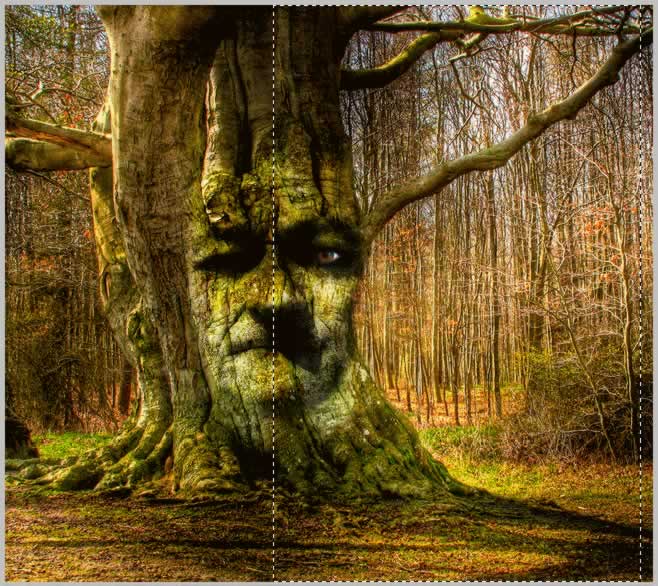
Move the selection to the left area. With the Eraser Tool erase part of this selection as shown in the image below...i have colored the image to see exactly what you have to erase;the red area is the one that stays , the rest was erased:
I did that move because:
The left area was not suited for a face blending
I wanted to give the tree a symmetric look
I have erased that parts because if you can notice there can be one shadow for the nose and in the duplicated case we had 2 shadows.
And last but not least I have erased parts of the tree to look symmetric but not the same.

The Tree looks pretty good but I want it to be the house of the fairies; so I will added a magic window to look like a home. I have found this lovely photo Old Window .
I have to first crop only the window without the stores:
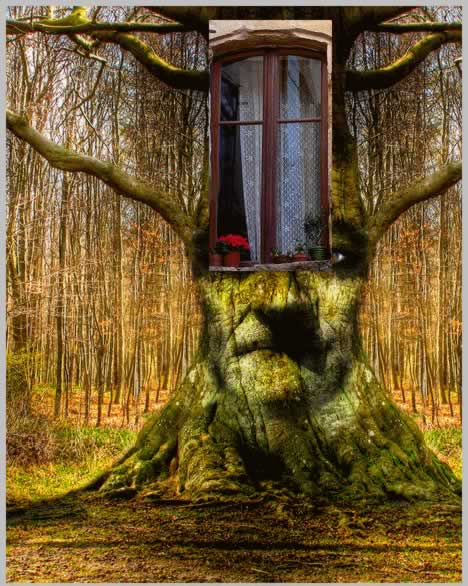
Resize this image to 40% . With the Eraser Tool and the Burn Tool try to blend the window with the tree as good as you can:
Add the princess , photo In the fog .
Copy the large size image and crop only the girl. Scale to 70%.
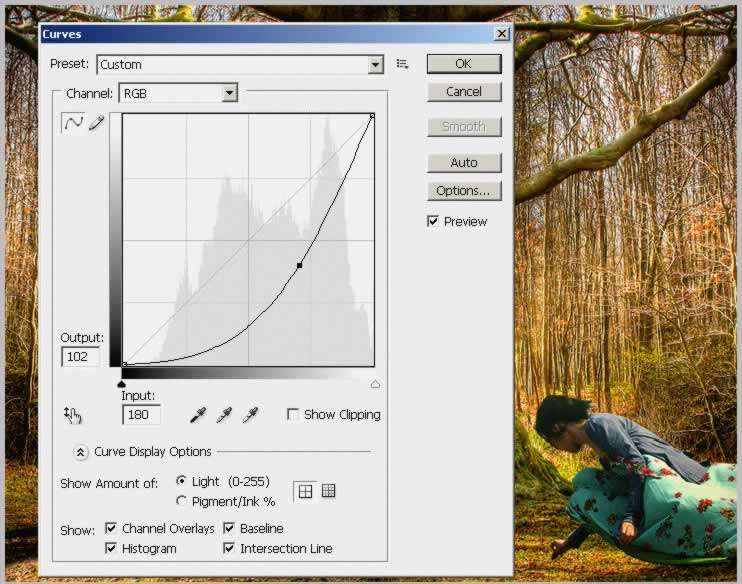
Because the image has a lower contrast I have to go to Image – Adjustments – Curves and do the following settings:
The tone of the girl is more to blue while the tone of the rest of the image is warm orange, but this is not a problem for me because when I will apply the blue filter it will not matter. The important part is the contrast.
A thing that I dont like is that the girl has short hair. For that you can search for really nice hair brushes or do what I did. Create a new layer and with a small size brush , and the color of the girl's hair try to draw over. To give the hair a more realistic look use the Smudge Tool, size 4-5, opacity 70-90%. It would be better with a graphic tablet
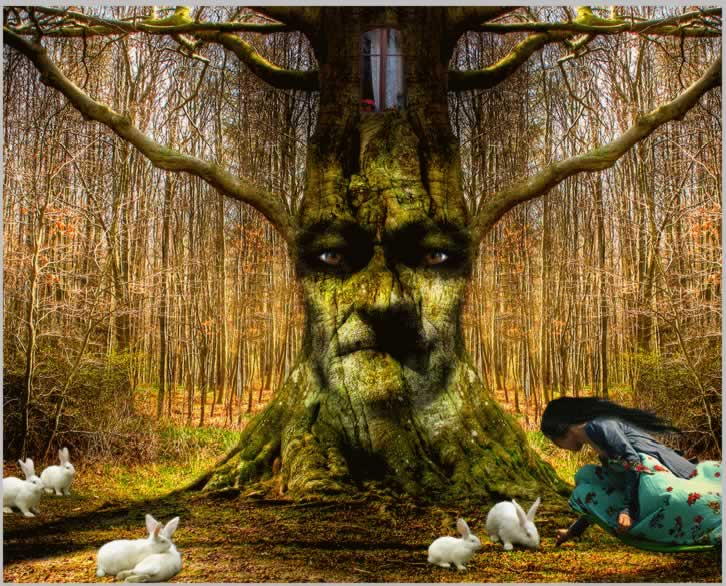
Add Rabbits, this beautiful photo Rabbits . Scale to 80%. Spread the rabbits through out the forest and scale them to different sizes.
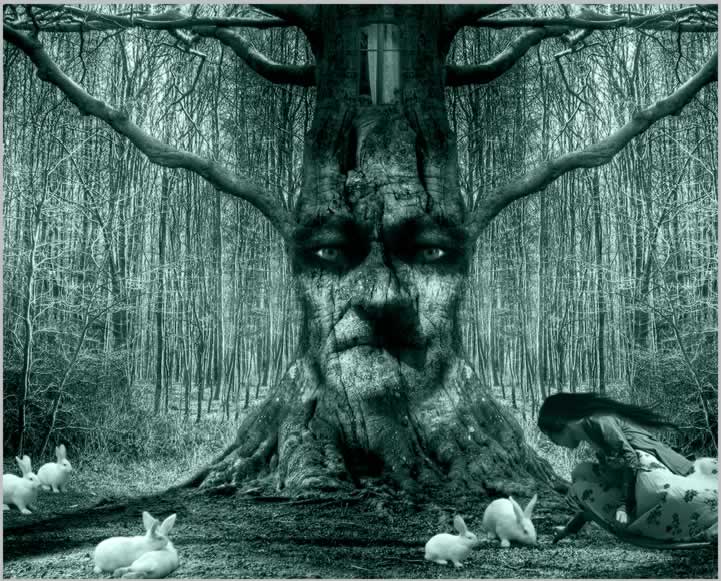
Blue Filter. Simply add a new layer and color it with the color that you like . I choose #1a3c37 but I will show you how it looks like with #8c7527

I will work with the image below that has a beautiful blue tone:
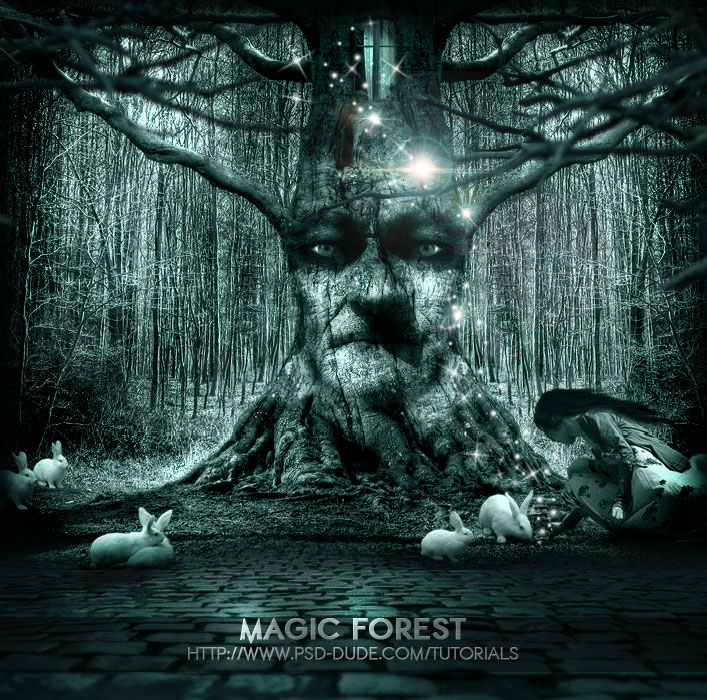
Create a new layer and go to Image>Apply Image. Now paint with light with the Burn Tool (shadows) and the Dodge Tool (highlights), Accentuate face features, the tree and also burn the edges of the entire image.
In the end add in another layer white sparkle coming out of the tree; you can use these sparkle brushes with white color. Learn how to create complex brushes using the Photoshop brush settings from this the tutorial for beginners
Tutorial Update: I have added some other elements to the intial photo manipulation to make it look more magical. First I added a lens flare effect that you can create yourself or you can use one of these lens flare textures
Second, I decided to add these dead tree branches to create a nice frame. Use some ajustment layers to make the color match with the rest of the images. Also add a soft Gaussian Blur effect.
Third, I added this stone floor to add depth to the image. Adjust the color tones, the brightness and contrast and also the exposure.
24 comment(s) for "Lost Princess in the Magic Forest"
please leave a message if you liked it... or even if you didn't like it
thanks,
PSD Dude reply
i changed the image a little bit to give it color , i am hopping to update the tut soon :)
reply
By the way i saw your site , very good works you have there ! reply
My question would be apply it to what? screen?
and is this just a blank layer your applying? reply
So the answer is: select the new blank layer and then Apply Image and choose Layer: Merged and Blending: Multiply ... the idea is to obtain only one layer with all the visible layers merged.
reply
@+. reply
un saudo reply
By the way i am working on adding a "submit tutorial" on my site so you can add the tut yourself!
reply
my best regards reply
reply