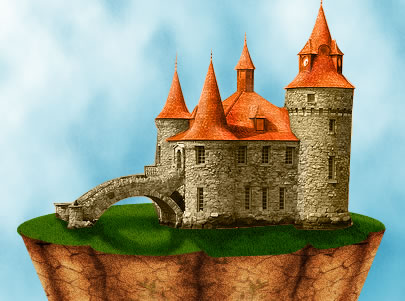
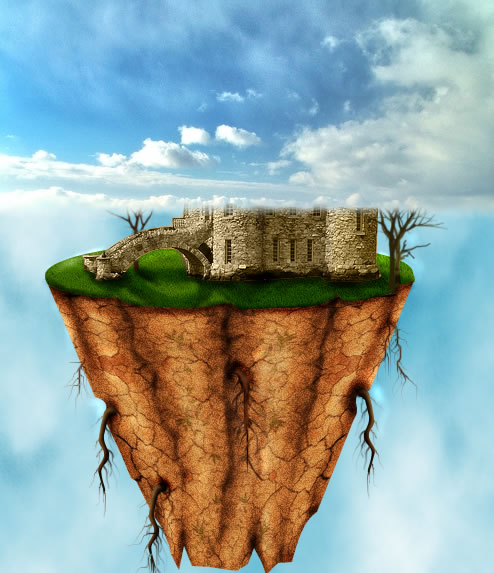
How To Create A Floating Island In Photoshop
Prepare the background. Create a new document with this size: 500/570 pixels.
Let's start by preparing the background. Because this island is on the air, our background will be the sky. Set the Foreground Color #58b4cf and the Background Color white.
Create a new layer and call it Sky Layer. Go to Filter - Render - Clouds. Now we have a nice background sky .
Step 2 - How To Draw A Floating Island
I've noticed that other people use photos for the island and make photomontage. I've decided to draw my own island. I will use photos for ground and grass texture. Maybe in another tutorial I will try the other method also.
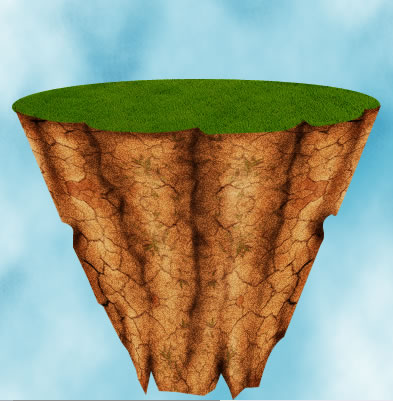
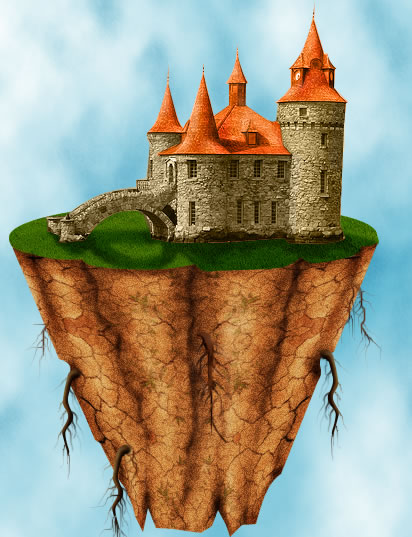
With the Pen Tool draw a shape like in the picture below. This shape must cover half of the image, bottom area. Call this layer Island Layer .
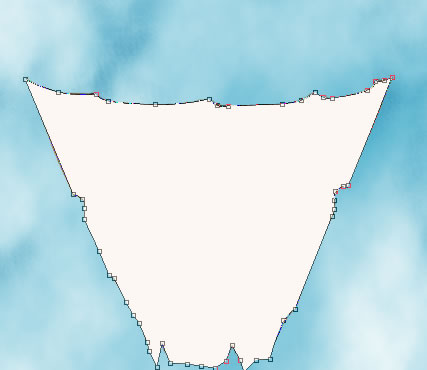
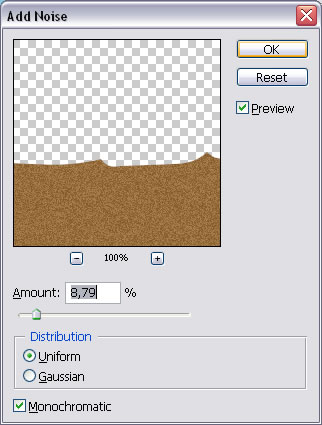
Change the color of this shape to #976e3b. Now go to Filter - Noise - Add Noise and do the following settings.
Now I will use the Burn Tool to give shape to my island. Be careful not to set a high exposure because you will obtain a darker color to soon. The range for this tool is Midtones.

The tehnique is relatively simple. As you can see in the picture below I've burned vertical lines that are the darkest in this image. You obtain this by burning repeatedly the same line (point1).
After this step you have to burn horizontal lines near the vertical lines; you have to obtain a round shape shadow - darken on the exterior and lighten in the center (point 2).
Than you can also darken parts of the island (point 3). This is where we will place some tree roots.
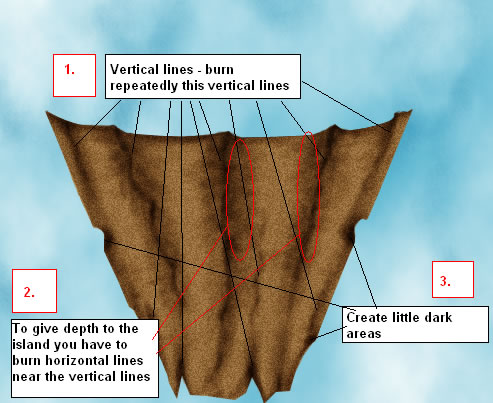
For a bigger effect I have used also the Dodge Tool to lighten some areas.

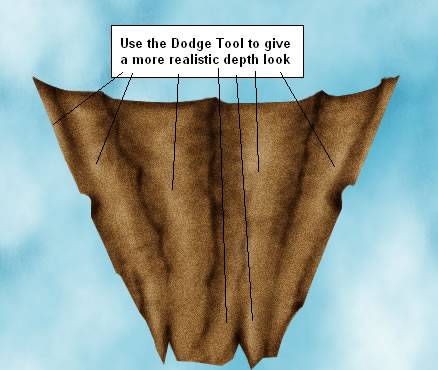
You can obtain the same effect using Brush Tool with low opacity and different color tones.
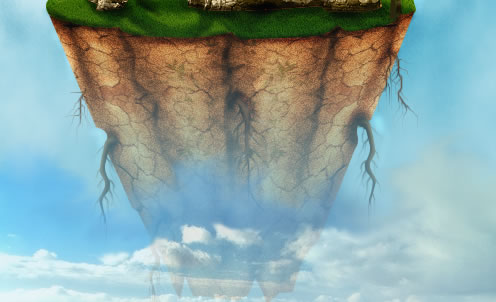
Step 3 - Dry mud texture
This is practically our island. You can really use any of the mud texture images.
It is obvious that this photo it is a detail of dry mu we need to zoom out this image. So download the image and copy it to your psd. Go to Edit - Transform - Scale W: 10 % H:10%.
Now the detail in right but the photo is too small for our island surface. So duplicate this layer and go to Edit - Transform - Flip Horizontal. Merge this two layers and call it Mud 1.
Duplicate Mud 1 and go to Edit - Transform - Flip Vertical. Call this layer Mud 2.
Duplicate Mud 1 , call it Mud 3 and place it on top of all layers. I put the image below to understand better the steps.
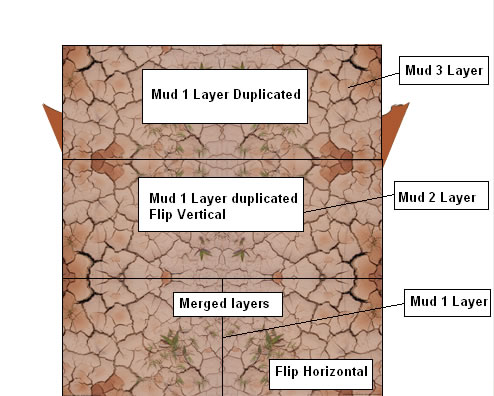
Now you can merge all those three mud layers. Call this new layer Mud Texture Layer .
Go to Edit - Transform - Warp and change the shape of Mud Texture to obtain a spherical look.
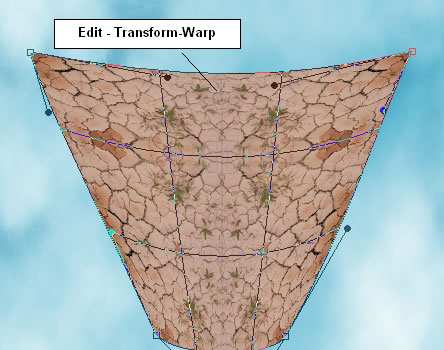
Press CTRL and click the Thumbnail of the Island Layer. Go to Mud Texture Layer and press CTRL+C and CTRL+V. You call this new layer Mud Texture Layer and delete the old Mud Texture Layer. Change the Blending Mode of this layer from Normal to Overlay opacity 100%.

Step 4 - Adding Grass to the Island
Set the Foreground Color to #455609. With Ellipse Tool draw an ellipse. Call this layer Grass Layer and place it under the Island and Mud Texture Layers.
It is now time to add some grass texture to this ellipse. Copy this seamless grass texture from Textures4Photoshop.
Press CTRL and click the Thumbnail of the Grass Layer. Go to Grass Texture Layer and click CTRL+C and CTRL+V. You can see that a selection of grass texture was copied in another layer. Call this layer Grass Texture Layer and delete the photo from Flickr.
Place the Grass Texture Layer on top ogf Grass Layer and change the Blending Mode from Normal to Overlay , opacity 100%. We will return to this layer later to burn some areas.
Your image should look something like this:
Step 5 - Adding the Castle
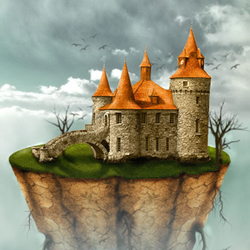
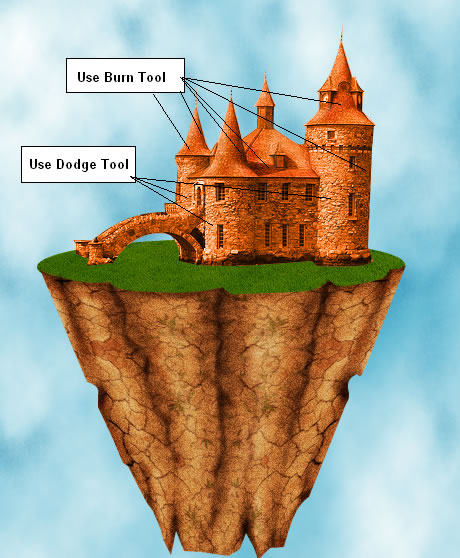
I have found this beautiful castle on Flickr, but you can use any castle PNG image from the internet. Copy it in your psd file.
Set the Foreground Color to # ff7f29. Now take the Pen Tool and draw the shape of the castle. Call this layer Castle Shape Layer. Press CTRL and click the Thumbnail of the Castle Shape Layer and go to Castle image; press CTRL+C and than CTRL+V. You now have the castle extracted from the background. Delete the initial flickr image.

Call the new layer Castle Layer . Lets change a little the color of the castle. For that simply change the blending mode of Castle Shape Layer from Normal to Color 100%.
The Castle Shape Layer must be on top of Castle Layer. Merge the two layers.
With Burn Tool I have decided to accentuate the shadows and with the Dodge Tool to accentuate the Highlights.


Step 6 - Adding details to the Castle
I want to make a difference between the walls and the roof of the castle. So create a new layer on top of all the castle layers. With Brush Tool, color #fae5b9, opacity 100% paint the walls of the castle. Change the Blending Mode of this layer from Normal to Color opacity 100%.
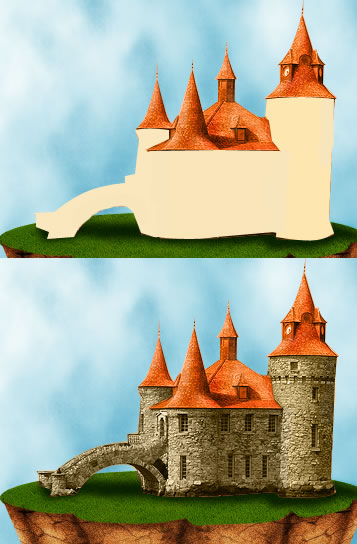
Now we have to deal with the Castle Shadow. Create a new layer and call it Castle Shadow Layer. Set the Foreground Color to # 142c01. With Brush Tool draw a castle shadow.
Go to Filter - Blur - Gaussian Blur (radius 1,8 pixels). Change the Blending Mode of this layer to Soft Light opacity 100%. With Burn Tool burn parts of the shadow.

Step 7 - Drawing Tree Roots
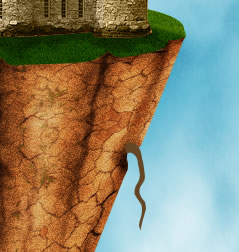
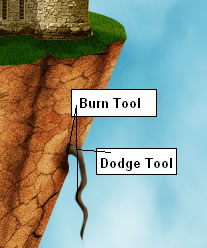
I want to make some nice roots coming out of the ground. Set the Foreground Color to # 654725 .I will use Pen Tool to draw a simple root shape. Right click and choose Rasterize Layer. Now with the Burn Tool I will give shape to the root�it is something similar to Step 2 - Draw the Island. Use also the Dodge Tool to give highlights to the root.
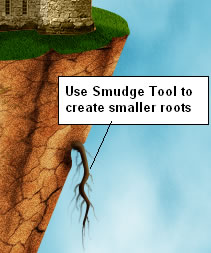
Now use the Smudge Tool to create smaller roots. Choose size 2 for the brush, mode normal and strenght 90%.

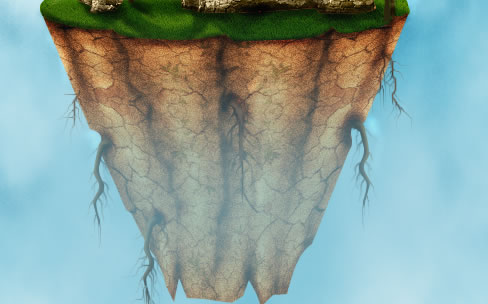
Duplicate this root two times, flip it horizontally and place it on the other side of the island. With the same tehnique draw other roots.
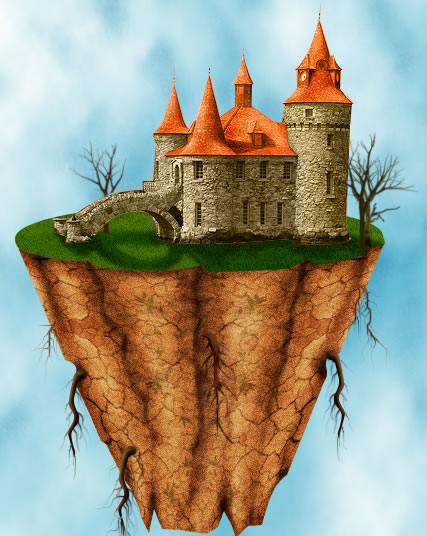
Step 8 - Add Trees to the scene
I have found this really nice Brush Tree Set or you can grab one from our Tree Brush Photoshop list. Download this set and import it into Brush Tool.
Create a new layer and place three trees. I've used Ded2.jpg tree, size 130 px, 120 px and different tones of braun color for the Foreground Color.
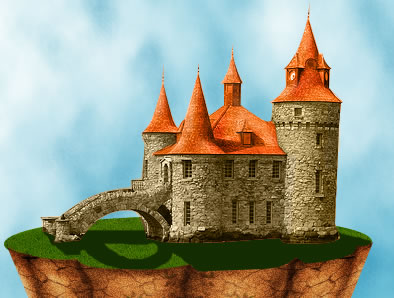
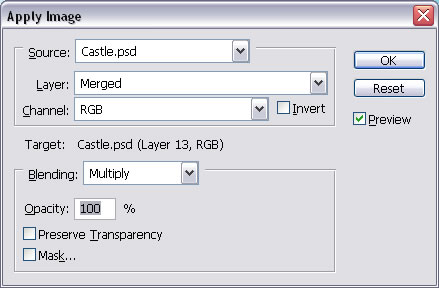
Step 9 - Play with Shadow and Light
Create a new layer on top of all the others . Go to Image - Apply Image.
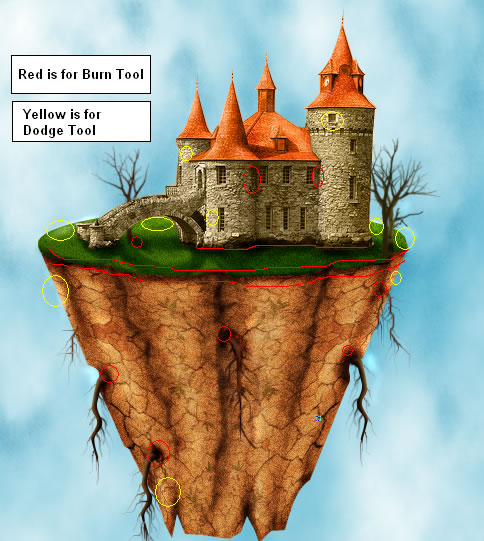
This step is optional. I like to play with shadow and light with Burn and Dodge Tools. In the image below you have some of the areas that need this treatment.
Step 10 - Add the Sky and the Clouds
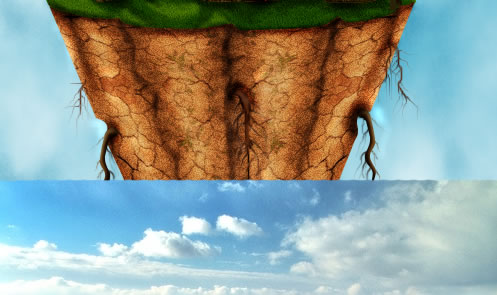
The sky is to flat, the image needs some clouds. I have used one of the clouds and sky background images. Copy the photo into the document. Use Rectangular Marquee Tool to select the parts that you don't want and delete. To blend the bottom sky area with our sky you only have to use Smudge Tool and than Blur Tool.
Call this layer Clouds Layer. Duplicate this layer and call it Bottom Clouds Layer.
You can see that the layer covers the castle and the trees; not a good thing. Return to Castle Shape Layer press CTRL and click the layer Thumbnail and return to Clouds Layer and simply press delete. Do the same for the trees.
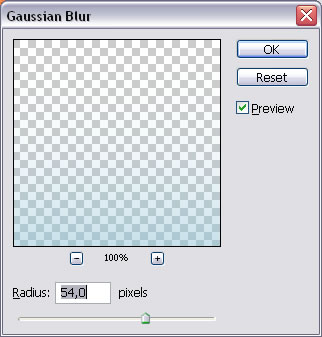
Draw a rectangle on the bottom of the image, color #88c6d9. Go to Filter - Blur - Gaussian Blur . Change the opacity of this layer to 70 %
Place Bottom Clouds Layer on the bottom of the image. I will now use Smudge Tool to make the top edge of this layer, blend with the rest of the sky. Use the Tool up and down, right and left with circular moves to make the result image look realistic.

Change the opacity of this layer to 70 %.
Step 11 - Add Final Touch
No image manipulation without birds! I have found a nice Crow Brushes (see how to load brushes in Photoshop). Place birds with color #52696d on the sky as you like.
The nest step is to draw a rectangle, color #b1aa9e on top of all the layers. The rectangle must cover the entire image. Change the Blending Mode of this layer to Hue and the opacity to 40 %.
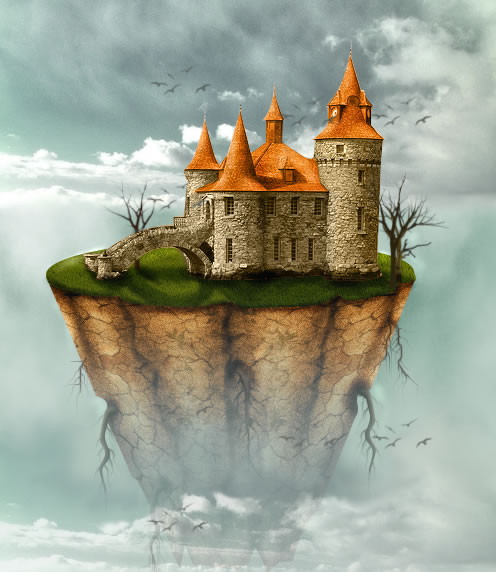
This is my final image! Hope you like it!
45 comment(s) for "Floating Island"
happly right?,yes I am a blogger too,and I wanna share with you my method to make some extra cash,not too much
maybe $100 a day,but when you kee reply
I am sorry for the castle image but the photo was removed from its initial location. This is the castle from another view http://sweetsoulsister.deviantart.com/art/Castle-on-Water-143854890 but you can use any nice castle reply
Jan I am so sorry for the mud texture but the guys from mayang.com changed the link, so you can find the mud texture at this link: http://mayang.com/textures/Nature/images/Mud/parche reply
http://mayang.com/textures/Nature/images/Mud/parched_earth_and_grass_3230109.JPG reply
When I wrote the tut(a long time ago) the link worked ok reply
reply
Thank you! reply
http://www.flickr.com/photos/43648166@N07/4426185633/
But if you have some problems with the tut maybe I can help you! reply
Thanks reply
i can't find d castle image
:-( reply
i finished it reply
https://photoshoptutorials.ws/photoshop-tutorials/photo-manipulation/how-to-create-this-eerie-floating-island-photo-manipulation-in-photoshop/
thanks reply
Old tutorials may have such problems with broken links, because in the meantime the authors may have removed the stock images. So it is important for you to adapt and be able to replace any stock image.
For the sky I can suggest you this clouds texture collection. You can pick one of these textures that looks similar to the original one.
reply