Things You need To Know About Brushes
Photoshop defines brushes based on a grayscale so it is no need to use colors when you make a brush. All you have to do is play with black, white and different tones of gray. The rules are: everything that is white will not be visible so the opacity is o%. The black areas on the other hand will be 100% visible, so maximum opacity. And the other tones of gray oscillate between 2 and 99% opacity.
For start, create a new psd file, and fill the background layer with white color. This means that the background will not make part of our brush being invisible.
Sparkle Brush 1
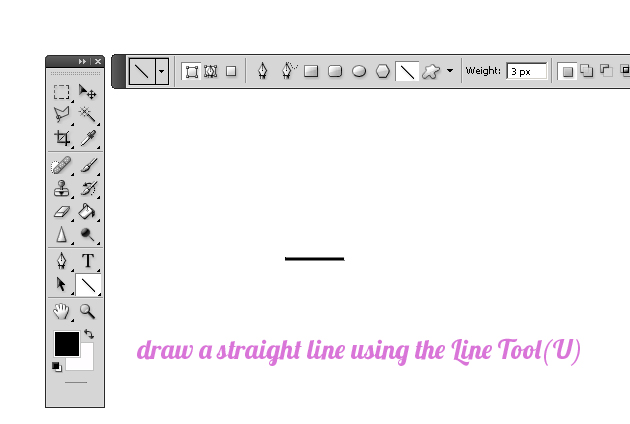
Use the Line Tool and draw a horizontal line. Or you can also use the Brush Tool with hard round brush. Keep the SHIFT key pressed to obtain a straight line. Anyway the size of the line has to be 3px and the color, black.

Rasterize the line shape. Go to Filter, Blur and apply Motion Blur with the following settings.

Duplicate the line layer and rotate it by 90 degrees.

Merge the two line layers. Duplicate the new merged layer and rotate it by 45 degrees.

Create a new layer above and with the Brush Tool draw in the center of the sparkle shape. Choose a soft round brush of around 100px and color black.

Define Your Brush
This is our first star sparkle and you can now define it as sparkle brush. To do that go to Edit menu, pick Define Brush Preset, give it the name Sparkle 1 and you're done!

Sparkle Brush 2
Now we will use the previous brush to create a new one, more detailed. Let's add some other elements to make another sparkle brush. Create a circle with the Ellipse Tool and center it with the star sparkle. Set the Fill of the layer to o%. Open the layer style window and add Outer Glow, Inner Glow and Stroke.

Our second sparkle brush is done; Go to Define Brush Preset again, name the new brush Sparkle 2 and press ok.
Sparkle Brush 3
Duplicate the first circle layer and resize it to 210%. You can leave the layer styles identical or make little changes of color. This is our third brush, Sparkle 3.

You can make lots of similar shapes by adding other circles with different gradient tones or you can add another rays with different sizes and opacities. I only showed you three examples of star sparkle brushes that are really easy to create.

How to use a Sparkle Brush
The sparkle brushes can be used in a similar way we use the Lens Flare brushes, Glow Brushes or any other Light Brushes. These brushes can also be combined to obtain beautiful effects. The sparkle effect can be used to create shiny stars, to add glitter effect to an object or simply to create abstract artworks.
We now have our sparkles on the Brush Tool's list of brushes. Create a new layer and fill it with black color. Set the foreground color white and select the Brush Tool. Pick the newly created sparkle brushes, choose different sizes and add them on your canvas.

To add color to sparkle brushes, we could use the Hue/Saturation(Colorize checked) adjustment. But a better choice is to add a Gradient Fill layer to apply different photoshop gradients. Press the create new fill or adjustment layer button, from the Layers pannel and choose Gradient Fill. Create your own gradient or if you don't feel inspired pick one from this list of free photoshop gradients. Set the Blending Mode of this Gradient Layer to Color, opacity is up to your taste, again.

Here is the final result, colorful sparkling stars made from scratch in Photoshop. Hope you like it!


5 comment(s) for "Create Sparkle Brushes in Photoshop"
SU reply