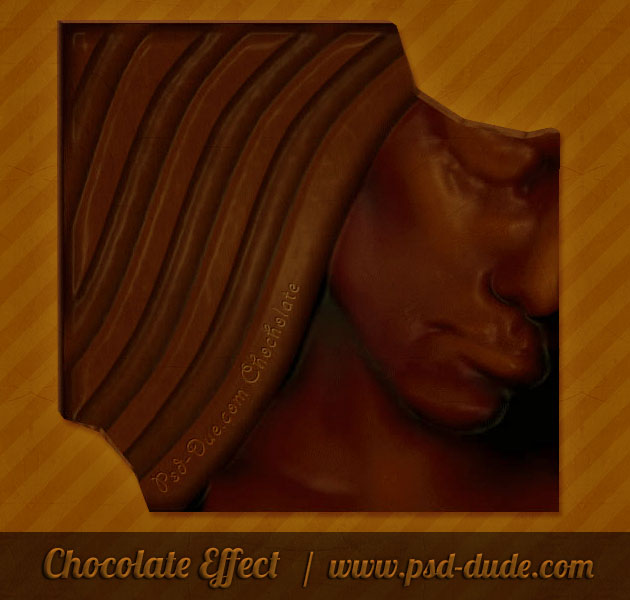
Before we begin let's take a quick look at the final result. Here is how our chocolate effect will look like. You can create your own chocolate tablets in just a few simple steps.
Step 1 - Prepare the background
The idea for this tutorial came from a forum. Somebody was asking about chocolate effect. I haven't found many tutorials while searching the internet so I have decided to write one myself. If you have another method to obtain chocolate or ideas to improve my tutorial please leave me a message. Ok , let's start!
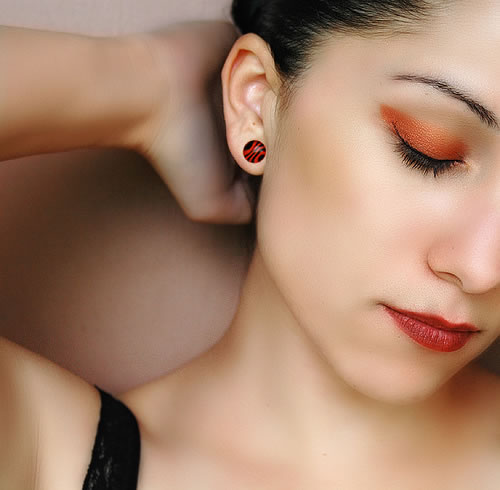
Open a new psd file 500/500 pixels. Go to Flickr and download this photo .
Step 2 - Turn the photo into a black and white
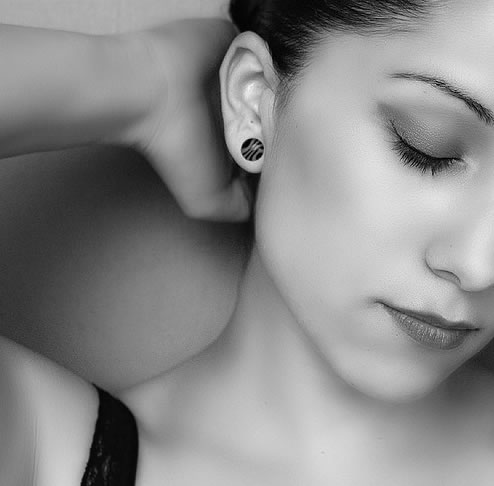
Because I want to transform this girl into a chocolate figurine I need to transform the photo into a black and white image. So go to Image - Adjustments - Desaturate or simply use SHIFT+CTRL+U. Call this layer Desaturate Layer and hide the initial layer.
Now we have this image
Step 3 - Remove the left part of the image
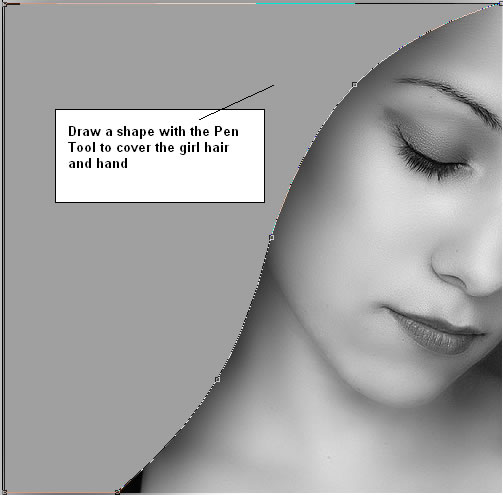
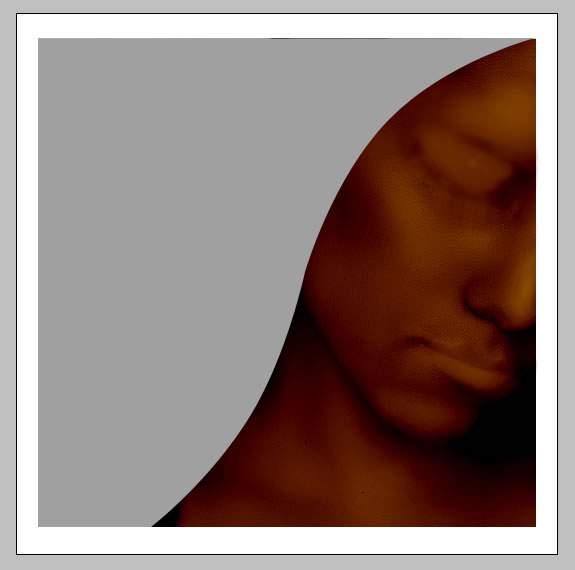
Because I want to use only the face of the girl I will draw with Pen Tool a shape . Call this layer Hair Layer . Set the color of the shape to #a0a0a0. Now press CTRL and click the Thumbnail of the Hair Layer and than go to Desaturate layer and press delete.
Step 3 - Hide Some Face Features
Now it is time to work with Desaturate Layer and hide or change some features of the face. Go to the View - Zoom in the image .
With the Dodge Tool lighten the dark areas of the mouth, eyes. The idea is to make the lips, eyes, ears, eyebrows the same color as the skin.

Start with the mouth and easily dodge the lips area. Than with the Blur Tool cover the same mouth area, opacity 15 %.
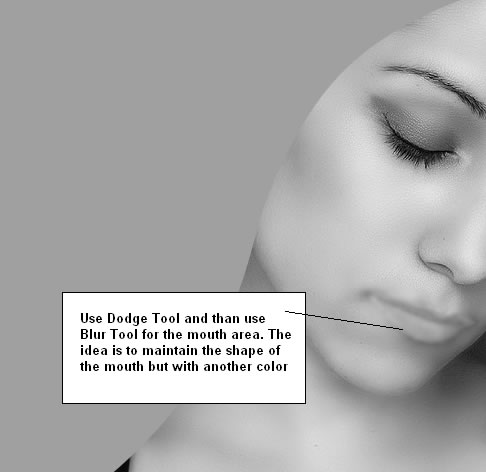
Now we have to reshape the mouth with Dodge Tool.
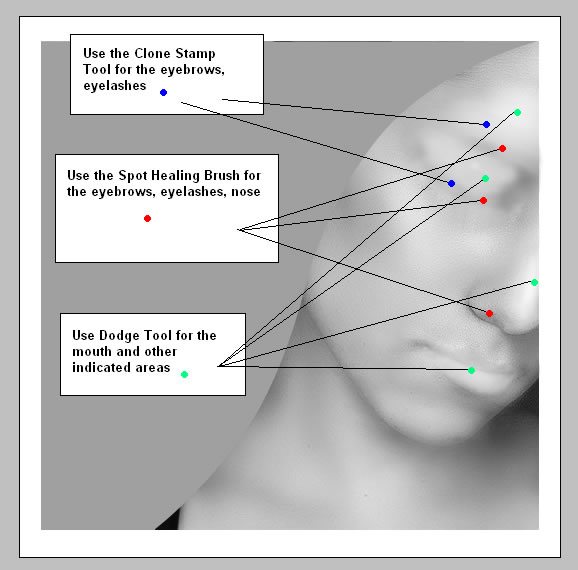
Use Spot Healing Brush Tool to hide the deep part of the nose.
Use the Dodge Tool to lighten the eye area like in the image.
Use the Clone Stamp Tool to hide the eyebrow and the eyelashes.
Step 4 - Let's add some color
Gray is not quait the chocolate color so let's fix that aspect.
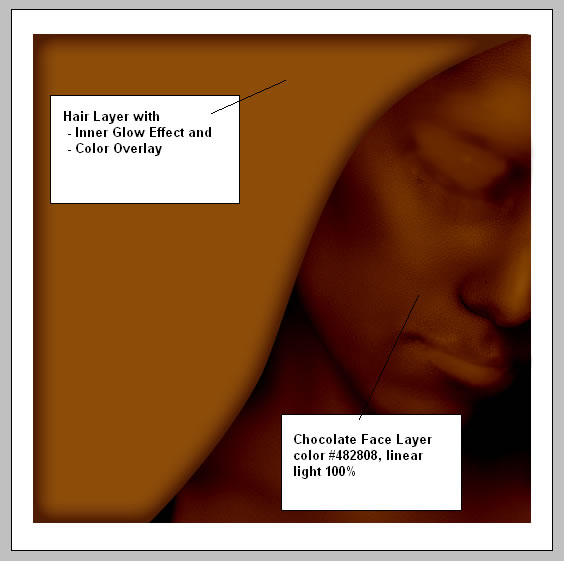
Create a new rectangle with the Rectangle Tool, color #482808. Call this layer Chocolate Face . This layer is placed above Desaturated Layer and below Hair Layer. Change the Blending Mode of this layer from Normal to Linear Light 100% opacity. Your image should now look like this:
As a tip you can adjust the Desaturated Layer with Dodge Tool after you've added this Chocolate Face layer�that way you can see the effect better.
Step 5 - Color the Hair of the Figurine
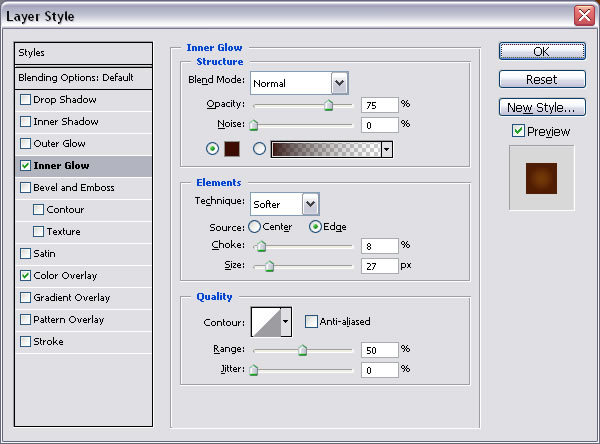
I will now change the color of the Hair Layer. So go to Blending Options of the Hair Layer and do the following settings:
Inner Glow : color # 3c0c00 - be careful to choose the exact color because it was so hard for me to choose the right color for this chocolate effect.
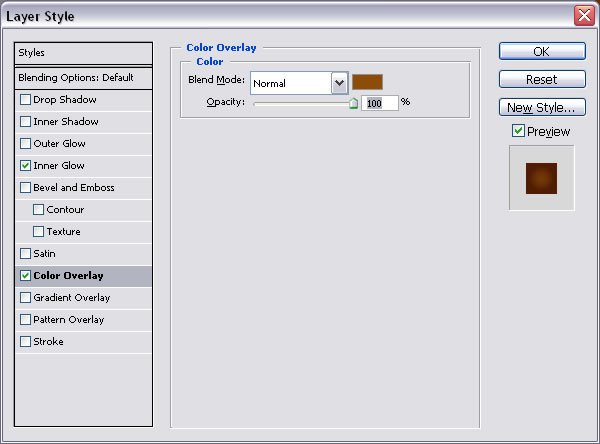
Color Overlay: color # 8d4d09
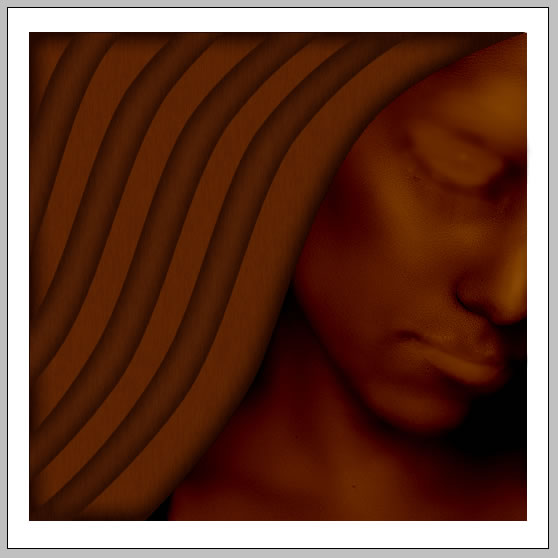
Your image should now look like this:
Step 6 - Detail the Hair of the Figurine
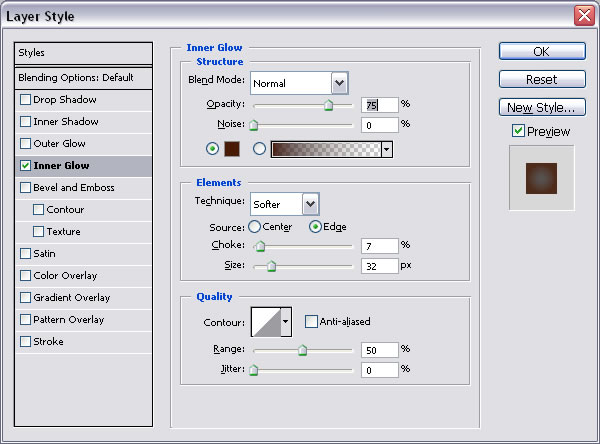
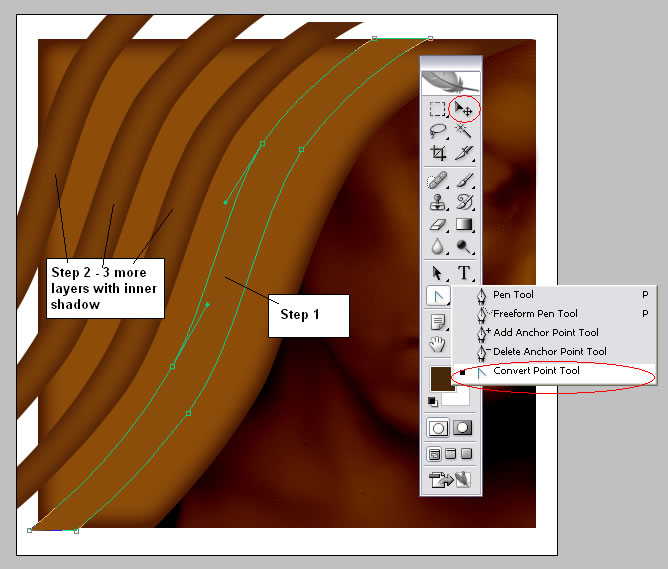
I will now use the Pen Tool to create a shape like in the image below. Choose the color for this shape to # 965611 . Go to the Blending Options of this layer and select Inner Glow(choose the color of the glow # 4a1b04) with the settings shown below.
Now duplicate this layer four times and adjust the shape of each of them to fit the image like in the image shown before. Use for that the Convert Point Tool and the Move Tool.
Step 7 - Work with the Hair Shapes
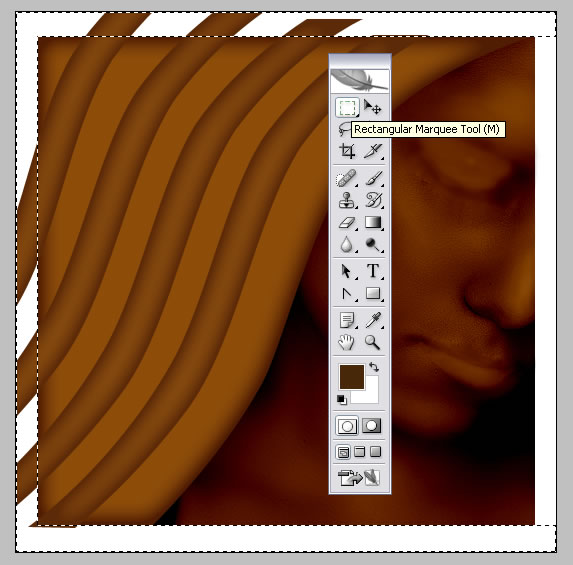
I will now select all the above shapes and choose merge layers. Call this new layer Hair Shapes. Now with the Rectangular Marquee Tool select the part of the shapes that exceed the image. Press SHIFT to make multiple selections than delete the selected part:
Step 8 - Add extra color effect to the hair
The hard part with this tutorial is the color part�the fact that we've use a desaturated image and a vector shape with no gradient what so ever make this color difference betwwen the two parts. I will try to fix that. So create a new layer and press CTRL and click the Thumbnail of the Hair Layer. You will see that a selection of this layer was made. Now simply take the Paint Bucket Tool and in the new layer fill the selection with color # 171717. Go to Filter - Render - Fibers and make the following settings; make sure that the background color is # 242323 and the foreground color is # 171717.
Set the Blending Mode of this layer to Soft Light 100%.

Step 9 - Add Chocolate Effect
You can leave the chocolate as it is or you can add another effect that will give depth and light to our figurine. For that I have used one of photoshop effects - Plastic Wrap.
For that I have create a new layer. Call this layer Chocolate Image. Now Go to Image - Apply Image.
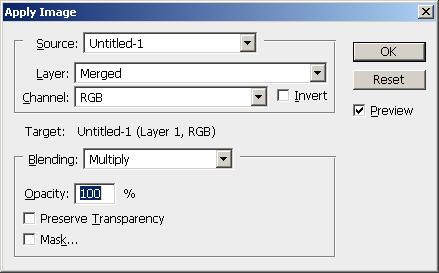
The result is a new image that contains all the visible layers in one image. It is like a printscreen of the image or like a jpg image of your file.
Ok, now go to Filter - Artistic -Plastic Wrap and make the following settings:
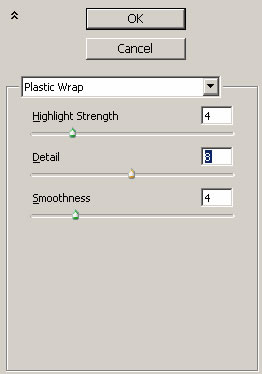
You can of course at any time change the settings if you find a better way to make this chocolate effect.
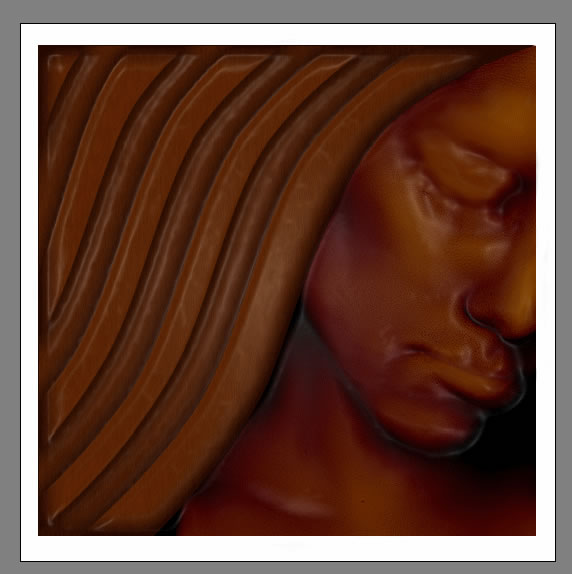
The result should look like that:
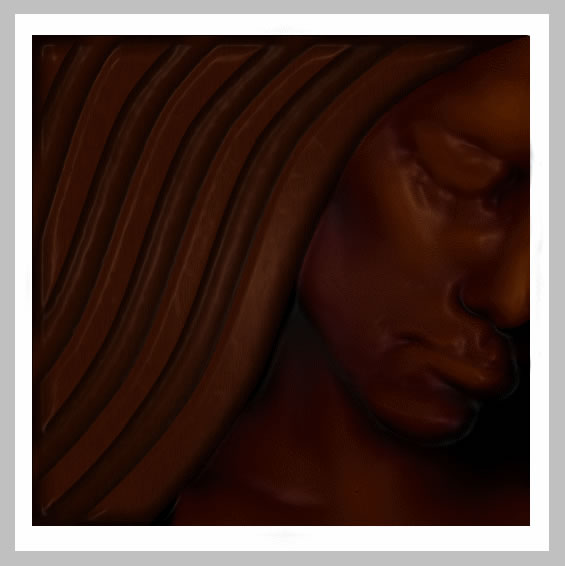
If you want a darker color it is enough to duplicate this layer and change the blending mode of this new layer from Normal to Multiply 70%. I did just that and look the result:
Step 10 - Add Further Details
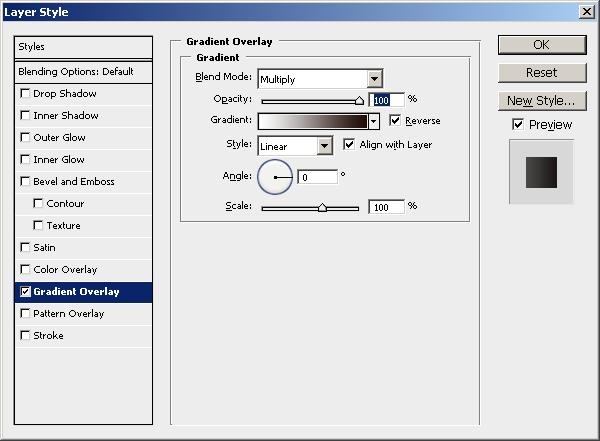
As you can see in the image below I have added two shapes to the initial image with the Pen Tool. Choose the color for this shapes #6a3523. For the vertical shape I have added an extra effect Gradient Overlay with the settings presented below:
Step 11 - Create Broken Chocolate Effect
The image looks to flat for me so I wanted to create a chocolate with broken edges.
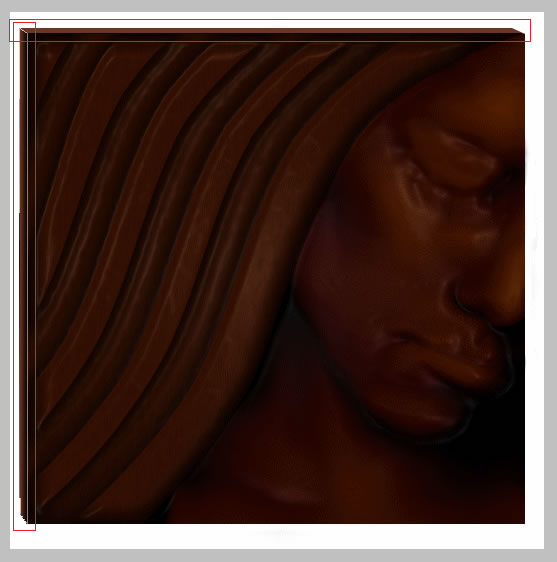
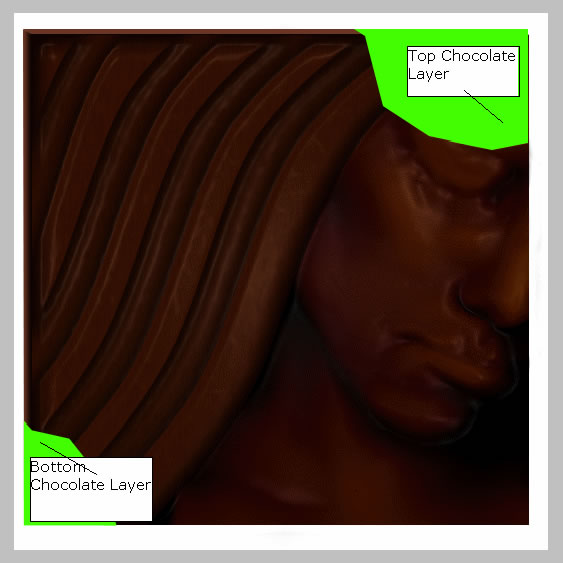
I will use the Pen Tool to create 4 shapes like in the image below. I have used this colors, red and green to see the shapes better; I will change the colors in the next step. The red shapes are above green shapes. I will first create the green shapes and than create the red shapes above the green shapes. In the images below you can find also the names of the each layer for this shapes.
Step 12 - Refine the Broken Edges
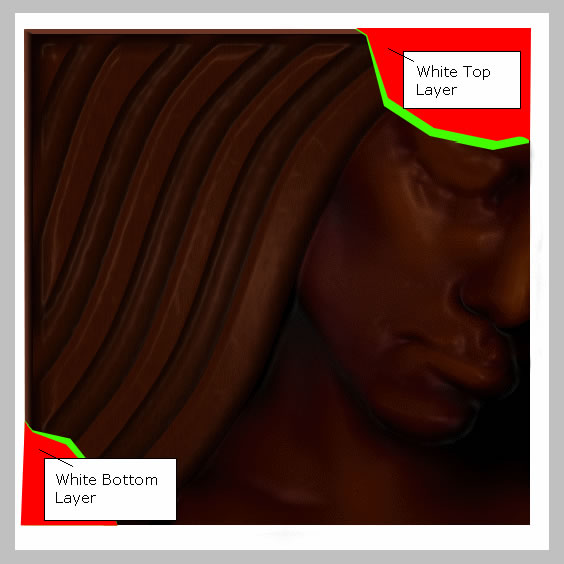
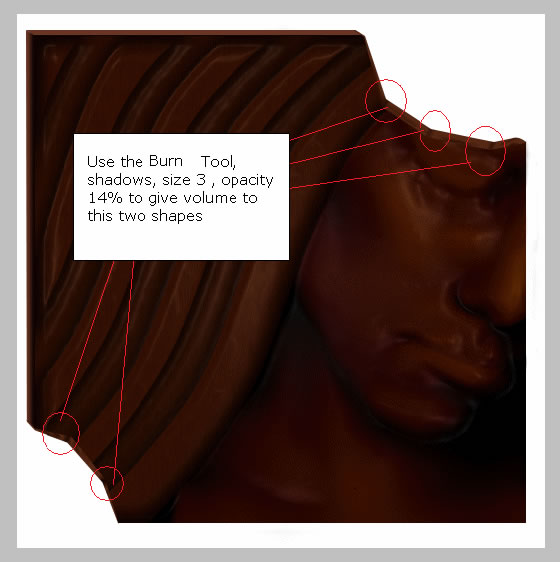
Now it is time to change the colors of the shapes from the step 11. The idea is to make the red shapes WHITE and the green shapes become #562814. It is important to have the white layers above and the other 2 layers (green) below. Select the Top Chocolate Layer and the Bottom Chocolate Layer and merge them. Use the Burn Tool with the settings below to give shape to the broken edges.
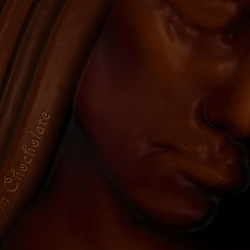
Step 13 - Add Your Name Engraved on the Chocolate
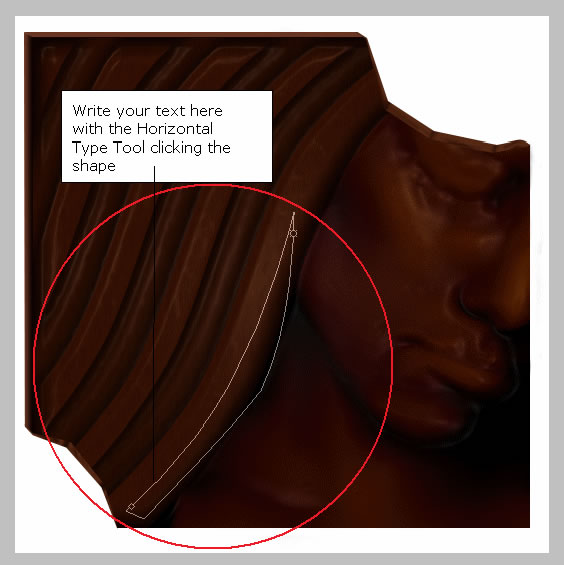
Ok this is the last step of this nice tutorial. Simple choose the Pen Tool and be careful to have Paths option selected.

Draw a simple shape with Pen Tool like in the picture below. With the Horizontal Type Tool write your text by clicking the path shape. Now you must write the text with black color. Duplicate this text layer and change the color to white. Move this white text layer 1px down and 1px right. Change the Blending mode of white layer to Soft Light. Now the last thing you have to do is to change the opacity of black text from 100% to 60%. You can see a more detailed tutorial about engraving effect in this tutorial
I really hope you have enjoyed this chocolate...This is the final result! Please leave a comment and maybe share this tutorial!
8 comment(s) for "Chocolate Tablet Effect"
reply