Step 1 - Find the Photos That We'll Use
I will find all the images from the beginning so we don't have to bother with that later on. So I will need an old wall photo, an brick wall photo, an old window photo, a landscape photo and of course the broken window brush image. This are all very beautiful images that are making the hole photo manipulation process possible.
Here is a link where you can find a nice free set with broken glass brushes .
And this is where you can find extra broken glass tutorials .
This broken window manipulation is the most simple idea I could find, you can of course use the broken glass effect in all kinds of ways if you have a vast imagination and I am sure you have!
Step 2 - Let's Begin!
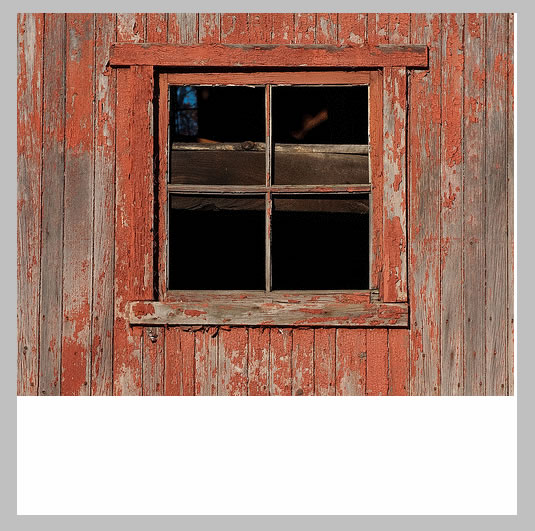
Copy all of the above images into your file and name them because I will refer to them after their names. The canvas size is 500/500 pixels.
First we will deal with the Old Window Layer . With the help of the Pen Tool I will trace the contour of the window and the glass and I will erase from the image the wood wall and the glass from the window.
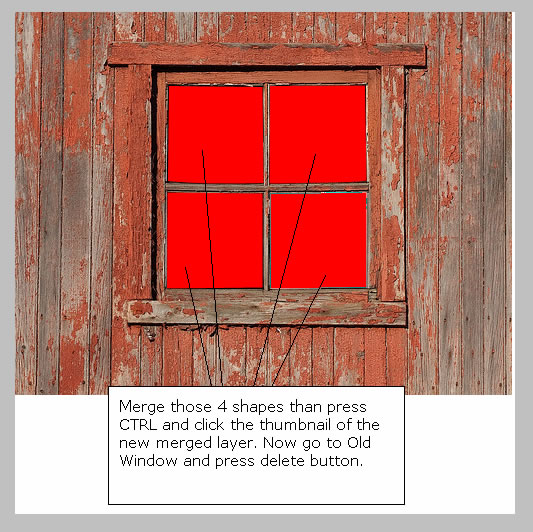 So take the Pen Tool and make four selections like in the image . Than merge all the 4 shapes and press CTRL and click the thumbnail of the new merged layer. You can see that a selection was made; return to Old Window layer and press delete button.
Now it is time to crop the window from its background. With the Pen Tool create the shape of the window. To see exactly what are you doing you have to set the opacity of the shape layer to 0% so you can see the window layer from behind You may also want to try to Zoom in the image if you want to obtain a better crop or if you wear glasses like I do.
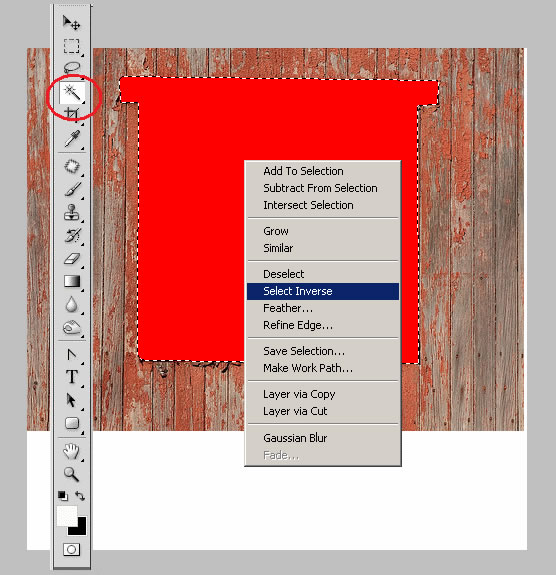
You can see that the window has a little shadow..include that shadow in the shape too. Ok now rasterize the shape and do the same steps: press CTRL and click the thumbnail of the shape layer than go to Old Window layer. Be sure you have selected the Magic Wand Tool. Right click on the selection and choose Select Inverse. Now press delete button. Now hide all the shape layers.
Step 3 - Make a Bigger Window
The window is too small so I have decided to make it bigger so we can see the landscape.
Duplicate the old Window Layer than go to Edit - Transform - Flip Vertical and move it downwards like in the image below. I have changed the color so you can the the both of them better.
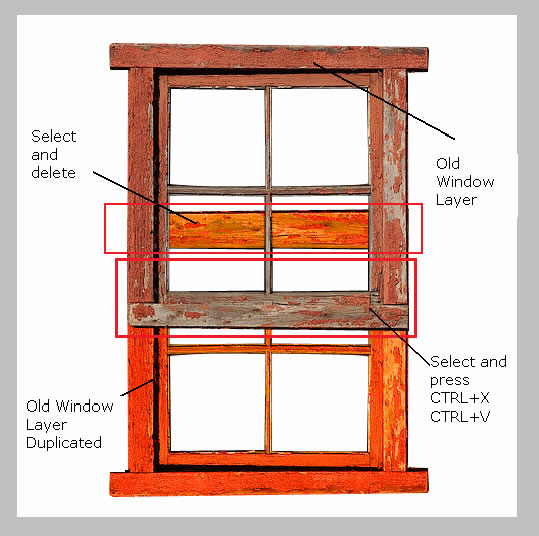
Ok so you can see in the image the further moves: select the indicated areas from Old Duplicated Window Layer and delete it. Than select the indicated area from the Old Window Layer and press CTRL+X and CTRL+V and move the new layer downwards.
This should be the result so far:
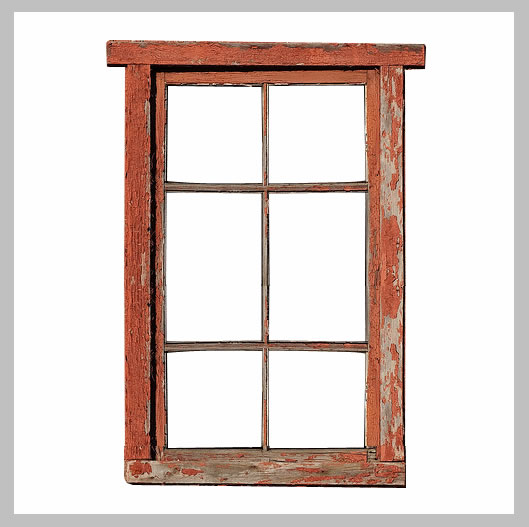
Merge all the window layers and call them Old Window Layer.
Step 4 - Add the Old Wall
Do you remember the two wall images Old Wall Layer and Brick Wall Layer? Now it is their time!
Place the two images behind Old Window Layer. Place the Old Wall layer above Brick Wall Layer and set the blending mode of this layer to Darken 100%. Duplicate Old Wall Layer , blending mode is now normal nor darken, and place it behind Brick Wall Layer. Now simply delete the window area from the third wall layers. Our image looks now like this:

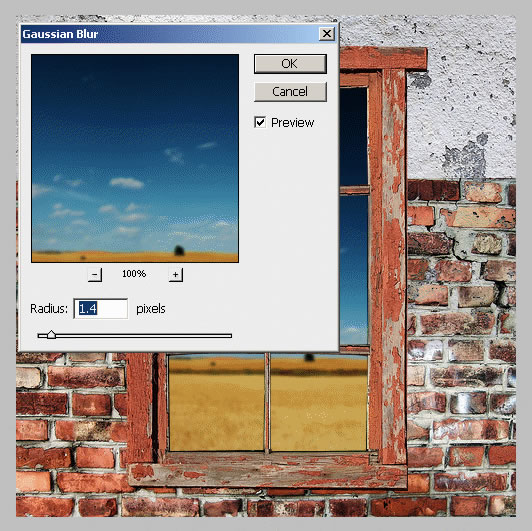
Step 5 - Add the Landscape
It is time to show the landscape behind the window. Simply copy the landscape and place it behind all the layers. Because we will put the focus on the glass and wall it is ok to make the landscape a little blurry so go to Filter - Gaussian Blur
Step 6 - Add Glass to the Window
Because we've cropped the glass from the window we will try to create our own glass.
I have simply created a rectangle with the Rectangle Tool, color #5dffff and than I have changed the opacity of this layer to 30%. Cal this layer Glass Layer.
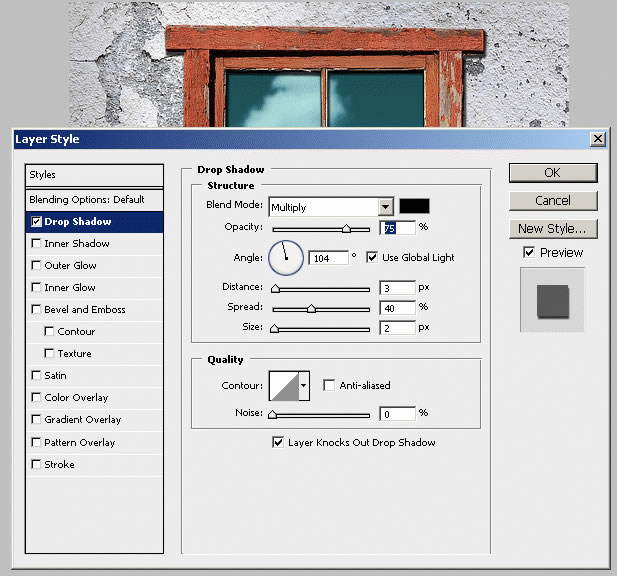
To make the glass more real add Drop Shadow to the Old Window Layer:
Step 7 - Add the Broken Window Effect
This is the final step , the broken glass effect. There are on the internet many broken glass free brushes. It is easy to integrate it into your image. I have chosen this image that I like very much, but you can use of course one of the brushes that I am going to presented to you later on.
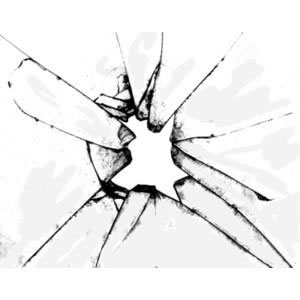
Resize the image to 65% and than place it like in the image below:
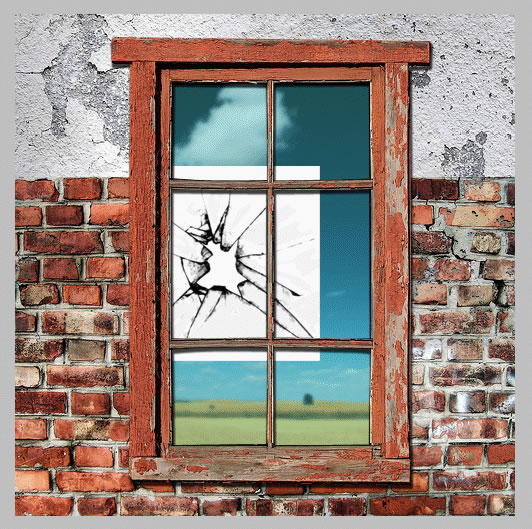
Now I have tied to blend my image (with layer's blending mode) so that it make part of the glass but because none of the blendings look right I have decided to invert my image. So go to Image - Adjustments - Invert or simply CTRL+I.

It is now time to add more broken spots so duplicated this layer and rotate it, scale it or whatever you like so you can add extra effect, something like this:
Now merge the three layers and change the blending mode to Screen 60%. The parts of the broken image that are not right simply delete it with the Eraser Tool.
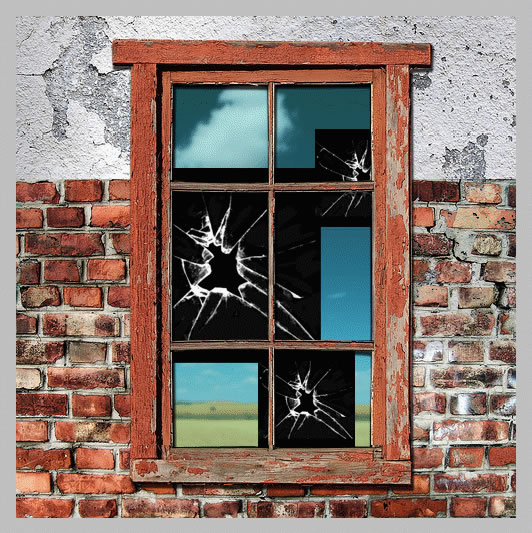
The final touch is to select with Magic Wand Tool the missing glass areas . Press SHIFT to make multiple selections and make sure the Contiguous option is checked. Than return to Glass Layer and press delete.

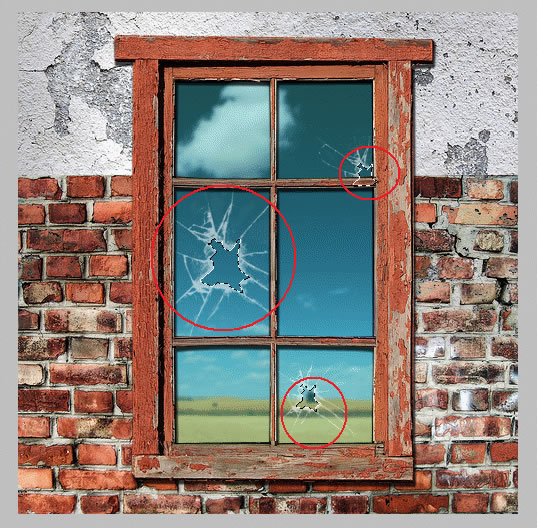
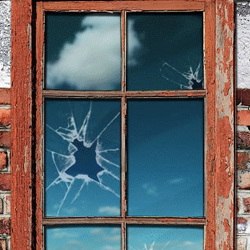
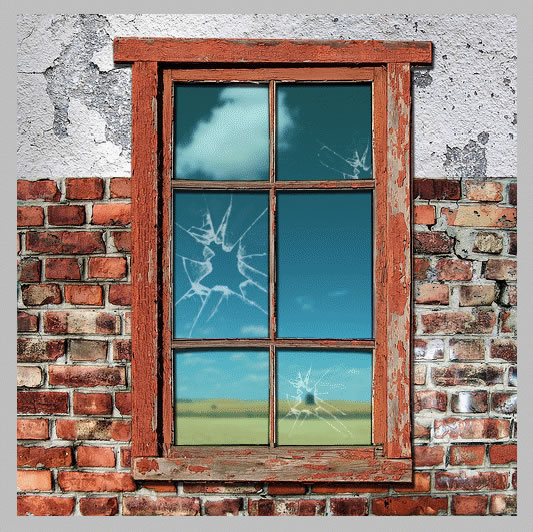
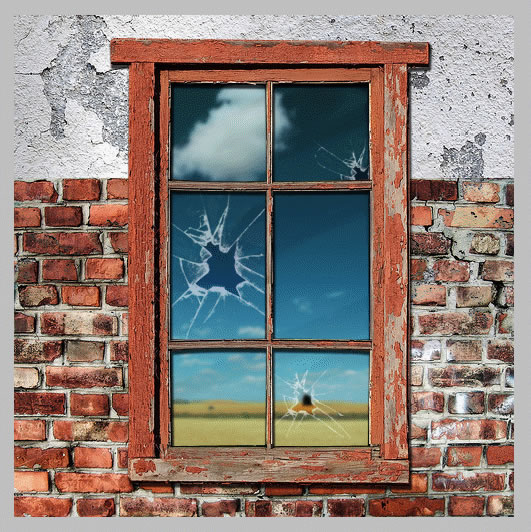
This is the final image! I really hope you have enjoyed this tutorial!
5 comment(s) for "A Simple Broken Glass Effect"
I think you are right. I will return to this tutorial (I did it about a year ago) and adjust the final result.
thanks for the suggestion reply
and I'm looking for tutorials to create a large banner. Hopefully if it turns out well enough I will show it on here! reply