 www.psd-dude.com
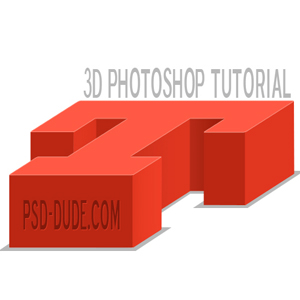
From this simple tutorial you will learn how to create a perfect 3D letter in Photoshop. Putting together more 3D letters you will obtain a cool 3D text effect. In just a few simple steps you will transform your boring 2D text into a cool 3D effect. I really hope you find it useful!
Font Family, Font Style and Size
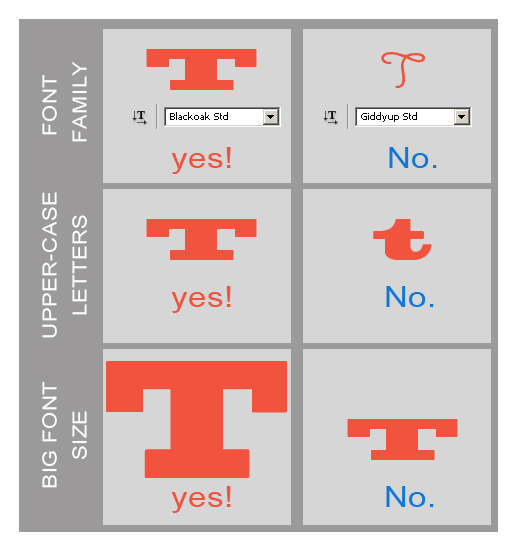
When you want to transform a simple letter into a 3D letter there are some things that you need
to take into account. First you need a proper font, simple and without decorations. Usually the handwriting font families, like Amienne, Giddyup,
Segoe, etc are not fit for 3D transformation.
I like to set the Font Style to Bold, usually the Normal style is too thin. And of course to obtain a more visible 3D effect you need to work with big font
size (70 - 100 px depending on the font family).
Between lower-case letter and upper-case letter I prefer to work with the last one.
You will see that the 3D effect is much better for upper-case letters.
3D Letter in Photoshop
For 3D transformation we need to work with every single letter and transform it into 3D. So it involves a certain
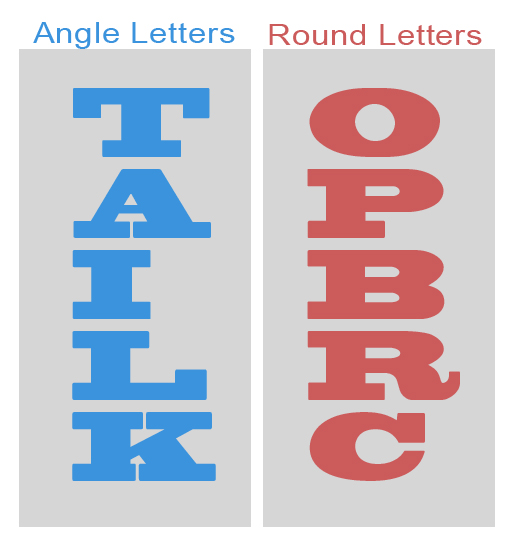
amount of work. For that reason keep your text short. There are two types of letters that need specific treatment: the ones
that have only straight corners or angles and the ones with angles and round shapes.
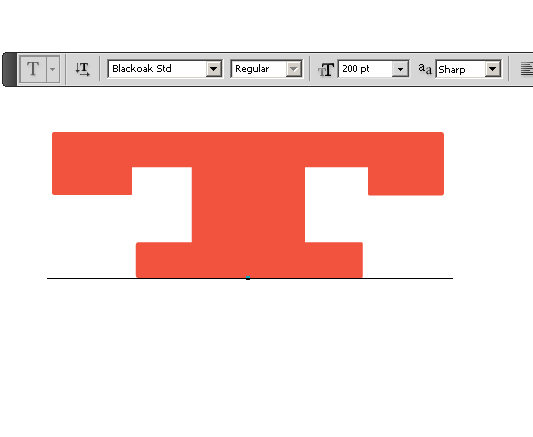
I will start with the "T" letter, so an angle letter. The font is Blackoak with the settings presented below.
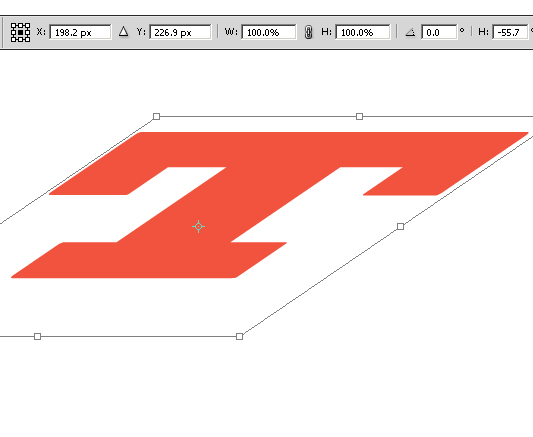
Go to Edit, Transform menu and choose Skew from the list. Transform the letter like
shown in the image.
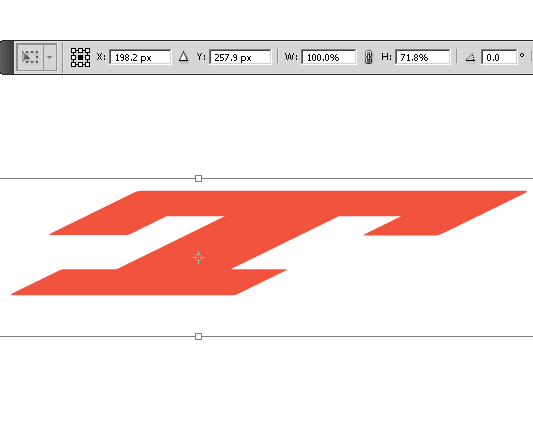
Go to Edit, Transform menu and choose Scale from the list. Transform the letter
like shown in the image.
Transform The Letter in 3D
Now I will start the 3D process by adding depth to this letter. You can of course
change the perspective(vertical for example) of this letter but I prefer
this one.
Duplicate the T Layer and call it T1 Layer. Change the color for both layers as
follows: T Layer #fe4e37 and T1 Layer #ce301b. Move the T1 Layer up like in
the image.

With the Pen Tool draw 3 shapes, each in 3 different layers, to complete the 3D
transformation.

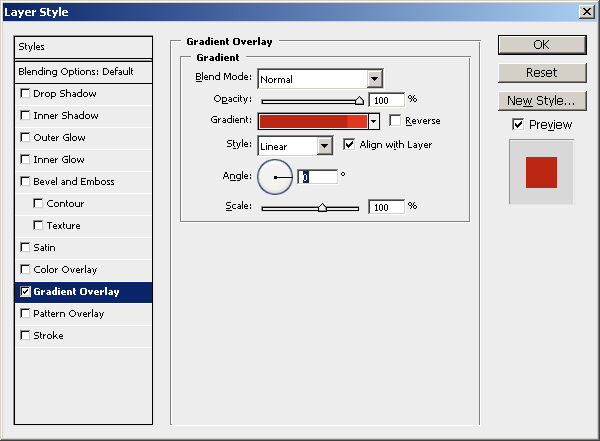
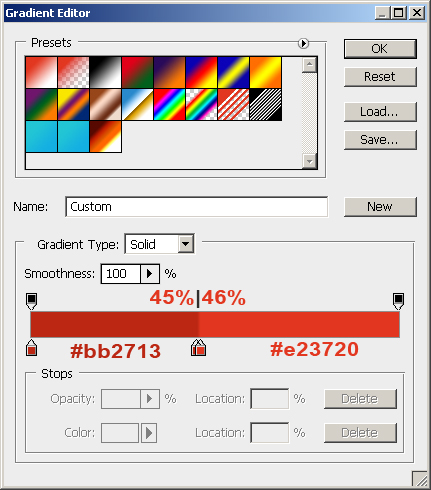
For Shape 1 simply change the color to #bb2713. Open the Layer Style Window and
add Gradient Overlay for Layer 2 and make the following settings.
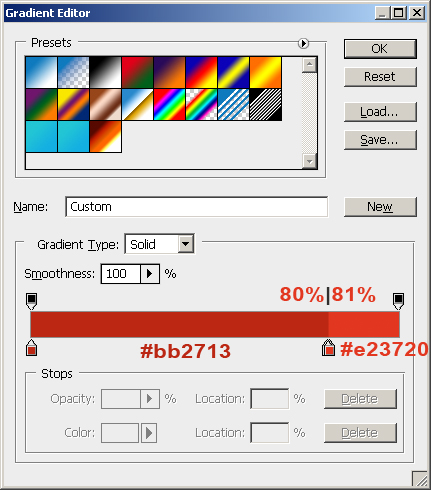
For Layer 3 add Gradient Overlay with the same settings, the only difference is
the Gradient colors and locations.
This is how our 3D letter looks like after adding Gradient Overlay to simulate the
shadow/light effect.

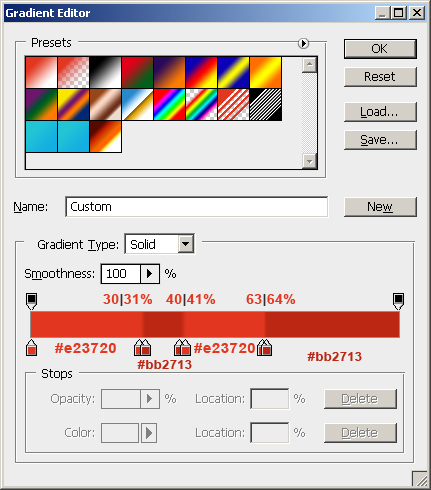
The last step is to add the Gradient Overlay to the initial T Layer. The setting
are the same except the Gradient map that looks like this:
If you want to make the letter a little high all you have to do is to move the T
and T1 Layers as far apart from each other as you want. Then simply
move the points to the direction you want, using the Convert Point Tool. You can
find this tool in the Pen Tool category. You can see that in this case
you have to add two extra shapes Layer 4 and Layer 5. Use Gradient Overlay to obtain a
similar result like in the other three layers.

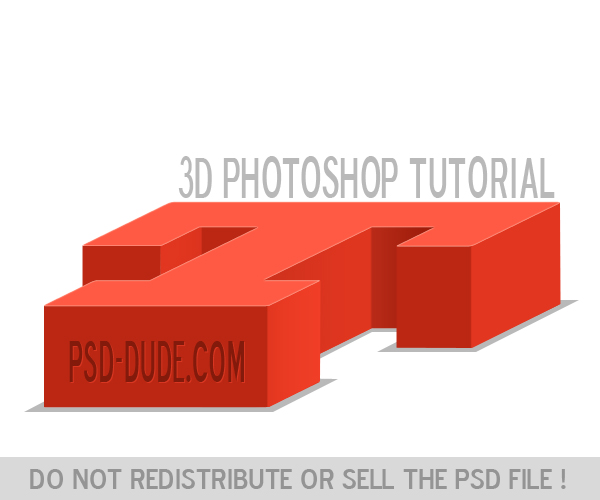
So the number of the layers depends on the depth of the 3D effect. In most of the
cases people want high depth so we need seven layers.
Now our letter looks pretty good.
If you want to see the exact settings you can download the PSD file for free. Remember that this PSD file is free
for personal, non-commercial use only!
DOWNLOAD! PSD FILE (67.5KB)
Previous Post
Cardboard Texture Photoshop Tutorial
Next Post
Box Photoshop Tutorial


1 comment(s) for "3D Letter Photoshop Tutorial"
Thank you reply